
June 21, 2008
Lisa: Friends don't let friends wear men's golf shirts.
You know those golf shirts they ordered for everyone at work? Yours doesn't really fit, does it? Like, it's somehow simultaneously too big AND too small? Maybe because you are not six feet tall and shaped like a sausage? I think I can help.

First things first: find a good show on Tivo, so you don't get bored, and plop the baby in the walker. Hi, cutie!


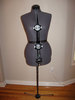
Double-check your measurements against your trusty dress form (you can even make your own if you don't want to splash out for this invaluable tool).
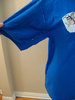
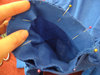
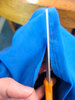
Okay. Turn your golf shirt inside out and put it back on the dress form. Your shirt probably doesn't have side seams now--we're going to create side seams in order to give it some shape. The process is the same whether it already has side seams or not, really. Just grab the fabric at the side of the shirt, under the arm, and pin it together close to the dress form, keeping the pins marching in a fairly straight line down the side. If there's a place where the shirt is already somewhat snug, like at the hips or whatever, then you only need a tiny pin tuck to keep the illusion of a side seam going. You're going to pin the body of the shirt and then continue the line of pins around the curve at the armpit and along the bottom of the sleeve. Trust me, there's enough room in that sleeve to take out an inch or so.
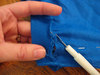
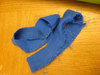
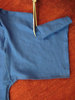
Unpick the ribbed material from the bottom of the sleeves. Just detatch it from the sleeve--don't unpick the stitching that keeps the cuff in a circle. Set those sad-looking things aside for now.
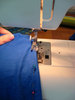
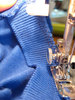
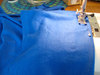
Time to start sewing! Don't bother cleaning off the table first; this is enough domesticity for one day, don't you think? Anyway, you should stitch along the line of pins you put in earlier, pulling them out as you go. After you do both side seams with a straight stitch, change your machine to a zigzag and add a row of that OUTSIDE the side seams. Trim off the extra fabric right next to the zigzag stitch. If you have a serger, this can all be done in one step (but...you are probably a very competent seamstress and don't need my help).
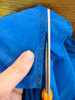
Let's address those monster sleeves. You can cut at least four inches of fabric off of each of those. This isn't an exact science; eyeball it, then fold over the fabric on top of itself as you go, using the cut-off bit as a guide so that you trim off a straight piece. Throw those pieces away, or make one into a headband a la 1990s Seventeen magazine featurettes.
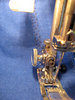
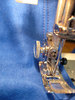
Once you have the sleeves trimmed down to size, pin the cuff back on. Make sure you think this through before you start sewing! Right sides go together, and the underarm seams go together. If your shirt is still inside out, you will be pinning the cuff inside the sleeve. Then stitch a straight stich and zigzag stitch (like the side seams) right along the rough edge of the ribbing.
If you haven't tried your newly curvy shirt on yet, you might want to do that now to measure where the hem should be. Put the shirt on inside out, and pull the hem up over the shirt until you like the length. Pin it in four or five places so it'll stay in place while you pull the shirt back off.
The bottoms of knit shirts are usually finished with a double row of straight stitching. To copy this look, just sew around the hem twice with a straight stitch, picking a place on the presser foot to measure against for the second time around. When you're sure that you haven't hemmed your shirt too short, trim off the extra fabric.
Voila! Isn't that better? You just lost twenty pounds, visually. Work will be 45% more bearable today!