
September 14, 2014
Lisa: Degrossification
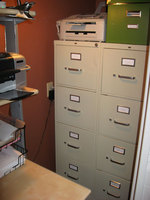
My laundry room was disgusting. There were dusty, sticky pipes everywhere of all shapes and sizes, half of the ceiling was open to the floorboards of the bathroom above (for pipe/cord access), and the drywall had never been finished, so there were gaps and cracks all over the place. Don't even talk to me about the spiders that came in through all those cracks and built webs in the corners around the pipes where I couldn't reach. The cement floor had been haphazardly covered with vinyl self-stick tile in a nauseating yellow-with-brown-smudges fake ceramic tile pattern, and then patched with a different vinyl self-stick tile in a beige fake ceramic tile pattern. Plus, the whole thing was super dirty because I spent as little time in there as possible, and because it looked bad even when it was clean, so why bother?
I didn't have the budget to gut what was there, reconfigure plumbing, and install beautiful tile. Plus, I knew we would probably be totally redoing the basement in a few years, so I needed more of a "phase one" fix. My main goal was to end up with a laundry room that was not gross. After putting in some quality time on Pinterest, I got started, getting my color scheme from a cute ironing board cover and deciding to embrace the biggest of the pipes instead of trying to hide them. The other pipes and all the mess of the open ceiling area just got vacuumed and dusted and then sprayed a uniform white, which I think helps them fade into the background a bit. Prying up the old floor tiles revealed a sea of old (but still very sticky) adhesive that would never have come off, even with the strongest of solvents, so I scrapped the idea of a painted cement floor in favor of new vinyl tiles.
Before:
After:
Cost/Detail Breakdown
Total: Somewhere in the range of $320-$350
March 24, 2013
Lisa: mom nest
Since we can't afford to move to a bigger house, in February I embarked on a crusade to make some of the less-used areas of our house into places we wanted to spend time. My theory was that our house would suddenly seem twice as big if we had all this newly-useful space to hang out in during the day. The family room in the basement was at the crux of this plan. I wanted to take it from a dark, low-ceilinged hodgepodge with prickly industrial carpet to a light, bright, fun place the kids could play in while I worked. I was hoping we could work around Blake's TV and keep it a functional place for him to play games, but make it feel basically like the opposite of a man cave.

You can see the before pictures in this old entry from 2007, but here they are a bit bigger. I wish you could really see the silly-putty beige walls AND ceiling, and feel the gray plastic berber carpet.
Before:
Unfortunately, I didn't take any pictures of the in-between phases of the family room, when the slightly newer couch was moved down there, or when we handed the elliptical machine down to E and made a (less awesome) play area in there for the kids.
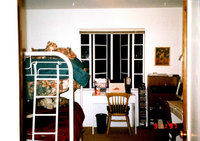
After:
E helped me so much with this project, guys. She came up with a bunch of great furniture arrangements on the Make Room Urban Barn room planner (including the layout we finally went with), and she put in many backbreaking hours painting walls in our poorly-ventilated basement and awkwardly leaning over bookcases in our freezing garage. I would never have gotten past the intimidation factor of what seemed like such a big project without her. Thanks, E!
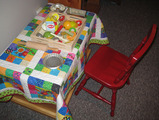
We ended up moving Blake's computer desk and chair into the sewing room/guest bedroom to make more space for kid stuff, which I think was a great idea on Blake's part. It is snuggled up next to the carved chest in there, and it's not bugging anybody. I'm rarely sewing at the times he needs to use his computer, so we don't even get in each other's business.
The new light blue paint on the walls is Behr's Snowdrop (530A-1). I made myself go one shade lighter than I wanted to, and I'm so glad I did. It definitely comes across as blue, not bluish-white, and a darker color might have gotten oppressive in a basement with minimal windows. The ceiling and bookshelves are just the basic white Behr sells already in the can. I think the ceiling is flat and the bookshelves are semigloss. Even if we had just painted the ceiling white and left everything else, it would have been an improvement--why did the previous owners paint the ceiling beige in the first place?? Anyway. We primed the bookcases with Zinsser Bull's Eye Water-Based Primer/Sealer, in hopes that we could get the paint to stick without sanding. So far everything seems to be holding up, with no bleed-through from the pine stain.
The play kitchen is from Amazon, purchased for Nora's 2nd birthday. We got the easel from IKEA in 2009, and I supplemented it with a magazine rack and gallery wire, also from IKEA. The dollhouse was a hand-me-down from KC and Shannon, spruced up with a little scrapbook paper and Mod Podge, and given to Nora for Christmas in 2010. I have pictures of that, but I'm so behind on the girls' website that they aren't online yet. Maybe someday? The fun canopy was an IKEA find that just happened to match and fit perfectly.
The family photos over the couch are more of the sitting from Busath you saw in the living room upstairs. Since Hazel was but a fluttering in my uterus when we took those photos (gross, sorry), I cut out a silhouette of her cute face so she would be represented on the wall, too.
The area rug is a solid dark brown shag from Target. I looked at so many shag rugs and bound remnants, and the price range was huge. I finally threw up my hands and just bought a cheap version from the Target website, and to my surprise I completely love it! It's soft enough that it's pleasant for the kids to sit and play on, and the color is exactly what I had in mind. It sits on top of low-pile carpet, and it isn't a high traffic area, so I'm not too worried about the quality concerns of the commenters on the Target site. It's a great option to hold us over until we can get new wall-to-wall carpeting in the whole basement.
Inside those closet doors is my upgraded closet office, which you can see here. The brown and green actually work well with the new light blue and white palette in the family room, and I'm using my office a lot more than the kitchen table now that the kids like hanging out down there. Mission accomplished!
September 23, 2012
Lisa: lateral movement
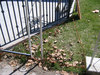
We decided at long last to paint our dingy mustard-yellow brick a classy warm grey (more to come on that decision later), and I started to get excited about prepping the house for that process. Since I knew we eventually wanted to put on some kind of new porch overhang, I worked really hard to convince Blake we should just rip off this old aluminum one before we paint. That way, we wouldn't have to do touch-ups later if removing it uncovered some still-yellow brick that didn't get covered up again by the new and improved porch. That...was a no-go. I made a good case that the old overhang would be easy to remove, but Blake (rightly) asserted that we'd lose a lot of functionality for our guests who might be arriving mid-rainstorm. So, as a compromise, we decided to give the awning a good washing and then paint it with a layer of black to match our wrought iron in the back of the house. Here's the before:
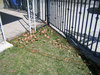
And here's the after:
Here's the thing. I like the black paint (Behr exterior semi-gloss primer/paint in Black Suede) a lot in theory. I like that it matches the other wrought iron we have, and I like that it ties in with the new lamp post, the mailbox, and the house numbers. I think it might look good with the gray paint when that gets done, and I like the idea of having a black accent on the house since we don't have shutters. I also think that no matter how white we paint it, our current overhang will never trick the eye into believing it's beautiful white wooden trim--I guess I like that the wrought iron isn't pretending to be something else. And above all, no matter what color the overhang is, at least it now looks clean and well-maintained. That's got to be an improvement, right?
In practice...I don't know that it's that great-looking. With the dark front door, I think it makes sort of a dark hole at the front, rather than letting either the door or the overhang make a dramatic statement. We haven't lost anything, since it was already ugly before and we can still replace it eventually like we planned (and paint is cheap). I guess we'll wait and see once we get the rest of the paint on. Stay tuned!
August 06, 2012
Lisa: sew much better
After redoing the downstairs bathroom, there were two days left before Sarah's arrival in Salt Lake City. The only thing to be done was to give the guest bedroom (also known as my sewing room) a makeover as well! Kill your guests with kindness paint fumes, right? I have been planning on painting this bedroom for years anyway, so I figured it wouldn't hurt to go with the Sarah-induced momentum.
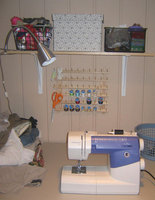
I don't have many before photos of this room, because it was sort of a catch-all of my furniture when I was little and my bedding from college, topped off with a nice pinky-beige paint slathered over everything. Somehow it didn't occur to me to immortalize it. I did just dig up one photo of the old bedding (in its natural habitat at the Alpha Chi house) and one that shows the old paint color, taken when I hung the first thread rack on the wall behind my sewing machine. Lucky you!
Since I was still working with the paneling on the walls, I decided to go for a sort of beach house feel. I thought I could use some of my favorite yellows, blues, and greens, and also hang some art I already had kicking around. Here are the after photos, so you can judge its beachiness for yourself:
Since this was a definite redo-on-a budget, the furniture is all the same as it was before. That's some pretty sweet 25-year-old Danish Modern shit up in there. Back by the bed, you can see the typewriter (and typewriter cart) I bought at the surplus sale, in its oilcloth cover. Most of the glass apothecary jars with craft supplies inside that you can see on the shelving above the bed are also from the county surplus sale.
I love the carved chest, which was an impulse purchase made the ONLY TIME I have ever been to The Quilted Bear.
My sewing table is a folding table from Costco, which is functional if not pretty. I have some plans to replace the folding chair with a carved wooden chair (found languishing in my parents' basement) with a newly-recovered seat, and I'll post a photo if I end up finishing that project in the next ten years.
But why are we here? The new stuff. The paint was purchased six years ago with the downstairs bathroom in mind, but I thought better of that choice (thank goodness) and went with dusky purple in there instead. At the same time, I had actually bought paint (in coral pink) for the sewing room, but I had that re-tinted brown and used it in my closet office two years ago. Anyway, I'm counting the paint as free since it's been sitting unused for so long.
The pictures on the wall above the chest are prints of watercolors of some iconic spots on Balboa Island done by Diane Moon and Jim Krogle that Blake and I bought on one of our first trips there right after we were married. I found some medium-brown frames for them at Target to match the other furniture.
The striped bedspread and new fluffy pillows are from HomeGoods, and the sheets and pillowcases are from Target. The crewelwork throw pillow and the new ceiling fixture above the bed (replacing some gross and overly-bright track lighting) are from IKEA. The helping with minimal eye-rolling and swearing was from Blake.
June 12, 2012
Lisa: Downstairs bathroom mini-makeover!
I started getting excited for Sarah to come stay with us from New York in a few weeks, and decided to finally get around to painting the bathroom she'll use when she's here. It's been this sort of horrible, not-designed, leftover cheapo-fixtured builder-basic cave that we rarely use and therefore rarely clean. Lately it had been serving as a temperature-controlled storage area for paint supplies, and as a haven for a large infestation of spiders and the carcasses of their prey. Doesn't that sound welcoming to our guests? Here it is before:
After an industrious cleaning (and the removal of SO MANY spider parts), I rolled on some leftover primer and paint from our master bedroom. The paint has been kept inside and is still perfectly good, but our bedroom walls have faded a bit over time so that the color doesn't match exactly. Since we can't use the canned paint for touch-ups anymore, I figured we might as well use it up in another room. Blake bought a new hand-towel ring (for about $15, the only actual money we spent on this little spruce-up) to replace that weird second towel rack, and I hung some fresh white towels I'd been keeping as backups for our upstairs bathroom. I dug out some framed art from we used in one of our earlier apartments, and filled a little basket with travel-sized toiletries in case our guests forget something. The paint supplies will have to find a new home in the garage or a storage room, because the shelves of the cart are now filled with neatly-folded extra towels. Voila:
A lot better, right? It's amazing what a huge different a little cleaning and paint can make. At least it doesn't look completely neglected, and I'm not embarrassed to have guests even go in there. As I promised Sarah in our last videochat, it's not even gross at all!
March 29, 2012
Lisa: front porch, creeper edition
More voting! This time (as threatened) I went around our neighborhood taking photos of porches like the ones we've been considering. It should help that they were designed (some with more skill than others) for houses in a similar style and scale. My Photoshopping, however, has not improved.
Also, please tell me in the comments if there are things you like or don't like on each one.
March 22, 2012
Lisa: front porch fun
I wrote in 2008 and again last spring about ripping off our current front porch and awning and replacing it with something nicer and more welcoming. I'm ready to get serious about deciding what we want, figuring out how much it will really cost, and getting some plans rolling. Will you help?
The first photo is the front of our house when we bought it. The next three are fairly terrible Photoshop mockups of porch ideas I collected on Pinterest. First, we've got a pointed roof option with an arch over the door, white pillars supported by an asymmetrical wooden deck and wide stone steps leading to some irregular flagstones. The second has a small extended roof overhang supported by two big corbels, and a large stone base including low walls on each side. The third option has a little fenced-in front porch off to one side that's totally covered by a larger roof overhang. Check out the photos, and vote on your favorite one below! If you have another idea altogether or want to suggest a tweak to one of these three, share it in the comments.
Next I want to go around our neighborhood photographing the porches I like, and do the same thing. Too creepy?
April 14, 2011
Lisa: It almost looks like we're real adults!
The dining room really only got an accidental makeover, when Sarah and E helped me paint it green along with the living room. Again, though, the only photos I had were really old (and never before posted here), so I thought it would be fun to post those along with some updated ones.
Before:
These photos were taken soon after we moved in, with our little apartment furniture awkwardly trying to fill the spaces of a real house. The green and white table was a hand-me-down from my dad's mom, but it was stained dark brown before I repainted it to go in the kitchen of our second apartment right before we moved. You can spy it in its original home in the background of these photos. The black locker-style IKEA cabinet was purchased in 2004, when Blake and I took Sarah and David to Balboa Island. This is the trip when Sarah got the worst sunburn I've ever seen on the back of her legs, but still trooped around IKEA with me the next day and then rode all the way back home with flat-packed furniture on the back car seat between us. The accent wall was painted that dark green when we moved in, and it's been bugging me for SEVEN YEARS.
After:
The rug that matches the one in the living room (they're two sizes of the IKEA GEDSER) was an awesome surprise Christmas gift from my parents last year. The updated chandelier is also from IKEA, and I blogged about installing it back in 2005. Blake and I bought the dining table and chairs in the summer of 2006, and he gave me the little table that holds cookbooks and Miss Petunia's tank for Christmas--possibly in 2007, since you can see evidence of its existence in these photos from 2008. The white cabinet that has doubled our kitchen-related storage capacity was a windfall from Blake's company when it was shut down last April. The painting of pomegranates in a bowl is one of the two Jamaica Trinnaman pieces I got for graduation in 2005, and you've seen it before surrounded by Christmas decorations. And...the roses are left over from a baby shower I hosted for a neighbor. I think that's it!
April 13, 2011
Lisa: Living Room Makeover
On Monday, I mentioned how excited I am about my progress on the house list, and today I want to share the room that I think is the most drastically different. Here are some very, very old before photos I found deep in the bowels of my laptop:
Now, these aren't really fair before photos. They were taken very soon after we
moved in to our house, and if you haven't actually been in my living room it's going to look like I went and bought a TON of furniture and art. There's no way we could afford to do that--in fact, we've been slowly acquiring everything over the years.
Proof:
1. I bought the Jamaica Trinnaman painting over the fireplace in 2009, and it's been mentioned here and seen on Facebook here.
2. I mentioned the big Jamaica painting over the buffet I got for graduation in 2005 (and it showed up behind the cardboard Jeffrey here).
3. My amazing family and friends chipped in on the Kathy Peterson painting (over the chair) for my birthday in 2009, as seen on Facebook here.
4. The rollerskate-themed prints have been seen on twitpic here (they used to be in the dining room, and then moved in to the living room on a different wall than where they are now). Sarah bought me the Leia Bell derby girl as a Christmas gift in 2009, and I bought myself Rollin' by Ryan Brinkerhoff early in 2010. I tried not to, but I couldn't fight it.
5. We temporarily inherited an upright piano when my brother David moved to New York for grad school in 2008.
6. Blake and I bought each other the leather armchairs for Christmas in 2007 (when I also made the throw pillows for them), and my parents gave us the coordinating leather storage ottoman that year as well.
7. When my parents moved to Spring City they didn't need their tan chenille sofa from the music room any more, so they passed it on from storage to us (possibly in 2007?). The green couch (and its ottoman) went down to the basement family room soon afterward. A lot of swearing was involved.
8. Blake bought me the side table next to the couch as a Christmas gift in 2005.
9. The family photos above the piano are new this (2010) Christmas from Busath, tweeted here (But I love the photos! Sorry about the angry tweet!).
10. I bought the yellow bird on the mantel at Craft Lake City in 2009.
BUT. The point is that you can see the original wall color and the basic dimensions of the room. The major differences from what we had a few weeks ago are the addition of the bookcases, the subtraction of our green TV cabinet (and some surface clutter), a little rearranging, and the new sage-y green paint.
Without further ado, the afters:
April 12, 2011
Lisa: I couldn't find a pun about blinds that didn't make me cringe
I have to admit, I kind of love watching Get It Sold. We're not selling our house, so I don't need to follow all the advice about neutralizing and depersonalizing, but a lot of the updates Sabrina does are very inexpensive but make a big impact on the overall look of the house. And when I say inexpensive, I mean stuff that real people could do--in a weekend--not a $20,000 budget for a glorious HGTV bathroom. It's also a great reminder that the unfinished projects you've been putting off/living with forever don't really take that much time or money to finish, and they can make a real difference in how happy you feel in your house.
Naturally, we had one such project hanging around that I decided to give the Get It Sold treatment. We have white wood-look vinyl blinds in our bedroom. I don't know if you're intimately familiar with the workings of these babies, but the top of the blinds (which is metal and holds all the mechanisms for tilting, raising, and lowering the blinds) is supposed to be covered with a decorative strip of vinyl molding. This strip is held on with two or three little plastic clips. Unfortunately, these clips are really brittle (especially after a few years), and it's almost impossible not to crack or break one as you take the molding off (or put it back on) when you're removing the blinds to wash them. At some hazy point in the past, the broken clips from all over the house got replaced with ones from the (admittedly more hidden away) bedroom, and we didn't put back those molding strips. Now, I'm sure you can just buy more clips wherever vinyl blinds are sold. The bad news is that the molding strips themselves (not sold separately and custom-cut to the size of our windows) got thrown away or lost somehow when they weren't attached to the window. DUN DUN DUN! The good news is that this was even easier than I thought it would be to fix. Photos and easy-peasy instructions below!
1. I carefully measured the length we would need the new molding strips to be.
2. Blake and I went to Home Depot, hoping for the best.
3. The regular molding area didn't have anything like what we needed, and after asking around a bit we headed back to where they sell blinds.
4. The blinds guy first told what we didn't want to hear, that those pieces are not sold separately. Then he thought for a minute out loud about how Home Depot custom-cuts them to size when people buy new blinds. He motioned us back to the area with the cutting saw.
5. Sitting right there out in the open next to the saw were two fairly long strips of vinyl molding, left from an earlier customer's sale. The blinds guy picked them up, measured them, and asked if they would work for what we needed. THEY WOULD!
6. We crossed our fingers and asked how much Home Depot would charge to let us take those off their hands. WHAT'S THAT? WE CAN HAVE THEM FOR FREE? Awesome.
7. We stopped in one more aisle for a pack of industrial-strength Velcro. I knew I wasn't going to mess with those stupid clips any more if I could help it.
8. When we got home, I cut the molding to the exact dimensions we needed with our trusty miter box and saw.
9. Then I applied one side of the Velcro pieces to the metal top bar of the blinds (a strip at each end and a piece in the middle of the longer section), and the corresponding other side to the back of the molding. This way you can get the molding off with a good tug, and the metal clips holding the blinds into the window frame aren't impeded in any way. BAM.
10. Press the new molding into place.
And that's it! No more visible metal bars with stickers listing the dimensions and previous owner's name! Pretty, finished blinds for only the cost of a pack of Velcro. We're not mentioning the paperclip situation for now. Ahem.
April 11, 2011
Lisa: Progress! (nursery edition)
You guys probably haven't noticed (because I can't imagine that anyone really cares), but I have been checking stuff off my before-the-baby-comes house list like crazy. Blake has been awesome, and Sarah and E have helped a ton as well. Thank goodness for tax refunds, too.
I took some (confusingly blurry) photos of Nora's spruced-up room with her new bed and rug. I haven't reassembled the crib yet to put in there, but we have measured everything out and the new furniture arrangement will fit the crib if we take out the rocker and the easel. I'm not sure if the magnitude of this discovery is clear, but our rooms are pretty tiny and I am VERY excited that it's going to work to have the girls share the upstairs bedroom.
As a reminder, the before photos are here. It's not so much a redecorating as it is a rearranging. Still, it means a lot of work and Nora is super excited about her big bed (and about her future roommate).
February 24, 2011
Lisa: home improvement wishlist (the big one)
Since the motherboard on our furnace fried earlier this week and we unexpectedly had to get a completely new furnace installed, the items on my pre-baby house wishlist are seeming a bit more out of reach. So, I figure I might as well get TOTALLY unrealistic and make a list of all the other stuff I want to do around the house, ever. (Disclaimer: these projects have not all been approved by Blake.)
Outside (here it is before I painted the front door dark purple)
Kitchen
Downstairs Bath
I'm not even touching the work we should probably be doing to get the yard in shape and get all of our storage beautifully organized, let alone routine maintenance. Oh, and someday I want to paint the downstairs bedroom, hallway, and family room. SEE, YOU CAN'T SQUASH MY DREAMS, FURNACE!
February 20, 2011
Lisa: refeathering the nest
In a practically lethal combination of pregnancy-induced nesting and reading a LOT of Young House Love, I've come up with a list of house-sprucing projects I want to try to do before the baby is born.
As a bit of pre-explanation: I already convinced Blake to let me pull up the carpet in our little hallway as an experiment, and what Sarah and I uncovered is good enough that I think we'll continue in the upstairs bedrooms as well. We have also already started buying one or two of these items each month, in an effort to spread out the costs and avoid buying everything on credit at the last minute.
THE LIST:
Nursery (see some before pictures here, although it's evolved a lot over the last three years)
Living Room
Family Room (see some before pictures here)
Master Bedroom (see some oldish before pictures here)
So. Thoughts? I'll try to post updates if and when I get around to actually completing any of these projects. Let me know if you want to put your name in for the toddler bed or TV cabinet (or the dish display rack, for that matter), or if you have any last minute warnings or advice.
January 26, 2011
Sarah: Bare Necessities
Today I realized that January is almost over and my main question is when did this happen? The first week of January I made a list of resolutions (more on that later) but then put off working on any of them until now. And now it's time to get serious. Tonight I've been musing on the amount of stuff in my life, from the clutter in my house to the number of (extremely enjoyable) social commitments that I take on each week and on down the list to what I put into my body. I will be writing about this sort of thing for the next few days.
In honor of Hoarders being on Netflix Instant, I'm thinking of ways to de-clutter my house and simplify my life a little bit. Some projects that are interesting to me are:
- Kendi's 30-30-30 challenges readers to choose 30 articles of clothing (and shoes) and wear them in 30 different combinations without buying new wearable items for 30 days. Honestly, I am so boring these days with my clothing choices, I probably already do something similar, but I like the idea of more consciously using your wardrobe creatively and having fun with accessories. I also think it's good to realize that you don't need 100 different black skirts (guilty) or 5 new ill-fitting shirts (me again) per month. I'm tempted to sign up for February, but is it cheating to shop in preparation for the challenge? I need some more long shirts to wear over leggings. Just saying.
- A Week Without Stuff is honestly a little too close to home for me. The author is a serious packrat (check) who knows that she needs to clean up and throw away (yep), but the things! She may need them someday! And they hold such sentimental value! (Okay, this is getting awkward for everyone involved.) And yet I'm inspired. Would I leave dishes in the sink if I only had one plate? Would I buy a ridiculous (but cute) sequin dress if I had to wear it at least once a week? Of course I am not going to suddenly lead a life free of possessions with some sort of new-found monk-like shopping piety, but maybe I can streamline my life a little if I detach myself a bit from stuff.
Speaking of Hoarders, does anyone else find it to be the single greatest motivator for cleaning your house? I watch that show medicinally. After watching an episode, I just wait for my hyperventilation to subside and then I'm off scrubbing floors, pulling clothing out of the closet, and otherwise improving my living situation. Please tell me I'm not alone. Please?
And now some questions for you:
- If I were to do one of these experiments, which one would be more interesting to you: 30-30-30 or A Week Without Stuff? Either way, I promise to post blurry photos and write at least 300 words on the subject.
- Am I the only one that lives in fear of becoming a hoarder? Am I the only one that lives in fear that they have already become a hoarder? And if you do not understand my feverish ramblings, please be so kind as to tell me your own irrational (or rational) fears. Yes, I'm asking you to make me feel better about my own neuroses.
November 04, 2010
Lisa: vine house
I think instead of building a treehouse, I want to build a vine house like the one we saw at Red Butte Garden. Here's what I'm thinking:
1) We were going to have to build a fake treehouse anyway, sort of more of a playhouse up on stilts NEXT to a tree, since we don't have any backyard trees large enough to support a real treehouse. This way we're not dependent on trees.
2) It's got to be cheaper and easier to build than a treehouse, since there's a lot less wood involved and the walls and roof are mostly chicken wire. Plus there's no floor, just packed dirt.
3) It still feels cozy and private for kids, but parents can keep an eye on things through the walls, and you don't have to climb any ladders to extract reluctant kids, a la the McDonald's playplace.
Next up: research. Are there kits you can buy? I love the curved shape of those rafters, and that might be a bit beyond my woodworking abilities. Also, I might need to make another trip to Red Butte with a measuring tape. Who wants in?
October 04, 2010
Lisa: deck the halls with skulls and pumpkins
Since it's officially October and Halloween season, I thought I'd post photos of some of my decorations from last year. Maybe it will give you guys ideas for something easy and festive, and give me a little motivation to figure out something new.
For our dining table centerpiece, I drew some inspiration from the much more glamorous glittery version over at Martha Stewart. I bought two sleeves of styrofoam bones from the holiday aisle at Michaels, and arranged them on my cake platter with a few rubber mice from Nora's toy box. The sparkly black fabric around the base was a sample from the early days of Concert Black that's been sitting in my fabric stash for a few years.
The pumpkins on our porch are from the local grocery store and sold by the pound. I got a bunch of different varieties and shapes, and just stacked them together in a way that I thought looked cool. I had to break the stems off a few of the lower pumpkins to make them nest right, but I didn't try to attach them to each other or anchor the stacks--pumpkins are pretty heavy. I took a styrofoam skull (also from Michaels but too big to fit under my cake dome) and screwed it down on the stem of the topmost pumpkin of one stack. After Halloween, just yank that thing back off and you've got a perfect Thanksgiving display.
By the way, you don't have to worry about the pumpkins rotting--and real ones are so much prettier than the plastic monstrosities at the craft store. A month or two (UNCUT) outside in cool fall weather, and the pumpkins will look pretty much the same as when you put them out. Ours even froze solid as the weeks got colder.
May 31, 2010
Lisa: Office Redo (part deux)
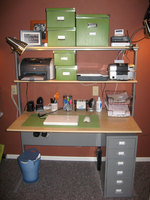
When I left my job at the library to work at home on Concert Black, I decided it was time to give my closet office a makeover. It was functional before, and I still liked the idea of an office using unexpected space that I could hide behind doors, but I thought it might be soul-killing after a while if I actually felt like I was going to work in a repurposed closet.
I had a gallon of paint sitting around that I'd bought with the idea of painting the sewing room--until I figured out that bright coral pink was a terrible choice. I took the paint back to Home Depot and had the paint guy add in some new pigment to create a usable color. He was great, giving me helpful advice about what colors we could reasonably get without overflowing the can. We ended up with an inoffensive warm dark brown--probably not something I would have chosen originally, but I think it works really well in the small space of the office.
The desk and shelving and a lot of the accessories are from IKEA, and I did a ton of measuring and planning on the IKEA site and with an employee in the store before I bought everything. Unfortunately, I still ended up with some shelving pieces that wouldn't work in the tight space I had designated for my "shipping station" (on the left in the photos below). I dragged Nora back to the store by myself and manhandled her and a bunch of really long pieces of steel, with only one minor altercation with an IKEA employee. Marci's dad lent me a Sawzall, and I cut down some of the new pieces to the right size before assembly. Success!
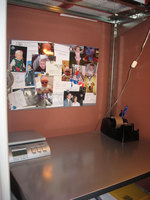

Better, right? So, why did it take almost two years for me to blog about this? Because that's how long it took me to hang that magnet board on the wall.
February 01, 2010
Lisa: Who will tell the internet these things if I don't?
1) In roughly an hour I am seeing an ENT about the possibility of getting my tonsils out. I have to admit, I am somewhat terrified. But...if it means that I get strep less often (or even maybe NEVER), then it will be worth it.
2) A lot of things have been happening lately, and I've been crossing things off my list (yay!), but I haven't gotten up the energy to actually blog about any of them. SO. I have just decided to attempt to post every single day of the month of February. I'm sure the one reader we have left will be shocked. Plus, depending on how much Lortab they put me on for my (possible) tonsillectomy, things could get a little crazy. At the very least, there will be a lot of drool. Something to look forward to.
3) Dripped pie filling had made a smoky mess in the bottom of my oven, so today I decided to run the self-clean cycle. It's been going for three hours so far, and everything in my house smells and/or tastes like burning. My eyes feel like burning. Nora actually asked to go down for a nap early--I'm guessing in self-defense. Moral: put a drip pan under the stupid pie next time, goofus.
4) I am presenting for your enjoyment photographic proof of my billboard doppelganger. She can be found on Highland Drive, directly east of the Home Depot, advertising the Generations Project on BYU TV. Uncanny, isn't it? I, for one, am completely freaked out.


June 06, 2009
Lisa: The package goes in the box. If you know what I mean.
Some of you know that I work from home, sending out orders for my online business. Thanks to the wonders of Click-N-Ship, my mailman can pick these packages up right from my front porch (for free!) and get them on their way. When I first started doing this, I bought a clear plastic tub with a flip-up lid to corral the slippery Tyvek envelopes and protect them a bit from the weather. It worked fine, but wasn't doing much for the aesthetics of my front porch.
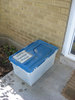
I clearly needed a prettier, more permanent solution. Here's what I came up with:
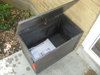
As a side bonus, the mailman and the UPS/FedEx guys deliver my incoming packages into the box now, so they're out of sight and protected from the elements as well. Materials and more details after the jump!
Base:
After a little research, I chose this unfinished toy box from JoAnn's. The size was about right, and I wanted a box with a hinged lid that could be raised from the top with one hand. On Sarah's excellent recommendation, I painted the pieces before assembly.
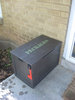
Paint:
Our new porch light, house numbers, and mailbox are all either oil-rubbed bronze or black, so I chose Hammered Dark Bronze Rustoleum spray paint. Supposedly, it's good for outdoor applications. I primed it first and put on a coat of clear polyurethane after I stenciled the letters on. I always forget how much spray paint it takes to cover something--this project used three full cans each of primer and paint.
Lettering:
I had some leftover Fern Green Patio Paint, which I already knew was weather resistant. I used that with some 2-inch block letter stencils I picked up at JoAnn's. I'm kind of a slapdash stenciler, but I figured that gives the box a pleasing rustic quality.
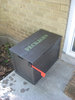
Flag:
I bought a mailbox flag replacement kit with an official-looking jaunty red flag at our local Ace Hardware, and adapted the instructions a bit for screwing it into wood rather than a thin metal box. As you can see in the photos, the flag is attached on one side, so when it is 'raised' it sticks out past the front of the box. So far, it seems to be an adequate system for signaling the mailman that there are items to pick up.
May 15, 2009
Lisa: Etch a Sketch
Inspired by this glass-etching tutorial on isly (found via this post on How About Orange), I decided to try etching a giant monogram (I love monograms) into my 9x13" pyrex baking dish, in an effort to make it prettier and more identifiable at potlucks.
All the background info and steps are after a jump, but here's the finished product:
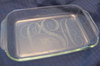
I liked my finished baking dish so much (and making it was so fun and easy) that I made another one for my cousin as a wedding gift, this time with just the first initial of her new last name.
I admit, I felt a little less cool when I went to church the next Sunday and found out that etching glass baking dishes is our upcoming Enrichment Night craft. But at least mine isn't made with one of those precut vinyl dealies, right? It's still a LITTLE bit original. So. Want me to make one for you?
Materials:
Computer
Printer
Monogram font
Adobe Illustrator (or whatever program you like)
Scotch tape
Transfer paper
Contact paper (any pattern)
Pen/pencil/stylus
X-Acto knife (sharp)
Spatula
Armour Etch
Pyrex baking dish
Kitchen sink
Silicone baking spatula
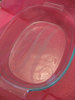
Note:
The bottle of Armour Etch says it won't etch Pyrex, so I did a little checking around on the internet. I'm glad I did, because I learned two important things that were backed up by several sources. First of all, you CAN etch Pyrex (at least some Pyrex) with Armour; you just have to leave it on for 25 minutes instead of five minutes. Also, you don't have to just wash the etching cream down the sink when your time is up, like it says on the packaging--you can scrape it right back into the bottle and use it again! A little bit is still lost, but you'll get a lot more use out of that expensive bottle.
Steps:
1) I downloaded monogram kk from Abstract Fonts, and tooled around with my initials for a few minutes in Illustrator. I was hoping the large size of the monogram would make it feel more modern, and that at first glance it would just appear be a pretty, scrolly design. Once you've decided on your design, reverse it before printing. You'll be etching on the bottom side of the dish (so little bits of food don't get stuck in there), and you want to be able to read the letters through the bottom of the dish when it's right side up.
2) Cover the bottom of your baking dish with whatever leftover contact paper you have on hand (keep the color of your contact paper in mind when you're buying transfer paper). Use your fingers or the back of a spoon to smooth out any bubbles. Be especially careful around the logo/raised lettering on the bottom of the pan. It's REALLY important to make a good, smooth seal.
3) Tape your reversed, printed out design on top of the transfer paper, which is on top of the contact paper. Trace over all the edges of your design with a pen. Remove the transfer paper and printout from the contact paper carefully, making sure your entire design got transferred.
4) Use the X-Acto knife to cut out all the pieces of your design that you want to be etched. Don't stress out about this part. I hate cutting with an X-Acto knife on paper and cardboard, because the knife always goes zinging out of control at the worst possible moment and ruins my design, but it's really super easy to cut contact paper on top of glass.
5) Brush on the Armour Etch in a very thick layer (enough so it's opaque and white), making sure you cover all the parts of your design. Don't let any sneak off the edges of your contact paper outside the design area. Also, be REALLY careful not to get any etching cream on your hands, because that stuff burns like a mother. Set your pan (carefully!) aside and time it for 25 minutes.
6) Once time is up, take your pan into the kitchen and very carefully scrape off the etching cream with a silicone spatula. Scrape it into a funnel and then back into the jar, or just right into the jar if you're coordinated enough. Then peel off the contact paper and throw it away without gooing yourself with the creamy side. You might need your X-Aacto knife to catch the tiny bits of contact paper--you don't want to be scraping them up with your fingernail and get Armour Etch under there. Then rinse off the rest of the etching cream on the pan with water. Wash your hands and arms really, really well with soap and water, and wash the pan again really thoroughly before cooking in it.
April 04, 2009
Sarah: Place settings
Dear Little Nora Bean,
While you and your mom were in China, your Dad missed you very much. During a cleaning spree, he set up a few play stations for you: a cooking spot, and a work station just like your mom's.
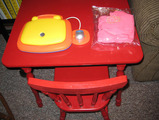
I think he might have missed you.
February 25, 2009
Lisa: Tool of the Week
Last week, Blake and I suddenly found ourselves in the market for a new vacuum cleaner. The Hoover we got for our wedding is now quite aged, and though it has served us well over the years, it recently stopped picking up much of anything at all. Since we now have a toddler who seems equally interested in holding up and inspecting every bit of debris she finds on the floor, and in carpeting our home with Cheerios, it's more important than ever that we have a functional vacuum.
On the strength of a glowing recommendation from E, we investigated and eventually purchased a
and so far, we love it. It's bagless, and watching that clear cylinder fill up completely with dirt, dust, and rug fuzz the first time we used it was simultaneously appalling and satisfying, in a way usually reserved for the popping of really juicy zits. Of course, it has a HEPA filter for making the air cleaner while you vacuum, but even more of a selling point than that is the attachments that actually WORK. You know that grody little line of dusty carpet at the edge of the baseboards, that the vacuum doesn't really reach? Yup. No longer a part of my life. And it may have been some kind of post-purchase-euphoria-related placebo effect, but Blake swore that the carpet even felt cleaner when he sat on it.
Some of the online reviews criticized the Bissell as being too heavy, but it doesn't seem to be any heavier than our old vacuum, so that didn't bug us. Plus, Blake does a lot of the vacuuming, and he doesn't mind lifting heavy things. It gives him a chance to flex his manly muscles.
If I had to complain about anything, it's that the Bissell is maybe a little bit too awesomely strong. It vacuumed (or at least enlarged) a small hole along a seam of our area rug--but it's nothing that can't be fixed.
Incidentally, my mom pointed out that the problem with our Hoover might be nothing more than a broken belt, and her suspicions were only strengthened when I looked at her blankly and just repeated, "Belt?" Apparently you're supposed to check and maintain these mysterious "belts" on a regular basis. Blake opened up the bottom of our old vacuum, and sure enough the belt was just hanging there, lifeless and snapped in half. I picked up a replacement at the grocery store (right next to the vacuum bags, which I've been buying for years) and we're going to fix the Hoover up and keep it downstairs. Win-win!
January 26, 2009
Lisa: Pork Roast
Remember how I'm trying to find main-dish recipes that I can memorize and make regularly? Well, I think this pork roast is easy and delicious enough that it might fit the bill. It's the first crock pot recipe I've tried that I'd classify as an unqualified success, and there's no sign of my pet peeve of crock pot dishes--the instruction to brown the meat before putting it into the crock pot. To me, the whole point of crock pot cooking is that the recipe is super easy and basically preps/cooks itself while you're at work or whatever. If you have to spend a bunch of time getting everything ready to go in the crock pot (including cooking things on the stove), then you might as well choose a regular recipe that doesn't take four hours to cook.
But I digress. Aside from adding a bit of cooking time--I think every crock pot is a bit different--and wishing I had one of those handy gravy-fat-separator dealies, I hardly had to think about it. If you decide to make this (and I think you should), save yourself a headache and cut the roast into nice slices with the electric knife when you're ready to serve. Also, see if you can talk Blake into making mashed potatoes to go with it.
Recipe from Simple & Delicious after the jump. My additions/changes are in brackets.
Pork Roast with Gravy, from Taste of Home: Simple & Delicious, February 2009
This home-style supper can be made [a day ahead]. Strain and skim the cooking juices, cover and store all in the fridge. Then reheat the pork to 165 degrees and finish the gravy in a pan [the next day].
1 boneless whole pork loin roast (3 to 4 lbs.)
1 can (14 1/2 oz.) chicken broth
1 cup julienned sweet red pepper
1/2 cup chopped onion
1/4 cup cider vinegar
2 Tbsp. Worcestershire sauce
1 Tbsp. brown sugar
2 tsp. Italian seasoning
1 tsp. salt
1 tsp. pepper
2 tsp. cornstarch
2 tsp. cold water
1. Cut roast in half; transfer to a 5-qt. slow cooker. In a small bowl, combine the broth, red pepper, onion, vinegar, Worcestershire sauce, brown sugar and seasonings; pour over pork. Cover and cook on low for [4-6] hours or until a meat thermometer reads 160 degrees and meat is tender.
2. Remove pork [and reserve some for another use if desired].
3. For gravy, strain cooking juices and skim fat; pour 1 cup into a small saucepan. Combine cornstarch and water until smooth; stir into cooking juices. Bring to a boil; cook and stir for 2 minutes or until thickened.
4. Slice pork; serve with [mashed] potatoes and gravy. Yield: 4 servings.
November 24, 2008
Lisa: you could put your weed in there
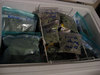
Before it got too cold outside, I did a mass harvest of my herb garden, stuffed the spoils into ziplock bags, and marked them with their contents and the date. Now if I have the urge to make my own lavender-scented bath products or season a dish with fresh sage, I can just pull the ingredients out of the freezer. I felt like Ma frickin' Ingalls, putting away stores for the winter. Sarah had a different reaction when she saw my stash: "Um, Lisa? Did you know your deep freeze is full of marijuana?"
In other domestic news, for the first time in weeks I haven't had to spend Nora's naptime sewing or hot-gluing. At long last, I scraped, cleaned, and re-painted the bathroom ceiling. Woot!
November 04, 2008
Sarah: I love you, Handy Andy
The handy man came around tonight to repair a nonfunctioning power outlet in my bathroom. He stood in my doorway, a raincoat draped over his head because his arm couldn't fit through the sleeve due to the cast encasing his forearm and hand. That's right, my handy man has a broken bone. I joked that this made him 50% less handy, but he didn't laugh.
Once inside, we headed straight to my power outlet. This dead outlet has sent me to blow-dry my hair bedside on the rare occasions that I get ready for the day. I left one-handy Andy (his real name) to his work and listened to him talk to himself as I hung up my clean laundry ("J***S S**T!" when he verified with his own flesh that electricity was coming to the outlet) and then to the outlet ("Of COURSE you just did that." when the fuse blew after his cast snagged a wire, leaving my entire apartment shrouded in darkness.).
After finding his flashlight and restoring light to my home, Andy successfully replaced my power outlet. Andy: my hairstyle thanks you, my bathroom thanks you, and I thank you.
August 22, 2008
Sarah: Midnight Crafting
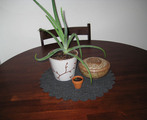
While getting my apartment into shape, I worried about scratching up my kitchen table with this pottery.
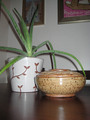

I tried attaching felt feet to the pot for my aloe plant, but the first time I watered it, sloppily of course, the water I sloshed around its base ruined the glue and made the whole thing unpleasant. Plus, the table needed something to make it look a little more finished, don't you think?
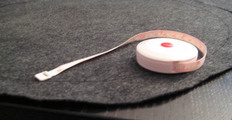
Perhaps a cute placemat/tablerunner, I thought. Something felt, so that no sewing is required. $3.50 for a yard of dark gray felt later, and I was in business. My tools:
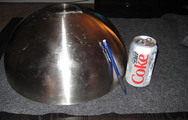
My giant IKEA bowl was used as a template. I traced the bowl, then added an inch all the way around.
I loosely measured 1 1/2 inch wide scallops all around the circle of felt, cutting down to the bowl outline. I embraced the handmade quality of the project and let the scallops be imperfect. Ten minutes later and:
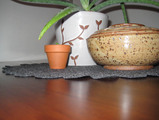
What do you think? Improvement?
August 20, 2008
Lisa: does anyone want some herbs?
I don't know if anyone remembers our herb garden project, but I thought I'd post an update since things are going so well.
Here's a view of the whole garden, the HUGE comfrey plant (What does one use comfrey for? I guess I should have researched that before planting.), mint, sage, and our little champion tomato plant. We've picked ripe tomatoes four times now, I think. Sorry, I'm blocking the sun with the camera in some of these shots.


So, does this count as having a vegetable garden? I think so. Now, to find a way to use some of these goodies before they go to waste...
August 19, 2008
Sarah: 2008 Cooking Adventure, Week 22
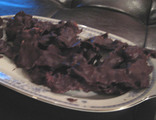
I'm sorry. I know I've been neglecting you. Don't be mad, I still care about you. See? I made you chocolate covered bacon.
You heard me right. Bacon. Covered in dark chocolate. See? These are the ingredients:
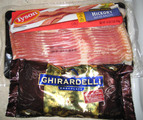
I brought these to our final potluck dinner with the lovely Angie and Dave before they got into their moving truck last Sunday and drove to New York City. How better to say "I'll miss you, I love you, and can I come visit soon and sleep on your floor?" than with a surprisingly not-disgusting sweet-salty treat? I can't think of a better way.
These are really easy to make. Once was good enough for me, but I recommend you make these, if only to see the look on your friends' faces when you offer up a plate. Plus, bacon has protein and dark chocolate has anti-oxidants. So, you know, healthy.
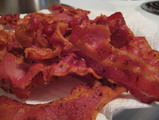
How to make Chocolate Covered Bacon:

Cook the bacon. Crispy. No one wants floppy, chewy bacon underneath the chocolate shell. Sounds gross, doesn't it? Glad we agree. Crispy bacon it is.
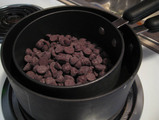
Melt the chocolate in a makeshift double-boiler. Or a real one, if you're fancy like that. Don't splash water into the melted chocolate. That always ends bad, trust me.
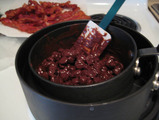
Dip the cooled, dry bacon into the chocolate. Sprinkle with sea salt, if desired. I sprinkled about half of the pieces with sea salt. I'm not sure if anyone noticed or had a preference. The bacon was salty enough on its own, though, so this isn't necessary if you don't have it on hand. Let the chocolate cool.
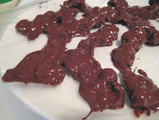
Serve. Watch your dinner guests approach the platter with extreme trepidation.
July 31, 2008
Sarah: Wishing I could justify inflicting pain upon my credit card.
Lately I've forbid myself from shopping for myself. Although I'm sad there are now Victoria's Secret models in the catalog that I don't even recognize, I suppose my money is better spent on things like rent and food.
If, however, my budget did not have such painfully strict restraints, I would be doing more than just admiring Jonathan Adler's collection for Barnes and Noble. And maybe going crazy with a seven sins pillow.

Is this something I could replicate myself with my meager embroidery skills?
July 11, 2008
Sarah: A Year in Review
In the past year, I have:
1. Gotten within a semester of college graduation.
2. Stood outside the hospital room while my niece was born, then held her on the first day of her life and countless days since.
3. Learned how to use an old hand-printing press.
4. Gained a new sister. An amazing new sister.
5. Traveled through Europe.
6. Bought a new (to me) car.
7. Learned to drive a manual transmission, just about burning through my clutch in the process.
8. Given up the apartment where I lived for almost two years.
9. Lived with my awesome family (Don't worry, guys, I promise that I'm looking for a new place).
10. Become much closer (whether she liked it or not) to a great friend.
11. Baked and cooked. A lot.
12. Cracked jokes with an albino.
It was a great year. One of my favorites yet. Thanks for being there with me.
July 02, 2008
Sarah: Here and There
You should never buy ugly motivational posters again. Why have stock photography of eagles soaring when you can have something cool like these? Via Zina, the coolest girl I know from Spring City.
Oh, and I can type things.
72 words
I want to try Loobylu's No Spend Month. I think about it fairly often and think it'd be a nice way to declutter my space and mind, relax about finances, and appreciate the possessions I already have. Plus, I'd finally get back on the cooking bandwagon.
This will make you laugh. Horrifyingly retro photos from an old JC Penney catalog.
June 18, 2008
Sarah: Catching My Breath
It's so good to be back home. To hug my friends, to chat with my family, to walk, hunched over, with my index fingers being gripped tightly by a little walking Nora. I am planning to write a little about the last six weeks I spent in Europe but am a little overwhelmed. How does one start? At the beginning? There are so many wonderful details, so many hilarious friends, so many new cities that I've fallen in love with. I want to share it with you, and I wish I could have taken you with me. Mostly, I am afraid to see how many pictures I crammed into 3GB, and I don't want to bore you. I hope to have some sort of wrap-up for you in the next few days, if you're interested. If you're not, well, you should comment and tell me what I should be writing instead.
Oh, and in case you are relieved that I finally stopped posting weekly entries about recipes that I often didn't have the culinary prowess to successfully pull off? Well, that's too bad. I actually cooked enough before leaving for Europe that I could have Lisa post an entry each week while I was gone, but then I didn't write them because I figured I should spend that time packing and catching my plane and stuff. So instead I plan to inundate you with cooking entries in the coming days or weeks.
Still there? I think you'd like this. I did.
I'm headed back to working (I was on time today, miraculous!) and apartment hunting. Thanks for bearing with me!
May 12, 2008
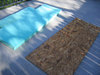
Lisa: herb garden
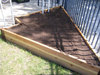
It took us at least three Saturdays, but Blake and I finally finished the herb garden we started a month ago (and have been planning since January). It turned into a much bigger project than we anticipated, but I'm really happy with how it turned out. The idea was that the garden would fill the triangular space created by the edge of our patio meeting the angle of the driveway. It's an awkward space to mow, and I thought a raised garden bed would solve that problem AND look nice there.
First, I mapped the whole thing out on paper and took all the measurements. Then I marked off where the garden would go, using a makeshift system of skewers and the ugliest yarn I own, Mr. Brown. We were out of string. You can see in these pictures that there are a few weird features in this corner of the yard, including two different types of wrought iron (the fence and the posts holding up the awning over the patio), two different types of cement bases for the posts, and some little braces connecting the fence to one of the posts--I assume to give stability to the fence. I was hoping the garden would sort of camouflage some of these idiosyncracies.
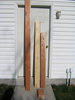
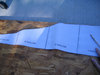
Blake cut the sod out of my marked area...

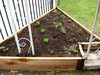
...and we picked up some redwood decking at Home Depot for the sides of the raised bed. The guys at the Depot cut it to the lengths I had measured and everything. Blake had to do a little extra cutting to make a hole for one of the wrought iron braces to go through, but that's it.
The corner brackets are made by a company called Frame It All, and I found them at a garden store in Bountiful called J&L Garden Center. The brackets are great, because they allowed us to build something that was much more complex and nice-looking than our carpentry skills would have allowed otherwise. You can use them with any 2x6 wood, too, not just the plastic stuff sold by Frame It All. A few caveats, though:
1) The included instructions only work if you're putting your garden (or sandbox, or whatever) out in the middle of an open lawn. Otherwise, you'll need to figure out the installation on your own.
2) There are two types of brackets--Anchor Joints and Stacking Joints. I think you'd only need the Anchor Joints if you have really loose, sandy soil. If you have rocky clay, like we do, give yourself a break and use the Stacking Joints for both levels. Trust me, that six-inch stake will be stable enough.
3) The copy on the box says that the joints adjust to any angle. This is not exactly true. There is a minimum angle, which is why they recommend using at least a four-foot timber between each joint. Our first layout had a very narrow angle at the top of the triangle, which was too small for the Frame It All brackets. We changed the layout a bit, picked up a few more brackets to accomodate the jog around the post anchor (and a few more boards), and ended up with a shape that I think I like better anyway.
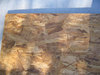
After we cut out another strip of sod, we laid out the boards and anchors where they would ultimately go, to make sure everything would work. Luckily, I had measured things right!

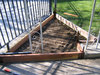
Blake and Sarah helped dig the holes for the stakes, and we got the boards and joints all in place and screwed together.
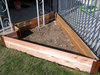
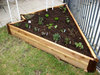
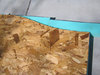
We took three trips to the garden store for bags of dirt, because we completely underestimated the amount of dirt it would take to fill up the garden. I think it was ten bags of compost and potting soil all together.
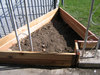
After the fresh, smooth dirt was in, it was quick work to plant the herbs and things we had bought. There's parsley, two kinds of sage, rosemary, thyme, two types of oregano, comfrey, two different mints, and I think a few others, plus several sweet williams (a Mother's Day gift from my mom) and a couple of the strawberry plants we got from the Turnbulls.
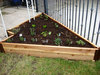
We left a little space to plant something that will climb up the post that is inside the bed. Now, if we can just manage to keep everything alive and looking nice! One of the lawn sprinklers is inside the new bed (Blake added some pipe to make it taller), so at least our efforts shouldn't be foiled by a lack of watering.
May 05, 2008
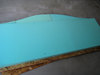
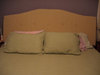
Lisa: headboard
The other day, I started vaguely considering a minor bedroom-revamping, and I priced some upholstered headboards online. That morphed into looking for instructions on making your own upholstered headboard, and then suddenly all the raw materials were at my house, waiting for me to do something with them. Funny how that happens.
Anyway, one day while Nora was down for a nap, I brought the baby monitor outside, dragged the chipboard and foam out of the garage, and got started.

I got the foam pieced together and glued by the time she woke up. I hadn't really thought about how I was going to glue the foam together, but I remembered from Cockeyed that contact cement might work. I wasn't sure what contact cement was, and I knew I didn't have any, so I googled it. Hmmm. That container looks kind of like blue glue, doesn't it? I dug the blue glue out of Blake's bag of sprinkler stuff and used that--it's stinky, but it worked fine. It didn't take much to get the edges to stick to each other.

For the headboard's arch, I traced a template I had found online, printed out, and taped together. After I had the shape marked, I used Marci's RotoZip saw to cut it out. This is the perfect tool for this kind of application. The RotoZip is basically a drill, but with a little guard added around the drill bit, and an extra handle on the side for stability. you put the guard right up against whatever you're sawing, and then move the drill wherever you want, making a freehand cut. So, it's not intimidating to use for anyone who has used a drill before. It doesn't make a perfectly smooth or straight cut (especially in a material of varying content, like chipboard), but that's OK when you're planning on covering your cut with thick layers of foam and fabric, and you just need the right overall shape. Thanks, Marci!

Meanwhile, Nora was being a superchamp, yelling back at the saw and thinking we were playing an awesome new game.

Once I had the wood cut out, I wrestled it on top of the foam and traced it with a sharpie. I used my trusty electric kitchen knife to cut the foam. That's what the instructions said to use, and when the lady at JoAnn's used an electric knife to cut the length I needed, I figured it was the way to go.
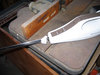
Nora thought the knife was almost as fun as the saw.

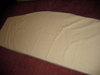
After I brought Nora inside and got her set up with some toys, I laid out my fabric, right side down, and lugged the wood and foam inside and centered the foam on the fabric. I trimmed the extra fabric a bit.
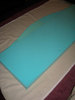
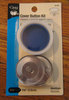
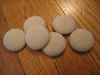
I got some big covered button kits (the only kind sold at JoAnn's) and made some buttons with the scraps I had trimmed off. I pinned the fabric loosely to the back of the foam, flipped it over, and figured out where I wanted to place the buttons. Then I sewed the buttons through the fabric and foam, and through another button on the back side to keep the thread from pulling through the foam. Here's the thing. In my experience, tufting with buttons is harder than you think it should be. For one thing, if you're using a covered button, the loop that your thread has to go through is on the back of the button. If your button is pulled into the foam really deeply, how do you get your needle back through that loop for another pass? It doesn't seem like one thickness of thread would be strong enough to keep the button tight against all that foam, either. And the first time you're pushing the needle through, it's tricky (and hurts your fingers) to push the needle in as far as you can while simultaneously compressing the foam to get the needle to poke through the other side far enough so that you can grab the tip and pull it out. I am convinced that the pros have a different set of tools to use when they're doing deep tufting--possibly including a very large needle, very strong thread, and some kind of button system with an open-faced (?) button on each side of the foam, which is easy to pull tight and allows for a decorative covered button to be snapped on afterward. Anyway, my buttons aren't as deep as I'd like, but they look OK.
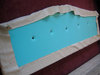
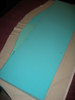
Once I had the buttons sewn in, I unpinned the fabric from the back of the foam, laid the chipboard down on top of the foam, and stretched the fabric as tightly as I could around the back of the board, stapling as I went. In a few places I had to pull the staples out, smooth things out a bit, and staple again, but it worked pretty well. I'm really glad I believed the part of the instructions that says to glue the board to the foam ONE INCH BELOW the top of the foam, even though they are cut to the same size. This allows the top of the foam to curve back around the board, making a nice round edge at the top of the headboard, instead of a slope ending with the hard edge of the board. With the headboard being so big and heavy, it was hard to get the fabric pulled tightly enough while keeping things smooth. Maybe enlist a strong person to help.
Speaking of strong people, I got Blake to help me prop up the headboard above our bed so that I could take this extremely anticlimactic picture of the final product. I don't know what's going on with the focus and the lighting and the colors here, but I'll post some prettier pictures when the whole revamping is done.
foam: $40
fabric: $18
button kits: $10
chipboard: $8
Everything else I already had or made Sarah dig out of her storage unit.
Total: $86
If I were going to do this over again, I'd use a lighter but still rigid material (MDF?) instead of the chipboard and a slightly thinner foam covered with a thin layer of quilt batting to soften the edges of the foam. I think I'd also cut the foam a bit larger than the backing, so that it would wrap around the edges more. I'd definitely try to figure out some way to get the buttons sewn in more deeply. All in all, though, I'm happy with it--and it was certainly cheaper than buying one readymade.
May 01, 2008
Sarah: 2008 Cooking Adventure, Week 18
I often forget about how much I love salmon. I'm so glad that on a certain, otherwise forgettable weekday, I decided to make myself a nice, warm dinner. I'm not a great chef, but salmon is something anyone can cook without going too far astray.
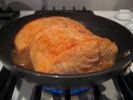
I just salt-and-peppered the fish, browned the top quickly, then let it cook, covered for most of the time, in a pan with some water and some asian salad dressing (you know, as a marinade). It was lazy, but easy.
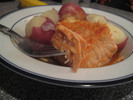
While the fish cooked, I put some red potatoes in some water (with a little salt and milk) and let them cook until soft.

And then dinner was done. It was not terribly exciting, but I recommend salmon and potatoes (or rice, or salad) for dinner tonight. Leftovers can be eaten hot or cold, served just like dinner or over a bed of lettuce. Yum.
April 30, 2008
Sarah: 2008 Cooking Adventure, Week 17
Three days after we baked this week's recipe, Lisa sent me a text message that said something like "Curse you and your satan cookies!" and I couldn't agree more.
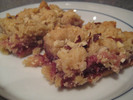
These bars were sneakily delicious. On first taste you think "well those are pretty good! And easy to make, too!" You finish a bar and think you might enjoy another tomorrow. You know, perhaps, if the mood strikes.
And then something in your brain snaps and you are a slave to these delicious little bars. They are breakfast! Snack! Dessert! Dinner! You must eat them all! Luckily, Lisa saved me from myself by putting the majority of the dessert bars in the freezer.* I have sold my soul to Blackberry Jamble. At least until I make another sugar-laden baked good.
Recipe after the jump.
*Lisa, I'm sorry. I may or may not have snuck one of these from the freezer. I am ashamed.
Satan cookies, aka Blackberry Jamble Shortbread Bars (from Sticky, Chewy, Messy, Gooey Desserts)
Ingredients:
1 pound (4 sticks) unsalted butter, room temperature
1 cup firmly packed light brown sugar
1 cup granulated sugar
2 teaspoons pure vanilla extract
1 teaspoon salt
3 and 3/4 cups all purpose flour
1 cup almond flour or very finely ground almonds
1 and 1/2 cup blackberry preserves
1/2 cup chopped almonds
Confectioner’s sugar for dusting
Directions:
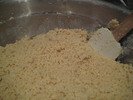
If you don’t have almond flour on hand, you can make it like I did by grinding up 1 cup of almonds in your food processor until they are finely ground. It’s going to be combined with the flour so texture-wise, you want to get it as finely ground as possible.
Combine the butter and sugars in a large bowl.

Using an electric mixture set at medium low speed, beat it until creamy. Add the vanilla and salt and beat until combined.
Combine almond flour (or ground almonds) with the flour. Mix well. Combine the dry mixture into the butter mixture on low speed, until a smooth, soft dough forms.
Spray a 9 by 13 inch baking pan with nonstick cooking spray and press 1/3 of the dough evenly into the pan to form a bottom crust.
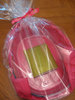
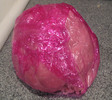
Wrap the remaining dough in plastic wrap and refrigerate until very cold and firm, at least 30 minutes. Wrap it in Lisa's pink plastic wrap for a fun brain-like effect!
Preheat oven to 325 degrees Fahrenheit.
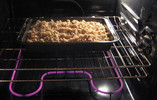
Bake the bottom crust until it is firm and just beginning to turn pale brown around the edges, about 20 minutes. Remove the pan from the oven and spread the preserves evenly over the crust. Crumble the remaining shortbread dough over the jam to form a pebbly, crumbled topping. Sprinkle with the chopped almonds.
Return pan to the oven and continue baking until topping is firm and crisp and lightly golden in color, about 30 to 35 minutes. Transfer to wire rack and let cool to room temperature.
Use a sharp knife to cut bars evenly into 15 large squares. Remove the bars from the pan with a metal spatula and if desired, cut in half on the diagonal to form 30 smaller triangular bars. Dust with confectioners’ sugar and serve.
The bars will keep, covered tightly, for about 1 week at room temperature, or in the freezer for up to one month.
April 29, 2008
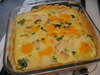
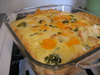
Lisa: chicken & broccoli quiche
Soon after I had Nora, my awesome friend Gabrielle brought over dinner. It was SO GOOD, you guys. It was a salad with homemade dressing (in a container that I complimented so much that she got me one for my birthday), and a deep-dish quiche with broccoli and chicken. Blake loved the quiche so much that he called Gabrielle and told her so. Possibly more than once. Gabrielle thoughtfully included a handwritten copy of the quiche recipe, and I finally got around to making it last week. Why didn't I do it before? I'm kicking myself, because it is so easy and so delicious. Anyway, this is definitely going to be one of the ten recipes I memorize.
Gabrielle's recipe is after the jump. Things I added are in bold. If you want to kick the whole thing up a notch (both in taste and in difficulty), make it in the homemade crust of your choosing.
Edited to add: I only have one glass pie pan, so I made the second quiche (which wasn't eaten yet by the time I took pictures) in a square baking dish. It worked fine, but the crust--which started out round--looks a little funny. Don't you judge me.
Gabrielle's Chicken & Broccoli Quiche
Serves 6. Cooking time 35-40 minutes. Preheat oven to 375 degrees.
1 unbaked 9" pie shell (I use Pillsbury) These are in the refrigerated section near the Pillsbury crescent rolls in the tube. Get the rolled up refrigerated kind instead of the kind in the freezer section that are already in a pie tin, because then you can bake the quiche in your own dish and crimp the edge yourself so that it looks more homemade. Tricky! They come two to a package, so you might as well make two quiches at once.
2 cups fresh broccoli, cooked and drained
1 whole chicken breast, cooked and chopped Or chopped and then cooked, which is how I did it since I was in a rush. Small pieces = faster cooking, plus they don't have to look pretty because they'll be covered with delicious, delicious egg and cheese.
6-8 ounces Swiss cheese, cut into 1/4" cubes When I was buying the cheese, I forgot I was doubling the recipe, so I bought an 8-ounce brick. When I figured out my mistake back at home, I threw in 4 additional ounces of cheddar that I had on hand. The cheddar was tasty in the finished product, and I ended up with about 6 ounces of cheese per quiche. Disaster averted.
3 eggs
1 cup heavy cream I also only got enough cream for one quiche, but I added a cup of milk to make up the difference in volume (skim is what I had on hand). I didn't notice a difference, and there was a little less fat, so...whatever. Your mileage may vary.
2 tablespoons lemon juice
1 teaspoon salt
1/8 teaspoon pepper
chives (green onions) to taste
Leave the pie shells out of the fridge for 15 minutes or so before unrolling. Unroll pie shell and place in pie pan while you prepare the other ingredients. Sprinkle broccoli in bottom of the shell. Top with chicken, then cheese. In a small bowl, using a whisk, beat the eggs, cream, lemon juice, salt, and pepper until blended, but not frothy. Pour over cheese mixture; sprinkle with chives. Bake in 375-degree oven for 35-40 minutes or until knife inserted in the center comes out clean. (If you have some extra, sprinkle grated swiss over the top for the last 15 minutes of cooking.) Let stand at least ten minutes before cutting.
Since I made two quiches but only needed one, I pulled the other out of the oven at 35 minutes and stuck it in the freezer. The interwebs tell me I can warm it up in a 375-degree oven for 20 minutes. I'll let you know how that turns out.
March 27, 2008
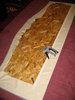
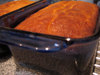
Lisa: lemon bread
I've been looking for a dessert recipe that sounded fresh and spring-y, but that would mail well so I could send a treat to my brother Jeff. A coworker suggested a quickbread, and after a little looking around, I thought lemon bread sounded perfect.
The recipe I used is from Muffins & Quick Breads, from the Williams-Sonoma Kitchen Library (recipe after the jump).
I finished baking the bread at around midnight, and turned the loaves out on the racks to cool. I considered leaving them out all night, but after puttering around for half an hour, I decided the bread was cool enough and wrapped one up in foil and sealed it in a padded mailing envelope, and put the other one on a plate with foil over it (because doesn't lemon bread sound delicious for breakfast?). The bread smelled so good, I had to slice a piece off the second loaf and eat it right then. It was delicious. The crumb wasn't as fine as it looked in the picture in the book, but that might be because I didn't chop the almonds fine enough, or because I cut it with a dull knife while it was still warm. Anyway, thank GOODNESS I tasted a piece (and took pictures), because...the ants.
The next morning, when I came into the kitchen, I noticed a thick trail of my tiny nemeses emerging from the edge of the cabinet by the dishwasher and leading across the front edge of the countertop, directly to the foil-covered plate of lemon bread. After shouting "oh NO!" loud enough to wake up Sarah, I whipped off the foil, and confirmed my fear that my newly-baked loaf was swarming with ants. Stupid little sugar-loving bastards.
Anyway, there was some crying. Some yelling. Some detective work. Some poison spraying. But we lived, and Jeff's (antless) loaf got mailed off all right. Thanks, Mom and Blake, for your help with all of that.
Shall we remember the bread that was?


Lemon Bread
Ingredients
1/2 cup (4 oz/125 g) vegetable shortening
1 cup (8 oz/250 g) sugar
2 eggs
1 1/4 cups (5 oz/155 g) all-purpose (plain) flour
1 teaspoon baking powder
1/2 teaspoon salt
1/2 cup (4 fl oz/125 ml) milk
1 tablespoon finely grated lemon zest
1/2 cup (2 oz/60 g) chopped pecans
FOR THE LEMON SYRUP:
1/4 cup (2 oz/60 g) sugar
3 tablespoons fresh lemon juice
Preparation
Preheat an oven to 350 degrees F (180 degrees C). Grease and flour a medium (8 1/2-inch/21-cm) loaf pan.
In a large bowl combine the shortening and sugar and beat until blended. Add the eggs, one at a time, beating well after each addition. In a medium bowl stir and toss together the flour, baking powder and salt. Add to the shortening mixture, along with the milk and lemon zest, and beat until blended and smooth. Stir in the pecans. Spread evenly in the prepared pan. Bake until a thin wooden skewer inserted in the center of the loaf comes out clean, about 1 hour.
While the bread bakes, make the lemon syrup by combining the sugar and lemon juice in a small bowl. Set aside, stirring occasionally; don't worry if the sugar does not dissolve completely.
Remove the bread from the oven and, using a fork, gently poke the top in several places. Stir the syrup, then slowly drizzle it over the hot bread. Cool in the pan for 15 minutes, then turn out onto a wire rack to cool completely.
Makes 1 medium loaf
Cooks' note:
This recipe carries a double dose of lemon: grated zest in the batter and lemon syrup poured over the bread after baking. For a heavenly dessert, bake it in 2 miniature loaf pans, then top the slices with berries and whipped cream.
March 22, 2008
Lisa: tortilla soup
As my mom pointed out the other day, I haven't really turned out to be much of a cook. ("You're more of a career woman!" was how she softened the blow.) That said, I think it's really important when you have a family with kids to sit down at a table for a homemade, nutritionally sound dinner every night and talk to each other. Well...now the theoretical kid has become an actual kid who is starting to eat solid foods, so I guess I'd better get this cooking thing figured out.
I checked out a cookbook from the library, and I'm really excited about it. It's called Everyday Food: Great Food Fast from the kitchens of Martha Stewart Living. The photos are gorgeous as always with Martha, and the recipes sound tasty and easy, using regular supermarket ingredients. I got Blake to go through the Spring section with me, and we marked all the recipes we thought would be fun to try. We're going to make a new one each week.
This week's effort was tortilla soup (recipe after the jump), and it was okay. The soup itself is super basic, just chicken broth with shredded, boiled chicken in it. The interest is all in the toppings you add--even the "tortilla" part is a topping. Also, garnishing a brothy (as opposed to creamy) soup with cheese is a little odd. The cheese doesn't blend in and make the soup creamier; it turns into melty self-contained globs floating in the broth, or glomming around bits of chicken or your spoon.


What I wish I'd known beforehand: The instructions as written require you to own two pots large enough to hold more than 8 cups of soup. I only have one pot that big, which meant some last-minute improvising, leading me to momentarily forget about the tortilla strips burning in the oven.
Verdict: The soup was fine, but I probably won't make it again.
Tortilla Soup
Serves 4 * Prep time: 30 minutes * Total time: 30 minutes
For the soup
4 skinless chicken thighs (about 1 1/2 pounds)
1 can (14.5 ounces) reduced-sodium chicken broth
1 jalapeno chile, diced (with seeds for more heat)
6 corn tortillas (6-inch)
3 tablespoons canola oil
Coarse salt
For the garnish
1 cup shredded Monterey Jack cheese (5 ounces)
4 large scallions, thinly sliced (about 1/2 cup)
1 green bell pepper, ribs and seeds removed, diced
1 avocado, peeled, pitted, and diced
1/4 cup cilantro sprigs
1 lime, cut in wedges
1. Preheat the oven to 400 degrees F. In a large pot, bring the chicken, broth, jalapeno, and 8 cups of water to boil over medium-high heat. Reduce the heat to medium; simmer until the chicken is cooked through, about 15 minutes. Transfer the chicken to a plate; let cool.
2. Brush both sides of the tortillas with oil, stacking them as you go. Cut the stack in half, and then slice crosswise into 1/2-inch strips. Place the strips on a rimmed baking sheet; bake, tossing the strips occasionally, until golden, 15 to 20 minutes.
3. Using a large spoon, skim the fat from the surface of the broth in the pot, and strain the liquid through a sieve into a clean pot (you should have about 8 cups). Shred the chicken with a fork or with your fingers, and return it to the pot. Stir in 1 teaspoon salt. Divide the soup among serving bowls, and add the tortilla strips. Garnish as desired.
PLANNING AHEAD
The chicken can be cooked up to a day in advance; cool, then store the chicken and cooking liquid separately in the refrigerator. Shred the meat just before using. You can also use the leftover or store-bought roasted chicken in this soup; use two quarts homemade or reduced-sodium canned chicken broth instead of the cooking liquid.
March 13, 2008
Sarah: Moving Recap
Today's Sponsor:
My move, brought to you by Diet Coke and Dextro Energy.
Whoa. That Dextro stuff completely messed with my mind.
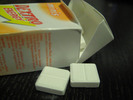
I was nervous that mixing energy pills with my already high soda intake would cause my heart to explode. Oh, and did I mention that I had a cold, so my dinner looked like this:
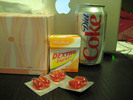
That's right. I mixed energy pills, caffeinated soda, and DayQuil. It was awesome (not to mention smart), except for the way that my stomach kept turning.
The point is, though, that I didn't have a heart attack. I actually didn't even feel hyperactive and full of energy. I just felt like I didn't need to sleep. Ever. I think I'll take Dextro again when I have a long day of work or a long night of studying. You don't feel frantic, you just feel like you have all of the awake time that you need until your project is done. Or until you're dead.
Want some Dextro Energy of your own? Well that is too bad, because it's a European product. So you'll have to make friends with someone as worldly and glamorous as my jet-setting friend Staci, who lives in Austria. Don't be too jealous, she can't help being awesome.
As far as the move, it took way longer than I thought it would, the number of dead spiders revealed when we removed the furniture was appalling, and the whole experience made me a little sad. Blake had to re-pack my garbage can to make room for everything I threw away. My dad lugged my table, couch, bed, and other items, all in his crisp dress shirt and pants. Lisa patiently packed countless boxes, never calling my stuff the crap that it is. David helped me fill up my storage unit. Oh, and Nora helped.


And now almost my entire life fits into a 5x10 space.
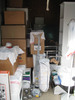
If you're curious about what my apartment looks like when it's all emptied out, I took pictures (though I forgot to take pictures when it was decorated. Lame!) and put them after the jump.
That's all I have to say, really. I lived there for over a year and a half. Countless heads have smacked against the low ceiling, many nights have been spent with the tv on as I fell asleep on the couch. Late nights, early mornings (or mornings that weren't early enough), dates, lonely weekends, and long talks with friends. This apartment served me well, and I hope to find a new one I like as well.
Living room: Complete with glamorous cable modem and wireless router:
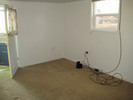
Kitchen:Providing a scenic view of the driveway:
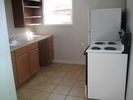
Bedroom: Meh. Boring, but serviceable. I don't even want to talk about how much crap that closet can hold. There are shelves behind and above the clothing rod. Having a double-deep closet is awesome.
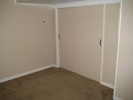
Bathroom: Probably the room that people comment the most about. I think that it was the start of a remodeling project that hasn't yet extended into the other rooms. The double shower heads were awesome.
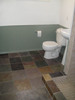
The photos are terrible, my apologies.
February 11, 2008
Sarah: 2008 Cooking Adventure, Week 5 and 6
There aren't any pictures this week, as my cooking has been a bit uninspired. I've been spending my time snowmobiling and deep cleaning my apartment instead of measuring and mixing. I also didn't feel like buying new ingredients or following recipes. I'm sorry.
So enough with the excuses, here's what I made:
Week 5: Pasta Bake
Pour a box of dry pasta, a few cups of water, some veggies, and a bottle of pasta sauce into an oven safe pot. Cook at 375 degrees while you clean your bathroom, dust your bookshelves, wash any dishes in the sink, take out the trash, and organize your junk surface (don't we all have one? Mine is the little buffet right next to my front door.). If you don't smell the pasta yet, go back to the bathroom and go through your cupboards, throwing out dried up nail polish, sample-sized conditioner that came with the at-home hair dye kit you used to turn your hair black over a year ago, and any other items you have no use for. Now can you smell the pasta? Good. Open up the oven, remove the lid, and sprinkle cheese on top. Close the oven and let the pasta cook about five or ten more minutes. Done!
Week 6: Baked Apples, Mmmm
Chop up three apples into a small oven safe dish (I used my little Corningware). Add about 1/2 cup water, a little sugar, and plenty of cinnamon. Cover your dish with foil and place in oven at 350 degrees. Let the apples cook while you eat dinner, then remove from oven and serve either by themselves or with vanilla ice cream.
See what I mean? These are not revolutionary culinary masterpieces. I'll try to step it up this week.
January 30, 2008
Lisa: yard work
Blake and I never had a yard before moving into our house, and it has been kind of a rude awakening. I thought about the furniture we'd need for our new place, but not rakes and shovels and fertilizer and lawnmowers and all of that. I also underestimated the time it takes to keep things looking really nice over the entire growing season.
The previous homeowners thankfully had a pretty low-maintenance system going. I always intend to weed everything on a more regular basis, but we've been able to keep things basically in control between the automatic sprinklers, one or two pruning sessions, and a (usually) weekly lawn-mowing. But who doesn't want to improve on the status quo, right?
Spring 2005
I bought some planters on clearance at JoAnn's, and filled one with flowers and the other with herbs. The herbs hung outside our kitchen door (theoretically for easy cooking access)...

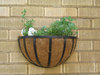
and the flowers beautified our (non-functional and somewhat hideous) lamp post. I was totally proud of myself for buying some black chain at Home Depot and improvising a hanging system for this planter.

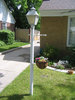
Spring 2006
I picked up two more planters for herbs, and added one on the other side of the kitchen door and one around the corner over our trash cans, to counteract the delicious warm-garbage aroma. I really liked the look of the planters flanking our kitchen door, but they had to get watered every day or they'd dry out in the bright summer sun. That just gave me an excuse to buy a cute watering can and feel all domestic!
We also bought two lilac bushes for the empty corner of our back yard that gets tons of sun and had previously been planted with tomatoes (turning the soil acidic). One of the bushes is doing great, while the other looks sickly and will probably have to be replaced.
Spring 2007
I had really ambitious yard plans last year, but I got pregnant. We started off well, ripping up about half of the black weed-blocker fabric under the top layer of dirt in our flower beds and tilling out the weed-infested area behind our garage for a future vegetable garden. We even cut down the bizarre eight-foot-tall bush-tree at the corner of the house (you can see it on the right of the top picture here) and let it grow back as a regular bush. Soon, however, lifting heavy things and bending down in the heat was mentally and physically out of the question--and I didn't even pull out the planters again.
Spring 2008
This year maybe I'll be able to get to the projects I meant to do last year--a vegetable garden and a raised herb plot off the back patio. The vegetable garden will go behind the garage, where there is a separate sprinkler station so that we can set the timing however we want. There's plenty of sun back there, and the weeds are thriving, so I think it could be a good place for it. The herb plot will go in the weird triangular space between the back patio and the fence separating the yard from the driveway--it's really hard to get the lawnmower in there anyway. LJC is my inspiration for both of these. I want the herb plot to be in sort of a raised box, like this, and I love her four-square veggie garden. I think I'll plant our vegetables in rows, though, since the area behind the garage is more of a rectangle than a square. Maybe when it gets warmer, Nora will love spending time outside and can keep me company while I work on the garden. Who knows?
Spring 2009
Sometime down the road I want to put in a little flagstone patio with a pergola over it on the side of the garage, to make some shade in that end of the yard. I also want to replace the aluminum awning over the back patio with a pergola, and get new (possibly fabric?) awnings for the front and kitchen doors. Onward and upward!
If you've done any of these things before, please share your tips with me in the comments. Assume I know nothing.
January 13, 2008
Sarah: 2008 Cooking Adventure, Week 2
For the second week in a row, I cooked up a recipe from Smitten Kitchen. Ever since I read this entry, I've been salivating over the idea of beautiful roasted onions overflowing with homemade stuffing.

The result is definitely very pretty. I'm not sure that it's quite impressive enough, however, to be with the work.
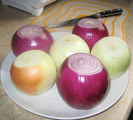
Hollowing the onions took for. ev. er. I found that gouging out the insides of onions is the perfect way to get them to squirt their juices directly into my eyes. I cried so much that I had to wash my hands and take a break. Thank goodness for my stainless steel soap. It killed the onion smell on my hands, but there was nothing to be done for the smell that seemed to have permeated every corner of my kitchen.
After the onions were hollowed and the bacon was cooked, throwing together the stuffing was easy, especially since I used bread that had already been cubed and toasted for use in stuffing. Lazy, I know, but the grocery store didn't have any loaves that looked just right to me, so I figured I'd give that bag a whirl. This recipe is simple and makes a pretty, colorful and tasty stuffing.
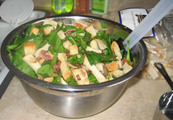
I halved the recipe and only stuffed six onions. I still had a small dish of extra stuffing. I didn't realize until several hours after cleaning up that I had forgotten to include the cashews. Doh!

Verdict: This is a pretty, easy stuffing. I think the crunchy cashews would make it even better. I'll definitely add some to the leftovers. As far as the onion shells are concerned, I think this is too much work for me. Yes, the presentation is impressive and they infuse the stuffing with their flavor, but that ended up tasting a bit too onion-y for my taste, and the onion is just waste anyway. With the color of the spinach and the interest of the bacon and cashews, I think you could serve this stuffing in a large bowl and your guests wouldn't know the difference. I'd make the stuffing again, but not the roasted onions.
Recipe after the jump.
Roasted Stuffed Onions
Gourmet Magazine, November 2002
If you wish to make this vegetarian, simply omit the bacon, and cook the filling in olive oil instead. Vegetable stock can be swapped for turkey.
If you’re stressing because you have a lot of guests coming over, you can definitely do the onion-hollowing step a day or two in advance. The stuffing can be made in advanced as well, then brought to room temperature before filling and baking.
10 medium red and yellow onions (4 lb)
1 lb sliced bacon, cut crosswise into 1-inch-wide pieces
3 celery ribs, cut crosswise into 1/2-inch-thick slices
1 teaspoon salt
1 teaspoon black pepper
3 garlic cloves, minced
15 oz baby spinach, trimmed and coarsely chopped (14 cups)
1 (9-inch) round loaf country-style bread (1 1/4 lb), cut into 1/2-inch cubes (10 cups), lightly toasted
2 cups salted roasted cashews (10 oz), coarsely chopped
1 stick (1/2cup) unsalted butter, melted
1 1/4 cups turkey giblet stock
Make onion shells: Cut a 1/2-inch-thick slice from tops of onions, discarding tops, and trim just enough from bottoms for onions to stand upright. Scoop out all but outer 2 or 3 layers from each using a small ice cream scoop or spoon (don’t worry if you make a hole in the bottom), reserving scooped-out onion and onion shells separately.
Make stuffing: Coarsely chop enough scooped-out onion to measure 3 cups.
Cook bacon in 2 batches in a 12-inch heavy skillet over moderate heat, stirring, until crisp, about 10 minutes, then transfer with a slotted spoon to paper towels to drain, reserving about 1/3 cup fat in skillet.
Add chopped onion, celery, salt, and pepper to skillet and sauté over moderately high heat, stirring, until vegetables are softened, about 5 minutes. Add garlic and sauté, stirring, 1 minute. Transfer mixture to a large bowl and stir in spinach, bread, cashews, butter, 1 cup stock, and bacon, then cool completely.
Roast onions: Preheat oven to 425°F. Arrange onion shells, open sides up, in a 13- by 9- by 2-inch baking pan, then add 1/2cup water and cover pan tightly with foil. Roast onions in middle of oven until tender but not falling apart, 25 to 30 minutes.
Stuff and bake onions: Reduce oven temperature to 350°F. Transfer shells to a work surface and pour off water in pan. Fill shells with stuffing, mounding it, and return to pan. Reserve 5 to 7 cups stuffing for turkey cavity, then put remaining stuffing in a buttered shallow 3 1/2-quart baking dish and drizzle with remaining 1/4 cup stock.
Bake stuffed onions and stuffing in dish in middle of oven, uncovered, until heated through, about 25 minutes.
January 08, 2008
Sarah: 2008 Cooking Adventure, Week 1
On this first weekend of 2008, I baked up a batch of mini pretzels with the help of my lovely assistant, Mallory.
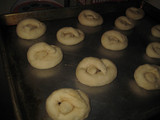
Something was a bit off with the dough (I think that it couldn't rise enough in my chilly apartment), but I pressed on, undaunted. They were such cute, chubby little buggers.
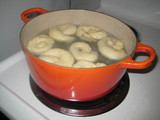
Poaching them made them puff up even more. They came unknotted somewhat, but who cares? I used my pretty new pot, because, why not?
Mallory (whose stunningly beautiful visage will not appear in this entry, at her request) applied the egg wash and salt (not too much! Aside from having cute new bangs, Mallory is a salt-application genius. She could totally work at a PretzelMaker) and then we popped them in the oven.
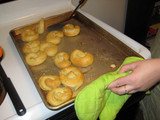
I think these are the tastiest while they're hot. They keep for a few days uncovered and beg to be dipped in mustard and enjoyed with a fizzy beverage.

I was, of course, happy to oblige.
The recipe is after the jump.
Next week: I'm deciding between beef stew, roasted stuffed onions, or something fabulous suggested by a reader. Votes? Suggestions?
Soft Pretzels
recipe found at Smitten Kitchen, originally from Martha Stewart
Makes 16 full-sized or 32 miniature
2 cups warm water (100° to 110°)
1 tablespoon sugar
1 packet active dry yeast
5 to 6 cups all-purpose flour, plus more for dusting
1 tablespoon salt
2 teaspoons canola oil
2 tablespoons baking soda
1 large egg
Coarse or pretzel salt
Vegetable-oil cooking spray
1. Pour warm water into bowl of electric mixer fitted with a dough hook. In a small bowl, combine water and sugar, and stir to dissolve sugar. Sprinkle with yeast, and let sit 10 minutes; yeast should be foamy.
2. Add 1 cup flour to yeast, and mix on low until combined. Add salt and 4 cups flour, and mix until combined, about 30 seconds. Beat on medium-low until dough pulls away from sides of bowl, about 1 1/2 minutes. Add 1/2 cup flour, and knead on low 1 minute more. If dough is still wet and sticky, add 1/2 cup more flour (this will depend on weather conditions); knead until combined, about 30 seconds. Transfer to a lightly floured board, and knead about ten times, or until smooth.
3. Pour oil into a large bowl; swirl to coat sides. Transfer dough to bowl, turning dough to completely cover all sides. Cover with a kitchen towel, and leave in a warm spot for 1 hour, or until dough has doubled in size.
4. Heat oven to 450°. Lightly spray two baking sheets with cooking spray (parchment paper, ungreased, also works). Set aside. Punch down dough to remove bubbles. Transfer to a lightly floured board. Knead once or twice, divide into 16 pieces (about 2 1/2 ounces each) or 32 if making miniature pretzels, and wrap in plastic.
5. Roll one piece of dough at a time into an 18-inch-long strip. Twist into pretzel shape; transfer to prepared baking sheet. Cover with a kitchen towel. Continue to form pretzels; eight will fit on each sheet (you may need a third sheet if making miniatures). Let pretzels rest until they rise slightly, about 15 minutes.
6. Meanwhile, fill large, shallow pot with 2 inches of water. Bring to a boil. Add baking soda. Reduce to a simmer; transfer three to four pretzels to water. Poach 1 minute. Use slotted spoon to transfer pretzels to baking sheet. Continue until all pretzels are poached.
7. Beat egg with 1 tablespoon water. Brush pretzels with egg glaze. Sprinkle with salt. Bake until golden brown, 12 to 15 minutes. Let cool on wire rack, or eat warm. Pretzels are best when eaten the same day, but will keep at room temperature, uncovered, for two days. Do not store in covered container or they will become soggy.
January 02, 2008
Sarah: Here's to a tasty 2008
Lisa's baking reminded me of one of my resolutions for 2008. I plan to cook or bake something new each week of the year. After all, with the Writers' strike dragging on (Come on, execs, we all want this to end. Compromise!), there isn't anything good on tv anyway. That means I'll need 52 recipes and friends willing to be my culinary victims. Someone who is willing to wash dishes for food is preferred, but anyone that wants to come over on the weekend (I'm thinking it'll probably be on Sundays) and chat and taste with me is welcome. I'm excited to put my new apron, pots, and knives to work, and would love suggestions on what to make.
This week, I think I'll try pretzels.
Someone who is also interested in expanding their culinary repertoire and is a fan of cheese should try making cheese at home.
December 14, 2007
Lisa: Can I fluff your pillows?
All of Sarah's holiday domesticity reminded me to post about the pillows I made for our living room. Blake and I gave each other two leather armchairs for Christmas this year, and I wanted to celebrate finally having adult furniture with the addition of some pretty new throw pillows. Nice-looking throw pillows are surprisingly expensive, but I thought I could make some on the cheap using the upholstery fabric I had left over from making my needle case. $75 worth of pillow forms and fancy trims later, I got all the pieces cut out and ready to sew. Four simple seams, right? Zip, zip, zip zip, turn it inside out and stitch it up, right? Well, sort of. It is really tricky to hold the trim tight enough against the zipper foot and keep all the layers lined up straight. If I were doing this again, I'd sew the trim onto the right side of one of the pieces of fabric first, like my mom suggested.
Here are the finished pillows:


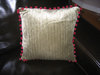

[ETA: These pictures looked fine on my monitor at home, but on my work computer they're super dark. I'll try to take some more with all the lights on!]
December 11, 2007
Sarah: Quick Holiday Craft
Yesterday, fueled by adrenaline, caffeine, and one hour of sleep, I found myself feeling restless. Already at the craft store getting ornament supplies, I picked up a styrofoam wreath form.
When I got home, I cut several strips from some green coordinating fabric I had laying around from a previous project.
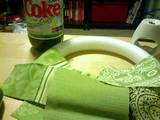
Then I just ironed the raw edges under and went crazy with the hot glue gun. If you try this project at home, learn from my mistakes: Hot glue will dissolve your styrofoam. While this may be a Fun With Science! moment, it will also make little craters in your wreath. Did I switch to one of the many other adhesives in my apartment at any given moment? No, because I will never give. If you insist upon using hot glue, apply the glue to the fabric, then press the glued fabric to the styrofoam. This dissolves it much less. Oh, and if you're clumsy by nature? You will burn off your fingertips. You always do.

Those dots on the bottom right side of the wreath are a few pushpins I purloined from my bulletin board. The wreath was just a little too plain. I tried to add a simple bow with my red ribbon, but my bow tying skills were not up to the task.
This project cost me about $4.50 and 20 minutes. Totally worth it!
Sorry the pictures are so fuzzy. I'm still sticking it out with only my camera phone. Hint hint, Santa!
December 04, 2007
Sarah: Swag
You guys know how I love free stuff, right? That's why I jumped at the chance to enter this contest. Yes, there is little chance that you or I would win, but the prizes are excellent. Go enter!
November 29, 2007
Lisa: let it snow
Now that snow is finally falling outside, things are looking all Christmassy! I thought it might be time to get out the tree and the decorations.

I forgot one of the garlands, and some sections of the lights aren't working (which means some tedious bulb-by-bulb checking), but it's still festive!
November 16, 2007
Sarah: Mmm, Smells Good

Method now has their seasonal scents in. I bought one of their holiday kits (but not the one with the aroma sticks in the picture above) and now my apartment smells fresh and festive. Buy one now and you also get a free "Plastic bag Rehab" bag to take to the grocery store and save a little spot of the ozone layer. Method must love me, because I got two bags! Yippee! If you prefer to shop at the store rather than the internet, you can email or fax in a form along with your receipt showing that you spent $20 or more on Method products and they'll still send you your free bag.
What's better than helping out the environment? Helping it out while it doesn't even cost you a thing!
November 09, 2007
Sarah: Retro Progressive
Today I discovered Tiny Choices via Not Martha. This blog is mostly about reducing your consumerism or energy use, but the author isn't condescending and I don't feel guilty for any of my wasteful ways. Instead I'm inspired to look for easy, small ways to simplify my life, to reduce the number of scary how-do-you-even-pronounce-that ingredients or chemicals I use or consume.
Perhaps I'm just feeling vulnerable right now because last night I ate a frozen pizza, only to find out minutes later that it had been recalled because of possible E. Coli contamination. (Good thing I bought Christmas gifts early. If I die, consider them my farewell gifts to friends and family.)
Anyway, Tiny Choices discussed a term called Retro Progressive to describe returning to old practices in order to reduce one's energy and chemical use. I know myself well enough to accept that I won't immediately start cooking and canning homegrown organic vegetables, refuse to purchase any frozen (albeit deadly-bacteria-containing) food, and washing all of my clothes by hand. But I will continue to air-dry about half of my clothes (I totally believe that it extends the life of my jeans and delicate items) and I'm trying to cook more at home instead of grabbing fast food for every meal. These are my tiny choices.
Giving sensible living a buzz term like "retro progressive" spurred some debate among Tiny Choices readers. Does the very notion of 'retro' home life imply oppression of women? Some found the term a bit insulting. It just made me want to put on a cute apron. I liked what one commenter said, though, that "'Domesticity' is not just a way to keep women oppressed - it's also a set of really useful skills." So I think that what I'm taking from that blog entry is that enjoying domesticity, whether it's crafting, cleaning (because what feels better than a sparkly clean house, really?), cooking, or taking an active role in your quality of life, is nothing to be embarrassed about. You can believe in your right as a woman or individual to choose your path in life, whether it's working or staying home, married or single, and still embrace how great your legs look in heels and enjoy the smell of something delicious bubbling on the stove.
November 07, 2007
Lisa: accessory clips
When I hung up the letter hooks in Nora's bedroom, it started an addiction that could only be fed by adding more hooks. Blake hung some little brass hooks in my craft closet for me that are now holding gift bags, and I ordered three more hooks from Restorers (through Amazon) for Nora's room.
I knew I wanted to hang her blessing dress and the gorgeous handmade blanket she got from her anonymous "secret grandma," but that left one empty hook and a long narrow space in the middle. With Sarah's help, I brainstormed an accessory holder.
Here's the result:
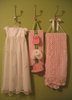
![]()
I'm really happy with how it turned out, and the whole thing took less than two hours to make. Endless variations are possible to suit your needs and tastes. Instructions and the materials I used are after the jump, if you're interested.
Materials:
Steps:
1. I cut the cardboard to the width I wanted, getting rid of the bent-up corners in the process. Then I set the cardboard on my fabric and cut around it, leaving plenty of extra fabric to wrap around the back.
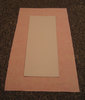
2. I pinned the dark green ribbon down the center of the right side of the fabric, and just stitched right down the center with the sewing machine. Easy peasy.

3. The next step was a little bit tricky for me, since I'm not really a good spatial thinker. I centered the cardboard on top of the fabric and ribbon, and marked the top center and bottom center of the cardboard with a pin. Then I messed around with the clips, the light green ribbon, and some pins for a while, until they looked right. The idea is that the light ribbon threads through the clip rings, which are held in place by one pin through all three layers in the center of the loop. These pins will be replaced with stitching in the next step.
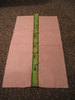
4. Next I replaced the pins with stitching. I slid the rings on each side away from the pin, carefully removed the pin without letting the ribbon slip, and backtacked over the light green ribbon a bunch of times.
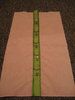
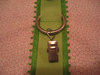
5. I cut a piece of batting a bit smaller than my fabric.
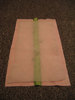
6. Then I plugged in my trusty hot glue gun, and while I was waiting for it to heat up I ironed my fabric so the final product would be nice and smooth. Placing the fabric right-side down, and the batting centered on top of it, and the cardboard centered on top of that, I folded the two ends over the cardboard and glued them down. I took special care to make sure the ribbon stayed centered on the cardboard, and pulled each end of the ribbon tight while pressing it into the glue. Don't burn yourself--hot glue hurts like a mother.
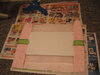
7. Folding the corners like wrapping a present, I pulled the sides in tight and glued them down, too. While the glue was still warm and slidy, I turned the project over to the right side and made sure things looked smooth and not puckery from the front. Then I took the leftover light green ribbon and glued it in a loop to the back side of the top edge. If I'd wanted to get fancy, I could have cut a panel from the leftover fabric, ironed the edges under, and glued it to the back of the project to cover the empty cardboard and rough edges. Nora was getting hungry, so I bagged that idea, but I might still do that sometime if it starts bugging me. It would definitely look more professional and finished that way.
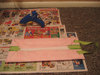
8. Ta-DA! I used five of the curtain clips for optimum future flexibility. I'm only using three of the clips now (see the top picture above), but in the future I might want to display different items, and I wanted to be able to accommodate various sizes.
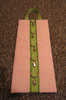
November 05, 2007
Sarah: Honey, You Baked!
In a recent flurry of domesticity, I decided to try the much talked about No-Knead Bread. The ingredients are so simple: flour, salt, yeast, and water. So around 1 pm on a Sunday, I mixed up the dough and then read on in the directions. Let the dough sit for at least 12 hours. Um. And then another two hours. I obviously had planned poorly. So after the dough sat through the night... and then while I was at work... and at school, I decided to throw away the dough. Because, obviously: Ew.
So how hard could kneading be? It would seem that long blocks of time would be more difficult for my schedule than a little kneading. I found a new recipe via Not Martha with the same simple ingredients and a significantly faster timeline.
The result? A tasty lunch of soup and homemade bread. Mmmm. This could be the start of something wonderful.
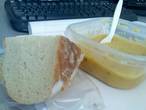
October 15, 2007
Sarah: Bugged
To the colony of potato bugs that seem to have moved in to my house:
You are not welcome here. You will be tracked and killed.
P.S. Are you the party responsible for my TiVo recording Mannequin and St. Elmo's Fire two weekends in a row? Because, wow. Touche.
September 28, 2007
Lisa: maybe if i just put a picture of myself next to the doorbell, that will scare them off
When I read Mindy's rant about door-to-door salespeople, I remembered how I felt when we first moved in to our neighborhood. I'm not normally a fan of door signs, and the 'no soliciting' signs you can buy are pretty hideous. On Gabrielle's recommendation, I took advantage of a trip to Color Me Mine with the girls to make my own. The colors are a little off in this picture, but here's the result:
Anyway, it works like a charm on everyone who knows what "soliciting" means.
In other Perschon-family reading, I tried the Celebrity Morph that Charles posted about, but after the site tried to match my face with Dave Navarro, Lance Bass, and Robert DeNiro, I gave up. Sarah, you don't still think you're the mannish one, do you?
September 27, 2007
Sarah: Medicine Cabinet Adventures
I've heard that an alarmingly large percentage (over 70%) of house guests will peek in your medicine cabinet while using your bathroom. Personally I had never taken a gander at my friends' medicine cabinets (with the exception of a few dates. I don't feel bad on dates, for some reason. It's... research. Does he use Rogaine? Does he have a vial of blood from an ex-girlfriend? Does he have a makeup compact that he may or may not use? These are things that a girl needs to know, and sometimes she has to do a little snooping. But I digress).
The point is that, with very few exceptions, I leave medicine cabinets be. I am curious, however, to know if the rest of you are secret medicine cabinet snoopers. Do you look? Would you be upset if someone looked in yours? Do you clean out your medicine cabinet before guests arrive, just in case?
I don't think I have anything too incriminating in my medicine cabinets. Yes, I could probably stand to clean out the bristles of my brush more often, and until the recent de-cluttering project, I had three separate hair products that could be used to achieve curly hair, but all in all, my medicine cabinet is pretty boring.
Do you have anything bizarre in your medicine cabinet? Better yet, do you plant anything (XL condoms? Chewing gum that you've labeled "toothbrush"? Anti-fungal foot cream [no judgement]?) for snooping guests to find?
September 22, 2007
Sarah: Not So Secret Window
After living in my apartment for over one year, I find myself still settling in. Some walls are still bare and the desk area still a bit uninviting. One thing that had to go, however, was this curtain on my front door:
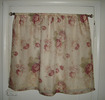
It's fine, I suppose, but not really me. Unfortunately, there's a matching curtain in my bedroom. Roses. Whatever. So obviously something had to be done. I decided to try for something a little more simple. And more importantly, something inexpensive.
I decided to try clear contact paper to simulate frosted glass. This would be a lot more sleek than the dusty rose look, plus I already had the contact paper on hand. Free project!
The process was simple: I just measured the window, cut four pieces of contact paper, and...
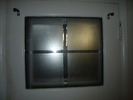
There's a definite lack of privacy, and those hooks are left behind from the rose curtain. So for now I drape a blanket over the hooks at night for privacy. It probably doesn't matter much, but you know that I have issues.
August 28, 2007
Lisa: In which I try to bore you to death with completely insignificant details.
For better or worse, the nursery is pretty much put together! It feels good to have that task done. The polka-dotted fabric bin on the lower shelf of the white table holds board books and tub books. You can see the Boppy pillow hanging out on the seat of Blake's grandpa's rocker.
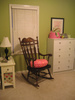
The dresser is full of baby clothes and linens that have been washed with Dreft, folded and sorted by size, and put into labeled drawers. The IKEA frog is sitting in a Bumbo baby seat next to George and Martha and a sweet little baby sock sorting thingie I found at HomeGoods. I made the print over the dresser in my letterpress class--it features my favorite quote from Peter Pan.
The top two shelves of the bookcase are full of baby supplies, and the bottom shelf is picture books. The art is two pages from an advance copy of You Were Loved Before You Were Born, written by Eve Bunting and illustrated by Karen Barbour. The book is due out in January.
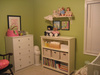
Under the window you can see the gift Marci got us--the first baby item Blake and I picked out together. Above the crib are the letter hooks I talked about here. Since I took these pictures, I got some big clear totes at Target to go under the crib: one for extra diapers, one for blankets, and one for stuffed animals. We're still waiting for our Sophie bumper and crib skirt to arrive from Pottery Barn.

The light must have been a bit different for this photo, because the wall color here looks closer to how it looks in real life. Anyway, you can see we've been messing around with the toys on top of the bookcase and on the shelf above it. We swapped out the fancy (and arguably creepy-looking) dolls I had when I was younger for the Cabbage Patch Garden Fairies I adopted in college. And of course we had to dig out my Boo doll and press her belly a bunch of times. The soccer-playing Build-a-Bear was a gift to Blake from the girls he coached one year, and the other one is Olivia, who Blake gave me for our anniversary three years ago.
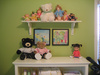
TA-DA! She'd better friggin' love it.
Sarah: Brain Dump, List Edition
Wanting:

Soaking up like a sponge:
Eagerly anticipating:

Plotting:
August 16, 2007
Sarah: Spicy
I'm considering some sort of spice-management system in my kitchen.
I have decided this is a worthy project because:
1. It will add some interest to my extremely blah kitchen.
2. I will free up a little much-needed cupboard space. I have a tiny kitchen.
3. You know what makes you look like a domestic goddess with amazing skills in the kitchen? Pretty spices. And one kick-ass recipe sure to seduce any man that tastes it.
So what do you think?
Cute little glass jars, all lined up on a shelf?
Or little tins with clear lids clinging to a magnetic strip?
Your opinions in the comments section are much appreciated.
July 31, 2007
Lisa: hooked on phonics
Back in June I mentioned that I bought some letter hooks for the baby's room. I got them hung on the wall over the crib soon after that post, but it's taken me a month and a half to download the pictures from my camera. AT LONG LAST, here are the hooks in their natural habitat:

Here's a closeup of the hooks. I want to get some prettier hangers, but these work for now.

And this is why everyone keeps asking me if I'm having twins:

July 02, 2007
Sarah: Domo Arigoto
Every young working girl needs a cleaning robot for her apartment.
On a completely unrelated note, my birthday is in a week and a half.
Just saying.
June 20, 2007
Sarah: MDFriday night craft
Using some MDF leftover from another project, I decided to create a fabric covered bulletin board inspired by these homasote and fabric bulletin boards (found by way of Not Martha, Craftzine, and shiso mama).

I first used spray adhesive to add corkboard to the MDF. Although MDF is soft enough for a tack to penetrate the surface, I didn't want the bulletin board to be stronger than my matching fabric-covered tacks.
Corkboard attached, I was ready for fabric. I wanted my bulletin board to have a pocket, so the bottom strip of green is the top of the pocket. See?
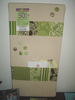
Attaching the fabric was an easy excuse for buying a staple gun. Just staple the fabric to the back of the board, and you're done.
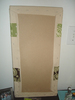
The little circles on the bulletin are my matching fabric covered tacks, which I made using this tutorial. They were easy and fun to make.
Thank you, internet.
Sarah: Don't call me listless.
Wishing:
That my living room was five feet wider
That the spiders would stay away
There were more hours in the day for me and my cruiser.
Wanting:
an Airstream trailer
a Vespa. Still.
Making:
a fabric-covered bulletin board (pictures to follow)
baby gifts
wood cuts for our letterpress class
thumbtacks. I may be selling a set or two soon.
Eating:
field greens
nine-grain bread
Mt. Rainier cherries
Pastries and sandwiches
Wandering:
the Farmer's Market on Saturday mornings
the Arts Festival with the girls on Friday.
Coveting:
Andrea's good taste
Lisa's knobs
wall decals
Liking:
my brothers. I miss them.
Working:
on my company's annual event. It's in three weeks and I'm freaking out a little.
fighting the good fight against apartment squalor.
June 19, 2007
Lisa: upping our Google count for "knobs"
I've been working on painting our hand-me-down crib and dresser white to match the new side table for the baby's room, and I wanted to get some knobs for the drawers that would tie everything together. I decided on some cut glass knobs from Anthropologie, and while I was there I couldn't resist these letter hooks.
I am afraid buying decorative knobs might be addicting. Now I want to replace all the drawer pulls and doorknobs in our house.
April 15, 2007
Lisa: help
I have a couple of things I need to get done in the next few weeks.
March 31, 2007
Lisa: office, redux
Since the office next to our bedroom is eventually going to become the baby's room, last weekend we moved the bookcases and desk downstairs to the family room. I was worried it would feel too crowded down there, but actually I think it's an improvement--it's looking like a real room instead of just a few stray furniture rejects in a weirdly long space. Here's what the family room looks like now:

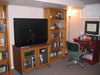


In the first and last pictures there, you can see a big set of white louvred doors behind the black office chair. A while ago, with inspiration from various design magazines, catalogs, and books on organization, I made the inside of the closet (which is quite deep and included outlets for power and telephone lines) into an office. It's not as pretty as the mini-office I linked, but it's functional and I can close the doors on the whole thing to make the room look neater. I do all my work for Concert Black from there. Before and after:

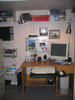
With the furniture out of the way, it was a lot easier to repaint the office/nursery. The old paint color was like Kermit after a hearty meal of radioactive waste, and we don't want the baby to go blind or anything, so we painted over it with a much softer, more minty green I had already bought for the downstairs hallway. An improvement, don't you think? And I still like how the green looks against the other paint colors in the nearby rooms and hall.
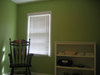

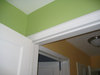
Thanks, Blake and Sarah, for all your hard work and help!
January 14, 2007
Lisa: Supercharged
Every electronic gadget we buy seems to come with its own proprietary charging cord and adapter. I've been wanting to make a charging center to hide the resulting ugly and inconvenient cord soup residing in the bin on our kitchen counter. At first, I was thinking of a painted wooden box, with holes drilled in it for the cord ends to poke out of. Then I got inspired by these ribbon boxes, and Sarah helped me develop the final idea.
Here's what went into it:
As with most craft projects, shopping for the supplies took far more time than the project itself. It seems like I used to see those cardboard photo boxes everywhere, but maybe they've fallen out of fashion. Once I got the stuff, all it took was cutting the holes in the box with the X-Acto knife, and attaching the bookplates around the openings with the brads. I was initially planning on using grommets or eyelets (like in the Martha Stewart version), but I couldn't find any big enough for all the plug ends to fit through.
Here's the result!
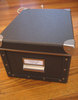
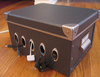
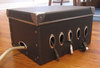
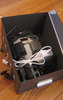

October 19, 2006
Sarah: Betty Crocker, Rescue Me
My grandma worked for many years as a Home Economics teacher, instructing countless cooking classes. My mom won the title as her school's Betty Crocker Homemaker of Tomorrow. The domesticity gene runs in the family, but apparently took a detour around me. I offer as proof my latest kitchen endeavor.
Using a recipe from this book, I attempted to make pumpkin cupcakes with cream cheese icing for our girls night. Sounds delicious, right?
Wrong. Apparently baking cupcakes from scratch is harder than it looks. Cream cheese frosting, however, is simple and delicious.
The cupcake saga: I doubled the recipe and measured ingredients exactly. I preheated the oven, set the timer, and did everything right. Here is my first batch:

Complete disaster. They were so large that they flowed into each other, then they deflated and made sad little concave puddles of moist cupcake. I decided that the problem was I had overfilled the tins, and perhaps I opened the oven one too many times. I prepared the second batch, leaving more room at the top of each cup. I set the timer and left the oven completely alone.
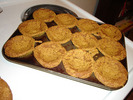
These were actually a little bit better. Although just as sunken, there was not as much lateral cupcake expansion, and the bottom of the cupcake was actually quite tasty. Still, these monstrosities were too hideous to give away.
After two bad batches, I was filled with sadness and a little bit of self-loathing. How hard could cupcakes be? Too hard for a Wednesday night, apparently.
The frosting, which I made while Cupcake Batch #2 was baking, had much better results.
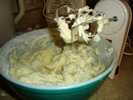
See? Tasty. So... want some frosting? Here's a spoon.
August 06, 2006
Lisa: everything in its place
Several months ago, someone Blake occasionally works for hired me to organize his wife's office while she was out of town. Risky, I know, but I think the results were worth it. And for some reason I'm more motivated to organize other people's stuff than my own (who knows, maybe it's the fact that I got paid).
Here's the desk area before...
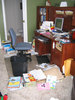
And after.
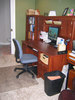
Here's the inside of one of the cubbies in the hutch of the desk.
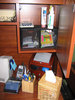
The other end of the room has a window flanked by two armchairs. Here's the area before...
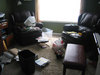
And then after!
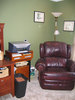
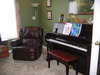
We got a table/file cabinet thing that would hold legal-size documents to go under the window.

For good measure, here's the newly organized interior of the office's 'supply closet.'
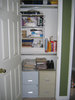
So...if you know anyone else who needs help getting organized, let me know. I'm no Megan Benson, but if it involves drawers or bins or labels of any kind, I'm your girl.
July 10, 2006
Lisa: bedroom
The painting adventure continues! This time I painted the master bedroom a dusky purple color. I love it! Here are a few before and after pictures.
Before:

After:

Before:
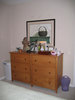
After (Obviously, there is a lot of supernatural activity going on here. I might need to call the Deans.):
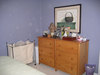
Before:
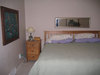
After:

Again, one of my favorite parts is seeing the colors in one room from another room. Here's the bedroom wall against the yellow hallway:
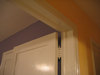
May 23, 2006
Lisa: office
Continuing the painting saga, I painted our office a few weeks ago. The color is a bright grass green, and it turned out REALLY bright. I like the color a lot, but I'm still getting used to it. It's very invigorating, which I guess is good for an office--maybe I will be lots more productive.
Here are some before and after pictures for you:
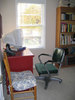

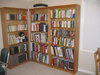


I do like how the green looks against the yellow of the hall.
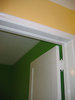
When I saw the green paint with our red desk, I realized the colors matched our stuffed George and Martha perfectly! Not that there are any little Smiths on the way at the moment, but wouldn't a George and Martha nursery be AWESOME? Keep an eye out for George and Martha merchandise for me, would you?
March 19, 2006
Lisa: Painting: upstairs bathroom and hall
ljc's house painting projects inspired me to go ahead and start on the painting I've sort of vaguely planned on doing around my house. Our paint is in good repair, but it's all beige and white and blah. I was especially impressed by ljc's willingness to try bold colors, so after thinking about the colors I might want in each room, Sarah and I went to Home Depot and picked up a whole bunch of paint chips. I stuck my favorites up on the walls and lived with them for a few days, and then took Blake on a tour and got him to sign off (according to GLP standards, of course) on the colors he approved of. Here are my first two finished areas:
Upstairs Bathroom
Here's what the bathroom looked like before:

You can't see terribly well in that photo, but the wall the sink and toilet are on was covered with wallpaper in a large floral heavy on the burgundy and navy blue. The other walls were beige. Sarah helped me strip off the wallpaper, and after a LOT of scraping and patching, the wall was ready to paint. The other walls just needed a quick wipedown with TSP. I taped off the trim and ceiling and got started.
Here's the result:


I was going for a bright Tiffany blue, and I LOVE the color. I really like how it makes the white fixtures look brighter and the chrome shinier. The color is Ralph Lauren's "Aegean Blue," but I had the guy at Home Depot match it in Behr paint, which costs about half as much. Actually, I had the first guy try to match it, but he just put the Ralph Lauren formula into the Behr paint base, which totally didn't work. The awesome paint guy at the store on Highland exchanged the ruined paint for new paint that was color-matched to the RL paint chip. I am definitely going straight to him next time.
Upstairs Hall
I don't have a before picture of the hallway, but it was a dark beige with a really ugly ceiling fixture involving yellow glass. I decided I wanted the hall a sunny, buttery yellow, so I chose Behr's "Cornmeal." Once I got it all painted and turned on the light, I realized that yellow paint + yellow walls = oven. It was a good excuse to choose a new light fixture for the hall. Blake and I went to Lowe's, which seemed to have the widest selection of reasonably-priced fixtures. Along with the new hall lamp, we got new shades to replace the flowery granny ones on the bathroom sconces, as well as new towel racks for the bathroom that matched the faucets more closely. These small changes made a huge difference in both areas. Yay!

I love how the yellow looks next to the blue of the bathroom when you're walking by...

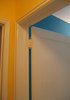
I had to put all the paint stuff away before leaving for Boston, but I'm excited to get going again when I get back!
January 12, 2006
Lisa: Triptych
Once I got my super cool Jamaica Trinnaman oil paintings for graduation, and put the big one up in the living room (I will try to remember to take a picture of it), I didn't think the print we had hanging over the couch went so well in there anymore. Plus, we had a blank bedroom wall where the print would go perfectly. I moved the print into the bedroom, leaving the wall over the couch blank.
Now, the over-the-couch area is tricky, because it is so wide. Whatever you hang there has to be big enough to visually balance the couch, or it looks dinky. I used some leftover inspiration from Vern on Trading Spaces, and decided to make sort of a triptych of abstract red oil paintings. The idea was that they would be simple and relatively easy to do, but create a visual impact and mesh with the more modern oil painting by the real artist hanging nearby.
Here's the living room before, with the print Blake gave me for Christmas last year. He remembered that five years ago in a print shop I said I liked it! Anyway, it looks right at home in the bedroom.
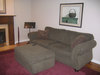
I bought three canvases on sale at JoAnn's. They're the kind that don't have visible staples on the edges, so they don't have to be framed. Then I painted them quick-and-dirty in three slightly different styles, and sprayed some varnish stuff over the top. Easy peasy! Here's the result:

Should I hang them further apart?
January 04, 2006
Lisa: I dip, you dip, we dip
I am officially a grownup. Proof: I was given a food assignment for an extended-family Christmas party! My aunt asked me to bring bean dip. I know, it's not homemade rolls or anything, but you have to start small.
Here's the fabulous dip I made. I arranged the tomato and green onion in stripes for extra festivity.
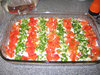
You can see from the cross-section that I achieved the proper beans-to-other-goop ratio. The pitfall of too few beans is all too common. The layers are (from the bottom) refried beans, salsa, grated cheese, sour cream, and tomato/green onion. Yummy!
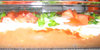
December 03, 2005
Lisa: 'Tis the Season
Last year we had just barely moved into our house, and I didn't really have my act together enough to put up any Christmas decorations besides the tree. Well, this year I am the master of my domain and I had the decorations up by the end of Thanksgiving weekend! I love how festive everything looks.
Here's the tree by the fireplace. We put it in the corner of the living room this year, instead of in front of the window, because we ended up bringing up the futon from downstairs for more seating. There just wasn't room for the tree in front of the window without major furniture rearrangement.
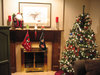
Here's the dining room table. I figure since its function is largely decorative anyway, having a large semi-permanent centerpiece will not be a problem.
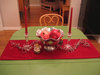
I wanted to get a close-up on the ends of the runner, since I like it so much. I found it at the new HomeGoods attached to the T.J. Maxx near my house. Obviously, it's made for a bigger table, but we intend to get a bigger table eventually so that all works out.
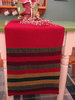
On the IKEA cabinet under one of the Jamaica Trinnaman paintings I got for graduation, I put a bowl filled with cranberries in water. There are little oil lamps floating on top.
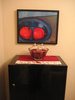
At HomeGoods I also found some garlandy stuff with red glass beads, and I strung it up on the dining room chandelier.
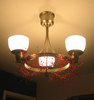
Last year, I bought a bunch of Christmas lights, but when we went to put them up, there were no plugs on the outside of the house! We asked our neighbors about our conundrum, and they recommended a little thingie that you screw in to a light-bulb socket that converts it into a plug. We used one during the summer to switch out our bare-bulb patio light for a string of lanterns:
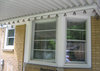
Anyway, the same thing worked like a charm for the Christmas lights on the front porch! We just swapped out the light bulb in the porch light and went crazy.

Super fun! Plus, now I don't feel like all the neighbors are wondering why they let such undesirables move in.
November 14, 2005
Lisa: Halloween Festivities
A year after I was inspired, I finally got around to making the cute Halloween lanterns from Laura Land. I cheated a bit by using the library's Sizzix machine to cut out the shapes, but I think they turned out pretty cute anyway. I used one strand to decorate our mantel, and a few more (Sarah helped!) as decorations for our Halloween party.
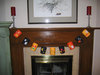
As always, the best part of a Halloween party is the costumes. Here are the girls:

Sarah, in the middle, is a mad scientist (obviously).
Here are Dave and Jess. She's a semi-sexy mummy, if you couldn't tell. I'm not sure what David represents. He borrowed our dad's Nigerian traditional, and then when we got to the party we added a fake mustache from the Target dollar-bin multipack. Somehow, I think the whole of his costume is greater than the sum of its parts.
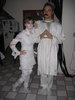

Marci was a semi-sexy devil, and Mal was Sally from Nightmare Before Christmas. Awesome costume, eh?
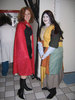
Here I am with Blake. I'm wearing the Princess Buttercup costume I made for the library, and for him we improvised a Dread Pirate Roberts/Westley costume at the last minute.

It turned out pretty well, don't you think?

Anyway, the party was fun, but I think next year maybe I will opt for something a bit more low-key. Plus, if I go to another costume party involving strangers college-age and up, I am going to have to devise some kind of sexy faux-stume. I felt somewhat ridiculous dancing to R&B in a princess costume.
October 17, 2005
Lisa: Time for Milking
Yesterday in sacrament meeting I drafted a daily schedule for myself. I have been feeling a bit overwhelmed (even though I only work 30 hours a week and SOME PEOPLE think my job is a joke) and a bit like I didn't have enough time to get done all the things I want to do. So I wrote down all those things and how much time I thought they would take, and this is what I came up with.
Schedule 1 (for days I work 8-5)
Schedule 2 (for days I work 12-9)
That leaves Wednesday, alternate Fridays and Saturdays, and Sundays unscheduled. I'm thinking that way I will be less likely to rebel and/or go insane.
The good part is that if I can stick to the schedule, I will already be accomplishing a lot of my smaller goals:
Anyway, I'm willing to give this a try. I got up and exercised this morning with Sarah, but the rest of the morning schedule sort of got preempted by sleep. I'm thinking if I go to bed on time tonight, I'll start the schedule for real tomorrow. The next thing I need to do is to create playlists for the entire day with music that fits the mood and length of time of each task. Suggestions welcome!
October 06, 2005
Lisa: colored contacts for my house
So, a while ago the cellular fabric blinds in our kitchen broke. I don't know when this happened--in fact, they might have been broken when we moved in. Basically, there was just no string coming out of the string hole. You know, the string that is supposed to pull the blinds up? So the blinds could not be pulled up. To add insult to injury, the blinds had been let down too far, so that they hung over the window sill, like so:
Anyway, it had been bugging me for a while, but A) we couldn't afford new blinds, and B) our neighbor's house is really close on that side, so I didn't want to just take the blinds down and have a naked window. Gabrielle suggested these window clings that imitate stained glass, so I picked up a few at Home Depot and went to town with the Exacto knife, a little soapy water, and my Costco card.
Much better, huh?
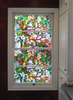
We had a similar situation in the bathroom. The blinds weren't broken, but they were those fabric shades. Since our bathroom seems to stay really steamy a lot, I was getting kind of freaked out about the possibility of mildew. Anyway, I decided to put the window clings up in there, too!
Here's the bathroom before.
And here's the window halfway done--you can tell the view is super great from this window, too...

Ta DA!
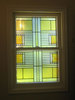
Anyway, I think the window clings are a pretty good temporary solution. You can tell up close that they're not really stained glass, but if you're not looking for it, it's not bothersome. And the light shining through to the inside during the day and to the outside at night is really pretty. Plus, they are totally temporary and easily removable, unlike the window frosting spray I put on the windows in my side door, to mixed results.
May 27, 2005
Lisa: Enlighten Me. (Get it?)
Quick question. Does anyone out there know stuff about lamp posts that automatically light up at night? We have a lamp post in our front yard that used to light up every night when it got dark. It stopped lighting up, so I replaced the light bulb, and now it doesn't light up at night any more. It never lights up. Any ideas? There is no switch for the post inside the house. There is a breaker just for the lamp post, but I have made sure it is in the correct position. I can't find any kind of sensor on the post itself that could be obstructed, but even if the sensor WAS obstructed, wouldn't that mean the lamp would think it was dark out and would just stay lit all the time?
Update:
Putting in a bulb with a smaller wattage made no difference. Here are some pictures of the lamp post to help with the detective work. There is a little thing on the front of the lamp post that I thought might be some kind of daylight sensor. It is a little round circle right below the lantern part. It looks almost like a mini bike reflector, with little horizontal lines inside the plastic--doesn't seem to be especially reflective, though.
Here's the lamp post:
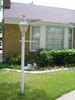
Here's a closeup on the possible sensor thingie:
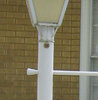
(Click on the thumbnails for bigger pictures.)
May 03, 2005
Sarah: Oh, we're movin' on up
I've spent the last week taking garbage bags, boxes, and armfuls of belongings to my new apartment. It's adorable. Pictures to follow, once we get the furniture in and the empty boxes out. Everyone's been so helpful and nice, but I've been so tired. If my parents were worried about a rock n' roll lifestyle, they need not be concerned. I'm in bed around 11 every night, after I spend the evening cleaning, putting away, and generally keeping house. It's nice though, and fun to be in my own place with my roommate. Also, I can finally see the floor in my room, so I must be making progress. The only tricky part is the flooded basement that did not affect us in any way, except for ruining our water heater. I've boiled more water in the last four days than in my entire life. My showers are bracing and... exhilarating. I'm calling the landlord today to threaten and rant. Stay tuned for an update.
Also apartment related is J's birthday (Happy 20th, cute roommate!) which brought the apartment a new clock and a small table (possibly for her sewing machine?).
Still on our apartment wishlist: coffee table, area rug (we have all tile floors, except for our bedrooms), and some awesome wall treatments (we have REALLY high ceilings - lots of white, blank space) that go with our retro feel (hopefully) living room. Also, I'd love magazines, websites, and books that tell me how to inexpensively make my apartment fabulous and swanky, instead of looking like a mish-mash college abode.
Lisa: Adventures in Beautifying
I have been having some skin issues lately, so I decided to try an oatmeal mask inspired by this book. There's not much to the recipe. You put some oats in a bowl, and then add water and stir until you have sort of a paste. You glop the stuff onto your face, let it dry, rub off the dried chunks, and then wash off the rest. I had pretty good results (at least, my skin doesn't look worse), but I think next time I'm going to try the cornmeal version from the same book. The oatmeal totally clogged my bathroom sink, and I get the idea that the cornmeal will make a smoother paste.

Also, since I don't like to use very much foundation, and since my foundation color is sort of orangey for my skin tone, and since I am always trying to simplify my morning routine to maximize sleeping-in time, I decided to combine my moisturizer and foundation into one bottle--essentially creating a tinted moisturizer. Here's what I started with:
I squeezed everything out into a bowl, mixed it together with a spatula, and used a ziplog bag with the corner cut off as sort of a funnel to get the mixture back into the moisturizer bottle again. The two substances mixed together quite well, and now I am applying a not-at-all-offensively-colored tinted moisturizer in just one step in the mornings! Admittedly, buying a moisturizer that is already tinted would be less messy, but this way I can use up what I already have. Please don't bother saying anything about the germs I introduced into my moisturizer, because LA LA LA I CAN'T HEAR YOU!
Oh, and I almost forgot--here's my newly-organized bathroom shelf, complete with plastic cubbies!

The Demeter spray is Honeysuckle, and it is so yummy. I highly recommend it!
April 28, 2005
Lisa: feeling productive
I have reached a very important milestone (only ten years after my peers!): wearing eyeliner without looking like an idiot. I purchased a black self-sharpening eyeliner pencil yesterday, and this morning I applied it fairly competently, I think. We'll have to see if anyone notices my smashing new look.
In other news, I finished sewing my black denim skirt with the pleated sides and my luxe knitting needle case, and I got some plastic cubbies and organized my bathroom shelf. Pictures to follow!
April 13, 2005
Sarah: Link Me Baby One More Time
So, do you find that your home looks barren, but you don't know what to decorate it with? You want your space to look personalized but not cheesy, sophisticated but not stodgy? Or maybe you're just looking for an interesting and original gift for a friend. These sites are great!
Both sites courtesy of Mighty Goods. Thanks Maggie, you enlighten us all.
Not to mention Modern Seed, which has fun stuff, even if you're not a parent...
April 05, 2005
Sarah: Strange Bedfellows
Since moving back home, I've felt a lot like I was back in high school. One chore that has been high on my mom's priority list is making my bed daily. This has always been important to her, and giving credit where credit is due, it makes things look a lot cleaner. Also, I love getting into bed when it's been made. The sheets are flat and cool, and it just feels cleaner. When I am running late to work and neglect my bed, however, my mom will tidy up my room for me, but leaves little surprises between my sheets to motivate me to pick up after myself. Among the sheet-dwellers have been: a plastic iguana, a poseable snake, a wind-up nun that spits fire (I'm lucky she didn't burn my bed!), and most recently my bobblehead Buttercup and miniature garden gnome (my mom told me later that they were DOING IT). Yesterday I came home on my lunch break to change after an unfortunate yogurt incident, only to discover my mother, standing in my room with a handful of plastic spiders. She's enjoying this way too much.
March 05, 2005
Lisa: Atomic Age Apron
A while back, on a 99-cent pattern day at Jo-Ann's, I picked up this retro apron pattern.
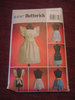
Since I believe not actually needing to use an item shouldn't stop you from making it, I took advantage of a Presidents' Day fabric sale to pick up this sweet fabric combo. The one with the bubble/dot things on it is seersucker, the pink is a linen-look fabric for the lining, and the trim is a lime-green velvet ribbon.
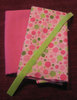
The pattern only took me a few sessions to sew, and it was pretty easy to figure out. I think this might be the best sewing I have ever done--my gathers lined up exactly right and my stitching stayed even right on the edge of the trim, and everything. I even learned how to sew on buttons and put in buttonholes on my sewing machine!
Anyway, here's the apron in all its neon-colored retro glory. Now I guess I'll have to find something to cook. In heels.
![]()
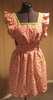


February 07, 2005
Sarah: Can you dig it?
I have again been surfing the internet during work hours. Oh, the shame. But how can I help it when there are sites like Digs Magazine (via Thimble)? I've spent most of the time in the Lounge category, where they discuss home improvement and decorating, but there are also ideas for entertaining, chilling out, and eating. New articles are added twice a week, and it's free! This is the perfect magazine for me. Crafty and do-it-yourself ideas presented in one of my favorite mediums, and with new articles, I'll never run out of stuff to read! I love the interweb. I really do.
December 30, 2004
Lisa: O, Tenenbaum!
I procrastinated putting up holiday decorations this year, but I'm glad I finally got around to it. There's nothing like a Christmas tree to make a house feel homey. Now we have a whole year to figure out how to string up Christmas lights outside with no handy electrical outlet.
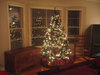
Somehow in the holiday madness I found some time to work on my Ribby Cardi, and you can actually see some progress! Here's a picture of the finished back panel (click on the thumbnail for a larger image):
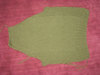
The instructions for the neck shaping on the left front piece kind of confused me, but with the help of a Christmas gift from Dave, I unpicked only what I had done wrong and redid it. I'm now about 10 inches into the right front piece. Woohoo!
For the next entry in the saga of the Ribby Cardi, click here.
December 06, 2004
Lisa: And now, the news we have all been waiting for
Here's the latest picture I took of my second try of the Ribby Cardi back piece. It's actually about a foot long now, and going much better! The shorter needles (and the pattern correction) helped a lot. Next up: not screwing up the decreases.
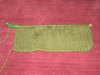
For the next entry in the saga of the Ribby Cardi, click here.
AND! The laundry room ordeal is over at last. The washer and dryer are hooked up--we even did a bunch of laundry yesterday. The drain is working fine, and the only problem we had after moving the washer and dryer in is that the sink doesn't fit in the laundry room any more. I can live with that!
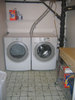
(As always, click on the thumbnails for a bigger picture.)
December 04, 2004
Lisa: sewer gas may be affecting my brain
We have a drain in our laundry room floor! Yay! That is something I never thought I would be cheering about. Anyway, we rented an electric jackhammer thing from Diamond Rental and found that the potential drain was indeed a (totally corroded) drain with a (concrete-filled) U-bend right beneath it connected to a pipe that goes directly to the sewer. Short of a perfectly preserved and functional drain, this was the best possible scenario. Our friends at Action Plumbing came back and--for the low, low price of $400--cut off the old U-bend, installed a new U-bend, bowl, and drain cover, and ran a bunch of water down the pipe to make sure it drained the way it was supposed to. Then they filled up the hole around the pipes with cement and cleaned up the mess. I spent yesterday cutting and sticking down vinyl tile, caulking, filling the gaps under the wall with spray foam, and applying vinyl coving (I think that's what it's called).
When it came time to install the washer and dryer, the washer went in fine but we didn't have a power cable for the dryer--probably because we bought it at Costco instead of a real appliance store. I snuck into Home Depot at 9:15 pm when they came out to lock up the snowblowers for the night (suckas!) and made them sell me a cable, but it was all for naught. Our dryer hose isn't long enough to reach the hole on the back of the dryer, which is at the very bottom. So, it's back to Home Depot today to get a longer dryer hose.
BUT! A drain! We are almost there.
For the final entry in the saga of the laundry room, click here.
November 16, 2004
Lisa: matters to attend to posthaste (like, maybe as soon as Gilmore Girls is over)
Here's what I still need to get done in the laundry room. The sooner this all happens, the better, because I am getting pretty tired of the constant emptying of the pipe-drip-catching bucket and not being able to use our new washer and dryer. This small section of the overall house to-do list is probably the most urgent, but is somewhere on the fun continuum between "go through boxes of papers and address, pitch, or file each item" and "plan vegetable garden." Unfortunately, I have checked all the good "buy plastic bins"-type items off the list already.
For the next entry in the saga of the laundry room, click here.
November 04, 2004
Lisa: Stop me before I do something stupid.
If you read this entry from a few weeks ago, you know that we have been having a few issues with a leaking water softener and the lack of a drain in the laundry room of our new house. Well, last week the awesome Jeff came and helped haul our new washer and dryer down the stairs and into the furnace room (alas, we "have bought the mansion of a love, but not yet possess'd it"), and then assisted Blake in dismantling and emptying the water softener and dragging it back up the stairs and out to the garage. Of course, the copper pipes that used to lead to the water softener still leak, so we currently have a bucket hanging from the pipe ends to catch the drips. Every few hours we have to go down and empty the bucket, or it overflows and mixes with the cement dust raised by the hammer Blake is using to break through the cement that was inexplicably used to fill in the old drain pipe we found under the linoleum.
The current plan is to buy a pipe cutter and some compression caps (to avoid the whole blowtorch/soldering process), cut off the pipes where they connect to the main water pipes, and cap off the ends. Is there some reason we should not do this? Please stop me before I do irreparable damage to my plumbing system.
Update: Thanks for nothing, Internet. This was indeed a stupid thing to do. The pipes can't just be cut off, they have to be connected together, bypassing the water softener. Also, we tried the soldering thing and I was right to be apprehensive--it was too hard for us. Anyway, a call to Action Plumbing and $225 later, our pipes look great and work perfectly.
For the next entry in the laundry room saga, click here.
October 21, 2004
Lisa: Home Sweet Home
Well, I don't know if the problem is fixed or not, but I got one of the pictures to work. Here's our beautiful house! (Click on the picture for a bigger view.)

Edited to add another picture:

October 14, 2004
Lisa: Leaks and Links
Leaks:
Before we closed on our house, the inspector warned us that there didn't seem to be a drain in the basement suitable for allowing leaking water to escape without icky flooding. While probably not urgent, this was a problem that needed to be fixed, so the previous owners agreed to throw in some cash so that we could get a drain installed after we moved in.
A few days before we moved in, our realtor noticed a little drip coming from the water softener, located in the basement laundry room. It seemed like no big deal, but the previous owners again agreed to add a bit to their check to us to facilitate repairs.
I know you see where I'm going with this--the water softener has been leaking like crazy and forming big puddles all over the drainless laundry room floor. Unfortunately, our home warranty doesn't cover water softeners, but I think we can fix it ourselves if we get the right part. However, the plumbing supply company referred to me by the water softener people as their distributor has never heard of the brand, MacCLEAN. After running all over town, I finally just tried ordering the part directly from the manufacturer, so we'll see if it shows up.
When I finally got a plumber to come out and give me a bid on putting in a drain down there, he pulled up a few linoleum tiles and found what looks like a drain already in place, that was for some reason PLASTERED OVER in a previous remodeling effort. He recommends that we bang on the plaster with a hammer, pull it out, and see what is underneath. If it's a pipe, we are in business. If not, we have just destroyed our floor AND have to pay to bore a hole for a drain into the giant cast-iron pipe in the corner of the laundry room.
The saddest part of all of this is that we can't buy a fabulous new front-loader washer and dryer until the drain situation is resolved. I was hoping the days of doing laundry at Mom and Dad's house were past.
Links:
I want to make these super cute (and easy looking) Halloween lanterns. Maybe on a string of white Christmas lights?
Thank goodness someone saved Bush's notes from the debate, so that we could all laugh before we think about it too hard and start to cry.
For the next entry in the laundry room saga, click here.
October 04, 2004
Lisa: Home is where my head is
Today is moving day. Yesterday we cleaned the new house and made a bunch of trips in our cars, carrying the stuff we didn't want to put in boxes like clothes and framed pictures. Right now Blake and some friends are loading up a moving truck with boxes and furniture and driving it over to the new place. At least, I assume that's what they are doing--I had to go to work. Blake says it's better this way anyway, as I'll just get all stressed out, which will make him more stressed out. Whatever. Now I'm just stressed out at work, imagining the worst.
Also, our phone and internet at the new house isn't getting installed until Thursday, which means FOUR DAYS without them. Plus, for some reason the guy at CompUSA couldn't install an AirPort card in my PowerBook, and the Adobe Creative Suite wouldn't install either, which means everything is screwed up and I can't even check email at my parents' house. I think David is going to come to my rescue, and in the meantime I am going to concentrate on organizing and cleaning my home in a very Zen-like state without interruptions from the outside world. As soon as I get home from work.
September 20, 2004
Lisa: Let's just crank that stress level up a notch
It looks like we may have to pay 3% down on our house, which would totally screw up our plans regarding the car, not to mention my precious front-loading washer and dryer. Cross your fingers for us (or touch the roof of your car when you go over railroad tracks, or whatever) that two years of school can stand in for two years of work in my current profession on the mortgage application.
Also, I took a few pictures of the house on yet another stealth-filled drive-by. To be posted here soon...
September 16, 2004
Lisa: More of the Same
I don't really have anything new to report, just mostly updates on the same old things I have been talking about for the last little while.
Car: Instead of taking 5 more weeks, it looks like my Scion will be ready to pick up next week sometime. This is great for Blake, since he won't have to take the bus and/or beg rides from coworkers anymore, and only slightly bad for our home mortgage situation. Actually, I think we have it worked out so that everything will be fine--we're just using some of the cash we originally had earmarked for the car to pay closing costs on the house.
House: After several recent drive-bys, I have to say that I don't think the sellers are getting ready to move fast enough. They technically have until the end of October, but I keep hoping they will find a house to move into sooner, so that we can then move into their house sooner, and vacate our smoke-smelling, broken-window, plywood-patched-cement-stairs, water-always-running, tiny apartment (go into Cartman singing voice here) in the ghetto.
Job: Everything at the library is awesome. There is a huge banner still up in the children's section that says "Welcome Lisa." Everyone seems really nice. The library is only ten minutes from our new house (but unfortunately 25 minutes from our apartment). I am still getting used to things and learning everyone's names and where things are. Luckily, I don't have to start doing storytimes until October. They will be kind of intimidating and intense at first, but at least I have a little while to adjust to the new job before I have to start doing them.
Business: My mom and I went and bought a fax machine, printer, phones, Quickbooks software, and a bunch of other office supplies on my day off. Then we went to a meeting with our manufacturer and designer. The manufacturer has all of our fabric and the "markers," which I think are these sort of giant pattern layout things. We should have samples of two tops and two skirts (all in two fabrics) by next Tuesday, which means we can start taking pictures of the clothes, which means I can put the website online sometime next week. I'll be posting the address here as soon as it's ready for public consumption.
Update: the website is live! Check it out here.
Anyway, all of this is clogging up my thoughts and I haven't had a chance to do anything crafty or think of anything funny. Actually, though, now that I think of it, I finished crocheting my poncho and David and I pulled an awesome fake wedding invitation prank on his former girlfriend. I will have to post pictures and more info on those exciting events, to remind myself that I am not completely boring.
September 01, 2004
Lisa: Everything is insane
1. I got the job at the library (WOOOHOOOO!!!) and I start September 13th.
2. Blake and I have met with our realtor twice and have been prequalified for a home mortgage.
3. My mom just took out a line of credit for our business, and we are rushing to finalize things with the manufacturer in time to fill our first order.
4. I ordered a Scion xA.
5. I started crocheting a poncho last night around midnight. Because...?
It is obviously a time for new beginnings. And a time for increased chance of stress-related illness or accident. I am planning to take deep breaths, drink lots of Diet Coke, and attempt to form coherent thoughts.
August 11, 2004
Lisa: the sheer cuteness of it all is overwhelming
For our anniversary, Blake took me to Build-A-Bear, because he is cute like that. Olivia (below, on her way home in a box) is the very endearing result.
This post and then this website made me all nostalgic for My Little Ponies, so I picked up one of the new ones while I was at Fred Meyer (or as I guess it's now called, "Smiths Marketplace") a few weeks ago. Isn't her sparkly pink skin glamorous? I reset her hair with water and curlers because it was all wonky when it came out of the box, but now I'm not really sure what to do with her. I did succeed in almost giving Blake a heart attack by trotting it up his arm while he was sleeping.
I found this cool drawer thingie at Target, by the recipe boxes. We all know I won't be using it for that purpose, but I haven't decided what I WILL be storing in those two little drawers. It appealed to me because I like little drawers and boxes with compartments, I like the places for labels, and it reminded me of library card catalog drawers. Plus, it was on sale for four bucks! Maybe I could line the drawers with velvet and store jewelry in them. But I already have a jewelry box. Maybe the drawers could hold office supplies. I will have to think on this.
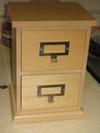
April 27, 2004
Lisa: But officer, we were following the scientific method!
A few months ago David, Blake, and I served as judges for a local school district's science fair. The simple truth is that we got jealous. WE wanted to do a science fair project, too! Besides, we were confident that three adults with a combined 12+ years of post-secondary education would be able to show those seventh graders how it's done. Anyway, it's taken us a while to come up with a decent topic. Around Easter time, we seriously considered trying to determine how to make the strongest-shelled boiled eggs, in order to always win in egg fights. (The sacred egg fight tradition is an entry unto itself, and will be discussed no more at this time.) Unfortunately, the cost of the thousands of eggs necessary to make our experiment scientifically sound became prohibitive.
Today David sent me this link to a series of pictures drawn by an artist at various stages of an LSD trip. Not only are these drawings and the associated commentary fascinating in their own right, but they are also serving as preliminary research for our new experiment. Don't worry, we're not planning to document the effects of LSD (Hi, Mom and Dad!); we're thinking of something less illegal. Something more along the lines of "The Mind-Altering Effects of Sleep Deprivation."
Look out, science-loving thirteen-year-olds! You won't know what hit you.
March 25, 2004
Lisa: The sad, sad tale of Mr. Eggman
I took advantage of my new deluxe picto box (YAY!) to record Blake's breakfast shenanigans. He did not know his work would be photographed--he just does this kind of thing for fun.
The birth:
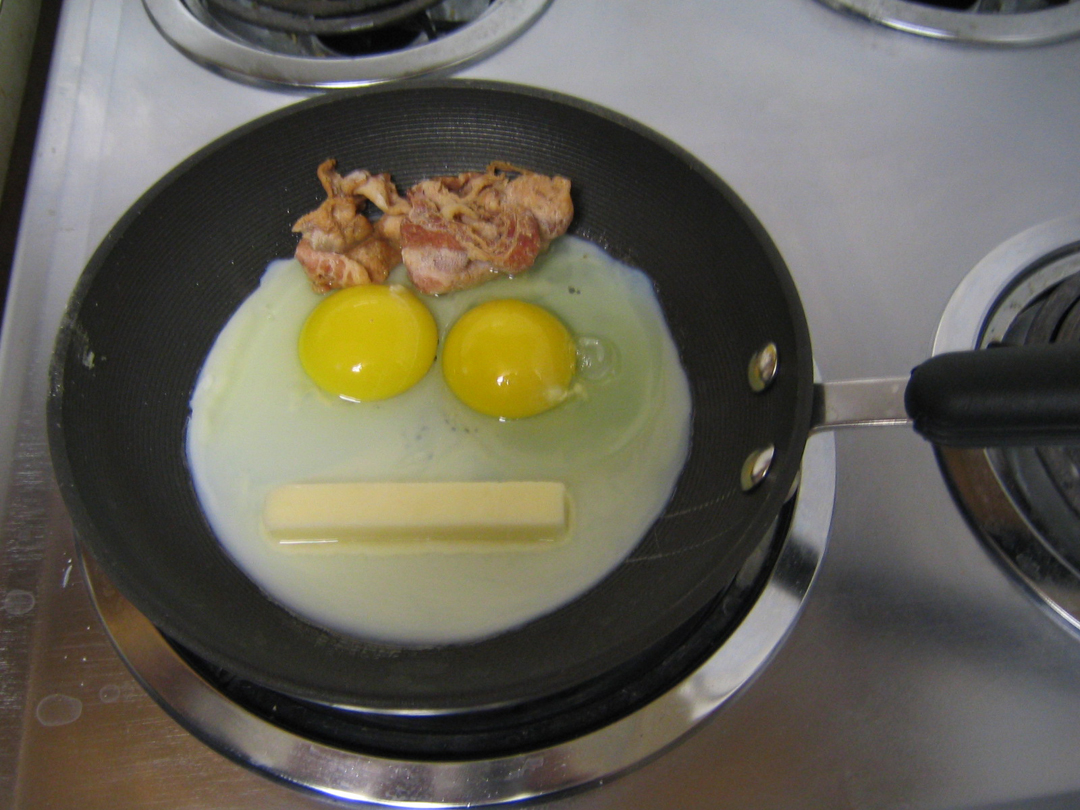
The death:

I guess that's all there is to the "tale"--maybe that was a bit of an overstatement.