April 04, 2011
Lisa: Happy birthday to us!
Happy eighth birthday, Two Loose Teeth! Here's hoping the upcoming year will be more filled with pithy posts than the last year has been. Thanks for being my blogging buddy, Sarah. I can't think of anyone I'd rather share my brain with.
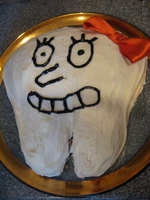
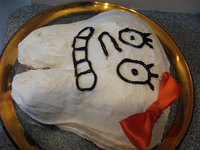
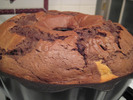
And now I will pretend that I made this tooth-shaped cake in honor of this momentous occasion, instead of for Marci's dental-hygiene-themed Crown birthday last summer. The face is modeled after the illustrations in this awesome picture book. (Edited for later reference: I baked the cake in the same cupcake-shaped pan I used for Blake's mushroom cake for his Super Smash Brothers Brawl birthday party [see it on Facebook here] and then shaved it down a bit to shape the roots and crown of the tooth.)
August 01, 2010
Lisa: Croquembouche
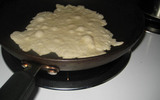
I had been considering trying my hand at making a croquembouche--which is a fancy French cake that is basically a tower of cream puffs held together with carmel and surrounded by a web of spun sugar--and Kaeleigh and McKenna's joint Great Gatsby birthday party (which I already mentioned in this entry on vintage hairstyles) seemed like the perfect opportunity. Plus, croquembouche is the perfect cooking project for me: impressive result, fairly easy to put together, and not at all practical or nutritive.
I was running super late for the party and trying to get out the door, so I didn't have time to take photos of the completed dessert. It was glorious, though. There were sparkles and sugar daisies. Anyway, I swiped a few pictures from Kaeleigh's Facebook albums that at least give pictorial evidence that my croquembouche really existed. (If you check out those photo albums, be sure to look for the Robert Redford movie being projected on one wall, which made an incredible backdrop.)
This entry from La Cerise was the most helpful when I was putting my croquembouche together. Lots of sites like this one will give you more help on how to make caramelized sugar if you haven't done that before, and I'll tell you my number-one secret to making this project super manageable and fun: frozen cream puffs from Costco. Yep. More info on croquembouche construction after the jump!
Here's what I learned when I made my croquembouche:
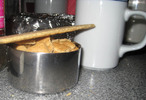
1. Unless you're a baking purist, just buy one big box of frozen cream puffs at Costco. Seriously, they taste fine and using them takes all the hard, boring parts out of this process. You can even just pull them out of the freezer and start assembling the tower while they're still frozen. By the time you're ready to serve (long before, probably), they'll be defrosted. I noticed that Astrid at La Cerise had frozen her homemade choux before assembling, which gave me the idea--and I wouldn't even have attempted to make a croquembouche without this shortcut. I am too afraid AND too lazy.
2. The paper cone upturned in a vase on La Cerise is genius--absolutely the way to go. I wish I had buttered mine so it would have slipped off a bit more easily.
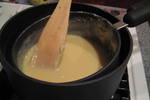
3. Be prepared to work FAST. You have to keep the caramelized sugar warm enough to stay pliable without browning it too much. Have everything ready and laid out with a plan in mind before you start the sugar process, and don't leave the sugar cooking on the stove and go start working on your hair. Even if the sugar does get too brown, though (as mine did), all is not lost. It makes the finished caramel have a more crackly texture and a more bitter flavor, which is actually kind of good. The crunchier caramel is more structurally strong than the delicate cream puffs, though, so they're hard to get apart without bursting or breaking the puff. If that happens, just use a fork to break off a hunk of tower wall onto your plate. Problem solved.
4. Caramelized sugar burns like a mother, and you're reaching down into a paper cone with a handful of it and pressing it into a mass of more hot caramel. For heaven's sake, be careful and have some cold water nearby.
5. Strings of caramelized sugar get everywhere--when you're swooping each dipped cream puff over to your paper cone and especially when you're whipping a spun sugar cage around the finished product with a fork. Then those little strings harden like the candy they are and coat everything in your kitchen with a hard, sticky shell. I wish I had covered my work area with a layer of aluminum foil, like Chica and Joe did when they made the candy jewels for their incredible Princess Peach cake.
July 29, 2010
Lisa: Stone Fruit Tea Cake
When I saw what a great review Amy gave this recipe on Angry Chicken, I had to try it myself. It sounded like a perfect storm of everything good:
1) cookie AND cake (cakey cookie? cookie-like cake?)
2) stone fruits (but with the flexibility to use a fruit of your choosing)
3) easy to make
4) slight veneer of healthiness since you don't add sugar to the fruit filling (making it a totally justifiable breakfast food)
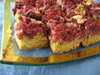
Looks good, doesn't it?
Except it wasn't. I mean, it was fine. I would give my version a resounding "meh." I take full responsibility, though. I think I have identified the problem: I used whole wheat flour. Here's the situation. I bought two large bags of whole wheat flour on different occasions after Nora was born, thinking I'd magically become healthier. But (and I keep repeating this to myself) you CAN'T JUST SUBSTITUTE WHEAT FLOUR FOR REGULAR FLOUR IN EVERYTHING. Especially light/sweet baked goods, which is largely what I use flour for. It gives even the most decadent recipes a sort of toughness and a "seems kind of...healthy (frown)" flavor. Possibly more importantly, it is browner than regular flour. Perhaps this is obvious. But when you think the top of your baked masterpiece is a nice golden brown, it is in fact barely darker than the color of the flour itself. What I am saying is that everything I make with wheat flour has a tendency to turn out underbaked. But what are you going to do with all that flour? Clearly, I chose, "continue making mediocre quasi-healthy desserts."
Amy's review is so good, though, that I think this might be worth trying again--as soon as I can justify buying more WHITE flour. I originally found the recipe (which is from Rustic Fruit Desserts) through this review on Gourmet. It looks like it's still linked, but either you have to create an account to view it now, or the content has been taken down. To the library!
February 01, 2010
Lisa: Who will tell the internet these things if I don't?
1) In roughly an hour I am seeing an ENT about the possibility of getting my tonsils out. I have to admit, I am somewhat terrified. But...if it means that I get strep less often (or even maybe NEVER), then it will be worth it.
2) A lot of things have been happening lately, and I've been crossing things off my list (yay!), but I haven't gotten up the energy to actually blog about any of them. SO. I have just decided to attempt to post every single day of the month of February. I'm sure the one reader we have left will be shocked. Plus, depending on how much Lortab they put me on for my (possible) tonsillectomy, things could get a little crazy. At the very least, there will be a lot of drool. Something to look forward to.
3) Dripped pie filling had made a smoky mess in the bottom of my oven, so today I decided to run the self-clean cycle. It's been going for three hours so far, and everything in my house smells and/or tastes like burning. My eyes feel like burning. Nora actually asked to go down for a nap early--I'm guessing in self-defense. Moral: put a drip pan under the stupid pie next time, goofus.
4) I am presenting for your enjoyment photographic proof of my billboard doppelganger. She can be found on Highland Drive, directly east of the Home Depot, advertising the Generations Project on BYU TV. Uncanny, isn't it? I, for one, am completely freaked out.


May 15, 2009
Lisa: Etch a Sketch
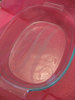
Inspired by this glass-etching tutorial on isly (found via this post on How About Orange), I decided to try etching a giant monogram (I love monograms) into my 9x13" pyrex baking dish, in an effort to make it prettier and more identifiable at potlucks.
All the background info and steps are after a jump, but here's the finished product:
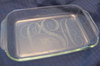
I liked my finished baking dish so much (and making it was so fun and easy) that I made another one for my cousin as a wedding gift, this time with just the first initial of her new last name.
I admit, I felt a little less cool when I went to church the next Sunday and found out that etching glass baking dishes is our upcoming Enrichment Night craft. But at least mine isn't made with one of those precut vinyl dealies, right? It's still a LITTLE bit original. So. Want me to make one for you?
Materials:
Computer
Printer
Monogram font
Adobe Illustrator (or whatever program you like)
Scotch tape
Transfer paper
Contact paper (any pattern)
Pen/pencil/stylus
X-Acto knife (sharp)
Spatula
Armour Etch
Pyrex baking dish
Kitchen sink
Silicone baking spatula
Note:
The bottle of Armour Etch says it won't etch Pyrex, so I did a little checking around on the internet. I'm glad I did, because I learned two important things that were backed up by several sources. First of all, you CAN etch Pyrex (at least some Pyrex) with Armour; you just have to leave it on for 25 minutes instead of five minutes. Also, you don't have to just wash the etching cream down the sink when your time is up, like it says on the packaging--you can scrape it right back into the bottle and use it again! A little bit is still lost, but you'll get a lot more use out of that expensive bottle.
Steps:
1) I downloaded monogram kk from Abstract Fonts, and tooled around with my initials for a few minutes in Illustrator. I was hoping the large size of the monogram would make it feel more modern, and that at first glance it would just appear be a pretty, scrolly design. Once you've decided on your design, reverse it before printing. You'll be etching on the bottom side of the dish (so little bits of food don't get stuck in there), and you want to be able to read the letters through the bottom of the dish when it's right side up.
2) Cover the bottom of your baking dish with whatever leftover contact paper you have on hand (keep the color of your contact paper in mind when you're buying transfer paper). Use your fingers or the back of a spoon to smooth out any bubbles. Be especially careful around the logo/raised lettering on the bottom of the pan. It's REALLY important to make a good, smooth seal.
3) Tape your reversed, printed out design on top of the transfer paper, which is on top of the contact paper. Trace over all the edges of your design with a pen. Remove the transfer paper and printout from the contact paper carefully, making sure your entire design got transferred.
4) Use the X-Acto knife to cut out all the pieces of your design that you want to be etched. Don't stress out about this part. I hate cutting with an X-Acto knife on paper and cardboard, because the knife always goes zinging out of control at the worst possible moment and ruins my design, but it's really super easy to cut contact paper on top of glass.
5) Brush on the Armour Etch in a very thick layer (enough so it's opaque and white), making sure you cover all the parts of your design. Don't let any sneak off the edges of your contact paper outside the design area. Also, be REALLY careful not to get any etching cream on your hands, because that stuff burns like a mother. Set your pan (carefully!) aside and time it for 25 minutes.
6) Once time is up, take your pan into the kitchen and very carefully scrape off the etching cream with a silicone spatula. Scrape it into a funnel and then back into the jar, or just right into the jar if you're coordinated enough. Then peel off the contact paper and throw it away without gooing yourself with the creamy side. You might need your X-Aacto knife to catch the tiny bits of contact paper--you don't want to be scraping them up with your fingernail and get Armour Etch under there. Then rinse off the rest of the etching cream on the pan with water. Wash your hands and arms really, really well with soap and water, and wash the pan again really thoroughly before cooking in it.
January 26, 2009
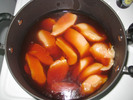
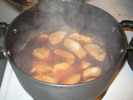
Lisa: Pork Roast
Remember how I'm trying to find main-dish recipes that I can memorize and make regularly? Well, I think this pork roast is easy and delicious enough that it might fit the bill. It's the first crock pot recipe I've tried that I'd classify as an unqualified success, and there's no sign of my pet peeve of crock pot dishes--the instruction to brown the meat before putting it into the crock pot. To me, the whole point of crock pot cooking is that the recipe is super easy and basically preps/cooks itself while you're at work or whatever. If you have to spend a bunch of time getting everything ready to go in the crock pot (including cooking things on the stove), then you might as well choose a regular recipe that doesn't take four hours to cook.
But I digress. Aside from adding a bit of cooking time--I think every crock pot is a bit different--and wishing I had one of those handy gravy-fat-separator dealies, I hardly had to think about it. If you decide to make this (and I think you should), save yourself a headache and cut the roast into nice slices with the electric knife when you're ready to serve. Also, see if you can talk Blake into making mashed potatoes to go with it.
Recipe from Simple & Delicious after the jump. My additions/changes are in brackets.
Pork Roast with Gravy, from Taste of Home: Simple & Delicious, February 2009
This home-style supper can be made [a day ahead]. Strain and skim the cooking juices, cover and store all in the fridge. Then reheat the pork to 165 degrees and finish the gravy in a pan [the next day].
1 boneless whole pork loin roast (3 to 4 lbs.)
1 can (14 1/2 oz.) chicken broth
1 cup julienned sweet red pepper
1/2 cup chopped onion
1/4 cup cider vinegar
2 Tbsp. Worcestershire sauce
1 Tbsp. brown sugar
2 tsp. Italian seasoning
1 tsp. salt
1 tsp. pepper
2 tsp. cornstarch
2 tsp. cold water
1. Cut roast in half; transfer to a 5-qt. slow cooker. In a small bowl, combine the broth, red pepper, onion, vinegar, Worcestershire sauce, brown sugar and seasonings; pour over pork. Cover and cook on low for [4-6] hours or until a meat thermometer reads 160 degrees and meat is tender.
2. Remove pork [and reserve some for another use if desired].
3. For gravy, strain cooking juices and skim fat; pour 1 cup into a small saucepan. Combine cornstarch and water until smooth; stir into cooking juices. Bring to a boil; cook and stir for 2 minutes or until thickened.
4. Slice pork; serve with [mashed] potatoes and gravy. Yield: 4 servings.
August 19, 2008
Sarah: 2008 Cooking Adventure, Week 22
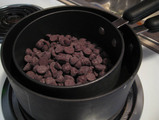
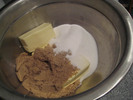
I'm sorry. I know I've been neglecting you. Don't be mad, I still care about you. See? I made you chocolate covered bacon.
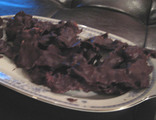
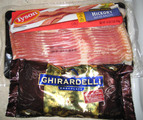
You heard me right. Bacon. Covered in dark chocolate. See? These are the ingredients:
I brought these to our final potluck dinner with the lovely Angie and Dave before they got into their moving truck last Sunday and drove to New York City. How better to say "I'll miss you, I love you, and can I come visit soon and sleep on your floor?" than with a surprisingly not-disgusting sweet-salty treat? I can't think of a better way.
These are really easy to make. Once was good enough for me, but I recommend you make these, if only to see the look on your friends' faces when you offer up a plate. Plus, bacon has protein and dark chocolate has anti-oxidants. So, you know, healthy.
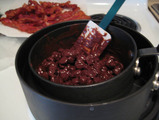
How to make Chocolate Covered Bacon:
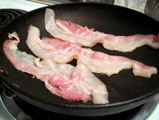
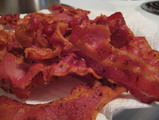
Cook the bacon. Crispy. No one wants floppy, chewy bacon underneath the chocolate shell. Sounds gross, doesn't it? Glad we agree. Crispy bacon it is.
Melt the chocolate in a makeshift double-boiler. Or a real one, if you're fancy like that. Don't splash water into the melted chocolate. That always ends bad, trust me.
Dip the cooled, dry bacon into the chocolate. Sprinkle with sea salt, if desired. I sprinkled about half of the pieces with sea salt. I'm not sure if anyone noticed or had a preference. The bacon was salty enough on its own, though, so this isn't necessary if you don't have it on hand. Let the chocolate cool.
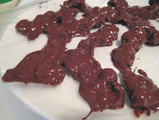
Serve. Watch your dinner guests approach the platter with extreme trepidation.
June 28, 2008
Sarah: MeTube
Yes, we've already talked about how much we love YouTube, but I think there are a few videos you might have missed.
If you like baking, perhaps you'd be interested in learning how to make bread.
If you didn't think you were interested in knowing how slugs mate, well, you were wrong. You are interested.
And if you're wondering what I would do while my friend got molested by an Italian tourist in Prague? The answer is: I would take a video of it.
That's right, I'm on YouTube. It feels like home.
Sarah: 2008 Cooking Adventure, Week 21
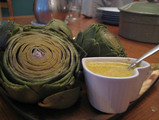
Did someone say artichokes?

Because, I think I might like those. Let me see...


Oh yes. They are, indeed, delicious.
I grew up dipping them in mayo, but if you want to look slightly more sophisticated, you could try a homemade aioli, thanks to Orangette. Yum. Just don't feed the aioli to the baby. She likes the plain artichoke just fine.
Recipe for the aioli after the jump.
Meyer Lemon Aioli
Adapted from Bon App�tit, April 2008
1 medium garlic clove
1 large egg yolk
2 tsp. Meyer lemon juice (though I just used regular lemon juice. I'm a rebel)
� tsp. champagne or white wine vinegar (I used vinegar)
Heaping � tsp. Dijon mustard (I used fancy mustard we had in the house. It wasn't as creamy as dijon, but I think the mustard seeds made it more interesting.)
� tsp. salt, or to taste
� cup extra virgin olive oil
Zest of 1 medium Meyer (regular works!) lemon, or to taste
If you have a garlic press, press the garlic clove. If you do not have a garlic press, mince the clove finely; then sprinkle it with a pinch of salt and smash it a bit with the side of your knife, so that it softens to a dense paste.
In a medium bowl, combine the garlic, egg yolk, Meyer lemon juice, vinegar, mustard, and salt. Whisk briefly, until the mixture is bright yellow and well blended, about 15 to 30 seconds.
Now, start adding the oil. It is absolutely crucial that you add it very slowly. For the first � cup, add it impossibly slowly � only a few drops at a time � and whisk constantly. Make sure that each addition of oil is fully incorporated before you add any more. (Your arm will get tired, yes, but don�t worry; you can stop to rest as often as you need to.) As the oil is incorporated, the mixture should begin to lighten in color and develop body, thickening tiny bit by tiny bit.
After you have added the first � cup oil, you can increase the speed at which you add it, pouring it in a thin, continuous stream, whisking constantly. Stop every now and then, if you need to, to put down the measuring cup, whisk well, and make sure that the oil is fully incorporated. The mixture should continue to thicken, and by the time you have added all the oil, it should be pale yellow (or yellowy-green, depending on the color of your olive oil), silky and thick. Whisk in the Meyer lemon zest. Taste, and adjust seasoning - vinegar, salt, zest - as needed.
Serve immediately, or cover and chill for up to three days.
Note: For safety�s sake, raw egg is not recommended for infants (I told you!), pregnant women, and people with weakened immune systems. To avoid the risk of salmonella, buy your eggs from a reputable source, and take care when separating the yolks and whites, so that the contents of the egg do not come in contact with the outer part of the shell. Or use pasteurized egg yolk instead.
Yield: about � cup, or enough for at least four artichoke eaters
June 27, 2008
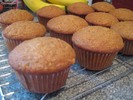
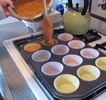
Sarah: 2008 Cooking Adventure, Week 20
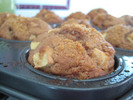
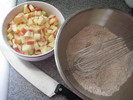
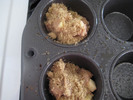
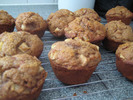
I think these Whole-Wheat Apple Muffins (from Smitten Kitchen) are perfect for Sundays. Make them for a late breakfast or a snack. They are sweet enough to feel like a treat, but the big apple chunks and whole wheat make you feel like you're being healthy. Which means you can have two, right?
This recipe convinced me that I need to sprinkle brown sugar on top of everything and put it in the oven. I am convinced that this would be delicious no matter what. I'll let you know how my new and improved tuna sandwich turns out.
Recipe after the jump. Make these. Right now.
Whole Wheat Apple Muffins
Adapted from King Arthur Flour
These dark, crazy moist muffins will keep well for several days, and the brown sugar on top, should you not skimp on it like I did, adds a crunchy touch, perfect for those of you who know that the lid is the best part.
Yield: They said 12, I got 18
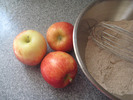
1 cup (4 ounces) whole wheat flour
1 cup (4 1/4 ounces) all-purpose flour
1 teaspoon baking powder
1 teaspoon baking soda
1/4 teaspoon salt
1 tablespoon cinnamon
1/2 cup (1 stick, 4 ounces) unsalted butter, at room temperature
1/2 cup (3 1/2 ounces) granulated sugar
1/2 cup dark brown sugar, packed
1 large egg, lightly beaten
1 cup (8 ounces) buttermilk or yogurt
2 large apples, peeled, cored, and coarsely chopped
Preheat the oven to 450�F. Grease and flour an 18 cup muffin tin and set aside.
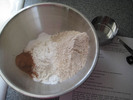
Mix together the flours, baking powder, baking soda, salt, and cinnamon, and set aside.
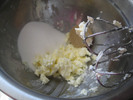
In a separate bowl, cream the butter and add the granulated sugar and 1/4 cup of the brown sugar. Beat until fluffy.
Add the egg and mix well; stop once to scrape the sides and bottom of the bowl. Mix in the buttermilk gently. (If you over-mix, the buttermilk will cause the mixture to curdle.) Stir in the dry ingredients and fold in the apple chunks.
Divide the batter evenly among the prepared muffin cups, sprinkling the remaining 1/4 cup brown sugar on top.
Bake for 10 minutes, turn the heat down to 400�F, and bake for an additional 5 to 10 minutes, or until a toothpick inserted into the center of a muffin comes out clean. Cool the muffins for 5 minutes in the tin, then turn them out onto a wire rack to cool completely.
June 22, 2008
Sarah: 2008 Cooking Adventure, Week 19
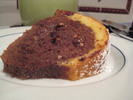
I wanted to make a treat for the girls on a Tuesday night. Well, truthfully I wanted to eat cake, but luckily the girls saved me from consuming the entire cake on my own. I decided to make an Orange and Chocolate Cake from Joy the Baker (via Tastespotting).
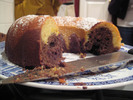
The cake is easy to put together, since it's the same mix, split in half, then flavored (orange one half, chocolate the other). The sour cream makes it delicious and moist (ew, I hate that word) and the presentation is great for only a little work.
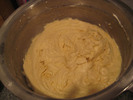
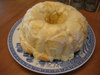
I didn't cook the cake quite long enough. I wish the cake hadn't fallen as a result, because it looked awesome when I first pulled it out of the oven.
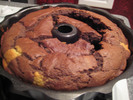
I sprinkled the top of the cake with powdered sugar, but you could also leave it plain or drizzle it with icing. Either way, I'd make this again if I needed an easy dessert. Thanks, Lisa, for letting me use your bundt cake pan!
Recipe after the jump.
Chocolate Orange Bundt Cake
adapted from the Gourmet Cookbook
3 1/2 cups cake flour
1 Tablespoon baking powder
3/4 teaspoon baking soda
1 teaspoon salt
2 sticks (1/2 pound) unsalted butter at room temperature
2 cups sugar
4 large eggs, left at room temperature for 30 minutes
2 teaspoons vanilla extract
2 cups sour cream
1/2 teaspoon orange extract
zest of 1 large orange
4 tablespoons cocoa powder
1/2 cup chocolate chips
Put rack in the oven and preheat oven to 350 degrees F. Butter and flour (I just used Pam on Lisa's nonstick pan) a 12 cup Bundt pan and set aside.
Sift together flour, baking powder, baking soda and salt and set aside.
Beat together butter and sugar in a large bowl with an electric mixer at medium speed until pale and fluffy, about 3 minutes. Add eggs one at a time, beating well after each addition, then beat in vanilla. Reduce speed to low, add half of flour mixture, and mix until just blended. Add sour cream, mixing until just combined, then add remaining flour mixture and mix until smooth.
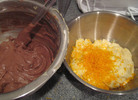
Divide the batter evenly into two bowls. In one bowl add the orange zest and orange extract and stir to combine. In the other bowl add sifted cocoa powder and chocolate chips and stir to combine.
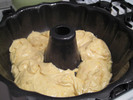
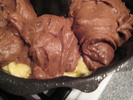
First pour the orange batter into the buttered Bundt pan, spreading it evenly around the bottom of the pan. Next, simply add the chocolate batter on top of the orange to cover. No swirling is necessary, although you can swirl the batters together if you like.
Bake until cake is springy to the touch and a wooden pick inserted in the center comes out clean, 45 minutes to 1 hour.
Remove from oven and cool cake in the pan for 30 minutes. Invert onto a cooling rack and cool completely.
June 20, 2008
Lisa: Friday, Fries, and Frolf
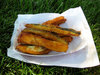
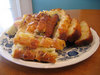
Last week, Nora and I had 45 minutes to kill before meeting my mom to shop for a Father's Day gift, so we decided to finally try the zucchini fries I've had my eye on at Woody's Drive-In.

After we got our food, we drove to Creekside Park for a picnic. Here's Nora, eating a quesadilla and trying to charm the nearby kids into coming over and making friends. It worked.

My raspberry shake was really good, and the zucchini fries were okay for a novelty food. They're strips of zucchini, battered and deep-fried--kind of like a heavier, wetter version of vegetable tempura.

There was some kind of frisbee golf tournament happening at the park; at least, I hope so. About fifty men in their twenties and early thirties--the majority of them unfortunately shirtless--were just hanging around, throwing frisbees at poles at 3:00 on a Friday afternoon. If it wasn't a tournament, I am terrified for my generation. Don't worry, though, I documented some of the half-naked frolfers for your viewing pleasure:
June 12, 2008
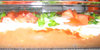
Lisa: how about I make you a nice sandwich, and we'll forget this ever happened?
I was innocently enjoying this unspeakably nerdy article on retconning in comic books when I stumbled across the words, "they like the taste of your sandwich."
I think it was lunchtime. "Mmm, sandwich," I must have thought. I made an immediate mental note to add this turn of phrase to my everyday speech. To my lexicon, if you will. I tried it out in several contexts:
1. In place of "I like the way you think"
2. In an "I find you adorable" sort of situation
3. As an "I'm picking up what you're putting down" substitute
4. As my Facebook status
I am saddened to report that I had a 0% success rate. People did not like the taste of my sandwich, if you know what I mean. I know, I know, you don't--that's the problem. It either came off as nonsensical or vaguely dirty, depending on the audience and the topic at hand. I'm afraid "I like the taste of your sandwich" will have to be retired (along with such gems as the exclamation, "that's over the COUNTER!").
Now, more importantly: ham and cheese or peanut butter?
June 02, 2008
Lisa: raspberry almond blondies
I've been reading about Martha Stewart's Cookies: The Very Best Treats to Bake and to Share everywhere, especially on Angry Chicken, so I had to check it out from the library and see it myself.
All of the recipes sound amazing, but you have to start somewhere, right? I went with the raspberry almond blondies (recipe after the jump).
Fresh raspberries were a ridiculous $7 a box at the grocery store, so I bought frozen rasberries instead. I thawed and rinsed them, but I think frozen fruit still has a significantly higher water content than fresh fruit. I'm pretty sure this was the problem with my lemon blueberry yogurt bread, too. The blondies came out great, but took 30 minutes longer to cook than the recipe called for.
Martha's Raspberry Almond Blondies
makes 16
9 tablespoons (1 stick plus 1 tablespoon) unsalted butter, room temperature, plus more for pan
1 2/3 cups all-purpose flour
1 teaspoon baking powder
3/4 teaspoon coarse salt
1 cup packed light brown sugar
2 large eggs
1 teaspoon pure vanilla extract
1 cup sliced almonds (about 3 ounces), toasted (I just spread them out on a cookie sheet under the broiler and turned them with a spatula once they started getting brownish on one side.)
2 2/3 cups raspberries
1. Preheat oven to 325 degrees F. Butter an 8-inch square baking pan. Line with one longish piece of parchment paper, allowing 2 inches to hang over two sides. Butter parchment.
2. Whisk together flour, baking powder, and salt in a bowl.
3. Put butter and brown sugar in the bowl of an electric mixer fitted with the paddle attachment. Mix on medium speed until pale and fluffy, about 3 minutes. Or cream in a large bowl with a hand mixer. Add eggs and vanilla; mix until combined. Mix in 3/4 cup almonds.
4. Pour batter into prepared dish; smooth top. Scatter berries and remaining 1/4 cup almonds over batter. Bake, rotating dish halfway through, until a cake tester inserted into center comes out with moist crumbs, 55-60 minutes. If you use frozen berries, plan to add about thirty minutes to your cooking time, checking often.
5. Let blondies cool 15 minutes. Transfer blondies to a wire rack, and let cool completely. Cut into 2-inch squares. Blondies can be stored in single layers in airtight containers at room temperature up to 3 days.
May 24, 2008
Lisa: sour cream chocolate chip coffee cake
For our Mother's Day dessert, I made chocolate-chip sour cream cake (recipe from the Boston Globe, after the jump). It was tasty with the chocolate chips, but I think it would be really good without, also--as a regular coffee cake, or with raspberries or something swirled in.

Yum! We had ours with a scoop of vanilla ice cream on top.
CHOCOLATE CHIP SOUR CREAM CAKE
Makes one 9-by-13-inch cake
1 stick of butter, at room temperature
2 cups sugar
3 eggs, separated
16 ounces sour cream
1 1/2 teaspoons vanilla extract
3 cups all-purpose flour
1 1/2 teaspoons baking soda
1 teaspoon baking powder
1/2 teaspoon salt
1 teaspoon cinnamon
12 ounces chocolate chips
1. Have ready a greased 9-by-13-inch rectangular baking pan. Set the oven at 350 degrees.
2. In a large bowl, cream butter and 1 1/2 cups sugar, then mix in the egg yolks, sour cream, and vanilla.
3. In a medium bowl, sift together the flour, baking soda, baking powder, and salt. Stir into the butter mixture.
4. Beat the egg whites until they hold stiff peaks, then fold into the batter. In a small bowl, mix the cinnamon with the remaining 1/2 cup of sugar and the chocolate chips.
5. Pour half of the cake batter into the pan. Sprinkle the top with half of the cinnamon-sugar mixture. Pour remaining batter on top, then cover that with the remaining cinnamon-sugar mixture.
6. Bake 40-50 minutes or until a tester comes out clean.
Adapted from Deb Perelman
May 22, 2008
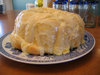
Lisa: orange rolls
I thought orange rolls would go nicely with our American potluck, and boy, was I right. The jello was fun and everything, but this pull-apart concoction was so amazingly, evilly good. It may become a Christmas morning tradition at our house.

It's easy, too--and if you don't have four hours to let the rolls rise, you can follow the quick-rise directions on the roll package. Recipe (from add to desired taste) after the jump. Reader beware: only make this if you have a lot of people to share it with, or if you want to gain approximately ten thousand pounds. Because you will eat the entire thing.
Easy Orange Rolls
1 package frozen rolls (Rhodes)
1/4 cup melted butter
5 Tablespoons sugar
2 Tablespoons orange peel
Preheat oven to 350. Mix butter, sugar and orange peel in large bowl. Add FROZEN rolls, stir to coat. Spray bundt pan with nonstick spray. Pour rolls into bundt pan, making sure all of sugar mixture is on rolls. Cover with towel and let defrost/rise, about 4 hours. Bake for about 15-20 minutes, until golden brown. Turn out onto serving plate immediately and pour frosting over top.
Frosting:
1/4 cup butter
2 cups powdered sugar
1 Tablespoon orange juice
1 Tablespoon orange peel
Mix with mixer until smooth.
May 20, 2008
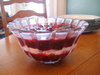
Lisa: Ruby Red Layered Jello Salad
When I was assigned a side dish for our last Freaks and Geeks potluck (American-themed in homage to Sarah's impending departure), I knew I had to make jello salad. What's more American than jello salad?
This salad sounded perfectly gross-yet-delicious. An inch-thick layer of pure sour cream? It cuts the sweetness of the fruit jello perfectly. A whole can of cranberry sauce in the top layer? What is jello anyway, if not jellied fruit sauce? Spoon it up. Best of all, it's pretty and translucent and unnaturally red, as jello salad should be. (Recipe from Ping on GroupRecipes, after the jump.)
Ingredients
1 (3 ounce) package raspberry flavored gelatin mix
2 cups boiling water
1 (10 ounce) package frozen raspberries
1 pint sour cream
1 (3 ounce) package cherry flavored gelatin
1 (8 ounce) can crushed pineapple, drained
1 (16 ounce) can whole cranberry sauce
Directions
1) Dissolve raspberry gelatin in 1 cup hot water. Add frozen raspberries, and stir until well mixed. Pour into a glass bowl. Refrigerate until almost firm, about 30 to 60 minutes.
2) Spread sour cream over firm gelatin. Refrigerate.
3) Dissolve cherry gelatin in 1 cup hot water. Stir in crushed pineapple and cranberry sauce. Chill until partially set, about 20 to 40 minutes.
4) Spoon cherry gelatin mixture over sour cream layer. Chill until firm, another hour or two.
Note: This salad is most attractive when made in a crystal bowl so the various layers can be seen.
May 18, 2008
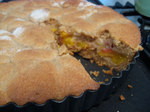
Lisa: apple tart
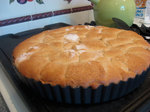
In an effort to use up a bunch of overpriced apples I had purchased for a library program, I found myself searching Tastespotting for good-looking apple recipes. Somehow I still ended up at Smitten Kitchen, with the Simplest Apple Tart.
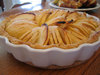

The tart turned out gorgeous AND delicious. The only trouble I had was with the dough--there just didn't seem to be enough of it. I rolled it so thin that it kept tearing, but it still barely made it to the edges of the dish. There wasn't enough dough to wrap up over the tops of the apples, and it certainly wouldn't have worked galette-style. Or maybe my dish was too big, and I had too many apples. I don't know.
Recipe after the jump.
Alice Waters�s Apple Tart
INGREDIENTS:
For dough:
1 cup unbleached all-purpose flour
1/2 teaspoon sugar
1/8 teaspoon salt
6 tablespoons (3/4 stick) unsalted butter, just softened, cut in 1/2-inch pieces
3 1/2 tablespoons chilled water
For filling:
2 pounds apples (Golden Delicious or another tart, firm variety), peeled, cored (save peels and cores), and sliced
2 tablespoons unsalted butter, melted
5 tablespoons sugar
For glaze: 1/2 cup sugar
MIX flour, sugar, and salt in a large bowl; add 2 tablespoons of the butter. Blend in a mixer until dough resembles coarse cornmeal. Add remaining butter; mix until biggest pieces look like large peas.
DRIBBLE in water, stir, then dribble in more, until dough just holds together. Toss with hands, letting it fall through fingers, until it�s ropy with some dry patches. If dry patches predominate, add another tablespoon water. Keep tossing until you can roll dough into a ball. Flatten into a 4-inch-thick disk; refrigerate. After at least 30 minutes, remove; let soften so it�s malleable but still cold. Smooth cracks at edges. On a lightly floured surface, roll into a 14-inch circle about 1/8 inch thick. Dust excess flour from both sides with a dry pastry brush.
PLACE dough in a lightly greased 9-inch round tart pan, or simply on a parchment-lined baking sheet if you wish to go free-form, or galette-style with it. Heat oven to 400�F. (If you have a pizza stone, place it in the center of the rack.)
OVERLAP apples on dough in a ring 2 inches from edge if going galette-style, or up to the sides if using the tart pan. Continue inward until you reach the center. Fold any dough hanging over pan back onto itself; crimp edges at 1-inch intervals.
BRUSH melted butter over apples and onto dough edge. Sprinkle 2 tablespoons sugar over dough edge and the other 3 tablespoons over apples.
BAKE in center of oven until apples are soft, with browned edges, and crust has caramelized to a dark golden brown (about 45 minutes), making sure to rotate tart every 15 minutes.
MAKE glaze: Put reserved peels and cores in a large saucepan, along with sugar. Pour in just enough water to cover; simmer for 25 minutes. Strain syrup through cheesecloth.
REMOVE tart from oven, and slide off parchment onto cooling rack. Let cool at least 15 minutes.
BRUSH glaze over tart, slice, and serve.
May 15, 2008
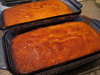
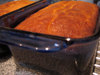
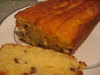
Lisa: lemon blueberry yogurt bread
This bread tasted great and looked pretty good considering what a hard time it had coming into the world. The recipe (from Ina Garten via Smitten Kitchen, after the jump) calls for a cup of yogurt that makes the bread super moist. Knowing this, I didn't worry when--after cooking for 50 minutes--the knife I used to test the center of the nicely browned loaf came out clean, but wettish. I soaked the bread with lemon juice glaze, let it cool in the pan for ten minutes, then turned it out onto a cooling rack. Immediately, the uncooked, heavy, wet center of the bread broke through the top crust and started dripping out onto the counter. I quickly slipped the pan back down over the bread, held the rack to the pan and flipped the bread back in, and popped the whole mess back in the oven for another TWENTY MINUTES. The edges got quite brown, but the center seemed to have firmed up. After the bread was cool and I sliced it up, it looked pretty good--I only ended up throwing out two slices from the very middle, where the crater at the top was most visible.
Anyway, I probably wouldn't make this again, at least not without keeping a very close eye on the baking time and temperature. If you're trying this recipe, I might suggest a lower temperature for a longer time. Other changes: I used a little more lemon zest than called for, and regular frozen blueberries instead of miniature wild blueberries (because, seriously?).
Smitten Kitchen's Lemon-Blueberry Yogurt Loaf
Adapted from Ina Garten
1 1/2 cups + 1 tablespoon all-purpose flour (if you�re skipping the fruit, you can also skip the last tablespoon of flour)
2 teaspoons baking powder
1/2 teaspoon kosher salt
1 cup plain whole-milk yogurt
1 cup plus 1 tablespoon sugar
3 extra-large eggs
2 teaspoons grated lemon zest (approximately 2 lemons)
1/2 teaspoon pure vanilla extract
1/2 cup vegetable oil
1 1/2 cups blueberries, fresh or frozen, thawed and rinsed (miniature wild blueberries are great for this, and pose the least risk of sinking)
1/3 cup freshly squeezed lemon juice
Preheat the oven to 350 degrees F. Grease an 8 1/2 by 4 1/4 by 2 1/2-inch loaf pan. Line the bottom with parchment paper. Grease and flour the pan.
Sift together 1 1/2 cups flour, baking powder, and salt into 1 bowl. In another bowl, whisk together the yogurt, 1 cup sugar, the eggs, lemon zest, vanilla and oil. Slowly whisk the dry ingredients into the wet ingredients. Mix the blueberries with the remaining tablespoon of flour, and fold them very gently into the batter. Pour the batter into the prepared pan and bake for about 50 (+) minutes, or until a cake tester placed in the center of the loaf comes out clean.
Meanwhile, cook the 1/3 cup lemon juice and remaining 1 tablespoon sugar in a small pan until the sugar dissolves and the mixture is clear. Set aside.
When the cake is done, allow it to cool in the pan for 10 minutes before flipping out onto a cooling rack. Carefully place on a baking rack over a sheet pan. While the cake is still warm, pour the lemon-sugar mixture over the cake and allow it to soak in (a pastry brush works great for this, as does using a toothpick to make tiny holes that draw the syrup in better). Cool.
May 01, 2008
Sarah: 2008 Cooking Adventure, Week 18
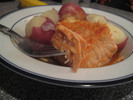
I often forget about how much I love salmon. I'm so glad that on a certain, otherwise forgettable weekday, I decided to make myself a nice, warm dinner. I'm not a great chef, but salmon is something anyone can cook without going too far astray.
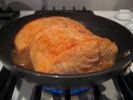
I just salt-and-peppered the fish, browned the top quickly, then let it cook, covered for most of the time, in a pan with some water and some asian salad dressing (you know, as a marinade). It was lazy, but easy.
While the fish cooked, I put some red potatoes in some water (with a little salt and milk) and let them cook until soft.
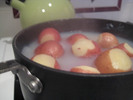
And then dinner was done. It was not terribly exciting, but I recommend salmon and potatoes (or rice, or salad) for dinner tonight. Leftovers can be eaten hot or cold, served just like dinner or over a bed of lettuce. Yum.
April 30, 2008
Sarah: 2008 Cooking Adventure, Week 17
Three days after we baked this week's recipe, Lisa sent me a text message that said something like "Curse you and your satan cookies!" and I couldn't agree more.
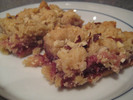
These bars were sneakily delicious. On first taste you think "well those are pretty good! And easy to make, too!" You finish a bar and think you might enjoy another tomorrow. You know, perhaps, if the mood strikes.
And then something in your brain snaps and you are a slave to these delicious little bars. They are breakfast! Snack! Dessert! Dinner! You must eat them all! Luckily, Lisa saved me from myself by putting the majority of the dessert bars in the freezer.* I have sold my soul to Blackberry Jamble. At least until I make another sugar-laden baked good.
Recipe after the jump.
*Lisa, I'm sorry. I may or may not have snuck one of these from the freezer. I am ashamed.
Satan cookies, aka Blackberry Jamble Shortbread Bars (from Sticky, Chewy, Messy, Gooey Desserts)
Ingredients:
1 pound (4 sticks) unsalted butter, room temperature
1 cup firmly packed light brown sugar
1 cup granulated sugar
2 teaspoons pure vanilla extract
1 teaspoon salt
3 and 3/4 cups all purpose flour
1 cup almond flour or very finely ground almonds
1 and 1/2 cup blackberry preserves
1/2 cup chopped almonds
Confectioner�s sugar for dusting
Directions:
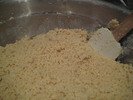
If you don�t have almond flour on hand, you can make it like I did by grinding up 1 cup of almonds in your food processor until they are finely ground. It�s going to be combined with the flour so texture-wise, you want to get it as finely ground as possible.
Combine the butter and sugars in a large bowl.
Using an electric mixture set at medium low speed, beat it until creamy. Add the vanilla and salt and beat until combined.
Combine almond flour (or ground almonds) with the flour. Mix well. Combine the dry mixture into the butter mixture on low speed, until a smooth, soft dough forms.
Spray a 9 by 13 inch baking pan with nonstick cooking spray and press 1/3 of the dough evenly into the pan to form a bottom crust.
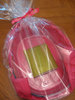
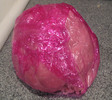
Wrap the remaining dough in plastic wrap and refrigerate until very cold and firm, at least 30 minutes. Wrap it in Lisa's pink plastic wrap for a fun brain-like effect!
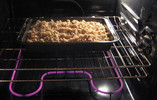
Preheat oven to 325 degrees Fahrenheit.
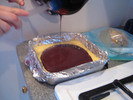
Bake the bottom crust until it is firm and just beginning to turn pale brown around the edges, about 20 minutes. Remove the pan from the oven and spread the preserves evenly over the crust. Crumble the remaining shortbread dough over the jam to form a pebbly, crumbled topping. Sprinkle with the chopped almonds.
Return pan to the oven and continue baking until topping is firm and crisp and lightly golden in color, about 30 to 35 minutes. Transfer to wire rack and let cool to room temperature.
Use a sharp knife to cut bars evenly into 15 large squares. Remove the bars from the pan with a metal spatula and if desired, cut in half on the diagonal to form 30 smaller triangular bars. Dust with confectioners� sugar and serve.
The bars will keep, covered tightly, for about 1 week at room temperature, or in the freezer for up to one month.
April 29, 2008
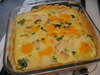
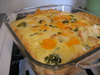
Lisa: chicken & broccoli quiche
Soon after I had Nora, my awesome friend Gabrielle brought over dinner. It was SO GOOD, you guys. It was a salad with homemade dressing (in a container that I complimented so much that she got me one for my birthday), and a deep-dish quiche with broccoli and chicken. Blake loved the quiche so much that he called Gabrielle and told her so. Possibly more than once. Gabrielle thoughtfully included a handwritten copy of the quiche recipe, and I finally got around to making it last week. Why didn't I do it before? I'm kicking myself, because it is so easy and so delicious. Anyway, this is definitely going to be one of the ten recipes I memorize.
Gabrielle's recipe is after the jump. Things I added are in bold. If you want to kick the whole thing up a notch (both in taste and in difficulty), make it in the homemade crust of your choosing.
Edited to add: I only have one glass pie pan, so I made the second quiche (which wasn't eaten yet by the time I took pictures) in a square baking dish. It worked fine, but the crust--which started out round--looks a little funny. Don't you judge me.
Gabrielle's Chicken & Broccoli Quiche
Serves 6. Cooking time 35-40 minutes. Preheat oven to 375 degrees.
1 unbaked 9" pie shell (I use Pillsbury) These are in the refrigerated section near the Pillsbury crescent rolls in the tube. Get the rolled up refrigerated kind instead of the kind in the freezer section that are already in a pie tin, because then you can bake the quiche in your own dish and crimp the edge yourself so that it looks more homemade. Tricky! They come two to a package, so you might as well make two quiches at once.
2 cups fresh broccoli, cooked and drained
1 whole chicken breast, cooked and chopped Or chopped and then cooked, which is how I did it since I was in a rush. Small pieces = faster cooking, plus they don't have to look pretty because they'll be covered with delicious, delicious egg and cheese.
6-8 ounces Swiss cheese, cut into 1/4" cubes When I was buying the cheese, I forgot I was doubling the recipe, so I bought an 8-ounce brick. When I figured out my mistake back at home, I threw in 4 additional ounces of cheddar that I had on hand. The cheddar was tasty in the finished product, and I ended up with about 6 ounces of cheese per quiche. Disaster averted.
3 eggs
1 cup heavy cream I also only got enough cream for one quiche, but I added a cup of milk to make up the difference in volume (skim is what I had on hand). I didn't notice a difference, and there was a little less fat, so...whatever. Your mileage may vary.
2 tablespoons lemon juice
1 teaspoon salt
1/8 teaspoon pepper
chives (green onions) to taste
Leave the pie shells out of the fridge for 15 minutes or so before unrolling. Unroll pie shell and place in pie pan while you prepare the other ingredients. Sprinkle broccoli in bottom of the shell. Top with chicken, then cheese. In a small bowl, using a whisk, beat the eggs, cream, lemon juice, salt, and pepper until blended, but not frothy. Pour over cheese mixture; sprinkle with chives. Bake in 375-degree oven for 35-40 minutes or until knife inserted in the center comes out clean. (If you have some extra, sprinkle grated swiss over the top for the last 15 minutes of cooking.) Let stand at least ten minutes before cutting.
Since I made two quiches but only needed one, I pulled the other out of the oven at 35 minutes and stuck it in the freezer. The interwebs tell me I can warm it up in a 375-degree oven for 20 minutes. I'll let you know how that turns out.
April 28, 2008
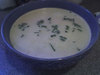
Lisa: potato leek soup
We tried our second recipe from Everyday Foods a while ago, and it was a definite improvement over the last effort. Blake cooked while I held Nora and dispensed unhelpful advice, and he was very competent and patient. The soup was good, but not good enough to bother heating up and eating later, apparently--we ended up throwing the leftovers out a week later. If you have a recipe for a main dish you think I should try, please let me know. I can always find a dessert recipe that sounds good, but I struggle more with the main course.
Recipe after the jump--things I added are in bold.
Potato-Leek Soup
serves 4 * prep time 15 minutes * total time: 45 minutes
6 medium leeks (about 2 1/4 pounds), whites only, halved lengthwise and thinly sliced crosswise, cleaned
2 cans (14.5 ounces each) reduced-sodium chicken broth
1 baking potato (8 ounces), peeled and diced We used two potatoes, and I'm glad we did. The soup was still fairly thin.
Coarse salt
3/4 cup heavy cream
1/2 cup snipped fresh chives mental note: chives are green onions, dummy
WASHING LEEKS:
Leeks can be extremely dirty and are best cleaned after they've been trimmed and cut. Soak cut leeks in a bowl of cool water; lift them out, replace the water, and repeat until no grit remains at the bottom of the bowl. Drain on paper towels. Good luck "lifting out" chopped up leeks. I think we used a colander.
1. In a large saucepan, combine the leeks, broth, potato, 2 cups water, and 1 teaspoon salt. Bring to a boil; reduce the heat to medium-low, and simmer until the vegetables are very tender, 20 to 25 minutes.
2. Working in batches, puree the soup in a blender, transferring it to a clean bowl as you work. (To prevent splattering, fill the blender only halfway, and allow heat to escape: Remove the cap from the hole in the lid, and cover the lid firmly with a dish towel.) Blend a little longer than you think you need to, so the potato blends in well and isn't still grainy. Stir the cream into the pureed soup, and season with salt. Garnish with the chives. Serve immediately.
3. If desired, chill the soup: Cover loosely with plastic wrap, adn chill until cold, at least two hours and up to two days. If necessary, thin with water, and season with salt. Serve the soup in chilled glasses, garnished with chives.
Cook's note:
Depending on the weather, serve this comforting soup hot or cold. You can quickly chill it by placing it into a metal bowl set into an ice bath; stir frequently until the soup reaches the desired temperature.
April 14, 2008
Sarah: 2008 Cooking Adventure, Week 16
To fully embrace this recipe, one should:
- Hear one's sister exclaim "Wow. Nice, plump breasts!" to you. Unfortunately, she was talking about the chicken.
- Set off the fire alarm. When the baby is a teensy bit fussy. Because, that's considerate.
- Once again serve an untried recipe to one's friends. I wonder if they live in fear of what I'll serve to them next. At least so far no one has complained of food sickness...
- Take zero pictures. Oops.
Over five months ago, Jeremy invited me to a recipe exchange and shared his beloved Sweet and Sour Chicken. Then, when I embarked upon my weekly cooking goal, he again encouraged me to try his recipe. Finally, I got around trying it out. Thanks, Jeremy! The tasty recipe (which Jeremy recommends you try cold when eating the leftovers. It'll change your life.) is not too difficult and makes a ton of food.
Recipe after the jump.
Sweet and Sour Chicken (Not the chinese type)
4-6 boneless, skinless chicken breasts, cut up into strips or chunks
(we fed 6 adults, with at least one or two extra servings, with five breasts)
In container one: beaten eggs (I think I only used two eggs total)
In container two: a mixture of half flour and half cornstarch (Maybe 1/2 cup each?) Dip the strips in the egg then the flour mixture and brown in a pan with canola oil (just enough to coat the bottom of the pan) until just browned, not cooked through. Drain on paper towels. In another bowl mix:
3/4 c ketchup
1 c sugar
1/3 c soy sauce
1/2 c chicken stock
You can adjust these amounts to taste, and Jeremy recommends that you double the sauce, so that you have plenty. Don't be freaked out. I was a little worried that 2 cups of sugar for a sauce would be freaky, but it was tasty.
Combine sauce with cooked chicken and bake in a casserole dish for 45-55 mins on 350�. Serve over rice.
April 07, 2008
Sarah: 2008 Cooking Adventure, Week 15
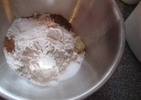
Lisa and I were in charge of dessert for a potluck, so we thought we'd try something out of the Everyday Food book that Lisa was liking. When we got down to deciding between two options, we decided on Carrot Cupcakes, since we weren't quite ready (with good reason) to face a lemon dessert yet.

Everyone has some gut feeling about what should or should not be in carrot cake. I believe strongly that raisins have no place in this delicious concoction. And you, pineapple! I love you, but once you've been cubed and heated, get off of my pizza and out of my cake! I do not want those shrunken orbs or bizarrely hot squares anywhere near my carrot cake. For Lisa, she has taken an anti-coconut stance, and I have to respect that. We searched again for a recipe void of these three ingredients. The internet embrace us in spite of our eccentricities (what is the internet for, if not for that purpose?) and delivered to us this recipe.
We set to work on the carrot cupcakes, deciding to still use the icing recipe from Everyday Foods.
Carrot cupcakes have never been prettier, you guys. They came out of the oven looking perfectly rounded and moist. The icing was just the right amount for 12 cupcakes (and I'm so glad I found a cupcake more worthy of cream cheese icing than I had in the past). Once it came time to eat the cupcakes they were good. Definitely inoffensive, but also a little boring. When did Princess Sunken Cupcake get so picky? Shouldn't she be happy with whatever non-disaster she can get? Apparently not.
The moistness was nice, and, like I said, they were very pretty and easy to make. But there was also nothing gripping, nothing remarkable. Lisa mentioned that she prefers a darker carrot cake. I think that walnuts and more spices would go a long way towards upping the interest. Still, I would make these cupcakes again if I needed something fast and, since they're missing any wacky ingredients, they're sure not to alienate someone with strong carrot cake beliefs, like myself.
Recipe after the jump.
Carrot Cupcakes
4 medium carrots
1 1/2 cups all-purpose flour
1 1/2 teaspoons baking powder
1/2 teaspoon baking soda
3/4 teaspoon salt
1 teaspoon ground cinnamon
1/2 teaspoon ground ginger
1/4 teaspoon grated nutmeg
3/4 cup vegetable oil
3 large eggs
1 cup packed light brown sugar
1 teaspoon pure vanilla extract
Preheat oven to 350�F with rack in middle. Line muffin cups with paper liners.
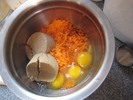
Coarsely grate enough carrots to measure 2 cups (we used the food processor, but you could also use a grater with large holes.
Whisk together flour, baking powder, baking soda, salt, cinnamon, ginger, and nutmeg in a bowl.
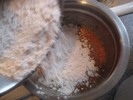
Whisk together oil, eggs, brown sugar, grated carrots, and vanilla in a large bowl, then stir in flour mixture until just combined.
Divide batter among muffin cups and bake until golden and a wooden pick inserted into center of a cupcake comes out clean, 20 to 25 minutes.
Cool in pan on a rack 10 minutes. Remove cupcakes from pan and cool completely on rack, about 1 hour more.
Cream Cheese Icing
8 oz. cream cheese, at room temperature
3/4 cup confectioners' sugar
1/4 teaspoon vanilla extract
In a mixing bowl, whisk the cream cheese, sugar, and vanilla together until smooth. Use immediately, or store in the refrigerator in an airtight container for up to 5 days.
Sarah: 2008 Cooking Adventure, Week 14
Despite my slow kitchen-to-blog turnaround time, I've still been cooking at least once a week, most of those times thanks to Lisa's willingness to hang out with me. More thanks go out to our Freaks and Geeks buddies who indulge us by tasting whatever items we decide to make. By the way, you should purchase/watch/rewatch Freaks and Geeks if you haven't already. Every episode is hilarious and heartbreaking and awesome.
And so, without further ado, the cooking:
We decided that beans and rice would be a great side dish to accompany E's tasty enchiladas. We trolled Epicurious looking for a recipe (I wish you could see the look on Lisa's face when I confidently said something like "All we have to do is just cook some rice and then mix in some salsa and maybe some spices. Tasty Mexican rice." Terror mixed with a sudden loss of appetite. And looking back, I have to agree with Lisa. Why am I so confident in recipe improvisation when I am petrified with indecision in most other areas of my life?) and decided that Yellow Rice Salad with Roasted Peppers and Spicy Black Beans described exactly what we wanted.
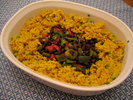
In addition to being overconfident when cooking, I also almost invariably fail to read the recipe all the way through before cooking. This is why I didn't understand the significance of the word "salad" in that recipe. "Salad" means cold. My brain had decided this dish was hot. That, combined with the lack of Mexican flavor (they have a more eastern flair) made these beans and rice much different than I'd planned, but it was all still fairly tasty. If I made this again, I would add different spices than cumin and turmeric (maybe chili powder to give it the Mexican flavor I was missing?) and serve this warm. Or you can enjoy it cold, especially now that I've given you ample warning on what to expect.
Recipe after the jump.
Yellow Rice Salad with Roasted Peppers and Spicy Black Beans
4 teaspoons ground cumin
1/4 cup fresh lime juice
2 1/2 tablespoons vegetable oil
1/2 teaspoon turmeric
2 cups water
1 cup rice
1 teaspoon salt
1/2 cup thinly sliced green onions
1 15.5 ounce can black beans, rinsed, drained (oops, I just realized that I dumped the beans and their associated liquid straight from the can into the mixing bowl. You can too! Fun!)
1/2 cup chopped roasted red peppers from jar
1/2 cup chopped green bell pepper
1/3 cup chopped fresh cilantro
1 1/2 teaspoons minced chipotle chilies*
Stir 3 teaspoons cumin in small dry skillet over medium heat just until fragrant, about 1 minute. Remove from heat. Whisk lime juice and oil into skillet.
Stir turmeric and remaining cumin in heavy medium saucepan over medium heat until fragrant, about 1 minute. Add 2 cups water, rice and salt; bring to boil. Reduce heat to low and cover; simmer until water is absorbed, about 15 minutes. Cool rice. Mix onions and half of lime juice mixture into rice. Season with salt and pepper.
Combine black beans, all peppers, cilantro, chipotle chilies, and remaining lime juice mixture in medium bowl. Toss to coat. Season with salt and pepper.
Mound bean mixture in center of platter. Surround with rice salad.
*Chipotle chilies canned in a spicy tomato sauce, called adobo and found in the Mexican food aisle at the grocery store.
March 27, 2008
Lisa: lemon bread
I've been looking for a dessert recipe that sounded fresh and spring-y, but that would mail well so I could send a treat to my brother Jeff. A coworker suggested a quickbread, and after a little looking around, I thought lemon bread sounded perfect.
The recipe I used is from Muffins & Quick Breads, from the Williams-Sonoma Kitchen Library (recipe after the jump).
I finished baking the bread at around midnight, and turned the loaves out on the racks to cool. I considered leaving them out all night, but after puttering around for half an hour, I decided the bread was cool enough and wrapped one up in foil and sealed it in a padded mailing envelope, and put the other one on a plate with foil over it (because doesn't lemon bread sound delicious for breakfast?). The bread smelled so good, I had to slice a piece off the second loaf and eat it right then. It was delicious. The crumb wasn't as fine as it looked in the picture in the book, but that might be because I didn't chop the almonds fine enough, or because I cut it with a dull knife while it was still warm. Anyway, thank GOODNESS I tasted a piece (and took pictures), because...the ants.
The next morning, when I came into the kitchen, I noticed a thick trail of my tiny nemeses emerging from the edge of the cabinet by the dishwasher and leading across the front edge of the countertop, directly to the foil-covered plate of lemon bread. After shouting "oh NO!" loud enough to wake up Sarah, I whipped off the foil, and confirmed my fear that my newly-baked loaf was swarming with ants. Stupid little sugar-loving bastards.
Anyway, there was some crying. Some yelling. Some detective work. Some poison spraying. But we lived, and Jeff's (antless) loaf got mailed off all right. Thanks, Mom and Blake, for your help with all of that.
Shall we remember the bread that was?
Lemon Bread
Ingredients
1/2 cup (4 oz/125 g) vegetable shortening
1 cup (8 oz/250 g) sugar
2 eggs
1 1/4 cups (5 oz/155 g) all-purpose (plain) flour
1 teaspoon baking powder
1/2 teaspoon salt
1/2 cup (4 fl oz/125 ml) milk
1 tablespoon finely grated lemon zest
1/2 cup (2 oz/60 g) chopped pecans
FOR THE LEMON SYRUP:
1/4 cup (2 oz/60 g) sugar
3 tablespoons fresh lemon juice
Preparation
Preheat an oven to 350 degrees F (180 degrees C). Grease and flour a medium (8 1/2-inch/21-cm) loaf pan.
In a large bowl combine the shortening and sugar and beat until blended. Add the eggs, one at a time, beating well after each addition. In a medium bowl stir and toss together the flour, baking powder and salt. Add to the shortening mixture, along with the milk and lemon zest, and beat until blended and smooth. Stir in the pecans. Spread evenly in the prepared pan. Bake until a thin wooden skewer inserted in the center of the loaf comes out clean, about 1 hour.
While the bread bakes, make the lemon syrup by combining the sugar and lemon juice in a small bowl. Set aside, stirring occasionally; don't worry if the sugar does not dissolve completely.
Remove the bread from the oven and, using a fork, gently poke the top in several places. Stir the syrup, then slowly drizzle it over the hot bread. Cool in the pan for 15 minutes, then turn out onto a wire rack to cool completely.
Makes 1 medium loaf
Cooks' note:
This recipe carries a double dose of lemon: grated zest in the batter and lemon syrup poured over the bread after baking. For a heavenly dessert, bake it in 2 miniature loaf pans, then top the slices with berries and whipped cream.
March 25, 2008
Sarah: 2008 Cooking Adventure, Week 13
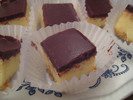
Aw. Yeah. Dulce de leche cheesecake squares, you guys.
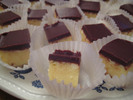
Lisa and I made dessert for our Freaks and Geeks night potluck. They were quite good.
Did you know that dulce de leche is just sweetened condensed milk that's been a little carmelized? It's super easy to make. And here I thought it was some secret, well-guarded recipe. Turns out that even we can make it.
Actually, most parts of this recipe are surprisingly easy. Graham cracker crust? Fast and simple. Dulce de leche? No problem. Cheesecake? We have no fear! Chocolate ganache-like glaze? Not tricky. The only thing that you have to be careful on with this recipe is planning ahead. The cheesecake has to be in the fridge for many hours before you can add the chocolate glaze and serve the squares.
The pan for the cheesecake is only 9x9, but don't let that deceive you. Once you cut it up into little squares, you will have a ton of bite-sized treats. Each one is pretty rich, so we had a bunch left over after serving them to six people.
Recipe is after the jump.
Smitten Kitchen's Dulce de Leche Cheesecake Squares
Time: 9 3/4 hr (includes chilling) (about 1 hour active time)
Makes 64 (1-inch) petits fours
For crust
3 graham crackers, crumbled (about 1 cup)
2 tablespoons sugar
3 tablespoons unsalted butter, melted
For filling
1 teaspoon unflavored gelatin
1/4 cup whole milk
8 oz cream cheese, softened
2 large eggs
3/8 teaspoon salt
1 cup dulce de leche (12 1/2 oz) (recipe follows)
For glaze
3 oz fine-quality bittersweet chocolate (not unsweetened), coarsely chopped
1/2 stick (1/4 cup) unsalted butter, cut into pieces
2 teaspoons light corn syrup
Dulce de Leche (Milk Caramel)
Pour 1 can (14 oz.) sweetened condensed milk into top of double-boiler pan; cover. Place over boiling water. Cook over low heat, stirring occasionally, for 40 to 50 minutes, or until thick and light caramel-colored.
Remove from heat. Whisk until smooth.
Make crust (you can easily do this while the dulce de leche is on the stove): Put oven rack in middle position and preheat oven to 325�F. Line bottom and sides of an 8-inch square baking pan with 2 sheets of foil (crisscrossed), leaving a 2-inch overhang on all sides.
Finely grind crackers with sugar and a pinch of salt in a food processor. With motor running, add butter, blending until combined. Press mixture evenly onto bottom of baking pan. Bake 10 minutes, then cool in pan on a rack 5 minutes.
Make filling: Sprinkle gelatin over milk in a small bowl and let stand 2 minutes to soften. Beat together cream cheese, eggs, salt, and gelatin mixture in a bowl with an electric mixer at medium speed until well combined, about 2 minutes, then stir in dulce de leche gently but thoroughly. Pour filling over crust, smoothing top, then bake in a hot water bath (we fit ours in a 9�13-inch baking pan) in oven until center is just set, about 45 minutes. Cool cheesecake completely in pan on rack, about 2 hours. Chill, covered, at least 6 hours.
Glaze cake within 2 hours of serving: Heat all glaze ingredients in a double boiler or a small metal bowl set over a saucepan of barely simmering water, stirring until smooth, then pour over cheesecake, tilting baking pan to coat top evenly. Chill, uncovered, 30 minutes.
Lift cheesecake from pan using foil overhang and cut into 1-inch squares with a thin knife, wiping off knife after each cut. (Don�t skip this step! Smitten Kitchen isn't kidding when she says this is crucial to making perfect, neat squares.)
Note: Cheesecake (without glaze) can be chilled up to 3 days.
March 22, 2008
Lisa: tortilla soup
As my mom pointed out the other day, I haven't really turned out to be much of a cook. ("You're more of a career woman!" was how she softened the blow.) That said, I think it's really important when you have a family with kids to sit down at a table for a homemade, nutritionally sound dinner every night and talk to each other. Well...now the theoretical kid has become an actual kid who is starting to eat solid foods, so I guess I'd better get this cooking thing figured out.
I checked out a cookbook from the library, and I'm really excited about it. It's called Everyday Food: Great Food Fast from the kitchens of Martha Stewart Living. The photos are gorgeous as always with Martha, and the recipes sound tasty and easy, using regular supermarket ingredients. I got Blake to go through the Spring section with me, and we marked all the recipes we thought would be fun to try. We're going to make a new one each week.
This week's effort was tortilla soup (recipe after the jump), and it was okay. The soup itself is super basic, just chicken broth with shredded, boiled chicken in it. The interest is all in the toppings you add--even the "tortilla" part is a topping. Also, garnishing a brothy (as opposed to creamy) soup with cheese is a little odd. The cheese doesn't blend in and make the soup creamier; it turns into melty self-contained globs floating in the broth, or glomming around bits of chicken or your spoon.


What I wish I'd known beforehand: The instructions as written require you to own two pots large enough to hold more than 8 cups of soup. I only have one pot that big, which meant some last-minute improvising, leading me to momentarily forget about the tortilla strips burning in the oven.
Verdict: The soup was fine, but I probably won't make it again.
Tortilla Soup
Serves 4 * Prep time: 30 minutes * Total time: 30 minutes
For the soup
4 skinless chicken thighs (about 1 1/2 pounds)
1 can (14.5 ounces) reduced-sodium chicken broth
1 jalapeno chile, diced (with seeds for more heat)
6 corn tortillas (6-inch)
3 tablespoons canola oil
Coarse salt
For the garnish
1 cup shredded Monterey Jack cheese (5 ounces)
4 large scallions, thinly sliced (about 1/2 cup)
1 green bell pepper, ribs and seeds removed, diced
1 avocado, peeled, pitted, and diced
1/4 cup cilantro sprigs
1 lime, cut in wedges
1. Preheat the oven to 400 degrees F. In a large pot, bring the chicken, broth, jalapeno, and 8 cups of water to boil over medium-high heat. Reduce the heat to medium; simmer until the chicken is cooked through, about 15 minutes. Transfer the chicken to a plate; let cool.
2. Brush both sides of the tortillas with oil, stacking them as you go. Cut the stack in half, and then slice crosswise into 1/2-inch strips. Place the strips on a rimmed baking sheet; bake, tossing the strips occasionally, until golden, 15 to 20 minutes.
3. Using a large spoon, skim the fat from the surface of the broth in the pot, and strain the liquid through a sieve into a clean pot (you should have about 8 cups). Shred the chicken with a fork or with your fingers, and return it to the pot. Stir in 1 teaspoon salt. Divide the soup among serving bowls, and add the tortilla strips. Garnish as desired.
PLANNING AHEAD
The chicken can be cooked up to a day in advance; cool, then store the chicken and cooking liquid separately in the refrigerator. Shred the meat just before using. You can also use the leftover or store-bought roasted chicken in this soup; use two quarts homemade or reduced-sodium canned chicken broth instead of the cooking liquid.
March 20, 2008
Sarah: 2008 Cooking Adventure, Week 12
For a while when I was around 12 years old, my dad became interested in baking bread. He even purchased a Breadmaker so that we could come home from church to freshly baked bread. He would get excited about the different kinds of mixes formulated especially for the breadmaker, and was always anxious to try his latest purchase. One time he even tried his hand at making bread from scratch, selecting a recipe for Irish Soda Bread.
As the less culinary half of the dynamic duo that is my parents, Dad knew this was an ambitious undertaking. When the small loaf emerged from the oven, my father's pride filled the kitchen and mingled with the aroma of freshly baked bread. He pried the loaf from its pan and sliced into his creation, eager to taste the fruits of his labors.
I watched my dad's face for a reaction as he chewed. And chewed. And chewed. Hmm. We looked back at the loaf sitting on the kitchen counter. I suppose it did look rather... dense. My brother entered the room, no doubt lured by the smell of Dad's latest endeavor. He asked us if the bread was good. Dad responded "Might I suggest a very thin slice."
It was with this culinary pedigree that I attempted my own loaf of Irish Soda Bread in honor of St. Patrick's Day.
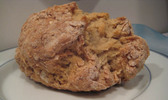
It yielded a much smaller loaf than I'd imagined, but seeing as half of it is still sitting on the kitchen counter, I'd say that it was plenty big enough to taste.
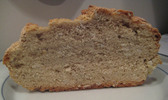
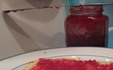
I like that Irish Soda Bread is so fast to make. With only a few ingredients (but plenty of variations online, if you want to get crazy), it's quick to mix together and doesn't have to be kneaded or left to rise for several hours. After a few days, it is a little dry, dense, and boring, but if you eat it fresh from the oven, the bread is dense and biscuit-y and tastes great with butter and jam.
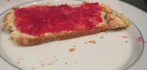
Especially Blake and Lisa's delicious raspberry jam that I keep using without asking permission. Mmm. Sorry guys.
I'll add the recipe and links when I find where I wrote it all down. Sorry!
March 13, 2008
Sarah: 2008 Cooking Adventure, Week 11
Despite my fear of cooking meat, I decided to brave the carnivorous storm to cook Chicken Adobo (found at Eating Out Loud, via TasteSpotting) for the girls. Let me now insert a preface to this recipe. Before I saw a tasty looking photo and recipe, I�d never cooked, tasted, or heard of Chicken Adobo. I didn�t know what it was supposed to look or taste like, and so my changes to this recipe may have seriously damaged the authenticity of this dish. In fact, in the weeks since making Chicken Adobo, I�ve read a little bit that has made me seriously question if my concoction could even be called by that name.
All of that said, I think it was pretty good. Lots of soy sauce meant that it was pretty salty and I think it�d have a more interesting flavor if I had made fewer omissions in the recipe, but the chicken wasn�t dry and it was easy to cook. Perhaps this means I�ll be cooking more meat in the future. I�m even considering making some Irish Stew (with lamb? How ambitious!) in honor of St. Patrick�s Day. I know you�re waiting with baited breath.
My dumbed-down recipe is after the jump.
Chicken Adobo
2 lbs. chicken
1/2 cup white vinegar (I used apple cider vinegar, because I had it on hand)
1/2 cup soy sauce
2 cups water
3 garlic cloves crushed
Juice from 1 lemon (I guesstimated by using bottled lemon juice)
In a medium pan, add the garlic, soy sauce, vinegar, water, and lemon juice. Cut chicken into chunky pieces. Place the chicken in the pan and allow to marinate for 15 minutes before turning on the burner.
Turn burner to medium heat and bring pan to a boil. Adjust heat and simmer for 45 minutes. Keep pan partially covered. At this point, if the sauce tastes too salty or bitter, add a tablespoon or two of sugar, to taste. The liquid will reduce to form a sauce on the meat. Serve over rice.
March 04, 2008
Sarah: 2008 Cooking Adventure, Week 10
As promised last week, I used another recipe from Gourmet Girl to make this noodle salad:
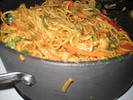
Asian Noodle Salad with Spicy Peanut Sauce
1 lb. linguini, cooked al dente in salted water
1 red bell pepper, sliced thinly
2 carrots, julienned
1 can water chestnuts, sliced
1/2 teaspoon minced garlic
1/2 cup cilantro, chopped
1 teaspoon ginger
1 recipe peanut sauce found here
1/4 cup chopped salted peanuts for sprinkling on top
Place all ingredients in a large bowl. Whisk 2 cups peanut sauce with up to 3 tablespoons of water to thin it out a little bit. Learn from my mistake: Don't think you'll be eliminating a dirty dish by simply adding the peanut sauce and the water to the noodle mixture separately. This will not mix them together and the peanut sauce will stay super thick and it will be a gluey mess. Add peanut sauce to noodles and vegetables and toss together until evenly coated. Garnish with chopped peanuts and herbs. Serve warm, cold or at room temperature.
February 19, 2008
Sarah: 2008 Cooking Adventure, Week 8
Naan: noun A delicious flatbread specially designed to soak up curry or other sauces. Also effective at absorbing human saliva brought on by the aromas of said sauces.
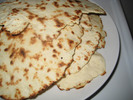
Add garlic for an especially savory and delicious naan to serve with curry. Or skip the garlic so that the naan is still great with dinner, but also works as breakfast (top with a dollop of jam? wrap around scrambled eggs?) or as the crust of mini pizzas. The possibilities are endless!
Obviously, I am having trouble overcoming a mental block about cooking with meats. I'm working on it.
Recipe after the jump.
Naan
1 (.25 oz) package active dry yeast
1 cup warm water
1/4 cup sugar
3 tablespoons milk
1 egg, beaten
2 teaspoons salt
4 1/4 cup flour
2 teaspoons minced garlic (optional)
oil or butter for pan
In a large bowl, dissolve yeast in warm water. Let stand about 10 minutes, until frothy. Stir in sugar, milk, egg, salt, and flour to make a soft dough. Knead for 6-8 minutes on a lightly floured surface, or until smooth. Place dough in a well oiled bowl, cover with a cloth, and set aside to rise for 1 hour or until the dough has doubled in volume.
Punch down dough and knead in garlic, if using. Pinch off small golf ball sized handfuls of dough. Roll into balls and place on a tray to rise about 30 minutes, until doubled in size.
Heat a lightly oiled pan to medium high heat on stove (or use a grill, if you have one). Roll out each ball of dough into a thin circle. Cook for 2-3 minutes or until puffy and lightly browned. Turn over and cook the other side. You can also brush each side with butter before cooking.
February 13, 2008
Sarah: 2008 Cooking Adventure, Week 7
The snow just won't quit, dudes. Today was a bit rough and with the snow on top of that, I needed some comfort food. Thank goodness for Jeremy, who suggested that I try this recipe.
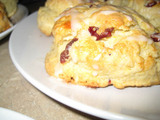
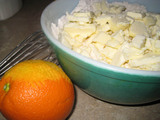
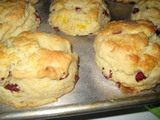
My house smells like cranberries and oranges right now. I want to make a blanket cocoon and never leave. I think I'm actually excited to wake up tomorrow morning, so that I can have a scone for breakfast.
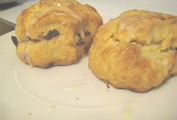
Honey, we're having twins!
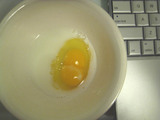
That's just one egg. Yes, I'm a nerd.
Cranberry Orange Scones
4 cups plus 1/4 cup all-purpose flour
1/4 cup sugar, plus additional for sprinkling
2 tablespoons baking powder
2 teaspoons kosher salt
1 tablespoon grated orange zest
3/4 pound cold unsalted butter, diced
4 extra-large eggs, lightly beaten
1 cup cold heavy cream
1 cup dried cranberries
1 egg beaten with 2 tablespoons water or milk, for egg wash
1/2 cup confectioners' sugar, plus 2 tablespoons
4 teaspoons freshly squeezed orange juice
Preheat the oven to 400 degrees F.
Sift together 4 cups of flour, 1/4 cup sugar, the baking powder, salt and orange zest. Add the cold butter and mix with a hand mixer at the lowest speed until the butter is the size of peas. Combine the eggs and heavy cream and, with the mixer on low speed, slowly pour into the flour and butter mixture. Mix until just blended. The dough will look lumpy! Combine the dried cranberries and 1/4 cup of flour, add to the dough, and mix on low speed until blended.
Dump the dough onto a well-floured surface and knead it into a ball. Flour your hands and a rolling pin and roll the dough 3/4-inch thick. You should see small bits of butter in the dough. Keep moving the dough on the floured board so it doesn't stick. Flour a 3-inch round plain or fluted cutter (I just use a round glass, because that's what I own) and cut circles of dough. Place the scones on a baking pan lined with parchment paper. Collect the scraps neatly, roll them out, and cut more circles.
Brush the tops of the scones with egg wash, sprinkle with sugar, and bake for 20 to 25 minutes, until the tops are browned and the insides are fully baked. The scones will be firm to the touch. Allow the scones to cool for 15 minutes and then whisk together the confectioners' sugar and orange juice, and drizzle over the scones.
February 11, 2008
Sarah: 2008 Cooking Adventure, Week 5 and 6
There aren't any pictures this week, as my cooking has been a bit uninspired. I've been spending my time snowmobiling and deep cleaning my apartment instead of measuring and mixing. I also didn't feel like buying new ingredients or following recipes. I'm sorry.
So enough with the excuses, here's what I made:
Week 5: Pasta Bake
Pour a box of dry pasta, a few cups of water, some veggies, and a bottle of pasta sauce into an oven safe pot. Cook at 375 degrees while you clean your bathroom, dust your bookshelves, wash any dishes in the sink, take out the trash, and organize your junk surface (don't we all have one? Mine is the little buffet right next to my front door.). If you don't smell the pasta yet, go back to the bathroom and go through your cupboards, throwing out dried up nail polish, sample-sized conditioner that came with the at-home hair dye kit you used to turn your hair black over a year ago, and any other items you have no use for. Now can you smell the pasta? Good. Open up the oven, remove the lid, and sprinkle cheese on top. Close the oven and let the pasta cook about five or ten more minutes. Done!
Week 6: Baked Apples, Mmmm
Chop up three apples into a small oven safe dish (I used my little Corningware). Add about 1/2 cup water, a little sugar, and plenty of cinnamon. Cover your dish with foil and place in oven at 350 degrees. Let the apples cook while you eat dinner, then remove from oven and serve either by themselves or with vanilla ice cream.
See what I mean? These are not revolutionary culinary masterpieces. I'll try to step it up this week.
January 24, 2008
Sarah: 2008 Cooking Adventure, Week 4
Oh ma gaaahhhh, you guys.
Homemade curry makes my life so much better.
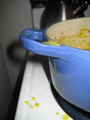
And I made up the recipe myself. I have never made curry before, but I couldn't find a recipe that matched the idea in my brain. "So I made some changes, using my own creative ideas."
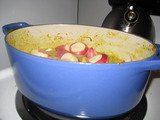
I let the curry simmer until the potatoes were practically falling apart. It was really tasty. At least according to me.
Recipe after the jump.
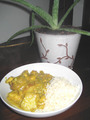
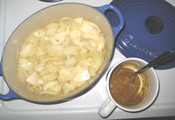
Chicken Curry with Potatoes and Cashews
(makes about 6 to 8 servings)
2 cloves garlic, finely minced
2 small yellow onions, coarsely chopped
1 1/2 tsp ginger
4 T curry powder
4 T water
1 T olive oil
1 cup coconut milk
1/2 cup milk (I used skim, but you could use whatever.)
10 small red potatoes, halved (or substitute about 2 regular potatoes)
3 chicken breasts, cubed
handful of cashews, chopped
salt to taste
Combine garlic, onion, ginger, and olive oil and saute until browned. In a separate small bowl, mix together curry powder and water. Add curry paste to onion mixture and saute together until smell is strong and fragrant.
Stir in coconut milk and regular milk. Then add potatoes and chicken and bring to a boil. Reduce heat and let simmer until chicken is cooked and potatoes are tender, about 25 minutes.
Stir in cashews and add salt to taste. Cook up some rice and enjoy!
January 23, 2008
Sarah: Mmm, Pie!
Today is National Pie Day. Not to be confused with Pi Day, this might be one of the tastier holidays that come to mind. Thanks to the American Pie Council (yes, my mind blew also) for designating this holiday. I am happy to support any organization "designed to raise awareness, enjoyment and consumption of pies." I always do my part to raise the consumption of pies. So celebrate this delicious holiday! Join the American Pie Council in solidarity or cook up your favorite flavor, if pies are in your culinary repertoire. If not, run out, buy a pie, and come over to my house. We can celebrate together, and I'll make the dinner if you bring the pie!
January 17, 2008
Sarah: 2008 Cooking Adventure, Week 3
When you come home from class in the middle of the week, and your fast food intake in the new year is almost as nonexistent as your dating life (good and bad, respectively), you might as well cook up some Black Bean and Rice Soup. It's easy!
Add beans, tomatoes, onion, garlic, and spices to your favorite pot. Forget that you are supposed to add chicken stock. Leave the pot on the stove on low while you do homework for two hours. You're so responsible. And your hair is so shiny!
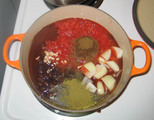
Return to the stove, add rice. Leave the soup uncovered in hopes that it will thicken. I love thick soup. Do the dishes because you are adorably domestic. And have straight, pretty teeth!
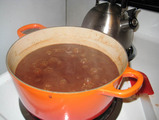
Add the bright green cilantro. Gather up some containers. You've just made lunch for a week. How fiscally responsible of you! Did I mention that your butt looks cute in those jeans?

Isn't it strange that, even though you first moved out of your parents' house almost six years ago, you don't own a ladle? Or really any serving utensils? Odd. Hey, remember that one time a couple years ago when you were acting depressed and said something like 'I'm just going to sit on my couch and eat sheet cake with a spoon' (because really, what's more depressing than that?) and your friends actually brought you a sheet cake and a spoon? Yes, I know they're adorable. But that spoon was also nice and deep, You can use that for the soup.
So, you took pictures of the new package of semi-disposable containers that you use when you bring lunches to work? That's... helpful. By the way, your new shoes are so hot.
Oh wait! You forgot something you were going to add to the soup. Did you just remember the chicken stock that is in the original recipe that is printed and sitting right in front of you? No, silly.
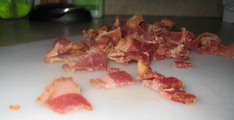
Bacon, of course. Just go ahead and sprinkle a bit on the top of each portion. Now, make sure that all of the tabs on the lids point the same way in your fridge. That is very important. No, it's not a sign of neurosis at all.
Recipe after the jump.
Black Bean and Rice Soup
makes 6 servings, recipe adapted from Kalyn's Kitchen recipe)
2 cans black beans with liquid
2 cans diced tomatoes
2 cups chicken stock or canned chicken broth (hi, I always forget ingredients! I bet that, if you remembered this, it would thin out the soup a bit, but probably tone down how spicy it is. I guess my forgetting this ingredient might make it optional.)
1/4 cup finely chopped onion
1 tsp. minced garlic
1 T ground cumin
1 T dried oregano
1 tsp. chile powder
1/4 cup white long-grain rice
1/3 cup chopped fresh cilantro
1/3 cup chopped bacon
1 or 2 limes (optional) for garnish
In a 3 quart sauce pan, combine beans, tomatoes, chicken stock, onion, garlic, cumin, oregano, and chile powder. Cook on low for 2 hours on stove, until tomatoes are disintegrating and beans are starting to fall apart. Add 1/4 rice and cook until rice is done, about 30 minutes. Add cilantro and bacon and cook 5 minutes. Serve hot, with a wedge of lime for each person to squeeze into soup.
Update: I didn't try the soup when I first cooked it because I'd already eaten and wasn't hungry. Dumb, I know. Verdict: Without the chicken stock and with less cilantro than the original recipe, it was too sweet. I'm going to put it all back on the stove, add the stock and some salt.
January 13, 2008
Sarah: 2008 Cooking Adventure, Week 2
For the second week in a row, I cooked up a recipe from Smitten Kitchen. Ever since I read this entry, I've been salivating over the idea of beautiful roasted onions overflowing with homemade stuffing.
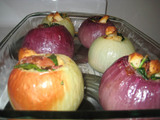
The result is definitely very pretty. I'm not sure that it's quite impressive enough, however, to be with the work.
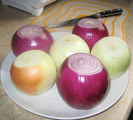
Hollowing the onions took for. ev. er. I found that gouging out the insides of onions is the perfect way to get them to squirt their juices directly into my eyes. I cried so much that I had to wash my hands and take a break. Thank goodness for my stainless steel soap. It killed the onion smell on my hands, but there was nothing to be done for the smell that seemed to have permeated every corner of my kitchen.
After the onions were hollowed and the bacon was cooked, throwing together the stuffing was easy, especially since I used bread that had already been cubed and toasted for use in stuffing. Lazy, I know, but the grocery store didn't have any loaves that looked just right to me, so I figured I'd give that bag a whirl. This recipe is simple and makes a pretty, colorful and tasty stuffing.
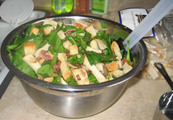
I halved the recipe and only stuffed six onions. I still had a small dish of extra stuffing. I didn't realize until several hours after cleaning up that I had forgotten to include the cashews. Doh!
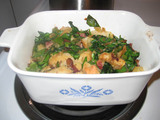
Verdict: This is a pretty, easy stuffing. I think the crunchy cashews would make it even better. I'll definitely add some to the leftovers. As far as the onion shells are concerned, I think this is too much work for me. Yes, the presentation is impressive and they infuse the stuffing with their flavor, but that ended up tasting a bit too onion-y for my taste, and the onion is just waste anyway. With the color of the spinach and the interest of the bacon and cashews, I think you could serve this stuffing in a large bowl and your guests wouldn't know the difference. I'd make the stuffing again, but not the roasted onions.
Recipe after the jump.
Roasted Stuffed Onions
Gourmet Magazine, November 2002
If you wish to make this vegetarian, simply omit the bacon, and cook the filling in olive oil instead. Vegetable stock can be swapped for turkey.
If you�re stressing because you have a lot of guests coming over, you can definitely do the onion-hollowing step a day or two in advance. The stuffing can be made in advanced as well, then brought to room temperature before filling and baking.
10 medium red and yellow onions (4 lb)
1 lb sliced bacon, cut crosswise into 1-inch-wide pieces
3 celery ribs, cut crosswise into 1/2-inch-thick slices
1 teaspoon salt
1 teaspoon black pepper
3 garlic cloves, minced
15 oz baby spinach, trimmed and coarsely chopped (14 cups)
1 (9-inch) round loaf country-style bread (1 1/4 lb), cut into 1/2-inch cubes (10 cups), lightly toasted
2 cups salted roasted cashews (10 oz), coarsely chopped
1 stick (1/2cup) unsalted butter, melted
1 1/4 cups turkey giblet stock
Make onion shells: Cut a 1/2-inch-thick slice from tops of onions, discarding tops, and trim just enough from bottoms for onions to stand upright. Scoop out all but outer 2 or 3 layers from each using a small ice cream scoop or spoon (don�t worry if you make a hole in the bottom), reserving scooped-out onion and onion shells separately.
Make stuffing: Coarsely chop enough scooped-out onion to measure 3 cups.
Cook bacon in 2 batches in a 12-inch heavy skillet over moderate heat, stirring, until crisp, about 10 minutes, then transfer with a slotted spoon to paper towels to drain, reserving about 1/3 cup fat in skillet.
Add chopped onion, celery, salt, and pepper to skillet and saut� over moderately high heat, stirring, until vegetables are softened, about 5 minutes. Add garlic and saut�, stirring, 1 minute. Transfer mixture to a large bowl and stir in spinach, bread, cashews, butter, 1 cup stock, and bacon, then cool completely.
Roast onions: Preheat oven to 425�F. Arrange onion shells, open sides up, in a 13- by 9- by 2-inch baking pan, then add 1/2cup water and cover pan tightly with foil. Roast onions in middle of oven until tender but not falling apart, 25 to 30 minutes.
Stuff and bake onions: Reduce oven temperature to 350�F. Transfer shells to a work surface and pour off water in pan. Fill shells with stuffing, mounding it, and return to pan. Reserve 5 to 7 cups stuffing for turkey cavity, then put remaining stuffing in a buttered shallow 3 1/2-quart baking dish and drizzle with remaining 1/4 cup stock.
Bake stuffed onions and stuffing in dish in middle of oven, uncovered, until heated through, about 25 minutes.
January 08, 2008
Sarah: 2008 Cooking Adventure, Week 1
On this first weekend of 2008, I baked up a batch of mini pretzels with the help of my lovely assistant, Mallory.
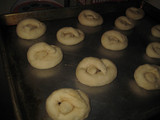
Something was a bit off with the dough (I think that it couldn't rise enough in my chilly apartment), but I pressed on, undaunted. They were such cute, chubby little buggers.
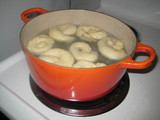
Poaching them made them puff up even more. They came unknotted somewhat, but who cares? I used my pretty new pot, because, why not?
Mallory (whose stunningly beautiful visage will not appear in this entry, at her request) applied the egg wash and salt (not too much! Aside from having cute new bangs, Mallory is a salt-application genius. She could totally work at a PretzelMaker) and then we popped them in the oven.
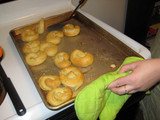
I think these are the tastiest while they're hot. They keep for a few days uncovered and beg to be dipped in mustard and enjoyed with a fizzy beverage.
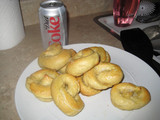
I was, of course, happy to oblige.
The recipe is after the jump.
Next week: I'm deciding between beef stew, roasted stuffed onions, or something fabulous suggested by a reader. Votes? Suggestions?
Soft Pretzels
recipe found at Smitten Kitchen, originally from Martha Stewart
Makes 16 full-sized or 32 miniature
2 cups warm water (100� to 110�)
1 tablespoon sugar
1 packet active dry yeast
5 to 6 cups all-purpose flour, plus more for dusting
1 tablespoon salt
2 teaspoons canola oil
2 tablespoons baking soda
1 large egg
Coarse or pretzel salt
Vegetable-oil cooking spray
1. Pour warm water into bowl of electric mixer fitted with a dough hook. In a small bowl, combine water and sugar, and stir to dissolve sugar. Sprinkle with yeast, and let sit 10 minutes; yeast should be foamy.
2. Add 1 cup flour to yeast, and mix on low until combined. Add salt and 4 cups flour, and mix until combined, about 30 seconds. Beat on medium-low until dough pulls away from sides of bowl, about 1 1/2 minutes. Add 1/2 cup flour, and knead on low 1 minute more. If dough is still wet and sticky, add 1/2 cup more flour (this will depend on weather conditions); knead until combined, about 30 seconds. Transfer to a lightly floured board, and knead about ten times, or until smooth.
3. Pour oil into a large bowl; swirl to coat sides. Transfer dough to bowl, turning dough to completely cover all sides. Cover with a kitchen towel, and leave in a warm spot for 1 hour, or until dough has doubled in size.
4. Heat oven to 450�. Lightly spray two baking sheets with cooking spray (parchment paper, ungreased, also works). Set aside. Punch down dough to remove bubbles. Transfer to a lightly floured board. Knead once or twice, divide into 16 pieces (about 2 1/2 ounces each) or 32 if making miniature pretzels, and wrap in plastic.
5. Roll one piece of dough at a time into an 18-inch-long strip. Twist into pretzel shape; transfer to prepared baking sheet. Cover with a kitchen towel. Continue to form pretzels; eight will fit on each sheet (you may need a third sheet if making miniatures). Let pretzels rest until they rise slightly, about 15 minutes.
6. Meanwhile, fill large, shallow pot with 2 inches of water. Bring to a boil. Add baking soda. Reduce to a simmer; transfer three to four pretzels to water. Poach 1 minute. Use slotted spoon to transfer pretzels to baking sheet. Continue until all pretzels are poached.
7. Beat egg with 1 tablespoon water. Brush pretzels with egg glaze. Sprinkle with salt. Bake until golden brown, 12 to 15 minutes. Let cool on wire rack, or eat warm. Pretzels are best when eaten the same day, but will keep at room temperature, uncovered, for two days. Do not store in covered container or they will become soggy.
January 02, 2008
Sarah: Here's to a tasty 2008
Lisa's baking reminded me of one of my resolutions for 2008. I plan to cook or bake something new each week of the year. After all, with the Writers' strike dragging on (Come on, execs, we all want this to end. Compromise!), there isn't anything good on tv anyway. That means I'll need 52 recipes and friends willing to be my culinary victims. Someone who is willing to wash dishes for food is preferred, but anyone that wants to come over on the weekend (I'm thinking it'll probably be on Sundays) and chat and taste with me is welcome. I'm excited to put my new apron, pots, and knives to work, and would love suggestions on what to make.
This week, I think I'll try pretzels.
Someone who is also interested in expanding their culinary repertoire and is a fan of cheese should try making cheese at home.
December 31, 2007
Lisa: chocolate chip cookies
As part of the splurge that precedes every good diet, I made chocolate chip cookies. Not just ANY chocolate chip cookies, mind you--these cookies from Gourmet on Epicurious, found via Super Eggplant. These cookies are by far the best I have ever made. They are big, chewy without being too thin or raw, and completely delicious. Blake ate three, which is saying something considering his usual abhorrence of sweets. The recipe is kind of finicky (yes, I actually measured out 1 3/4 tablespoons of an egg), but I followed every step except for flattening the mounds of dough with a moistened palm. Gross, right? Anyway, they spread out just fine on their own. [Recipe after the jump in case that link ever dies.]
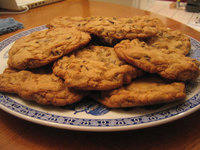
Thanks, Sarah, for your help--and for the use of your hand mixer after mine ingested its own power button. On a completely unrelated note, does anyone know how to get melted butter out of clothing? Washing it in cold just makes little butter balls on the surface, and I'm afraid hot will just melt it back in again.
For those of you who are much more domestically advanced than I am (and I don't kid myself, that is probably most people), regular chocolate chip cookies might seem too elementary. To you I give Bacon Chocolate Chip Cookies with Maple Cinnamon Glaze. You're welcome.
Chocolate Chip Cookies
Gourmet | October 2003
Adapted from Carla Rollins
Active time: 35 min Start to finish: 2 hr
Servings: Makes about 28 large (4 1/2-inch) cookies.
Ingredients
3 cups all-purpose flour
1 1/2 teaspoons baking soda
1 1/2 teaspoons salt
2 sticks (1 cup) unsalted butter, melted and cooled slightly
1 1/2 cups packed light brown sugar
1 cup granulated sugar
3 large eggs
1 1/2 teaspoons vanilla
2 1/2 cups semisweet chocolate chips (16 oz)
Preparation
Put oven rack in middle position and preheat oven to 375�F. Line 2 large baking sheets with parchment or wax paper.
Whisk together flour, baking soda, and salt in a small bowl.
Beat together butter and sugars in a large bowl with an electric mixer at high speed until pale and fluffy, 2 to 3 minutes. Lightly beat 1 egg with a fork in a small bowl and add 1 3/4 tablespoons of it plus 2 remaining whole eggs to butter mixture, beating with mixer until creamy, about 1 minute. Beat in vanilla. Reduce speed to low and mix in flour mixture until just blended, then stir in chips.
Scoop 1/4 cup batter for each cookie, arranging mounds 3 inches apart, on 2 baking sheets. Flatten mounds into 3-inch rounds using moistened palm of your hand. Form remaining cookies on additional sheets of parchment.
Bake, 1 sheet at a time, until golden, 13 to 15 minutes. Transfer cookies to a rack to cool and continue making cookies in same manner using cooled baking sheets.
Cooks' note:
Cooled cookies keep in an airtight container at room temperature 3 days.
December 13, 2007
Sarah: Come Over for Tea and Cookies!
Christmas time inevitably makes me feel like baking, and now that school is over until January, I have a bit more free time on my hands. Last night I got started on my recipes-to-try list and made these dainty little cookies. They so so easy to make and end up sweet, light, and crunchy-yet-soft, and would go perfectly with a cup of coffee, tea, or hot chocolate. I want to bundle up with a little plate of these cookies, a steaming mug of something tasty, and a friend to either watch a Christmas movie or just talk. I think these are a great cookie for parties because they're bite-size and pretty.
Russian Tea Cakes/Mexican Wedding Cakes
1 cup (2 sticks) butter, room temperature
2 cups powdered sugar
2 teaspoons vanilla extract
2 cups all purpose flour
1 cup pecans, hazelnuts or other nuts, toasted and finely ground (if using hazelnuts, wrap in a dishtowel while still warm and roll about until most of the brown skins come off. I used pecans.)
1/8 teaspoon ground cinnamon (optional, but cinnamon makes everything better, wouldn't you agree?)
Using electric mixer, beat butter in large bowl until light and fluffy. Add 1/2 cup powdered sugar and vanilla; beat until well blended. Beat in flour, then nuts. Divide dough in half; form each half into ball. Wrap separately in plastic; chill until cold, about 30 minutes.
Preheat oven to 350�F. Whisk remaining 1 1/2 cups powdered sugar and cinnamon, if using, in pie dish to blend. Set cinnamon sugar aside.
Working with half of chilled dough, roll dough by 2 teaspoonfuls between palms into balls. Arrange balls on heavy large baking sheet, spacing 1/2 inch apart. Bake cookies until golden brown on bottom and just pale golden on top, about 18 minutes. Cool cookies 5 minutes on baking sheet. Gently toss warm cookies in cinnamon sugar to coat completely. Transfer coated cookies to rack and cool completely. Repeat procedure with remaining half of dough. (Cookies can be prepared 2 days ahead. Store airtight at room temperature; reserve remaining cinnamon sugar.)
Sift remaining cinnamon sugar over cookies and serve.
Makes about 4 dozen. (Or so they claim. My batch probably made about 3 dozen, but that's still plenty!)
December 12, 2007
Sarah: Noggin'
Jeremy encouraged his friends to each post a favorite holiday recipe, and my mind was swimming with possibilities. After all, my mom is a legendary great cook, so the holidays offer a dizzying array of delicious items coming from her kitchen.
One recipe that I think is different than a dozen others you might already have, is my mom's homemade eggnog. This isn't a boozey concoction, so you may have to look elsewhere if that's your sort of thing, but this is one tasty, foamy drink, and the only eggnog that I like.
Mom's Eggnog, recipe serves six people
Separate 6 eggs. Beat the yolks until thick and lemon colored and beat the whites until they make peaks, but not until they are dry.
Whip a half pint of whipping cream with 1/4 cup powdered sugar and 1 teaspoon vanilla.
Fold these three mixtures together gently.
Add about 4 cups milk (mom says any combination of 2%, whole, or half and half that you want), another teaspoon of vanilla, a little nutmeg, and sugar until sweet (start with about 3 tablespoons and then more as needed.). You'll want to mix the milk mixture with the fluffy stuff, but only til they're about evenly distributed. You don't want to lose all of the air that you blended into the eggs and whipped cream.
Top with a little more nutmeg. Lemon zest also tastes good on top. Serve.
November 06, 2007
Sarah: Recipe Exchange
Adorable Jeremy invited me to participate in a recipe exchange. I decided to share a recipe I found (I think while I was looking for a yummy soup recipe) at Smitten Kitchen. I don't know much about the author, Deb, but I do know that she makes delicious looking foods and photographs them wonderfully. Mmm. Anyway, without further ado, I present to you a perfect comfort food dessert for autumn and winter. This recipe includes so many things I love about food: pumpkin, spices, bread, and sugar mixed right in. Tantilized yet? I hope so.
Pumpkin Bread Pudding
Adapted from Gourmet Magazine, October 2007
1 1/2 cups whole milk (Or 1 cup heavy cream plus 1/2 cup whole milk)
3/4 cup canned solid-pack pumpkin
1/2 cup sugar
2 large eggs plus 1 yolk
1/2 teaspoon salt
1 teaspoon ground cinnamon
1/2 teaspoon ground ginger
1/8 teaspoon ground allspice
Pinch of ground cloves
2 tablespoons bourbon (optional)
5 cups cubed (1-inch) day-old baguette or crusty bread
3/4 stick unsalted butter, melted* (can skip this step if using the second set of instructions)
Preheat oven to 350 degrees F with rack in middle.
Gourmet's Instructions: Whisk together pumpkin, cream, milk, sugar, eggs, yolk, salt, spices (I added extra spices) and bourbon (I made it without bourbon and it was still great), if using, in a bowl.
Toss bread cubes with butter in another bowl, then add pumpkin mixture and toss to coat. Transfer to an ungreased 8-inch square baking dish and bake until custard is set, 25 to 30 minutes.
Alternate, Come On, Be Lazy With Me, instructions (I followed these instructions, obviously. Lazy? I'm in.): While preheating oven to 350 degrees F with rack in middle, melt butter in bottom of a 8-inch square baking dish. Once it is melted, take it out of the oven and toss bread cubes with butter, coating thoroughly. In a separate bowl, whisk together all the remaining ingredients. Pour them over buttered bread cubes in baking dish, stirring to make sure all pieces are evenly coated. Bake until custard is set, 25 to 30 minutes.
Hey! Are you still there? Awesome! If you want to participate in the recipe exchange, it's easy! I've attached the exchange email script after the jump. Just follow the instructions and we all get more yummy recipes (maybe I'll even get one for that homemade soup I've been craving). Delightful!
1. Jeremy: hobbes8u at yahoo dot com
2. Sarah: sarah at twolooseteeth dot com
Hello! You've been invited to be part of a recipe exchange! Please send a recipe to the person whose name is listed in the number 1 position above. It should preferably be something quick, easy, without rare ingredients. Actually, the best is the one you know in your head and can type out and send right now. Then, copy this letter into a new email, move my name to the number 1 position, and put your name in the number 2 position. Only your name and mine should appear in this list when you send out your email. Please send this to 20 friends. If you cannot do this within 5 days, please let me know so it will be fair to those participating. You should receive 36 recipes. It is fun to see where these recipes come from! Seldom does anyone drop out because we can all use new recipes. The turn around is fast because only 2 names are on the list. Have fun with it!
November 05, 2007
Sarah: Honey, You Baked!
In a recent flurry of domesticity, I decided to try the much talked about No-Knead Bread. The ingredients are so simple: flour, salt, yeast, and water. So around 1 pm on a Sunday, I mixed up the dough and then read on in the directions. Let the dough sit for at least 12 hours. Um. And then another two hours. I obviously had planned poorly. So after the dough sat through the night... and then while I was at work... and at school, I decided to throw away the dough. Because, obviously: Ew.
So how hard could kneading be? It would seem that long blocks of time would be more difficult for my schedule than a little kneading. I found a new recipe via Not Martha with the same simple ingredients and a significantly faster timeline.
The result? A tasty lunch of soup and homemade bread. Mmmm. This could be the start of something wonderful.
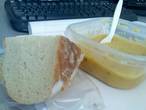
February 26, 2007
Sarah: Honey, you baked!
Let it never be said that I can't work at something. Remember my catastrophic cupcake project? Well, my baking spirit was not dampened.
Last weekend I finally had a successful concoction emerge from my oven. Following this recipe (fool-proof? I can do that!), I produced what I think turned out to be some tasty souffle.
Making it was quite easy. Here are the instructions with some of my own blurry, poorly-lit photos.
Preheat the oven to 350 degrees, with the rack in the center.
Prepare the souffle container: butter the sides, then sprinkle with some sugar so the souffle can climb the walls. I used ramekins, because individual servings are pleasing.
Heat 1 cup heavy cream until it simmers in a medium saucepan. I probably took the cream off a tad early, because I was worried it would burn. I think it's fine as long as the cream is hot enough to melt the chocolate.
Pour the hot cream over 8 oz. bittersweet chocolate that has been broken up into small pieces (I used Ghirardelli) in a heatproof bowl. Stir it until it is smooth, and uniform in color.
 + cream =
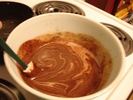
Looks tasty, huh?
Beat seven egg whites and two tablespoons of sugar until they are stiff and shiny.
Mix about 1/4 of the beaten egg whites in with the chocolate to lighten it.
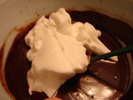
Pour the lightened chocolate mixture into the egg whites. Fold them together using a rubber spatula. Break up any large streaks of whites, but in the end, this is more about keeping it light than making it even.
Spoon the souffle batter into the prepared dish, and bake for 15 minutes. When done, it should be nice and puffy. I wish I'd taken a picture of the ramekins right as they came out of the oven, because they were truly a thing of beauty. They still looked pretty good when I served them to Lisa and Blake, topped with powdered sugar and raspberries.
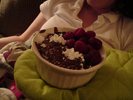
Ta-Da!
October 19, 2006
Sarah: Betty Crocker, Rescue Me
My grandma worked for many years as a Home Economics teacher, instructing countless cooking classes. My mom won the title as her school's Betty Crocker Homemaker of Tomorrow. The domesticity gene runs in the family, but apparently took a detour around me. I offer as proof my latest kitchen endeavor.
Using a recipe from this book, I attempted to make pumpkin cupcakes with cream cheese icing for our girls night. Sounds delicious, right?
Wrong. Apparently baking cupcakes from scratch is harder than it looks. Cream cheese frosting, however, is simple and delicious.
The cupcake saga: I doubled the recipe and measured ingredients exactly. I preheated the oven, set the timer, and did everything right. Here is my first batch:
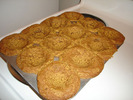
Complete disaster. They were so large that they flowed into each other, then they deflated and made sad little concave puddles of moist cupcake. I decided that the problem was I had overfilled the tins, and perhaps I opened the oven one too many times. I prepared the second batch, leaving more room at the top of each cup. I set the timer and left the oven completely alone.
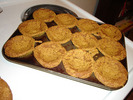
These were actually a little bit better. Although just as sunken, there was not as much lateral cupcake expansion, and the bottom of the cupcake was actually quite tasty. Still, these monstrosities were too hideous to give away.
After two bad batches, I was filled with sadness and a little bit of self-loathing. How hard could cupcakes be? Too hard for a Wednesday night, apparently.
The frosting, which I made while Cupcake Batch #2 was baking, had much better results.
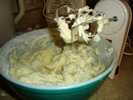
See? Tasty. So... want some frosting? Here's a spoon.
January 04, 2006
Lisa: I dip, you dip, we dip
I am officially a grownup. Proof: I was given a food assignment for an extended-family Christmas party! My aunt asked me to bring bean dip. I know, it's not homemade rolls or anything, but you have to start small.
Here's the fabulous dip I made. I arranged the tomato and green onion in stripes for extra festivity.
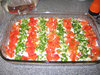
You can see from the cross-section that I achieved the proper beans-to-other-goop ratio. The pitfall of too few beans is all too common. The layers are (from the bottom) refried beans, salsa, grated cheese, sour cream, and tomato/green onion. Yummy!