
February 26, 2017
Lisa: Deliver the letter, the sooner the better
If you follow me on Twitter, you've undoubtedly noticed that added to the old mix of quotes from my kids and my thoughts on various snack foods are a lot of retweets of political posts and feminist statements. I'm pretty unhappy about the direction our government is moving, and I'm worried that Trump and his compatriots are bombarding us with a ton of terrible things up front so that we'll get tired and stop resisting. I'm also worried about the general level of stress and anxiety floating around, and I know it's not a sustainable situation. I read this article, "How to Stay Outraged Without Losing Your Mind," which is full of good advice on focusing your energy, making activism fun, and self-care.
I'm not sure if my mom read the same article, but she shared with me her idea of how to keep resisting without being angry, anxious, and sad every single day. Her plan is to 1) not read the news first thing in the morning, and 2) calmly make three calls to her legislators every day as part of her routine after lunch. I wanted to figure out a way to incorporate resistance into my daily routine too, but I knew that making daily calls wasn't going to be the answer. I'm a weird hermit and it takes me days to gear up to making a call or two, even with the awesome directions from 5 calls, and then I'm weirdly relieved when I get sent to voicemail--or even when voicemail boxes are full.
Inspiration hit with the indomitable Zina Bennion's Jason Chaffetz Mail Campaign (which is Monday, February 27, and something any of you from Utah should absolutely participate in). Her idea is a deluge of postcards, showing Chaffetz what real Utah voters actually want. Postcards can be processed more quickly and efficiently than letters in envelopes, and as far as I know a snail-mailbox can't be too full to accept new messages. I'm going to start with this campaign, and then keep on writing two or three postcards each day to different legislators about whatever issues I'm currently worried about.
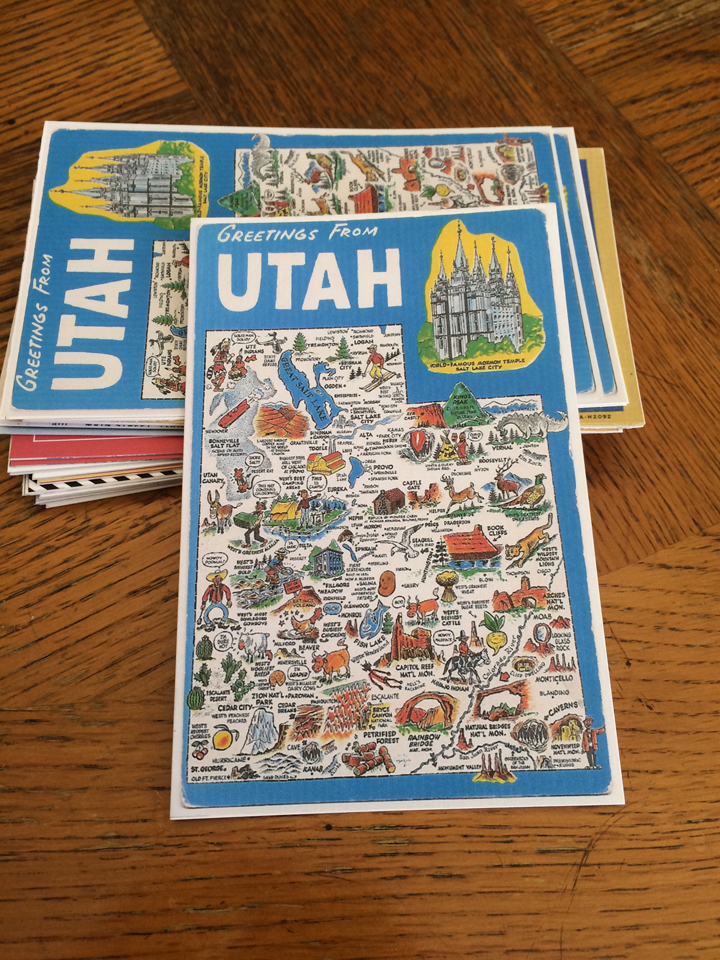
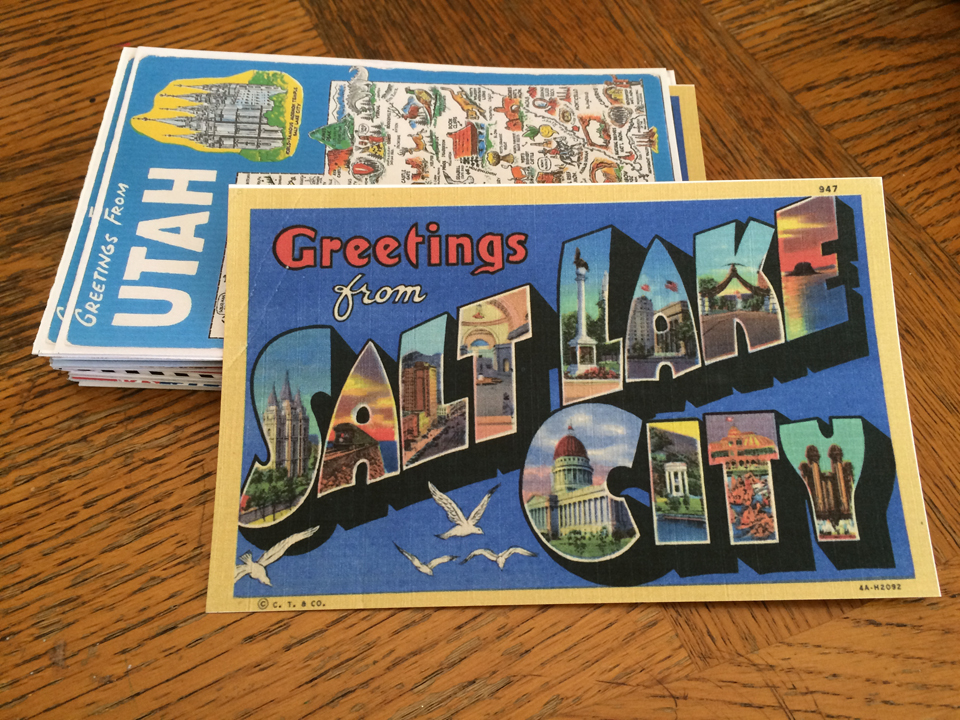
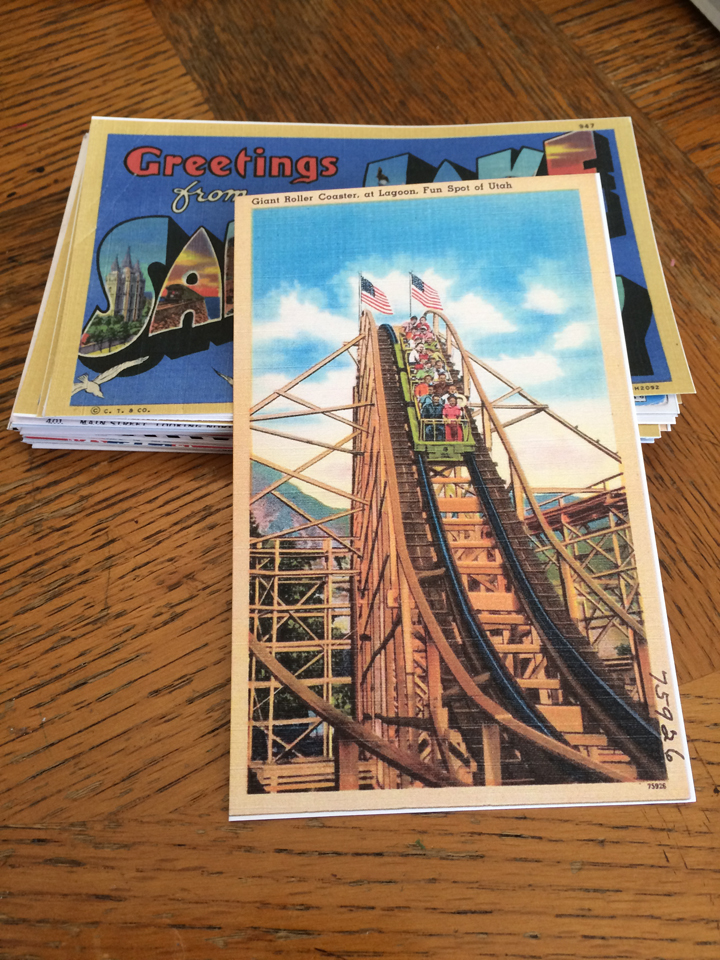
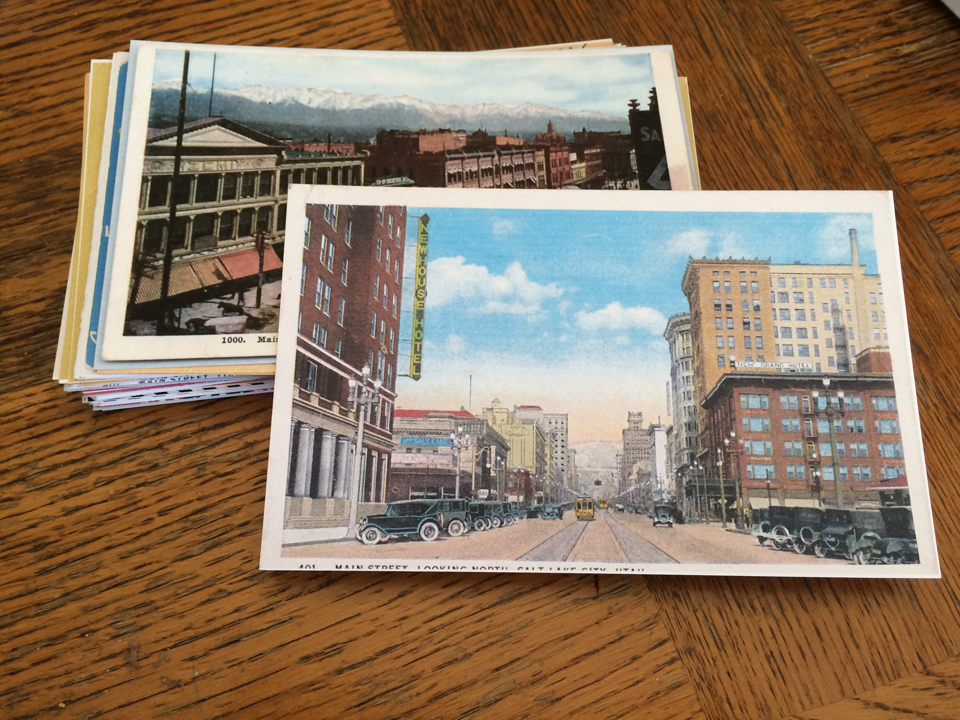
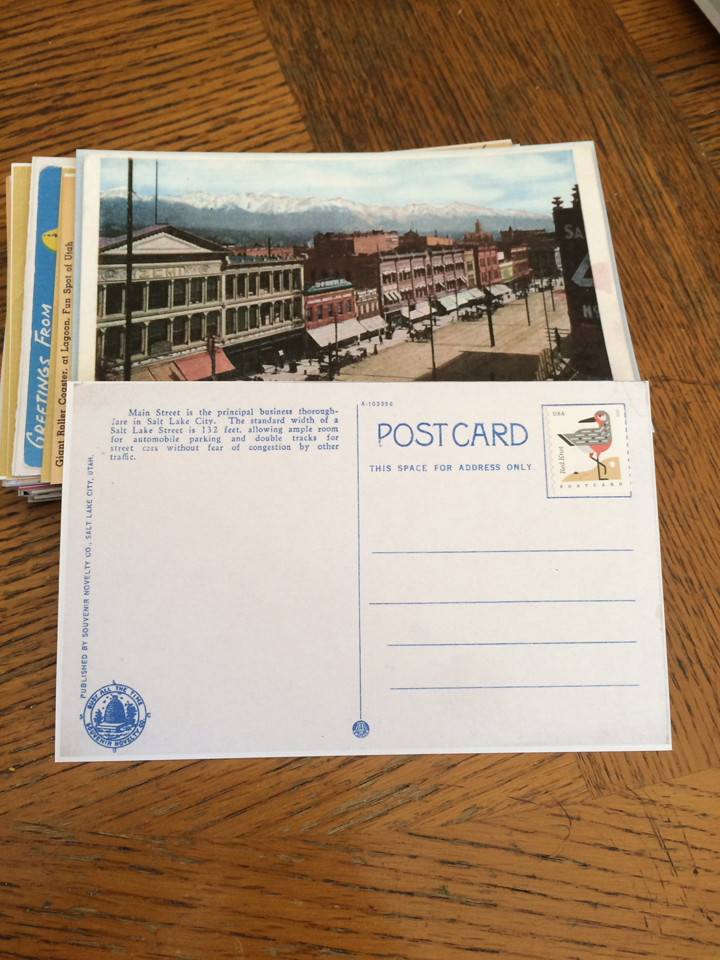
On the Facebook page for the Chaffetz mail campaign, Zina posted a link to a Design Crush post full of fun, printable, artist-designed postcards especially for this purpose. There's also a PDF there for a universal postcard back. I also wanted some retro, Utah-specific postcards to underscore where my comments are coming from, so I dropped some scans of old postcards into the same template for easy printing. As far as I can tell these are old enough to be public domain images, so I'm posting the files here if anyone wants to download them.
There's a Utah map, one with illustrated letters spelling 'Salt Lake City,' the old Lagoon roller coaster, and two of Salt Lake's Main Street from different time periods. I had a scan of the back of one of the Main Street postcards, so I dropped that into the template too and printed it on the back of both of those two.
I knew it was going to take me weeks to get around to going to the office supply store, so I ordered some 110-lb. cardstock on Amazon Prime and a roll of postcard stamps from the USPS website. I was exercising self-care by not giving myself more errands to run, okay?
If you care a lot about professional-quality printing, and cards you print yourself are going to bug you because the fronts and backs are slightly off or the cutting isn't perfect, I recommend buying some cool postcards like these from Anderson Design Group to make the task more pleasurable. I would love to hear what postcards you think I should write, or what you're doing to take care of yourself while also trying to take care of our social programs and our country.
September 14, 2014
Lisa: Degrossification
My laundry room was disgusting. There were dusty, sticky pipes everywhere of all shapes and sizes, half of the ceiling was open to the floorboards of the bathroom above (for pipe/cord access), and the drywall had never been finished, so there were gaps and cracks all over the place. Don't even talk to me about the spiders that came in through all those cracks and built webs in the corners around the pipes where I couldn't reach. The cement floor had been haphazardly covered with vinyl self-stick tile in a nauseating yellow-with-brown-smudges fake ceramic tile pattern, and then patched with a different vinyl self-stick tile in a beige fake ceramic tile pattern. Plus, the whole thing was super dirty because I spent as little time in there as possible, and because it looked bad even when it was clean, so why bother?
I didn't have the budget to gut what was there, reconfigure plumbing, and install beautiful tile. Plus, I knew we would probably be totally redoing the basement in a few years, so I needed more of a "phase one" fix. My main goal was to end up with a laundry room that was not gross. After putting in some quality time on Pinterest, I got started, getting my color scheme from a cute ironing board cover and deciding to embrace the biggest of the pipes instead of trying to hide them. The other pipes and all the mess of the open ceiling area just got vacuumed and dusted and then sprayed a uniform white, which I think helps them fade into the background a bit. Prying up the old floor tiles revealed a sea of old (but still very sticky) adhesive that would never have come off, even with the strongest of solvents, so I scrapped the idea of a painted cement floor in favor of new vinyl tiles.
Before:
After:
Cost/Detail Breakdown
Total: Somewhere in the range of $320-$350
August 07, 2014
Lisa: also, they're British
Me: "I was watching this show, The Bletchley Circle. It's everything that I like."
Blake: "Women power, solving crimes, and...books?"
Me: "...and the 1950s. How did you DO that?"
May 30, 2014
Lisa: who says mermaids can't dance?
I dare you not to smile during this performance. Here's to being awesome and hilarious instead of perfect!
April 15, 2014
Lisa: Cool Girl
I'm putting the "Cool Girl" pages of Gillian Flynn's Gone Girl here so I can find them any time. It's a little long (and maybe a little aggressive), but I think it's worth a read for any young woman. I'm not saying it's gospel truth--Amy Dunne is a sociopath, after all--but at a minimum it's thought-provoking. I hope I can figure out who Real Lisa is and be that person, or at least pretend to be the person I want to be, not someone else's ideal.
--
That night at the Brooklyn party, I was playing the girl who was in style, the girl a man like Nick wants: the Cool Girl. Men always say that as the defining compliment, don�t they? She's a cool girl. Being the Cool Girl means I am a hot, brilliant, funny woman who adores football, poker, dirty jokes, and burping, who plays video games, drinks cheap beer, loves threesomes and anal sex, and jams hot dogs and hamburgers into her mouth like she's hosting the world's biggest culinary gang bang while somehow maintaining a size 2, because Cool Girls are above all hot. Hot and understanding. Cool Girls never get angry; they only smile in a chagrined, loving manner and let their men do whatever they want. Go ahead, shit on me, I don't mind, I'm the Cool Girl.
Men actually think this girl exists. Maybe they're fooled because so many women are willing to pretend to be this girl. For a long time Cool Girl offended me. I used to see men�friends, coworkers, strangers�giddy over these awful pretender women, and I'd want to sit these men down and calmly say: You are not dating a woman, you are dating a woman who has watched too many movies written by socially awkward men who'd like to believe that this kind of woman exists and might kiss them. I'd want to grab the poor guy by his lapels or messenger bag and say: The bitch doesn't really love chili dogs that much�no one loves chili dogs that much! And the Cool Girls are even more pathetic: They're not even pretending to be the woman they want to be, they're pretending to be the woman a man wants them to be. Oh, and if you're not a Cool Girl, I beg you not to believe that your man doesn't want the Cool Girl. It may be a slightly different version�maybe he's a vegetarian, so Cool Girl loves seitan and is great with dogs; or maybe he�s a hipster artist, so Cool Girl is a tattooed, bespectacled nerd who loves comics. There are variations to the window dressing, but believe me, he wants Cool Girl, who is basically the girl who likes every fucking thing he likes and doesn't ever complain.
I waited patiently�years�for the pendulum to swing the other way, for men to start reading Jane Austen, learn how to knit, pretend to love cosmos, organize scrapbook parties, and make out with each other while we leer. And then we'd say, Yeah, he�s a Cool Guy.
But it never happened. Instead, women across the nation colluded in our degradation! Pretty soon Cool Girl became the standard girl. Men believed she existed�she wasn't just a dreamgirl one in a million. Every girl was supposed to be this girl, and if you weren't, then there was something wrong with you.
I was probably happier for those few years�pretending to be someone else�than I ever have been before or after. I can't decide what that means.
But then it had to stop, because it wasn't real, it wasn't me. It wasn't me, Nick! I thought you knew. I thought it was a bit of a game. I thought we had a wink-wink, don't ask, don't tell thing going. I tried so hard to be easy. But it was unsustainable. I hated Nick for being surprised when I became me. I hated him for not knowing it had to end, for truly believing he had married this creature, this figment of the imagination of a million masturbatory men, semen-fingered and self-satisfied. He truly seemed astonished when I asked him to listen to me. He couldn't believe I didn't love wax-stripping my pussy raw and blowing him on request. That I did mind when he didn't show up for drinks with my friends.
That was pure, dumb Cool Girl bullshit. Again, I don't get it: If you let a man cancel plans or decline to do things for you, you lose. You don�t get what you want. It's pretty clear. Sure, he may be happy, he may say you're the coolest girl ever, but he's saying it because he got his way. He's calling you a Cool Girl to fool you! That's what men do: They try to make it sound like you are the Cool Girl so you will bow to their wishes. Like a car salesman saying, How much do you want to pay for this beauty? when you didn't agree to buy it yet. That awful phrase men use: "I mean, I know you wouldn't mind if I�" Yes, I do mind. Just say it. Don't lose.
So it had to stop. Committing to Nick, feeling safe with Nick, being happy with Nick, made me realize that there was a Real Amy in there, and she was so much better, more interesting and complicated and challenging, than Cool Amy.
December 06, 2013
Lisa: hashing it out
Lisa: Is Lion King the first Disney with explicitly premeditated murder? Or do, like, the oysters on Alice In Wonderland count?
Jeannie: Snow White? I mean - she didn't die, but the witch tried.
Lisa: She just tried to put her to sleep, though, right? It's not the Grimm version.
Lisa: Hmm. Also, Gaston does purposely incite a mob to try to kill the Beast.
Jeannie: That too. What about Bambi?
Lisa: I think hunters would argue they aren't murdering animals.
Jeannie: Right, but Disney gave it personality. And based a movie around an animal. Where do we draw the line? Because...the lions are animals too.
Lisa: Also Maleficent tried to murder Aurora, but Merryweather softened the spell.
Lisa: But in Lion King it's animal-on-animal violence. I think it's another level.
Jeannie: Some gnarly shit going down.
Lisa: Truth.
Lisa: Maleficent's was arguably a crime of passion.
Jeannie: I think either way you have to go with some assumptions. They're animals so it's all good, or they're characters so you have feelings about deaths. No matter who commits them.
Lisa: No, because the humans in Bambi are like unseen, all-powerful, dangerous gods. It's like being killed by a tornado. I mean, obviously you have feelings about Bambi's mom's death. It's a tragic truth of the wild, though.
Jeannie: One could say the same thing then about lions killing each other.
Lisa: You don't see them evilly plotting to kill Bambi's mom specifically, like Scar.
Jeannie: That is true. I still cry when I watch that.
Lisa: The humans in Bambi are at worst like the rainforest-clearing developers in FernGully.
Jeannie: I guess the end result is still the same. But you're arguing intent affects how you feel about this.
Lisa: Yes. I guess I'm arguing am I encouraging my child to plot the murder of a sibling who gets in the way of her ambitions? Which I consider worse than encouraging her to become a hunter.
Jeannie: Okay. That's another story, right? Have you read Cain and Abel to her? (Joke)
Lisa: Hee. And no. Have you read Robin the one where Gaia kills the wiccans?
Lisa: I've literally got nothing.
Jeannie: Hahahahaha. I have a bible, okay? It is fascinating. And the basis for a lot of amazing literature. Pertinent: one of my all-time faves, East of Eden.
Lisa: Well, don't read it to Robin. That shit is violent
Lisa: -ly boring.
June 01, 2013
May 11, 2013
Lisa: education > ignorance
I recently read an unusually thoughtful and calm Facebook thread started by someone sharing an article about Elizabeth Smart's controversial talk at the Johns Hopkins human trafficking forum. I don't really want to argue about whether Elizabeth�s remarks indicate if she is or is not against abstinence-only education. I will say that as a fully active Mormon who practiced abstinence until marriage, I strongly believe our schools should present a balanced, fact-based sex education program that includes abstinence as one valid (and very effective) form of protection against STDs and pregnancy. I personally think a lack of education doesn�t necessarily keep teenagers sexually unawakened. It just breeds the kind of ignorance that results in a pregnant teen saying to her dad, "But I don�t understand how this happened. We didn't even have sex!"
Even if Elizabeth Smart did not say the words "abstinence-only education," she certainly mentioned a specific object lesson she had been given, comparing a girl who had engaged in sex before marriage to a "chewed-up piece of gum" that no future abstinence-minded spouse would want to put in his mouth. This version of The Tainted Muffin (which I�ve railed against before here) had the particularly heartbreaking effect of making an innocent victim of kidnapping and repeated rape feel so worthless she wasn�t even sure it was worth trying to escape.
The Facebook thread I mentioned above was discussing how to successfully teach our children the practical and moral value of abstinence, without using shame or describing sex (and the associated feelings and body parts) as dirty or evil. These techniques may be effective in the short term for some young people, but can have long-lasting and very damaging effects on their sexual attitudes as adults who are suddenly allowed to have sex within the bonds of holy matrimony.
I thought one comment in the thread was particularly thought provoking. I would like to give the commenter credit here, but I don�t know her and I don�t know if she would like her anonymity preserved. Here's what she said:
You have to eliminate "sin next to murder" rhetoric, stop teaching that sexual arousal is problematic, talk openly and directly about sexual power and agency (waiting for marriage becomes a proactive, empowered choice, instead of a reactive, fear-based one), openly and explicitly teach grace for those who choose not to wait instead of shame and condemnation, stop including masturbation and "necking and petting" as part of the law of chastity, and eliminate any teaching that implies that girls and women are responsible for the sexual feelings and responses of boys and men. For starters.
I think there�s a lot of good stuff here, and the response from the subsequent commenters was largely positive. One commenter, who I will also leave anonymous, politely offered a slight amendment:
I am grateful that I was advised to avoid necking and petting before marriage. It made it unique and special to share with it with my husband and comforting to know I wasn't xteenth experience for him either.
I am glad this was true for this woman and that she is happy with her choices, but I would like to state emphatically that I know this does not have to be true for everyone. How? I know because it is not true for me. Petting aside (because none of your business), "necking" with the boys I dated before I met my husband is a happy memory for me. Those experiences were fun, and exciting, and a little silly and ridiculous, and part of being close to someone I cared about. They were part of being a teenager and growing up and figuring out how to be an adult. They helped me decide how I wanted to be treated by a romantic partner. They are a kind of physical interaction that isn't focused on as much when you're allowed to "go all the way." And finally, they are part of what makes me know that what I have with my husband now is lasting and truly special.
I hope when my girls are teenagers they have all the information. I hope they see how beautiful and smart and amazing they are. I hope they know their intrinsic worth is not determined by how others see or treat them. I hope their health teachers scare the crap out of them with banana/condom demonstrations and the Miracle of Life video, and give them practical information on what exactly could get them pregnant. I hope they have fun and feel free to be teenagers (within reason). I hope they understand why I felt abstinence was important for me. I hope they are thoughtfully taught why our church puts a high value on chastity, fidelity, and the sanctity of the power of procreation. I hope they are comfortable coming to me with questions about this stuff. Most of all I hope they know that if they make different choices than I did, that I--and God, and their future spouse--will still love them just as much.
March 24, 2013
Lisa: mom nest
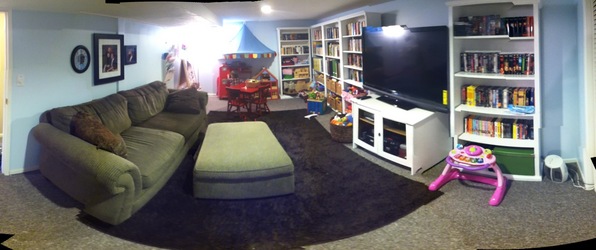
Since we can't afford to move to a bigger house, in February I embarked on a crusade to make some of the less-used areas of our house into places we wanted to spend time. My theory was that our house would suddenly seem twice as big if we had all this newly-useful space to hang out in during the day. The family room in the basement was at the crux of this plan. I wanted to take it from a dark, low-ceilinged hodgepodge with prickly industrial carpet to a light, bright, fun place the kids could play in while I worked. I was hoping we could work around Blake's TV and keep it a functional place for him to play games, but make it feel basically like the opposite of a man cave.
You can see the before pictures in this old entry from 2007, but here they are a bit bigger. I wish you could really see the silly-putty beige walls AND ceiling, and feel the gray plastic berber carpet.
Before:
Unfortunately, I didn't take any pictures of the in-between phases of the family room, when the slightly newer couch was moved down there, or when we handed the elliptical machine down to E and made a (less awesome) play area in there for the kids.
After:
E helped me so much with this project, guys. She came up with a bunch of great furniture arrangements on the Make Room Urban Barn room planner (including the layout we finally went with), and she put in many backbreaking hours painting walls in our poorly-ventilated basement and awkwardly leaning over bookcases in our freezing garage. I would never have gotten past the intimidation factor of what seemed like such a big project without her. Thanks, E!
We ended up moving Blake's computer desk and chair into the sewing room/guest bedroom to make more space for kid stuff, which I think was a great idea on Blake's part. It is snuggled up next to the carved chest in there, and it's not bugging anybody. I'm rarely sewing at the times he needs to use his computer, so we don't even get in each other's business.
The new light blue paint on the walls is Behr's Snowdrop (530A-1). I made myself go one shade lighter than I wanted to, and I'm so glad I did. It definitely comes across as blue, not bluish-white, and a darker color might have gotten oppressive in a basement with minimal windows. The ceiling and bookshelves are just the basic white Behr sells already in the can. I think the ceiling is flat and the bookshelves are semigloss. Even if we had just painted the ceiling white and left everything else, it would have been an improvement--why did the previous owners paint the ceiling beige in the first place?? Anyway. We primed the bookcases with Zinsser Bull's Eye Water-Based Primer/Sealer, in hopes that we could get the paint to stick without sanding. So far everything seems to be holding up, with no bleed-through from the pine stain.
The play kitchen is from Amazon, purchased for Nora's 2nd birthday. We got the easel from IKEA in 2009, and I supplemented it with a magazine rack and gallery wire, also from IKEA. The dollhouse was a hand-me-down from KC and Shannon, spruced up with a little scrapbook paper and Mod Podge, and given to Nora for Christmas in 2010. I have pictures of that, but I'm so behind on the girls' website that they aren't online yet. Maybe someday? The fun canopy was an IKEA find that just happened to match and fit perfectly.
The family photos over the couch are more of the sitting from Busath you saw in the living room upstairs. Since Hazel was but a fluttering in my uterus when we took those photos (gross, sorry), I cut out a silhouette of her cute face so she would be represented on the wall, too.
The area rug is a solid dark brown shag from Target. I looked at so many shag rugs and bound remnants, and the price range was huge. I finally threw up my hands and just bought a cheap version from the Target website, and to my surprise I completely love it! It's soft enough that it's pleasant for the kids to sit and play on, and the color is exactly what I had in mind. It sits on top of low-pile carpet, and it isn't a high traffic area, so I'm not too worried about the quality concerns of the commenters on the Target site. It's a great option to hold us over until we can get new wall-to-wall carpeting in the whole basement.
Inside those closet doors is my upgraded closet office, which you can see here. The brown and green actually work well with the new light blue and white palette in the family room, and I'm using my office a lot more than the kitchen table now that the kids like hanging out down there. Mission accomplished!
November 23, 2012
Lisa: Skating in New York City
Since I just had my 34th birthday, I've been working on my 35 x 35 list, crossing off things I've done and gearing up for things I want to try to accomplish this year. In doing so, I realized that (like most of what I've done in the last few years) I never blogged about visiting New York over New Year's at the end of 2009. I did hastily throw up some photos on Facebook. Anyway, I'm not going to blog about the trip today, either--but I AM going to post about crossing something off my list while we were there.
12. Ice skate at Rockefeller Center.
Because my family is adorably supportive, they didn't tell me right away that trying to skate at Rockefeller Center was a terrible idea. On our third day there, after standing in line for the ticket lottery for In the Heights, Dave and Angie took me, Blake, Nora, and Sarah to see the giant Christmas tree at Rockefeller Center. That's when I saw this:
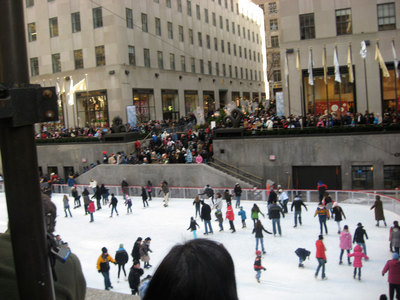
Yep, all those people packed in at the side of the rink there are waiting to skate. Now, I love skating, but I hate crowds. And it was freezing cold. And we had a little two-year-old Nora with us, who refused to wear gloves. It was time to modify the goal. Dave heard there was a skating rink at Bryant Park, so after Sarah and I were finished with the play we met up with the rest of our group there. Guys, the wait was two hours minimum, it was even colder than it had been when the sun was out, and we still had a toddler in tow. We gave her a ride on the carousel, and then ran for the warmth of the New York Public Library to reassess.
Dave and Angie knew of one more skating rink, this time in Central Park--walking distance from their neighborhood. Sarah and I decided to wake up early and hit the rink first thing, without dragging Nora along. Even when we looked out the window and saw this, we stayed strong:
We couldn't figure out the park signage, and blundered around the completely deserted park in the snowstorm for an hour before we happened upon the Wollman Rink, which was miraculously open and staffed in spite of the weather (and the fact that it was New Year's Eve). We ignored the naysayers, rented our skates, and clomped through the empty (but still smelly) locker room and out onto the ice. The snow stopped, the clouds parted, and we skated for an hour in front of the New York City skyline. Mission accomplished, and back in time for brunch.
October 01, 2012
Lisa: Drugstore Dirt
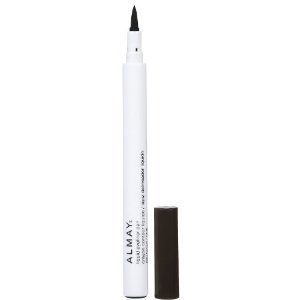
This is everything I've always wanted in an eyeliner--it's dark, lasts but isn't too hard to take off, and goes on precisely like a liquid but with the ease of a felt-tip pen. It's perfect for retro/cat-eye stuff. Unfortunately the lid fits so tightly that I have to pry it off with my teeth every morning.
Revlon Photoready Eye Primer + Brightener
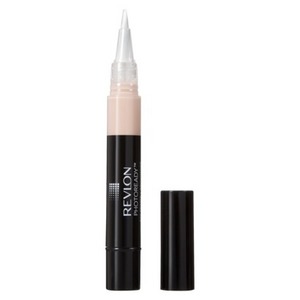
The applicator/delivery method for this product is so terrible that I can't even tell if I like the primer itself. You turn the base a few clicks and supposedly a bead of primer gets dispensed into the tiny brush, which you can then brush right onto your lids. WRONG. It takes like ten clicks to get any product to come out, and then it's a huge mess, dripping everywhere. The brush is way too narrow to be useful as an applicator, so I just brush a swipe over each eye and then use a larger concealer/foundation brush to even things out. I liked my old L'Oreal De-Crease lipgloss-style applicator a lot better, but that product was kind of...meh. Maybe it's time to pony up for the NARS.

This product may be the best thing to happen to mascara since Maybelline XXL Volume+Length. Bonus points to Maybelline for finally making the primer coat black instead of white, solving the problem of accidentally gray upper lashes. In a serendipitous twist, the shorter double wands are easier than a long single wand for those of us with suboptimal hand-eye coordination, and I get less mascara in my hair.
Revlon Just Bitten Kissable Balm Stain
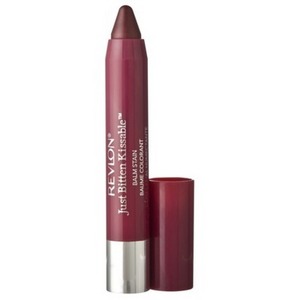
I clearly haven't given up my quest for the perfect lip stain, because this rave review on On the Rag Mag totally convinced me to make an extra trip to the drug store. At first, I was completely sold on the Kissable Balm Stain's texture and staying power, and I swear the first day I wore it, it was amazing. Unfortunately, this product has one major problem: as soon as you leave the house or get in a position where you're not walking past a mirror every so often and can sneak a quick quality-control peek, the color brightens from a nice dark rose (I chose "Crush") to a bright purply-pink, something like how the Smitten color looks on Tracy in that review. Now, if you choose the bright pink on purpose, fine--but if you're not expecting it, and it doesn't match whatever else you have going on, it's annoying. Now the question is if it's worth trying the Honey version instead, or if I should just go back to my not-quite-perfect-but-best-so-far Tarte LipSurgence.
September 23, 2012
Lisa: lateral movement
We decided at long last to paint our dingy mustard-yellow brick a classy warm grey (more to come on that decision later), and I started to get excited about prepping the house for that process. Since I knew we eventually wanted to put on some kind of new porch overhang, I worked really hard to convince Blake we should just rip off this old aluminum one before we paint. That way, we wouldn't have to do touch-ups later if removing it uncovered some still-yellow brick that didn't get covered up again by the new and improved porch. That...was a no-go. I made a good case that the old overhang would be easy to remove, but Blake (rightly) asserted that we'd lose a lot of functionality for our guests who might be arriving mid-rainstorm. So, as a compromise, we decided to give the awning a good washing and then paint it with a layer of black to match our wrought iron in the back of the house. Here's the before:
And here's the after:
Here's the thing. I like the black paint (Behr exterior semi-gloss primer/paint in Black Suede) a lot in theory. I like that it matches the other wrought iron we have, and I like that it ties in with the new lamp post, the mailbox, and the house numbers. I think it might look good with the gray paint when that gets done, and I like the idea of having a black accent on the house since we don't have shutters. I also think that no matter how white we paint it, our current overhang will never trick the eye into believing it's beautiful white wooden trim--I guess I like that the wrought iron isn't pretending to be something else. And above all, no matter what color the overhang is, at least it now looks clean and well-maintained. That's got to be an improvement, right?
In practice...I don't know that it's that great-looking. With the dark front door, I think it makes sort of a dark hole at the front, rather than letting either the door or the overhang make a dramatic statement. We haven't lost anything, since it was already ugly before and we can still replace it eventually like we planned (and paint is cheap). I guess we'll wait and see once we get the rest of the paint on. Stay tuned!
August 17, 2012
Lisa: 10+ Years
Am I going to see Channing Tatum's new movie, 10 Years? Absolutely. You know I can't resist a big, charming meathead who can dance. Is it just going to make me a little more disappointed in my own ten year high school reunion experience? Absolutely. Let's see how the two stack up:
1. Friends who actually haven't seen each other in ten years coming in from out of town and joyfully meeting up in advance
Channing: 1, Lisa: 0
2. Pre-gaming/illicit booze
Channing: 1, Lisa: 0
3. Dancing
Channing: 1, Lisa: 0
4. Old flames turning up unexpectedly and declaring they still have feelings for me
Channing: 1, Lisa: 0
5. Former classmates who morphed into surprisingly down-to-earth rock stars
Channing: 1, Lisa: 0
6. Toilet-papering
Channing: 1, Lisa: 0
7. Crazy revelations, regrettable decisions, or life-changing coincidences
Channing: at least 1, Lisa: 0
8. Karaoke
Channing: 1, Lisa: 0
9. Presence of Channing Tatum (or for that matter, Ron Livingston)
Channing: 2, Lisa: 0
Total score:
Movies: 10+, Real life: 0
See you there?
August 06, 2012
Lisa: sew much better
After redoing the downstairs bathroom, there were two days left before Sarah's arrival in Salt Lake City. The only thing to be done was to give the guest bedroom (also known as my sewing room) a makeover as well! Kill your guests with kindness paint fumes, right? I have been planning on painting this bedroom for years anyway, so I figured it wouldn't hurt to go with the Sarah-induced momentum.
I don't have many before photos of this room, because it was sort of a catch-all of my furniture when I was little and my bedding from college, topped off with a nice pinky-beige paint slathered over everything. Somehow it didn't occur to me to immortalize it. I did just dig up one photo of the old bedding (in its natural habitat at the Alpha Chi house) and one that shows the old paint color, taken when I hung the first thread rack on the wall behind my sewing machine. Lucky you!
Since I was still working with the paneling on the walls, I decided to go for a sort of beach house feel. I thought I could use some of my favorite yellows, blues, and greens, and also hang some art I already had kicking around. Here are the after photos, so you can judge its beachiness for yourself:
Since this was a definite redo-on-a budget, the furniture is all the same as it was before. That's some pretty sweet 25-year-old Danish Modern shit up in there. Back by the bed, you can see the typewriter (and typewriter cart) I bought at the surplus sale, in its oilcloth cover. Most of the glass apothecary jars with craft supplies inside that you can see on the shelving above the bed are also from the county surplus sale.
I love the carved chest, which was an impulse purchase made the ONLY TIME I have ever been to The Quilted Bear.
My sewing table is a folding table from Costco, which is functional if not pretty. I have some plans to replace the folding chair with a carved wooden chair (found languishing in my parents' basement) with a newly-recovered seat, and I'll post a photo if I end up finishing that project in the next ten years.
But why are we here? The new stuff. The paint was purchased six years ago with the downstairs bathroom in mind, but I thought better of that choice (thank goodness) and went with dusky purple in there instead. At the same time, I had actually bought paint (in coral pink) for the sewing room, but I had that re-tinted brown and used it in my closet office two years ago. Anyway, I'm counting the paint as free since it's been sitting unused for so long.
The pictures on the wall above the chest are prints of watercolors of some iconic spots on Balboa Island done by Diane Moon and Jim Krogle that Blake and I bought on one of our first trips there right after we were married. I found some medium-brown frames for them at Target to match the other furniture.
The striped bedspread and new fluffy pillows are from HomeGoods, and the sheets and pillowcases are from Target. The crewelwork throw pillow and the new ceiling fixture above the bed (replacing some gross and overly-bright track lighting) are from IKEA. The helping with minimal eye-rolling and swearing was from Blake.
June 12, 2012
Lisa: Downstairs bathroom mini-makeover!
I started getting excited for Sarah to come stay with us from New York in a few weeks, and decided to finally get around to painting the bathroom she'll use when she's here. It's been this sort of horrible, not-designed, leftover cheapo-fixtured builder-basic cave that we rarely use and therefore rarely clean. Lately it had been serving as a temperature-controlled storage area for paint supplies, and as a haven for a large infestation of spiders and the carcasses of their prey. Doesn't that sound welcoming to our guests? Here it is before:
After an industrious cleaning (and the removal of SO MANY spider parts), I rolled on some leftover primer and paint from our master bedroom. The paint has been kept inside and is still perfectly good, but our bedroom walls have faded a bit over time so that the color doesn't match exactly. Since we can't use the canned paint for touch-ups anymore, I figured we might as well use it up in another room. Blake bought a new hand-towel ring (for about $15, the only actual money we spent on this little spruce-up) to replace that weird second towel rack, and I hung some fresh white towels I'd been keeping as backups for our upstairs bathroom. I dug out some framed art from we used in one of our earlier apartments, and filled a little basket with travel-sized toiletries in case our guests forget something. The paint supplies will have to find a new home in the garage or a storage room, because the shelves of the cart are now filled with neatly-folded extra towels. Voila:
A lot better, right? It's amazing what a huge different a little cleaning and paint can make. At least it doesn't look completely neglected, and I'm not embarrassed to have guests even go in there. As I promised Sarah in our last videochat, it's not even gross at all!
March 29, 2012
Lisa: front porch, creeper edition
More voting! This time (as threatened) I went around our neighborhood taking photos of porches like the ones we've been considering. It should help that they were designed (some with more skill than others) for houses in a similar style and scale. My Photoshopping, however, has not improved.
Also, please tell me in the comments if there are things you like or don't like on each one.
March 22, 2012
Lisa: front porch fun
I wrote in 2008 and again last spring about ripping off our current front porch and awning and replacing it with something nicer and more welcoming. I'm ready to get serious about deciding what we want, figuring out how much it will really cost, and getting some plans rolling. Will you help?
The first photo is the front of our house when we bought it. The next three are fairly terrible Photoshop mockups of porch ideas I collected on Pinterest. First, we've got a pointed roof option with an arch over the door, white pillars supported by an asymmetrical wooden deck and wide stone steps leading to some irregular flagstones. The second has a small extended roof overhang supported by two big corbels, and a large stone base including low walls on each side. The third option has a little fenced-in front porch off to one side that's totally covered by a larger roof overhang. Check out the photos, and vote on your favorite one below! If you have another idea altogether or want to suggest a tweak to one of these three, share it in the comments.
Next I want to go around our neighborhood photographing the porches I like, and do the same thing. Too creepy?
February 24, 2012
Lisa: fever all through the night
Some people need their phone taken away when they get drunk. Maybe I should have mine taken away when I have a fever. Here's what happened when Sarah texted me, concerned, after reading my tweet a few nights ago. (Original questionable spelling and grammar choices preserved for your enjoyment.)
Tweet: Low: tried to turn down electric blanket because it was burning my face; it was unplugged. High: invented new videogame
Sarah: Oh no Lisa, YOUR FACE.
Lisa: Told you
Lisa: Don't worry blanket turned on now. I AM INVINCIBLE
Lisa: Also nanotechnology just became self aware. So loud
Lisa: Small comfort: it seems to be chaotic neutral. Hhahahahahhha
Sarah: I don't know what that means but I hope you wrote down your video game
Lisa: Easy, first person shooter where the camera is actually a separate character
Sarah: Dave thinks that maybe you should see a doctor.
Lisa: Too cold there
Sarah: What is your current temp?
Lisa: No idea. I wwould have to find thermometer. Blake left with girls
Lisa: He made me take advil i'm sure i'll be better soon. The nanobots
Sarah: Lisa, please don't spontaneously combust. It's very important to me.
Lisa: Mwah
January 25, 2012

January 13, 2012
Lisa: Well played, Melinda Clarke's publicity team
UPSIDE: If your television or low-budget movie production needs an attractive, seductive brunette of a certain age, you're in luck! There are three nearly identical actresses who have been capably filling that niche for years. One of them is sure to be free (probably Musetta Vander).
DOWNSIDE: If you are Polly Walker or Musetta Vander, all your acting credits are going to Melinda Clarke, because NOBODY KNOWS YOU ARE DIFFERENT PEOPLE.
THE CANDIDATES

Sarah knows Melinda Clarke as Lady Heather, the so-called "Moddom" from CSI. Melinda played another brothel owner on Firefly, but you might remember her best as Julie Cooper on The O.C.. IMDB says she played a Siren on Charmed. Obviously.

When I see Musetta Vander, I can't think of anything but the praying mantis substitute teacher on Buffy. Apparently she also--like Melinda--played a Siren (this time on O Brother, Where Art Thou?) and some kind of corset-wearing villainous lady bodyguard on Wild Wild West.

Before some extensive Googling, I'd pretty much forgotten I'd seen Polly Walker as the "elegant" Jane Fairfax in Gwyneth Paltrow's Emma and (much further back) the beautiful but jaded Caroline Dester in Enchanted April. More relevantly, she appeared as Atia of the Julii on Rome, a character confusingly but aptly dubbed Julii Cooper on Television Without Pity. She hasn't played any characters named "Siren," and there don't seem to be any photos of her online in fetish wear. If there weren't so many completely nude stills from Rome, I'd be forced to call her the classy one.
YOU BE THE JUDGE
Honestly, if I told you these were all the same woman, you'd believe me, right?


AS IF FURTHER PROOF WAS NEEDED
I explained to Sarah that I was doing a little research in preparation for this post, and she inadvertently proved my point:
Lisa: "I had to physically stop myself from searching the Internet for photos of Polly Walker in a corset. Ten pages of Google Images results and nothing!"
Sarah: "What? There MUST be screen captures of her in a corset from CSI!"
Lisa: "Yes. The problem is that was Melinda Clarke."
EDITED TO ADD:
Blake peered over my shoulder at these three photos and emphatically stated they looked completely different. Then he pointed at the middle one (Musetta Vander), and said, "That looks like the lady who played Julie Cooper (Melinda Clarke). You know, the girl from Rome (Polly Walker)." SERVED, SERVED, SERVED.
July 24, 2011
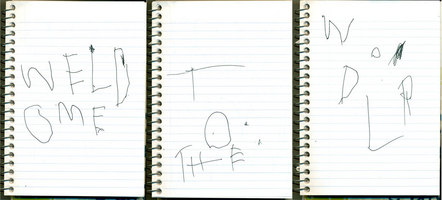
Lisa: our life now
A month ago, life at our house changed forever, and--I think--for the better. On June 21st at 7:46 pm, Hazel Madeline Smith was born. While I was in labor, Nora wrote Hazel a message in my notebook. Jeff helped her spell it, but I think the idea and the words are all Nora.
There's something so difficult but so incredibly magical about a three-year-old opening up room in her life for a new baby sister. I can't wait to see their relationship grow, and I can't believe how lucky I am they're both mine.
April 23, 2011
Lisa: 2010 ornament: Dita's Sleep Mask
As you probably know, Sarah hosts a Christmas ornament exchange every year. I know she still has some to show from this latest exchange, but take my word for it--the ornaments are just getting more and more awesome and we have so much fun coming up with something and then seeing what everybody else has made. Before I let it get too much later in the year, I wanted to show those of you who weren't in my swap group what I ended up making this time.
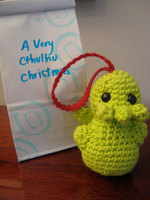
Preface: it probably doesn't mean anything to anyone but me, but for each swap I try to make an ornament that represents something that has been influencing me in the last year--either in subject matter or in technique. The first year we did the exchange, I had recently discovered knitting and was getting excited about the crafting potential there, so instead of glass balls I made little balls of yarn, each topped with a tiny pair of knitting needles and the beginnings of a miniature scarf. Our second year, there had been a LOT of discussion about zombie apocalypse preparedness plans, and I planned to buy Blake largely zombie-themed presents. A zombie ornament seemed like the next logical step. For 2009, I got obsessed with amigurumi and nerd culture, and crocheted tiny Cthulhus for everyone.
In 2010, I started getting more into vintage beauty, burlesque, and specifically the incredible Dita Von Teese. I drove away the few male readers we had left babbling on about it, and the rest of my free time sewing dresses from vintage patterns. Sarah and I and some of our girlfriends also had fun checking out a local burlesque troupe, the Voodoo Darlings. And don't tell her parents, but a certain like-minded friend and I actually went to see Dita perform at the Crazy Horse in Las Vegas. So fun.
But I digress. When it came time to decide what to make for the 2010 exchange, I couldn't stop thinking about an image Dita had posted on her twitter feed, featuring her beautiful self holding up a glamorous Moschino sleep mask over her eyes. I decided (because I am possibly cracked) that miniature versions of the sleep mask would make awesome Christmas ornaments. The fact that I had a lot of the fabrics I needed already on hand made it an even more attractive option, since we were pretty broke at the end of the year.
I copied the shape of the mask and the style of the lashes and writing as best I could, swapping out "Dita for Moschino" with the more fitting phrase "All I Want for Christmas." I'm sure these details were hand-embroidered on the original, but in my slacker way I substituted carefully-trimmed printable iron-ons. I decided to line the back of the mask (which you can't see in either Dita's photo or the photo of my finished product) with a dark red satin, and I stitched in little loops of black satin ribbon on each side to accommodate either ornament hooks or a longer ribbon (for practical use by the very small-headed).
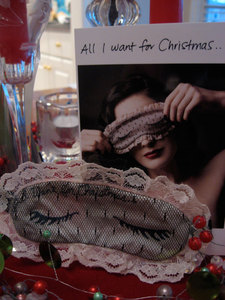
Once I had the system down and the materials in hand, I decided to make a few full-size sleep masks as well, as Christmas gifts for some of my friends. The larger version has sewn-in long ribbon tails instead of the little loops. I hope Dita would approve!
April 14, 2011
Lisa: It almost looks like we're real adults!
The dining room really only got an accidental makeover, when Sarah and E helped me paint it green along with the living room. Again, though, the only photos I had were really old (and never before posted here), so I thought it would be fun to post those along with some updated ones.
Before:
These photos were taken soon after we moved in, with our little apartment furniture awkwardly trying to fill the spaces of a real house. The green and white table was a hand-me-down from my dad's mom, but it was stained dark brown before I repainted it to go in the kitchen of our second apartment right before we moved. You can spy it in its original home in the background of these photos. The black locker-style IKEA cabinet was purchased in 2004, when Blake and I took Sarah and David to Balboa Island. This is the trip when Sarah got the worst sunburn I've ever seen on the back of her legs, but still trooped around IKEA with me the next day and then rode all the way back home with flat-packed furniture on the back car seat between us. The accent wall was painted that dark green when we moved in, and it's been bugging me for SEVEN YEARS.
After:
The rug that matches the one in the living room (they're two sizes of the IKEA GEDSER) was an awesome surprise Christmas gift from my parents last year. The updated chandelier is also from IKEA, and I blogged about installing it back in 2005. Blake and I bought the dining table and chairs in the summer of 2006, and he gave me the little table that holds cookbooks and Miss Petunia's tank for Christmas--possibly in 2007, since you can see evidence of its existence in these photos from 2008. The white cabinet that has doubled our kitchen-related storage capacity was a windfall from Blake's company when it was shut down last April. The painting of pomegranates in a bowl is one of the two Jamaica Trinnaman pieces I got for graduation in 2005, and you've seen it before surrounded by Christmas decorations. And...the roses are left over from a baby shower I hosted for a neighbor. I think that's it!
April 13, 2011
Lisa: Living Room Makeover
On Monday, I mentioned how excited I am about my progress on the house list, and today I want to share the room that I think is the most drastically different. Here are some very, very old before photos I found deep in the bowels of my laptop:
Now, these aren't really fair before photos. They were taken very soon after we
moved in to our house, and if you haven't actually been in my living room it's going to look like I went and bought a TON of furniture and art. There's no way we could afford to do that--in fact, we've been slowly acquiring everything over the years.
Proof:
1. I bought the Jamaica Trinnaman painting over the fireplace in 2009, and it's been mentioned here and seen on Facebook here.
2. I mentioned the big Jamaica painting over the buffet I got for graduation in 2005 (and it showed up behind the cardboard Jeffrey here).
3. My amazing family and friends chipped in on the Kathy Peterson painting (over the chair) for my birthday in 2009, as seen on Facebook here.
4. The rollerskate-themed prints have been seen on twitpic here (they used to be in the dining room, and then moved in to the living room on a different wall than where they are now). Sarah bought me the Leia Bell derby girl as a Christmas gift in 2009, and I bought myself Rollin' by Ryan Brinkerhoff early in 2010. I tried not to, but I couldn't fight it.
5. We temporarily inherited an upright piano when my brother David moved to New York for grad school in 2008.
6. Blake and I bought each other the leather armchairs for Christmas in 2007 (when I also made the throw pillows for them), and my parents gave us the coordinating leather storage ottoman that year as well.
7. When my parents moved to Spring City they didn't need their tan chenille sofa from the music room any more, so they passed it on from storage to us (possibly in 2007?). The green couch (and its ottoman) went down to the basement family room soon afterward. A lot of swearing was involved.
8. Blake bought me the side table next to the couch as a Christmas gift in 2005.
9. The family photos above the piano are new this (2010) Christmas from Busath, tweeted here (But I love the photos! Sorry about the angry tweet!).
10. I bought the yellow bird on the mantel at Craft Lake City in 2009.
BUT. The point is that you can see the original wall color and the basic dimensions of the room. The major differences from what we had a few weeks ago are the addition of the bookcases, the subtraction of our green TV cabinet (and some surface clutter), a little rearranging, and the new sage-y green paint.
Without further ado, the afters:
April 12, 2011
Lisa: I couldn't find a pun about blinds that didn't make me cringe
I have to admit, I kind of love watching Get It Sold. We're not selling our house, so I don't need to follow all the advice about neutralizing and depersonalizing, but a lot of the updates Sabrina does are very inexpensive but make a big impact on the overall look of the house. And when I say inexpensive, I mean stuff that real people could do--in a weekend--not a $20,000 budget for a glorious HGTV bathroom. It's also a great reminder that the unfinished projects you've been putting off/living with forever don't really take that much time or money to finish, and they can make a real difference in how happy you feel in your house.
Naturally, we had one such project hanging around that I decided to give the Get It Sold treatment. We have white wood-look vinyl blinds in our bedroom. I don't know if you're intimately familiar with the workings of these babies, but the top of the blinds (which is metal and holds all the mechanisms for tilting, raising, and lowering the blinds) is supposed to be covered with a decorative strip of vinyl molding. This strip is held on with two or three little plastic clips. Unfortunately, these clips are really brittle (especially after a few years), and it's almost impossible not to crack or break one as you take the molding off (or put it back on) when you're removing the blinds to wash them. At some hazy point in the past, the broken clips from all over the house got replaced with ones from the (admittedly more hidden away) bedroom, and we didn't put back those molding strips. Now, I'm sure you can just buy more clips wherever vinyl blinds are sold. The bad news is that the molding strips themselves (not sold separately and custom-cut to the size of our windows) got thrown away or lost somehow when they weren't attached to the window. DUN DUN DUN! The good news is that this was even easier than I thought it would be to fix. Photos and easy-peasy instructions below!
1. I carefully measured the length we would need the new molding strips to be.
2. Blake and I went to Home Depot, hoping for the best.
3. The regular molding area didn't have anything like what we needed, and after asking around a bit we headed back to where they sell blinds.
4. The blinds guy first told what we didn't want to hear, that those pieces are not sold separately. Then he thought for a minute out loud about how Home Depot custom-cuts them to size when people buy new blinds. He motioned us back to the area with the cutting saw.
5. Sitting right there out in the open next to the saw were two fairly long strips of vinyl molding, left from an earlier customer's sale. The blinds guy picked them up, measured them, and asked if they would work for what we needed. THEY WOULD!
6. We crossed our fingers and asked how much Home Depot would charge to let us take those off their hands. WHAT'S THAT? WE CAN HAVE THEM FOR FREE? Awesome.
7. We stopped in one more aisle for a pack of industrial-strength Velcro. I knew I wasn't going to mess with those stupid clips any more if I could help it.
8. When we got home, I cut the molding to the exact dimensions we needed with our trusty miter box and saw.
9. Then I applied one side of the Velcro pieces to the metal top bar of the blinds (a strip at each end and a piece in the middle of the longer section), and the corresponding other side to the back of the molding. This way you can get the molding off with a good tug, and the metal clips holding the blinds into the window frame aren't impeded in any way. BAM.
10. Press the new molding into place.
And that's it! No more visible metal bars with stickers listing the dimensions and previous owner's name! Pretty, finished blinds for only the cost of a pack of Velcro. We're not mentioning the paperclip situation for now. Ahem.
April 11, 2011
Lisa: Progress! (nursery edition)
You guys probably haven't noticed (because I can't imagine that anyone really cares), but I have been checking stuff off my before-the-baby-comes house list like crazy. Blake has been awesome, and Sarah and E have helped a ton as well. Thank goodness for tax refunds, too.
I took some (confusingly blurry) photos of Nora's spruced-up room with her new bed and rug. I haven't reassembled the crib yet to put in there, but we have measured everything out and the new furniture arrangement will fit the crib if we take out the rocker and the easel. I'm not sure if the magnitude of this discovery is clear, but our rooms are pretty tiny and I am VERY excited that it's going to work to have the girls share the upstairs bedroom.
As a reminder, the before photos are here. It's not so much a redecorating as it is a rearranging. Still, it means a lot of work and Nora is super excited about her big bed (and about her future roommate).
April 04, 2011
Lisa: Happy birthday to us!
Happy eighth birthday, Two Loose Teeth! Here's hoping the upcoming year will be more filled with pithy posts than the last year has been. Thanks for being my blogging buddy, Sarah. I can't think of anyone I'd rather share my brain with.
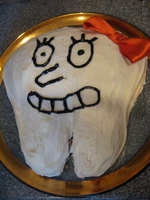
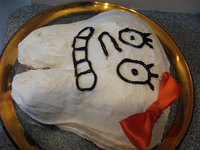
And now I will pretend that I made this tooth-shaped cake in honor of this momentous occasion, instead of for Marci's dental-hygiene-themed Crown birthday last summer. The face is modeled after the illustrations in this awesome picture book. (Edited for later reference: I baked the cake in the same cupcake-shaped pan I used for Blake's mushroom cake for his Super Smash Brothers Brawl birthday party [see it on Facebook here] and then shaved it down a bit to shape the roots and crown of the tooth.)
February 24, 2011
Lisa: home improvement wishlist (the big one)
Since the motherboard on our furnace fried earlier this week and we unexpectedly had to get a completely new furnace installed, the items on my pre-baby house wishlist are seeming a bit more out of reach. So, I figure I might as well get TOTALLY unrealistic and make a list of all the other stuff I want to do around the house, ever. (Disclaimer: these projects have not all been approved by Blake.)
Outside (here it is before I painted the front door dark purple)
Kitchen
Downstairs Bath
I'm not even touching the work we should probably be doing to get the yard in shape and get all of our storage beautifully organized, let alone routine maintenance. Oh, and someday I want to paint the downstairs bedroom, hallway, and family room. SEE, YOU CAN'T SQUASH MY DREAMS, FURNACE!
February 20, 2011
Lisa: refeathering the nest
In a practically lethal combination of pregnancy-induced nesting and reading a LOT of Young House Love, I've come up with a list of house-sprucing projects I want to try to do before the baby is born.
As a bit of pre-explanation: I already convinced Blake to let me pull up the carpet in our little hallway as an experiment, and what Sarah and I uncovered is good enough that I think we'll continue in the upstairs bedrooms as well. We have also already started buying one or two of these items each month, in an effort to spread out the costs and avoid buying everything on credit at the last minute.
THE LIST:
Nursery (see some before pictures here, although it's evolved a lot over the last three years)
Living Room
Family Room (see some before pictures here)
Master Bedroom (see some oldish before pictures here)
So. Thoughts? I'll try to post updates if and when I get around to actually completing any of these projects. Let me know if you want to put your name in for the toddler bed or TV cabinet (or the dish display rack, for that matter), or if you have any last minute warnings or advice.
January 31, 2011
Lisa: Tool of the Week
When I found out I was pregnant for a second time (yay, us!), I was faced with a bit of a (head-) hair dilemma. I didn't want to fume out the fetus with a lot of nasty chemicals right up near my (eye, nose, and mouth-type) sensitive membranes, but I also wasn't ready to grow out nine months' worth of ashy, light brown roots. I did a lot of research on more natural hair-coloring methods, including henna, but I wasn't left with a lot of hope regarding either their effectiveness or any increased gentleness.
Time passed. My roots got more obvious. Finally, in a fit of desperation I rushed into a nearby drugstore, intending to just get a box of the regular stuff and open some windows and hold my breath while I slathered it on. BUT! The drugstore didn't carry my preferred brand (or was out of my preferred color? I don't remember) and I found myself in the dye aisle, searching for an alternate solution. Enter...
CLAIROL NICE 'N EASY ROOT TOUCH UP
(Beware, Angela Martin starts talking to you when you open that link, and I couldn't figure out how to turn her off.)
Allow me to tell you why this product is awesome/what makes it different.
1) It's guaranteed to match any brand of home or salon color, and even lists the popular brands and their colorways on the side of the box.
2) It's significantly cheaper than the regular, full-application box.
3) It comes with significantly less product. This is probably why it's cheaper. HOWEVER, this is a plus in my book. As a long-time same-color dyer, I was following the touch-up application instructions in the full box anyway. That means that after applying dye to my roots, I was supposed to finish by combing it through the rest of my hair, resulting in an unattractive ombre effect that was darkest at the ends. Also, there was so much more dye than I really needed that I was probably overapplying, in an effort not to waste what I'd bought. The Nice 'N Easy has just enough dye to apply to the roots over my whole head--no anxiety about throwing half a bottle away.
4) The dye is mixed and delivered in a different format--with a little dish and brush instead of the squeeze bottle. The little brush that comes with the Nice 'N Easy lets you apply just the amount of dye you need right where you need it. With the squeeze bottle, I found I was applying a ton of dye pretty inexactly. No more sploogeing it out past your hairline!
5) You wait with the dye on your hair for less time. The box I was using before was a 25-35 minute wait, but Nice 'N Easy takes only 10-15 minutes.
6) The dye doesn't seem to contain a foaming agent that you work into a lather before rinsing it out in the shower, like the L'Oreal did. I don't know if that's better or worse, but I haven't noticed a major difference.
7) The only slight downside I see is that the Nice 'N Easy doesn't come with the tube of conditioner that is the best part of any box of home hair dye. This isn't a huge deal for me, because I never use those up before I get a new one, and thus I have a bit of a stockpile.
SO. To sum up: less dye on my hair for less time means fewer fumes to sting my eyes and make me start worrying about hurting the baby. The lower price is just a bonus. Plus, I've been using just touch-up packs for four months now, and I haven't noticed any weird stripeyness from not dyeing my whole head in between. I call that a win.
(Edited to add parenthetical explanations for sensitive, dirty-minded types.)
December 22, 2010
Lisa: 2009 ornament: Cthulhu
Since I'd been so obsessed with making amigurumi earlier in the year, I decided I had to crochet some for the 2009 ornament exchange.
I'd been wanting to try a pattern from my new Creepy Cute Crochet book, and some nerdy reading on the internet helped me decide that tiny Cthulhus would be just the thing.
I got started in early December, making all the pieces assembly-line style.
I find terrible/awesome movies from the past are the best to watch while crafting. Start with The Cutting Edge. Use the time when you're actually looking at the screen to contemplate the inexplicable hotness of D.B. Sweeney.
I thought when I got to assembling the heads, little tentacles and eyes and hanging ribbons and all, that I was almost done. I was wrong. Because you know what takes an excruciatingly long time? Crocheting TEN of the same amigurumi all at once. Heaps of thirty tiny tentacles, twenty tiny arms, and twenty confusingly-shaped wings can get overwhelming.
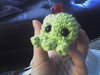
Anyway. Once the pain of construction was past, and I just had ten cute little baby Cthulhus staring up at me, I picked up some white fold-down bags and blue ink from Xpedx. The uppercase O stamp from my alphabet set was perfect for simulating sucker marks across the top, and I just wrote the theme title across that in coordinating blue Sharpie. Success!
November 04, 2010
Lisa: vine house
I think instead of building a treehouse, I want to build a vine house like the one we saw at Red Butte Garden. Here's what I'm thinking:
1) We were going to have to build a fake treehouse anyway, sort of more of a playhouse up on stilts NEXT to a tree, since we don't have any backyard trees large enough to support a real treehouse. This way we're not dependent on trees.
2) It's got to be cheaper and easier to build than a treehouse, since there's a lot less wood involved and the walls and roof are mostly chicken wire. Plus there's no floor, just packed dirt.
3) It still feels cozy and private for kids, but parents can keep an eye on things through the walls, and you don't have to climb any ladders to extract reluctant kids, a la the McDonald's playplace.
Next up: research. Are there kits you can buy? I love the curved shape of those rafters, and that might be a bit beyond my woodworking abilities. Also, I might need to make another trip to Red Butte with a measuring tape. Who wants in?
October 26, 2010
Lisa: last minute costume, awesome edition
Maybe you weren't planning on dressing up for Halloween this year--a valid if unexciting choice--but then you got invited to a costume party. Don't hide at home because it's too late to put together a cool costume! If you can work a space, future, Tron, or robot costume into the party's theme, you're in luck. This might be the easiest and cheapest costume I've ever put together, and it's well within your capabilities.
1) Find a basic black dress and some black boots you already own.
2) Buy a couple of different colors of masking tape at the hardware store (usually in the paint section) and a roll of SILVER METAL-LOOKING TAPE from the area with the heating/duct repair stuff. This metallic tape is a dress-up miracle.
3) Lay your dress flat or put it on a dress form if you're a sewing dork like me, and start laying out the tape in a cool pattern. You might want to sketch out your design idea on paper first, to avoid repositioning tape too much. In my experience, the masking tape isn't sticky enough to move around, and the silver tape is just sticky enough that you start worrying about the dress underneath if you're taking it on and off.
4) Tape up your boots, too, IF YOU DARE.
5) Check the dollar store for some glow-stick necklaces or bracelets. I taped some sticks to the side of a headband so they'd stick up out of my hair, too.
6) The dollar store is also a good place to find chunky, brightly colored plastic earrings and bangle bracelets. Intermix them with glow-bracelets.
7) Dig out a pair of black tights with no holes and put on the whole shebang. DONE.
I didn't even look lamer than everyone else at Val's Future party! Proof here and here. I now pass this costume secret on to you. See you at the Tron Legacy premiere?
October 21, 2010
Lisa: Battlestar Birthday
Do you know Jennilyn? I hope so. She is a relatively recent (and very welcome) addition to Crown Tuesday Mondays (if you can call 8 months or so recent).
Anyway, we had an inaugural Birthday Crown for Jennilyn back in March, featuring a Battlestar Galactica theme. There were tiny Battlestar Minimates, dog tags, eye patches, water guns, spacey-looking pencils, tic-tac "stims," raider-shaped cookies, wife-beaters (to wear backwards), terrible drawings of the Battlestar logo, and a robot mask fashioned from a dollar store shield. I'm sure there was something involving paper with the corners cut off as well. Marci provided cinnamon rolls, and Brian surprised Jennilyn with the complete Blu-Ray set (featuring poseable Centurion).
We love you, Jennilyn. Please never leave us (like stupid Battlestar Galactica did).
October 13, 2010
Lisa: let's win a cargo bike!
If I win a MADSEN Cargo Bike, I solemnly swear to:
a) give you a ride around the block in the bucket
b) give your kid/pet a ride around the block in the bucket
c) go buy treats for everyone and bring them back to the party in the bucket
d) peddle something charming and/or delicious from the bucket
e) reduce my carbon footprint by carrying my own stuff/kid in the bucket
I could go on, but isn't it just simpler for you to click on the banner and help me win? You've always been a giver.

Bonus points: leave a comment mentioning what you would like me to carry with my new cargo bike.
October 11, 2010
Lisa: hoopin'
You guys know me and traditional exercise: I pretty much hate it. But something about the current hula hooping fitness craze caught my interest. Maybe it's the retro appeal. Maybe it's because I have positive memories of hula hooping as a kid. Maybe it's because you can burn up to 600 calories an hour while looking almost like you're holding still. Who knows? But I do know the purpose of having a blog, and that is to embarrass yourself in front of a large audience whenever possible. SO. Here's a creepily silent video of me doing all the hooping tricks I currently know. Maybe in a few months I'll be posting one where I look a lot thinner and have a more impressive repertoire. It could happen. More importantly, if you saw me over on Health Month and I said I exercised, this is probably what I was doing.
October 04, 2010
Lisa: deck the halls with skulls and pumpkins
Since it's officially October and Halloween season, I thought I'd post photos of some of my decorations from last year. Maybe it will give you guys ideas for something easy and festive, and give me a little motivation to figure out something new.
For our dining table centerpiece, I drew some inspiration from the much more glamorous glittery version over at Martha Stewart. I bought two sleeves of styrofoam bones from the holiday aisle at Michaels, and arranged them on my cake platter with a few rubber mice from Nora's toy box. The sparkly black fabric around the base was a sample from the early days of Concert Black that's been sitting in my fabric stash for a few years.
The pumpkins on our porch are from the local grocery store and sold by the pound. I got a bunch of different varieties and shapes, and just stacked them together in a way that I thought looked cool. I had to break the stems off a few of the lower pumpkins to make them nest right, but I didn't try to attach them to each other or anchor the stacks--pumpkins are pretty heavy. I took a styrofoam skull (also from Michaels but too big to fit under my cake dome) and screwed it down on the stem of the topmost pumpkin of one stack. After Halloween, just yank that thing back off and you've got a perfect Thanksgiving display.
By the way, you don't have to worry about the pumpkins rotting--and real ones are so much prettier than the plastic monstrosities at the craft store. A month or two (UNCUT) outside in cool fall weather, and the pumpkins will look pretty much the same as when you put them out. Ours even froze solid as the weeks got colder.
September 28, 2010

August 26, 2010
Lisa: Craft Lake City 2010
Sarah, Jeff, Nora, and I ventured out to Craft Lake City a few Saturdays ago. It was easily the best craft fair of the summer. Possibly the best craft fair of the state. NO, OF THE YEAR! Okay, to be honest I'm not really sure what the competition is or what I'm talking about, but what I'm trying to say is that Craft Lake City is awesome and we had a great time.
As you can see, I held back and only bought two things this year. The booths were just as great, but...blah, blah, times are tight, etc. ANYWAY. The adorable crayon roll is from Urban Patchwork. Here's her Etsy shop (no crayon rolls) and blog. It was tiny bit pricey, but I couldn't resist; it's so beautifully made and handy, too. So much sweeter than collecting the crayons at the bottom of my purse into a ziplock bag. (Isn't having a kid glamorous?)
The pink flower earrings are from jellabee; here's her blog and Etsy shop (and another one here for her cute kids' stuff). I wish I could find some evidence of this type of jewelry in one of those spots--she had tons in her booth, and I've already had people ask where I bought my earrings. (ETA: On further investigation, it looks like you can just buy the flower cabochons and then glue them onto posts or bobby pins or whatever all by yourself. Easy peasy.)
The last photo of me and Nora is at the fun kids' activity booth, where we made a bird feeder out of an old milk jug. Despite her serious expression, Nora loved gluing on the pompoms and paper shapes. The result is hanging in our backyard--just because the birds seem to find it repellent doesn't mean we won't treasure it (at least for a few weeks).
I also picked up cards from Easily Amused (super cute softies!), babyGgear (that orange sock monster is still calling to me), and Vintage Fern (charming and cheap appliqued dish towels would make great hostess gifts!).
I noticed It's the Little Things had a booth again. This time, some flower headbands that I don't see in their shop caught my eye. I thought I was being so good, keeping my purchases to a minimum and taking cards of things to consider later, but very few of the artists have much stock in their Etsy shops--and the selection is always narrower than it was at the fair. Next year I'll save my pennies in advance and just go ahead and buy the things I like.
I coveted the stuffed sewing machine in the Nifty Kidstuff booth (again) after looking at it periodically online all year, but it's still just too pricey for me to consider buying for Nora. Maybe it's more of a grandparent thing to spend $60+ on a child's stuffed toy. Similarly, on our way out, Sarah spied these gorgeous tote bags with awesome interior pockets made from adorable Japanese prints from Elsa Bags (sorry, that particular bag isn't in her shop). Again, I wish I was the type of person who had $80 to drop on a cloth tote bag, because these really are beautiful.
I also loved the hand-embroidered skirts from Cory Bushman of Songs of the Sea. They're thrifted pieces that are cleaned up and then stitched with quotes from Tolstoy (among others) and whimsical graphic designs. Each one is completely unique and just incredible. I should have taken the time at her booth to search through and see if there were any at all that would have fit me, because her Etsy shop is empty and her blog hasn't been updated in a year.
Also: these are the Japanese-fabric-covered-button barrettes I bought last year but couldn't source. Apparently the mysterious "am" stood for Anne Michelle.
If I had one suggestion for the organizers of Craft Lake City, it would be to better publicize the artists. In the fair's program, artists are listed alphabetically by name, but most booths have a shop/brand name that they publicize. If you know one but not the other, there's a disconnect. I also asked three employees where I could find the Beehive Bazaar booth (I knew they were listed as a sponsor and must be there somewhere), but nobody knew where to find them and there didn't seem to be any way to look it up. Including a map, shop names, and even artists' websites in the program would be super helpful.
To the artists: please, PLEASE brand yourself in a memorable way, have cards that are easy to grab, and then have something waiting for the people who take the time to track you down online! I can't be the only person who went to Craft Lake City, saw something awesome that I didn't get, and wanted to fix that a week later.
August 24, 2010
Lisa: infomercials can be convincing
Me: I'm thinking of buying a shake weight.
Sarah: Bolsters your biceps and your sex life. Think of all the relationship bargaining power in your future.
Me: Clearly, they are a turn-on...as are taut upper arms.
Sarah: Ha!
August 13, 2010
Lisa: What you need? Baby, I got it.
It's taken me three weeks of swimming workouts to finally feel like I'm bringing the right stuff with me and that I haven't forgotten anything. If you're swimming (and showering) at a gym, this list might help you. Otherwise, it's pretty much just here for me, so that next time I get motivated I won't have to start from scratch.
Here's what to assemble:
- 1) Old messenger bag. It can really be any smallish bag. Dig around in the back of your closet. I bet you have something that will work. If it has a zipper pocket in front to throw your keys and wallet into, so much the better. The important thing is that you're not using this bag for anything else--you will want to just leave it packed with your swimming stuff all the time. The bag has to be big enough to hold...
- a) Padlock. You probably have one kicking around in a drawer from some kind of previous gym or school situation, but in case you don't (or you didn't write down the combination), Kmart has a bunch of options. Get one in your favorite color so it's easy to spot.
- b) Goggles are really important if you're going to be spending a lot of time in the pool. More important than I thought. I just got some crappy ones at Walgreens originally, but it only took me a few days to upgrade to a pair of Speedo women's Vanquishers, and I love them. Plus, I bought them at a great local swim shop (Poco Loco); the woman there was super friendly and helpful.
- c) Hanging toiletry caddy, which I thought I got at REI, but could just as easily have come from ShopKo or Target. You probably got one for traveling before the airlines started making you pack everything in clear ziplocks. The exact brand or type doesn't matter, as long as it's fairly small/basic, can get a little wet without getting ruined, and has a hanging hook. Mine also has a little mirror velcro-ed into the top that has come in very handy. Stock that baby up with...
- i) Travel-size containers of your face wash, toner, and moisturizer. Buy travel-size toiletries or find some tiny refillable bottles. Just test your bottles for leakage first.
- ii) Travel-size shampoo, conditioner, and body wash. Shampoo can be from hotels or the trial-size section of the store if you're not picky about your product, or fill up an empty bottle with your favorite. The conditioner tubes that come in hair dye boxes are a good size, if you do your own coloring. I think body wash is easier on-the-go than worrying about bar soap in a box. Use a small quick-drying puff or just your hands to lather up.
- iii) Disposable razor
- iv) Trial-size hair gel and wide-tooth comb
- v) Cotton pads, which you can use to apply your toner and then quickly sweep up your hairs that came out in the shower so you can throw them away when you get out. Nobody wants to step on someone else's hairs. I bought a little snap-closed plastic box of cotton rounds in the trial-size section, and I've been refilling it from my regular package.
- vi) Small deodorant and purse-sized perfume atomizer
- vii) Chapstick (Pool water is DRYING.)
- d) Cheap rubber flip-flops (try Target or Old Navy) to walk to and from the pool, and to wear in the shower. Fungus is not your friend.
- e) Small makeup bag (another thing you just have kicking around) containing...
- i) Redness-reducing eye drops. Especially important if your goggle situation is sub-optimal.
- ii) Backup makeup. If you're like me, you have a drawer of reject makeup products that you don't use every day. Dig out a passable mascara, some eyeshadow, and a lip stain (for example). The idea is to pack a bare-bones makeup kit that you can just leave packed in your swimming bag all the time. You don't want to be thinking what makeup to pack at 7 am or to find you've forgotten to bring something you need.
- iii) Wisps, in case you forgot to brush your teeth before leaving the house. It was early!
- iv) Feminine hygiene product of your choice. One or two should be enough for emergencies.
- v) Sample-size body lotion
- f) Refillable water bottle. You might not feel thirsty after swimming, but you are.
- 2) Plastic shopping bag. You know you have some from all those times you forgot to bring your reusable fabric bags into the store. Perhaps in your IKEA bag keeper? The night before you're going swimming, toss the underwear for the outfit you're going to wear into the plastic bag, and stuff it into your swimming bag. While you're taking your shower (in the tiny stall with no place to put down your stuff), you can hang your clothes in the bag on the towel hook so they don't get wet. Then when you've gotten dressed, roll up your swimsuit in your towel, and put the whole damp roll in the plastic bag to take home. (bonus: recycling!)
- 3) Swimming suit. If you have a fashion suit (like I did) you may spend your entire workout tugging it into place. I bought this old-lady skirted Speedo, and I kind of love it. I will admit that I sewed some low-profile bra cups into the lining for a bit of extra shaping and coverage. I think I saw what a difference that could make in my shirred halter-top suit, and I couldn't resist. Anyway, just wear your suit under your clothes on the way to the gym. Then you don't have that awkward moment where you're wondering if you should just get naked out in the open in front of the lockers, or go into a toilet stall ("but I'm not peeing!") or shower stall ("and I'm not showering!")
- 4) You will need a place at home to hang your swimsuit and towel to dry. This seems obvious, but putting on a damp suit is unpleasant. Rinse your suit out in the shower after you swim, and wash it on the weekends. Easy peasy!
August 08, 2010
Lisa: One on One
Since I was trying out No-Spend Month back in June, I wanted to come up with a birthday gift for Angie that I could make myself, using mostly materials I already had on hand. One passing reference to Hall & Oates later, an idea was born.
Here's the finished product: A throw pillow proudly featuring the head of Daryl Hall on one side and John Oates on the other.

Here's the inspiration image I started with, showing our boys in all their '80s glory.

I tried to convince Sarah she needs a pillow with Horatio on one side and Grissom on the other, but she just said she hated me. Confusing. Anyway, more info on the process after the jump!
What I bought for this project:
needle punch tool (really too small for regular yarn)
Build-a-Bear faux leather Harley Davidson jacket
green lipcord trim (from JoAnn's but not online)
tiny iron (which I am taking back because it was crap and wouldn't get hot enough to transfer anything)
What I had on hand:
off-white cotton duck
printable iron-on transfer paper
poly batting
plain white toddler-size t-shirt
puffy paint
two colors of brown yarn
needle & thread
pencil
fabric glue
embroidery hoop (borrowed from Sarah)
Order of operations:
1. I traced the shape of the hair/mustache areas on the back of the fabric, and started needle punching according to the instructions included in the needle package. I adjusted my technique a bit to compensate for working with yarn that was clearly much too large for the type of needle I had. (There was more yanking the yarn through the needle and holding it in place in the fabric than there should have been.) After all the yarn loops were in, I drizzled fabric glue over the back side of those areas to anchor everything in place.
2. I splatter-painted Oates' t-shirt, and tracked down a mini leather jacket to cannibalize for Hall. I cut them apart, strategically placed things as best I could, and sewed them in place. The idea was to use three-dimensional materials to emulate a two-dimensional representation of a three-dimensional object, and it was as confusing as it sounds. I wanted to use the real neck trim, zippers, placket, etc., whenever possible.
3. After throwing out the idea of sewing with actual human skin I tried to iron the skin-area transfers directly to the spaces between the hair and clothing, and failed miserably. I had saved the iron-ons for last because I knew from washing Nora's pillowcase that the surface of the transfers can crack and scuff if they're messed with too much. This left me with some very tiny areas to try to press bits of transfer into (Sorry about your ear, Hall. It's not happening.). I thought a miniature iron was the answer, but it didn't get hot enough. My final solution was to iron the face and hand transfers onto another piece of smooth cotton fabric, and then to sew that fabric into place on the pillow sides. The look isn't as seamless as I wanted, but I think it works.
4. Once the pillow sides were done, I pinned the lipcord trim to one of the sides and sewed it in place with a zipper foot. (You might want to check out a tutorial like this one for more step-by-step help.) Then I pinned the two halves of the pillow together, right sides together, and sewed around the edges again, catching the lip part of the lip cord between them. I left a bit open for turning, flipped the whole apparatus right side out, and stuffed it with batting. Use small chunks of batting for a smoother pillow. Then I hand-stitched the opening. Voila!
August 01, 2010
Lisa: Croquembouche
I had been considering trying my hand at making a croquembouche--which is a fancy French cake that is basically a tower of cream puffs held together with carmel and surrounded by a web of spun sugar--and Kaeleigh and McKenna's joint Great Gatsby birthday party (which I already mentioned in this entry on vintage hairstyles) seemed like the perfect opportunity. Plus, croquembouche is the perfect cooking project for me: impressive result, fairly easy to put together, and not at all practical or nutritive.
I was running super late for the party and trying to get out the door, so I didn't have time to take photos of the completed dessert. It was glorious, though. There were sparkles and sugar daisies. Anyway, I swiped a few pictures from Kaeleigh's Facebook albums that at least give pictorial evidence that my croquembouche really existed. (If you check out those photo albums, be sure to look for the Robert Redford movie being projected on one wall, which made an incredible backdrop.)
This entry from La Cerise was the most helpful when I was putting my croquembouche together. Lots of sites like this one will give you more help on how to make caramelized sugar if you haven't done that before, and I'll tell you my number-one secret to making this project super manageable and fun: frozen cream puffs from Costco. Yep. More info on croquembouche construction after the jump!
Here's what I learned when I made my croquembouche:
1. Unless you're a baking purist, just buy one big box of frozen cream puffs at Costco. Seriously, they taste fine and using them takes all the hard, boring parts out of this process. You can even just pull them out of the freezer and start assembling the tower while they're still frozen. By the time you're ready to serve (long before, probably), they'll be defrosted. I noticed that Astrid at La Cerise had frozen her homemade choux before assembling, which gave me the idea--and I wouldn't even have attempted to make a croquembouche without this shortcut. I am too afraid AND too lazy.
2. The paper cone upturned in a vase on La Cerise is genius--absolutely the way to go. I wish I had buttered mine so it would have slipped off a bit more easily.
3. Be prepared to work FAST. You have to keep the caramelized sugar warm enough to stay pliable without browning it too much. Have everything ready and laid out with a plan in mind before you start the sugar process, and don't leave the sugar cooking on the stove and go start working on your hair. Even if the sugar does get too brown, though (as mine did), all is not lost. It makes the finished caramel have a more crackly texture and a more bitter flavor, which is actually kind of good. The crunchier caramel is more structurally strong than the delicate cream puffs, though, so they're hard to get apart without bursting or breaking the puff. If that happens, just use a fork to break off a hunk of tower wall onto your plate. Problem solved.
4. Caramelized sugar burns like a mother, and you're reaching down into a paper cone with a handful of it and pressing it into a mass of more hot caramel. For heaven's sake, be careful and have some cold water nearby.
5. Strings of caramelized sugar get everywhere--when you're swooping each dipped cream puff over to your paper cone and especially when you're whipping a spun sugar cage around the finished product with a fork. Then those little strings harden like the candy they are and coat everything in your kitchen with a hard, sticky shell. I wish I had covered my work area with a layer of aluminum foil, like Chica and Joe did when they made the candy jewels for their incredible Princess Peach cake.
July 29, 2010
Lisa: Stone Fruit Tea Cake
When I saw what a great review Amy gave this recipe on Angry Chicken, I had to try it myself. It sounded like a perfect storm of everything good:
1) cookie AND cake (cakey cookie? cookie-like cake?)
2) stone fruits (but with the flexibility to use a fruit of your choosing)
3) easy to make
4) slight veneer of healthiness since you don't add sugar to the fruit filling (making it a totally justifiable breakfast food)
Looks good, doesn't it?
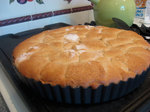
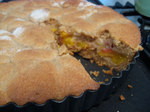
Except it wasn't. I mean, it was fine. I would give my version a resounding "meh." I take full responsibility, though. I think I have identified the problem: I used whole wheat flour. Here's the situation. I bought two large bags of whole wheat flour on different occasions after Nora was born, thinking I'd magically become healthier. But (and I keep repeating this to myself) you CAN'T JUST SUBSTITUTE WHEAT FLOUR FOR REGULAR FLOUR IN EVERYTHING. Especially light/sweet baked goods, which is largely what I use flour for. It gives even the most decadent recipes a sort of toughness and a "seems kind of...healthy (frown)" flavor. Possibly more importantly, it is browner than regular flour. Perhaps this is obvious. But when you think the top of your baked masterpiece is a nice golden brown, it is in fact barely darker than the color of the flour itself. What I am saying is that everything I make with wheat flour has a tendency to turn out underbaked. But what are you going to do with all that flour? Clearly, I chose, "continue making mediocre quasi-healthy desserts."
Amy's review is so good, though, that I think this might be worth trying again--as soon as I can justify buying more WHITE flour. I originally found the recipe (which is from Rustic Fruit Desserts) through this review on Gourmet. It looks like it's still linked, but either you have to create an account to view it now, or the content has been taken down. To the library!
June 16, 2010
Lisa: chivalry
2 am. Silence. I adjust the bedsheet.
Blake: "Are you happy now?"
Me: "...Yes?"
Blake: [pompous windbag voice] "Good, because your happiness is paramount to my LIFE."
Me: "Aw."
Blake: [snores]
June 07, 2010
Lisa: Viewing candy marketing is not a right.
Overheard in the checkout lane at Jo-Ann's.
Five-year-old boy: "Mom, I really, REALLY want to go to baby-bottle-pop-dot-com. Can I go to baby-bottle-pop-dot-com? Please?"
Harried but very well-groomed mom with Dolce & Gabbana purse: "No, you haven't earned that privilege."
Two minutes elapse.
Boy: "Mom, if I fill up all my stickers, can I go to em-and-ems-dot-com?"
Mom: (busy with one-year-old, who keeps throwing things out of the shopping cart)
Boy: "Okay, well I am going to keep this wrapper, so that I remember to go to em-and-ems-dot-com. OK, Mom? I am going to keep this wrapper. Mom?"
I have so many questions.
June 03, 2010
Lisa: label me
One of the things I love about my new closet office is that every drawer and box has a little slot for a label. I had Sarah come over one day and help me type up some labels, old-school-style, with typewriters and white cardstock.
(Please excuse the poor photography and the grimy handle from the exactly Nora-height drawers.)
Some of the labels are typed with the IBM Selectric that I made the oilcloth cover for. Here's how it looked before it got cuteified:

I found a few never-before-posted pictures of Nora playing with/on my Selectrics, right before she cut the side of her face open on the black one (and earned the nickname 'Scarface'). Needless to say, the black Selectric got sold and the other one got put away in the craft room very quickly.
The script labels were typed with another machine I bought at the same time--a Smith Corona SL 480, which is an adorable small travel-friendly typewriter with a snap-on cover. I haven't found much of a use for my typewriters other than a few small crafts like this one, unfortunately. Ideas?
May 31, 2010
Lisa: Office Redo (part deux)
When I left my job at the library to work at home on Concert Black, I decided it was time to give my closet office a makeover. It was functional before, and I still liked the idea of an office using unexpected space that I could hide behind doors, but I thought it might be soul-killing after a while if I actually felt like I was going to work in a repurposed closet.
I had a gallon of paint sitting around that I'd bought with the idea of painting the sewing room--until I figured out that bright coral pink was a terrible choice. I took the paint back to Home Depot and had the paint guy add in some new pigment to create a usable color. He was great, giving me helpful advice about what colors we could reasonably get without overflowing the can. We ended up with an inoffensive warm dark brown--probably not something I would have chosen originally, but I think it works really well in the small space of the office.
The desk and shelving and a lot of the accessories are from IKEA, and I did a ton of measuring and planning on the IKEA site and with an employee in the store before I bought everything. Unfortunately, I still ended up with some shelving pieces that wouldn't work in the tight space I had designated for my "shipping station" (on the left in the photos below). I dragged Nora back to the store by myself and manhandled her and a bunch of really long pieces of steel, with only one minor altercation with an IKEA employee. Marci's dad lent me a Sawzall, and I cut down some of the new pieces to the right size before assembly. Success!

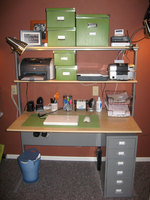
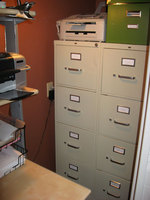
Better, right? So, why did it take almost two years for me to blog about this? Because that's how long it took me to hang that magnet board on the wall.
May 28, 2010
Lisa: Tools of the Week
I consider myself fairly lipstick-impaired. During my formative years, the vast majority of my dress-up occasions involved playing the flute--an activity I cannot perform while wearing lipstick. It wasn't until I saw photos of myself singing with Voices as an adult that I realized lipstick is the only thing keeping me from looking like a particularly lipless decaying corpse. Unfortunately, the only decent lipstick I have owned for the last 10 years or so is an old tube of Clinique Plum Brandy that I'm sure I stole from my mom. It was time for me to woman up, do a little research, and take the plunge. Here's what I found.

The internets told me that matte lipstick is the best for vintage looks, but there aren't many drugstore-level choices around nowadays. This is a good option to try, to see if you like the effect before you spring for MAC or something even more glamourous. The color I bought is In The Red, which is a bit more on the orangey side than I expected from seeing it in the tube. I still like the color with the right outfits, though, and I love the texture, especially when I first put it on. It does get eaten off my lips pretty quickly, but I think that might happen with all lipsticks. Anyway, it's a bargain at $6 for a pack of two through Amazon right now, so you can afford to reapply as often as you like.
OBSESSIVE COMPULSIVE COSMETICS LIP TAR

YouTube makeup tutorials convinced me I had to try these. At $12.50 apiece, they're not as cheap as the Revlon lipstick, but still somewhat reasonable. Plus you only use a teeny bit at a time, so the tiny tubes should last a long time. Lip Tar (which does not contain actual tar) applies wet like a gloss, but is highly pigmented like a lipstick. Both of the colors I tried (Plum and Vintage) are great: dark and rich with a shiny finish. The plum looks pretty improbable in the tube--it's really bluish--but on, it's awesome in a vampire-y sort of way. Lip Tars are really made to be mixed with powder pigments or with each other to create custom colors, but I'm not that advanced yet.
There's definitely some feathering action with the Lip Tars, which I think is more common with lustre-finish lip colors, but that can be minimized by layering over a base of lipliner. It helps with darker/brighter lips also to create a really sharp lip line with concealer and a brush on the skin around your lips. I did find that the pigment of the Lip Tar sort of sinks into the cracks in your lips, so that when the main surface of the color gets eaten off, you're left with a really bizarre Jack-the-Pumpkin-King kind of look. A little more Lip Tar or even just some lip balm smeared around to pick up and spread the remaining color can salvage things.
So. That's what I've been playing with so far. What's your favorite lipstick?
May 05, 2010
Lisa: Plain Jane or Wacky Sailor?
I just finished making a skirt with this gathered skirt tutorial from Gertie's NBfBS (which I just wrote about a few days ago). I'll put more details about my skirt-making process after the jump, in case anyone is interested, but meanwhile I have a pressing question for you. A question involving yellow-gold rickrack. And a hot pink petticoat.
Exhibit A (sorry about my ironing issues):
Exhibit B:
I love the skirt's shape with the petticoat, but is it too much? Is it the pink that makes it too much? Or is the pink only too much when combined with the yellow rickrack? I like the rickrack because it is oversized and fun and gives some interest (and a little more fullness) to the plain skirt, but does it make the previously perfectly serviceable skirt tacky and ridiculous? I was thinking about a possible nautical vibe to go with the navy skirt fabric, but then I sort of lost control in the aisle with the gold trims. Maybe the idea of trim is good, but the yellow rickrack is the wrong choice. Or maybe I should whole-hog it and throw some gold anchor buttons on the waistband. I fear I have completely lost perspective.
Here comes the important bit: please help me end this madness and vote on your favorite version!
One of the things I liked about Gertie's tutorial is that there is no pattern to buy! You just take your measurements and plot out some rectangles. Finding some 100% cotton fabric that was around $1/yard (in the form of a clearance duvet cover at Bed Bath & Beyond) meant an almost free sewing project--the exact opposite of my usual undertakings.
Since I didn't have much to lose, I also tried out a few new techniques and used THREE specialty presser feet for my machine! Of course, I jumped on the opportunity to use my new ruffler foot. I had to fiddle around with it quite a bit and do some test ruffles to figure out what settings I needed to make the 80 inches of skirt fabric gather down to the length of my waistband, so it probably didn't save me a lot of time in this case. I wrote down the settings on my homemade pattern, though, so next time should be faster.
I also used the blind hem foot that came with my machine for the first time (following this great tutorial). My hem isn't as invisible as I'd hoped, but I think that was the fault of user error and some possibly sloppy folding. When I get the technique down better, I think it will make a very professional-looking blind hem --great for big skirts that would take yards and yards of hand-hemming.
Lastly, I pieced together my crappy-but-functional plastic invisible zipper foot and set in a zipper with this tutorial. I don't know what crafters did before the internet.
Verdict: I will DEFINITELY be making this skirt again. It's a relatively easy, flexible project, with a cute, wearable result. Maybe next time I'll use a border print or a stiff taffeta.
May 04, 2010
Lisa: sexy?
Sarah sent me the following text messages yesterday:
Sarah: I can hear Rocco humping his bed and it is...intimate.
Lisa: Ew.
S: I. Know. But who am I to say stop? He deserves a fulfilling life? Ugh.
L: Ew! But...dogs don't wear condoms, so I guess it is the more responsible choice.
S: Dogs also don't have the only 100% effective form of birth control: Levis.
L: Good point.
Later...
S: Aaand I now have Showtime.
L: Your TV situation confuses me.
S: Me too! Anyway. You should come over sometime. I bet we could see some titties.
L: Who doesn't like a good pair of titties?
S: They're the Sara Lee of anatomy.
This morning during the Diane Rehm show, I heard a radio commercial I had to investigate further. It was for PajamaGrams (now including pajama jeans!) Apparently, 'the gift of relaxation' is great for Mothers' Day. For a mere $45 - $75, you can have the loungewear of your choice delivered in a periwinkle or pink organza hatbox. (Yep. Organza. Hatbox.)
The good news is that pajama jeans (essentially wide-leg "jeggings" as far as I can tell) are still a 100% effective form of birth control: not because of their sturdy fabric and construction, but because no one wants to become intimate with someone wearing a pair. And can we just revel in that trademarked fabric name for a moment? DORMISOFT. I'm not going to say that this particular garment symbolizes the downfall of society, but...it is clearly a gift for someone you hate.
May 01, 2010
Lisa: hair-suit
I have naturally wavy/curly hair, and since becoming an adult my attitude has swung like a pendulum between the extremes of 1) celebrating curly hair and decrying the media position that wavy hair is ugly and messy, and 2) forcing it into smooth submission. Recently, I tried a modified version of the "curly girl" method for a while, but now I've swung back into something more styled--using hot rollers regularly. My dad asked if I started doing my hair differently to distance myself from my billboard doppelganger, but it's probably more a case of just getting bored with having the same look every day. Plus, I've been getting more into retro looks lately, and the only decade my natural hair is reminiscent of is the 1980s. Hot rollers are actually surprisingly fast and low-maintenance. There's no tiresome (and damaging) blow-drying or flat-ironing, either; the rollers are my only straightening agent.
But...remember how I couldn't stop raving about Grey Gardens yesterday? Sarah could testify that a good part of what was making me drool with each new outfit was Drew's fabulous 1950s hair.
Barring having a team of experts on hand for styling and touch-ups, what do I need to do to get my hair to look like that? Online research suggests having my hair cut specifically for curling--the words 'wedge cut,' 'undercut,' and 'double cut' have been thrown around. But how do I convince my much trendier stylist (who seems to give me a mullet no matter what I ask for) that this is what I want? Salt Lake City isn't exactly full of salons that specialize in retro cuts.
In the meantime, YouTube is a great source for instructions and tutorials for retro hairstyles. I've been wearing a modified version of this easy pin-up "pomp" fairly often. (You can see it on Facebook here, here, and here.)
I also tried out this faux finger wave bob for Kaeleigh's Great Gatsby party (photos on Facebook here and here) and I was really happy with how it turned out and how easy and approachable it was compared to doing real finger waves. I think the key to shiny hair with the waver is Redken Spray Starch (mentioned in the video), which is tricky to find in stores these days, but gave me a much better result than my Britney concert attempt. I also didn't bother straightening first, but just brushed out pieces of that day's curly style and mashed them into the waver's hungry jaws.

Next up, I want to try some real victory rolls, or maybe this victory rolls and ponytail combo that is supposed to be good for second-day hair. But...that's not really what my hair looks like on the second day after washing at all. Maybe I need to do some more research. Or maybe the texture difference is a result of pin-curling instead of using hot rollers. I think I'll try one of these two videos to set in some pin curls, and see what happens. The part two videos from both of these channels is making me think I need to buy a new brush first, but I can handle that.
Last but not least, four blogs I've read in the last two weeks have recommended a book called Vintage Hairstyling: Retro Styles with Step-by-Step Techniques by Lauren Rennells (check out her blog here). I wish my library had it, so I could check it out right now. As it is, it will probably languish on my wishlist for a while. But who knows? I may break down and need something to hold me over until Dita's book comes out.
April 30, 2010
Lisa: Glee, Gertie, and Grey Gardens
I hope the few of you who suffered through my long entry on vintage-y fashion aren't too sick of the subject. One page/idea just keeps leading me to another, and the internet is suddenly big and exciting again.
1) I love Glee. This should not be a shock to you, since a) it is awesome, b) there is singing, and c) there is dancing. There is also one adorable guidance counselor with the cutest, matchiest, most bow-adorned cardigans, blouses, pencil skirts, vintage pins, and (!) sweater clips. I'm sure the character's OCD (and having a full staff of behind-the-scenes television professionals) helps with the immaculately maintained clothing and perfect hair, but I can squeal about her outfit pieces just the same. If you want to find a whole community of fellow squealers who will tell you exactly where Emma's clothes can be bought, try What Would Emma Pillsbury Wear?. There are a LOT of Polyvore sets featured, if that's your kind of thing. It is
technically a shopping blog focused on one (admittedly really great) look, so if you're trying to be frugal, stay away. Found via Go Fug Yourself.
2) Gertie's New Blog for Better Sewing is a sort of Julie & Julia experiment, with the blogger talking about her journey making all the pieces in the 1950s guide, Vogue's New Book for Better Sewing. I think having a directed project like that is kind of a great idea. It gives your blog a good theme to start from, which I think would help a lot in marketing your site and getting a following. Plus, there's always the book to go back to when you get stuck on interesting things to write about or need motivation. I can't lie, I kind of have a blog crush on Gretchen right now. I love her retro-but-quirky look, and the things she sews (from the book and otherwise) are lovely. Her writing style and her brand of feminism are appealing to me, too.
If I had one tiny complaint about Gertie's NBfBS, it would be that when you click to read more of each entry "after the jump," the post opens in a new browser window. I guess you can just close that window when you're done reading and the old window you clicked in from will still be there--no waiting for that page to reload! --but when you close the wrong window, can't hit 'back,' and have to find your place in the archives all over again, it's really annoying. I'm surprised she chose that system, especially since her external links open in the same browser window and necessitate clicking 'back' to finish reading an entry. Anyway. My new-found love is not diminished by this very minor inconvenience, and I'll be checking back soon for sewing progress updates. Found via WWEPB (Gretchen is, OF COURSE, also a fan of Glee and Emma Pillsbury's style).
3) Sarah and I finally watched HBO's Grey Gardens on Monday. It's the fascinating story behind the Maysles' cult-classic documentary, and Drew Barrymore and Jessica Lange were both awesome. You can read about writer/director Michael Sucsy's inspiration and process here. Engrossing story aside, the costumes Drew Barrymore wears as Little Edie Beale in the 1930s through the '50s (before things spiral out of control) are just gorgeous--and I think they're even prettier in the film than in photos.

You can see lots more of Drew's incredible costumes on Jezebel and Grey Gardens News, and there's also an interview with the costume designer reproduced here.
The Beales' house is almost its own character in the movie, and it goes from luxurious and tastefully bohemian in the 1930s to completely run-down, overgrown, and squalor-ridden by the 1960s. Visual Vamp (who actually met the Beales in the '70s) talks about East Hampton style and the movie sets. I wish I could find a better set of the National Enquirer photos that were taken of Big and Little Edie in the house at its most squalid, but there is a house tour up at the New York Times that shows the condition of the house after clean-up, when Little Edie finally sold the property.
Happy clicking!
April 26, 2010
Lisa: Lovin' a follow-up
Maybe you remember my rant about the McDonald's Playplace last May. Nora and I stopped at McDonald's after our library visit today, and I let her play for a bit while I gathered some pictorial evidence for you.
Here's the ludicrous evacuation procedure I mentioned:

In case my camera phone quality is too substandard, here's the exact text.
EVACUATING A PLAYPLACE
TO ENSURE SAFETY OF EVERYONE WHEN EVACUATING A PLAYPLACE
1. Manager will get childrens [sic] attention.
2. Manager will instruct children to leave play equipment.
3. All parents should wait for their children and should not enter the play equipment.
4. Manager will complete a circuit of all play areas to ensure all are clear of children.
5. Everyone is to move to the main doors and exit to assemble point. [sic]
I don't think I need to say again how ineffective I think step 2 would be in an emergency. I am curious about step 4. Are prospective managers asked to perform this circuit of play areas during the interview process, to make sure they have the necessary flexibility (and diminutive size) to navigate the little gerbil tubes? If they're over four feet tall, I think they might have a hard time--and the Hamburglar agrees with me.
Last, and possibly grossest, is the "record" of past Playplace sanitations. The last time someone who had a grease pencil sanitized this particular play area was in 2008. TWO YEARS AGO. Do you think it was sanitized again in January of '09, and the hapless chemical-sprayer just rubbed out bits of the old numbers when he realized he'd forgotten a writing implement? I would like to believe so. Especially considering my daughter just crawled around in there for half an hour.

April 23, 2010
Lisa: dress-up closet
We finally rented Fantastic Mr. Fox to watch with Nora last week, and I fell in love with (among other things) Mrs. Fox's yellow housedress. I love a vintage dress anyway, but this sunny a-line one with a tiny apple print, an adorable stand-up collar, and an empire waist is so tailored and cute. Add a brooch and a few pockets on the front for holding art supplies, and it's pretty much perfect. You can see more of it here at Design*Sponge and The Handmade Experiment.
Thinking about retro dresses naturally sent me back to the Bettie Page Clothing site again, where I've spent a lot of time lately hanging around looking at the same dress over and over. I bought this Bettie Page dress a while ago, and the quality is great. I've gotten a ton of compliments on it, too. Does it strike anyone else as odd that one of the only places I've found consistently modest but stylish and sexy dresses is a costume/fetish shop? But I digress. The only thing keeping me from just buying the rust-colored one has been the price--but when I got an email about a birthday sale (enter code BETTIE BDAY at checkout for 25% off until April 26!), I couldn't resist. Plus, Blake bought it for me as an early Mother's Day gift because he's a model husband.
Searching around for housedresses online inevitably led me to A Dress A Day, a blog about sewing and wearing vintage dresses and skirts that's been around for years, and has the clunky old blog template to prove it. For some reason I decided I absolutely had to read all the archives at once, which is taking a bit of time. I'm enjoying them a lot, and getting more excited about sewing along the way. I even posted a page on the Vintage Sewing Patterns Wiki about the pattern I used to make my dress for Jillian's funeral party, which I still intend to blog about someday...AHEM. I do wish the A Dress A Day archives were heavier on dresses Erin has sewn herself, and lighter on adorable vintage patterns that have already been snapped up by someone else. Mostly because I keep falling in love with things I can't have.
I can (AND WILL) have this reproduction Vogue pattern Erin mentioned, though! Isn't it cute, with the little pintucks on the front and the big, full skirt? I started thinking about possibly making it in a cotton batiste, and some idle online searching led me to Belraf Fabrics. I clicked around on some prints I liked, and almost before I knew it, free batiste samples were winging their way to me through the postal service. For free. DID I MENTION THE SAMPLES WERE FREE? Very exciting.
Another site I dug up in the Dress A Day archives is StyleShake, which I want to try out next time I'm feeling flush. They let you design your own creation (using quite a few possible building blocks) and have it made-to-measure for around $100. StyleShake would be great also for outfitting your bridal party in coordinating dresses that they can customize to work for their tastes and body types (sort of the next logical step from the David's Bridal-type mix-and-match styles). I really like how the photo galleries range from classic to trendy to avant garde.
Somewhere along the way, I came across Vintage Vivant. I don't know why it surprises me when I find something new (to me) on the internet. Don't worry, I got caught up on all her archives, too, so it's just like I've been reading all along. Amelia wears vintage every day, and has a tattoo by Sunny Buick, the artist behind the most beautiful tattoo of all time. Looking at the hilarious embroidered slips Amelia sells in her Doublespeak Etsy shop also got me thinking about vintage slips as a possibly awesome lengthening tool/modesty enhancement for some of my summer dresses that are a tiny bit on the short and skimpy side. Or maybe I could make or embellish something with my new ruffler foot. You non-sewing, non-wearing-used-underwear types might be interested in the (possibly-Utah-based?) Vintage Hem.
Thinking about vintage slips reminded me of What I Wore Today (which I used to read religiously a few years ago, and just now figured out is still going strong!). Whether or not you like Kasmira's style, I think she'll make you braver about wearing dresses and skirts, pairing unexpected pieces, layers, and colors together, and remembering to accessorize.
Speaking of accessories, it's really hard for me to look at dresses without thinking about the shoes that will go with them. You know how everything on Modcloth goes out of stock in about two seconds? Well, I did manage to grab these green retro mary janes with cone heels a few weeks ago that would be perfect with a vintage silhouette. Unfortunately, now I've also seen these even more retro metallic Veronica t-straps with even cone-ier heels. Of course, Modcloth is sold out, but maybe I will save my pennies and order them right from the Seychelles website.
Unless I'm too busy donating all my time to orphans and developing new mathematical theorems, of course. Or cleaning the baseboards (in a dress). You never know.
April 15, 2010
Sarah: Facebook Commentary
For you Facebook users: Do you feel like the latest redesign of Facebook has buried any vaguely interesting content that about what your friends are saying and instead presenting you with... well, not much?
Luckily, there are still ridiculous ads. And luckily my sister is hilarious. Observe:
From: Lisa
To: Sarah
Subject: question

What degree do you think these ladies are pursuing?
From: Lisa
To: Sarah
Subject: too busy to get a degree?

Yeah, when I saw this picture I was like, "that girl looks BUSY."
I like that girl. And I have a lot of ideas about how we can take photos together. A lot of ideas.
Lisa, start applying the frosted lipstick. I'll be right over to start weaving myself into your hair.
April 12, 2010
Lisa: Wolf Business
For my last birthday party, Sarah and the girls planned an awesome Mad Men-themed party. To keep the theme a surprise from me, she led me to believe I was getting (under protest) another Twilight-themed party to go with the New Moon movie release--this time, appropriately, heavily featuring wolves.
To keep the farce going, Sarah printed out a wolfy party invitation and passed them out to a few friends in front of me. In a central place of honor on the invitation was this drawing of a very well-developed, anthropomorphized wolf.

I wish I could tell you where Sarah found this gem. DeviantART, possibly? What I do know is that there were several conversations about his (its?) abs. And about how (and why) the artist decided to stop drawing when he finished the abs. We ultimately decided it was because he HAD to, for decency's sake. Because what do you imagine would be featured directly below that well-highlighted six pack? A very well-highlighted wolf-schlong, that's what. A big bowl of were-bit stew, is what I'm saying. And no one needs to see that.
Apparently, the creators of Dragon Age: Origins agree with me. When I glanced up at the Xbox game Blake was playing one evening several months later, I caught part of a serious conversation his dwarf, Trog, was having with a gang of very menacing werewolves. With visible abs.
"Wait, pause. Can you pause this? Hold on. I have to go get my camera RIGHT now. I have to send a picture of this to Sarah. This answers SO many questions."
You are welcome, Deviant Artists! Your well-muscled and possibly bipedal wolves no longer need to hide their shame under a blank piece of paper. You can now feel free to sketch them running through the woods, confident in the knowledge that their most wolfy parts are safely shrouded in self-fabric loincloths.
April 09, 2010
Lisa: she said/she said
Arguments I have had with my daughter in the last week:
- Brains make you smart vs brains make you strong
- If we had another baby, would it be Nora's little brother, or Nora's son?
- Whether it's pirates or vampires that suck blood
So far I think we have both only succeeded in becoming more convinced that we are each correct. And so it begins.
March 26, 2010
Lisa: you can't hide talent
My father, esteemed and eminently respectable attorney, doodled an imaginative interpretation of the hand of Robert Baden-Powell during church. Luckily, Sarah's sticky fingers did not allow this masterpiece to pass unnoticed into the wastepaper basket.
(Click to enlarge.)
March 19, 2010
Lisa: A Love Story
Seven years ago I admitted having a dream featuring both David Boreanaz/Angel and Dwayne "The Rock" Johnson. Four years ago I got an Angel action figure for my birthday and brought him to the Crown for some photo ops. Last year, Sarah bought me a vintage 1999 action figure of The Rock at Miah's wrestling match. So, you can see that this meeting was prophesied, long-awaited, and finally inevitable.
When Angel and The Rock ventured outside of their respective residences (possibly a holding cell and a cardboard box at the intersection of Jabroni Drive and Smackdown Hotel Boulevard) and found each other, the first instinct of each was to fight. Angel's heart really wasn't in it, though--much like the events of the episode his tiny plastic accessories are modeled after. Knowing it was a risky move, Angel dropped his knife and went in for a hug. But The Rock is only human, after all--his heart softened and he accepted the embrace. His trademark single quirked eyebrow might have led passers-by to believe his initial surprise was something more cynical, but deep inside The Rock knew his life would never be the same lonely road again.
This is pretty much the best use of my new homemade light box I could think of. Sorry, everybody. Or maybe I should say YOU ARE WELCOME.
March 09, 2010
Lisa: Bridges
I should have known it was a bit ambitious to think I might blog every day of February, when I hadn't blogged at all for months. In the interest of keeping things going on the blog-front, and in honoring one of my favorite actors, Jeff Bridges, on his recent Oscar win, I bring you this:
Lisa: Tron: Legacy
Sarah: Yeah, it goes without saying that we'll be seeing that, right?
Lisa: Yes. It should. Although you did not make sure i saw Crazy Heart as instructed.
Sarah: Ha. YET.
Lisa: Also how could you not be awesome when your dad is this guy?
Samuel Harvey Graynamore
Sarah: Hee hee. Seriously. (Also, how did i not know that until now?)
Lisa: I just looked it up. It makes me just as happy as Keifer/Donald Sutherland.
Sarah: Hee. Seriously.
Lisa: Also he is the guy from the Airplane movies.
Sarah: I have never seen Airplane.
Lisa: Well, he is basically Leslie Nielsen, but wackier and less annoying?
Sarah: Hee. That's good.
Lisa: Bridges
Sarah: Who is squishy Bridges over there on the left? Because in that photo? Jeff is lookin feeeeeeine!
Lisa: Well there is a reason I like him, doy. And Beau Bridges. I think also an actor?
Sarah: Whoa, really? He usually doesn't look that squidgy. He usually looks like the love child of Jeff Bridges and John Ritter.
Lisa: Fencing on Fairfield
Sarah: Ha. That makes me uncomfortable.
Lisa: Hee. Peace & Love Beau Bridges has what i like to call an "eyebrow situation."
Sarah: hee
Lisa: Too bad Jeff Bridges and Val Kilmer aren't farther apart in age. They could have played a convincing father/son.
Sarah: hee
Lisa: Val Kilmer has become Bridgier than Jeff Bridges
Sarah: HOLY CRAP. I THOUGHT THAT WAS JEFF BRIDGES UNTIL I READ THE TEXT.
Lisa: Hee. I know, right? Like, "why is Lisa sending me this unattractive and yet unsurprisingly run-of-the-mill photo of Jeff Bridges?"
Lisa: Oh no, Val: Val Kilmer Fat Whence Iceman??
Sarah: I did not need to see that. That was unpleasant.
Lisa: His abs were a national treasure. HE DID NOT PROTECT THEM AS HE SHOULD HAVE!
Lisa: Just saying. With great power comes great responsibility.
Lisa: Whoa: Fotos
Sarah: That was Jeff Bridges as the lead singer of Red Hot Chili Peppers and I was not prepared for that.
Lisa: Heeeeeee. Sorry.
Sarah: But also, nice onramps, Jeff.
Lisa: Right.
Lisa: This is my favorite Jeff Bridges: Full Jeff Bridges
Sarah: Hee. That is the Jeff Bridges equivalent of the Swingers Vince Vaughn.
Lisa: Well I like that Vince Vaughn, too.
Sarah: Exactly!
It's good for a girl to know her type.
February 14, 2010
Lisa: platters
This is the present that ate Christmas. I don't know why I thought it would be really easy and inexpensive to just throw together a homemade pottery platter for my mom, but I did. Ignorance is bliss, I suppose. On the bright side, 1) she ended up with two awesome and humongous new platters to replace some that went missing from storage, 2) I got to force Sarah to spend a lot of quality time with me, and 3) I think I also get to check "sign up for a pottery class" off my list.
We didn't get any photos of our first session at Rob's studio, but we spent a lot of time squeezing blocks of clay into flat slabs, cutting those into circles (for the platter bases), turning those on the wheel and scraping them with spirals, extruding more clay for the platter sides through a homemade template on a Play-Doh contraption on steroids, and painstakingly attaching and shaping the sides on the wheel.
Rob let the platters dry in his studio for a while, and then put them through their first firing. He's the one who suggested we make two platters--so that if one broke in the kiln, we'd still have a presentable gift for my mom. Rob's watchful eye and expertise kept them both intact, and I brought the fired platters home and sanded off the really rough bits.
Back at the studio for our second session, Sarah (who was really sick and a SUPER good sport) and I chose glaze colors and mixed them up by hand while Rob built a form to hold the glaze. It had to be wide and deep enough to dip the platters into, but also maximize the amount of glaze we had. There is a surprising amount of math that goes into pottery-making. We wiped down the sanded platters and carefully dipped them into the glaze. While they dried a bit, we bailed gallons and gallons of glaze back into the garbage-can storage bins. Then we had to scrape the glaze off the bottoms of the platters so the final firing wouldn't melt them onto the kiln shelves.
Rob put in one more marathon kiln session, and the platters were done! Dishwasher, microwave, and even oven safe (if they would fit in any of those handy devices), and large enough to serve four children...to a table of hungry child-eating monsters.
Thank you again to Rob Marquardt, scientist-artist, and most of all to Sarah, for helping me to bring even my most ridiculous ideas to fruition.
February 13, 2010
Lisa: A New Hope
These gifts for the Bossyths (that is, the beautiful and talented Valori, Jillian, and Kaeleigh) were some of the first I decided to make, and some of the last to be completed.
Perhaps I should explain. 1) The Bossyths love costumes more than anyone else I know. It only seems fitting that they should own one of the most iconic costumes in cinematic history. 2) I happened to already own a very large quantity of stretchy white fabric. 3) Everything is more awesome in multiples. 4) Wouldn't you enjoy arriving at Yuma Haus for a night of relaxed TV viewing, only to find one of the ladies of the Haus lounging in a Leia costume? I thought so.
I improvised a pattern using this helpful advice. I ran into trouble twice: once when I cut the neck openings too large (right after being specifically instructed not to) and again when I left the main body of the dresses twice as wide as they needed to be. Thank goodness, both errors were ultimately fixable.
You can see photos of the ladies good-naturedly wearing their costumes here (on Facebook) or here. E made the awesome matching belts as her gift.
February 12, 2010
Lisa: The Eye of Jupiter
For my dad the painting lover, I finished an oil painting I'd started years ago. I realize that space photos are an odd subject for such a traditional medium, but something about the layers of gases around the Great Red Spot reminded me of brush strokes in thick paint. Plus, I think images that seem abstract but are actually realistic are kind of fascinating--maybe I can attribute this to reading Powers of Ten a million times as a kid. Whatever. Clearly I cannot articulate this in an intelligent fashion. Also, sorry about the lackluster photography.
February 11, 2010
Lisa: purse-frame clutch
I meant to post a few blog entries while we were in Spring City for the holiday weekend, but my cute family (and The Invention of Lying) seemed more important at the time. What do you say we just back-date a few entries, get caught up, and pretend this little lapse never happened? It's not like these Christmas present entries aren't already a month or so overdue.
I decided to make Marci a purse-frame clutch, which is another project I've been wanting to try. I started with this purse frame, which I found on Etsy. It was very important to me to find a kiss lock frame with really big balls. I tried looking around for patterns, but I guess there's just too much variation between purse frames for a traditional pattern to work. I ended up following this tutorial from U-handbag instead.
The black-and-pink tweed fabric and the pink lining were from my stash, and I bought some Platinum Bond Super Fabric textile adhesive to glue the fabric into the frame. The gluing was by far the trickiest part of making the clutch. Tucking the fabric edges into the frame opening and getting them all to stay in at once without getting gobs of glue on the rest of the purse fabric was almost impossible. I ended up using the end of a metal knitting needle to poke things into place, and luckily the dry adhesive can be picked off the metal frame.
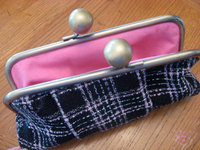
A little more thoughtful measuring would have served me well here, and I think I also made things more difficult for myself by using thicker fabrics and by deciding to add pleats at the last minute--which made things thicker and even less exact. The sewing involved is really easy, though, and a clutch is really small and can be finished quickly. Quick projects are so satisfying.
February 10, 2010
Lisa: a cunning piece of knittery
I made this Jayne hat for my "shiny"-saying baby brother, Jeff. He didn't recognize it immediately, which I admit did make me doubt his Firefly credibility a tiny bit. I didn't doubt the accuracy of my hat replica, because it is clearly spot-on.
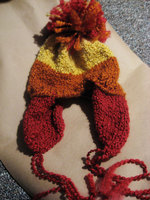
I used this pattern from Heather on Craftster, which was great. The yarn is Lion Brand Homespun, which is the only thing the regular craft store had that was rustic enough and came in remotely close colors. I've had a lot more knitting experience since last time I used Homespun, and besides, I'd say the yarn is easier to knit with than to crochet with. When you're crocheting, you have to figure out what loop to pick up from the mass of your project; with knitting, the loops are already on the other needle. Anyway, since I had to buy three huge skeins, I probably could have spent less on something more appropriate at the real yarn store, but whatever. Jayne hats for everyone!
I am notoriously bad at checking my gauge, and I was worried the hat would turn out way too big for Jeff's smallish head, but it was perfect! Jeff even humored me by wearing his hat everywhere he went for an entire week.
February 09, 2010
Lisa: feather earrings
Mallory's present was another one that could have used a bit more advance planning.
I decided to make her some crazy feather earrings, which I've seen around a lot (most notably on the lovely Jillian), and I just grabbed some feathers and jewelry findings at the craft store and figured I'd wing it.
Luckily, I tried on my first attempt before wrapping the box. They went down past my boobs. Now, maybe if you are Jillian you can pull this off, but I think it takes a certain level of commitment to accessorizing that I wasn't sure Mallory shares.
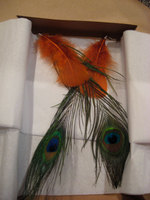
I ripped them apart carefully, cut the feathers down several inches, and tried again.
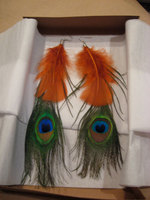
I didn't take a photo of my third version, which came about because I remembered after wrapping the box that Mallory doesn't have pierced ears. Luckily it's not hard to swap out hooks for clips. If you think about these sorts of things before you start, though, this project is easy and fun! I want to make a pair for myself now.
February 08, 2010
Lisa: Laptop Sleeve
You guessed it, another homemade Christmas gift! This one was for Angie.
I had been thinking about making a minimalist laptop sleeve, possibly out of pretty oilcloth, when I saw this one at geeksugar. It was exactly what I had in mind: no fussy extra handles or pockets, just a pretty, slim sleeve that would protect her computer inside another bag.
I struck a deal with Sarah for a piece of her Corner Station oilcloth (which is exactly the same print as the one in the article photo), and purchased a pattern I thought would work from Etsy.
The pattern--from Sew Spoiled--is great and easy to sew. Overall it was clear to follow and I was happy with the result. I had hoped the sleeve would fit a bit more closely, like the one in the geeksugar photo, but it has a little extra room. At least this way the zipper won't scratch Angie's laptop, and maybe she can throw in a little makeup bag for cords and a USB key or something.
My major regret is that I didn't choose more carefully the way the pattern would lie on the outside of the sleeve. I was so concerned with using as little of Sarah's oilcloth as possible that I didn't even check what the squares I was cutting would look like. On the pieces I ended up with, the arched feather motif seems VERY prominent (and Angie is not what I'd call a bird lover), and it's a little off-center as well. She was really sweet about it, though.
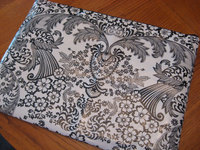
I do like the bright green fleece I found for the lining, and using fleece kept things cushy and protective--minimizing the repercussions from my not interpreting "heavyweight fusible interfacing" in the instructions as "fusible fleece."
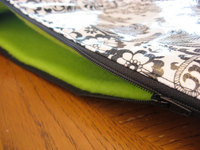
Like a lot of my handmade gifts, I'd say this project was generally a success, but there are a few things I would change if I were to make it again. If only I could have made rough drafts for each present! Angie (or anyone else) if you want a revised version in time for the next appropriate holiday, let me know.
February 06, 2010
Lisa: book character softies
When I saw this adorable dollhouse created for homemade versions of Lauren Child's Charlie and Lola on sweet sweet life (found, I think, via loobylu), I knew Nora had to have her own Charlie and Lola dolls.
From there, things sort of spiraled out of control, and she had to have dolls of ALL of her favorite book characters. Luckily, it was harder than I thought to find suitable illustrations of the characters standing alone in a way that made sense for being cut out of context and played with, so the pool was limited a bit. As you can see, we also ended up with George and Martha, the Powerpuff Girls, Cynthia Rylant's Hansel and Gretel, the No No Yes Yes baby, Alice, Eloise, and Edith.
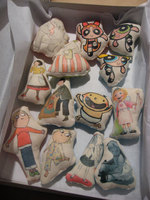
I scanned the images from Nora's books and printed them onto iron-on sheets with my hand-me-down inkjet printer. I love printable iron-ons, and I always keep a few packs on hand for spontaneous crafting. Anyway, I ironed the images onto some off-white cotton duck I already had--actually some old curtains from our first apartment--and cut matching backs out of a set of coordinating fat quarters from JoAnn's. You can kind of see the backing fabrics in this photo:
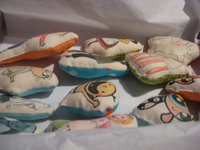
Nora's still a bit young for her dollhouse, but I think the more she gets into it, the more these little softies will get used. And they're so easy and inexpensive to make, I could always add in a few new ones (maybe even mini family members?) to keep things interesting. Plus, I like the idea of incorporating her favorite characters but retaining the feel of a homemade, non-commercial toy.
February 05, 2010
Lisa: Voices Photos
I got to use my trusty photo printer for another Christmas gift--framed photos for the girls in Voices, the a cappella singing group I joined in the fall.
First, I made Sarah come to one of my concerts, with the express purpose of taking a workable photo. She performed admirably. Next, I got rid of red-eye and flash-related clothing transparency in Photoshop (very advanced for me).
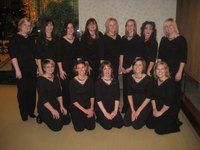
I printed the photos and put them in a bunch of RIBBA frames I found at IKEA, and finished them off with a raffia bow. Easy peasy--and I think it definitely counts as homemade.
February 04, 2010
Lisa: Model Train Photos
My father-in-law has the most incredibly intricate display of model trains that I have ever seen. He has been asking me for years to take photos of all his trains and the little vignettes he has set up, so that he can a) have a record of them in case he ever dismantles things or starts over, or b) write an article about them for one of his beloved train magazines. This Christmas, I finally got around to taking the photos, and I think it was the most well-received gift I have ever given.
I took about 70 photos and burned them onto a CD, printed around forty of the good ones on my little 4x6 photo printer (my second-best Ebay purchase ever), and got three 8x10s of my favorites printed at Walgreens. Bam. Favorite daughter-in-law of all time.
Not bad for a point-and-shoot, right? Plus, it was fun to take the real version of these photos.
February 03, 2010
Lisa: Typewriter Cover
Another homemade Christmas gift for you today!
For Sarah, my favorite typewriter collector, I made an oilcloth cover for one of her typewriters. She and I bought matching IBM Selectrics at a county surplus sale, so I had a handy-dandy model at home to try the cover on.
My Selectric came with the standard-issue black plastic cover, which was getting brittle and had a few holes in it. I carefully cut the original cover apart along the seams and used it as a pattern for the new one.
The oilcloth is from the adorable Corner Station, and I'd been hoarding it until I found the perfect use. One precut piece was exactly enough for two typewriter covers--so I made one for Sarah and one for myself to replace the one I cut up.
The super-skinny bright green binding tape is from JoAnn's. I forgot to bring a scrap of the oilcloth with me to match when I picked it out, but I think I actually like it better less matchy-matchy.

February 02, 2010
Lisa: Nintendo Cross-Stitch
My decision to make all homemade Christmas gifts this year gave me a great excuse to try some crafts I've been wanting to do and to finish some projects I'd started and then abandoned. These cross-stitched dish towels featuring classic Nintendo characters are one of the latter.
With their matching gun-arms, I always thought Samus and Megaman would make a cute couple. Almost as cute as Angie and Dave, who I hope are using these towels in their tiny kitchen right now.
The cross-stitchable towels are available at most craft stores--I think I got mine at JoAnn's. For the patterns, I found pictures of the 8-bit characters online (try looking for game packaging and sprites), and then mapped the pixels out on graph paper as best I could.


February 01, 2010
Lisa: Who will tell the internet these things if I don't?
1) In roughly an hour I am seeing an ENT about the possibility of getting my tonsils out. I have to admit, I am somewhat terrified. But...if it means that I get strep less often (or even maybe NEVER), then it will be worth it.
2) A lot of things have been happening lately, and I've been crossing things off my list (yay!), but I haven't gotten up the energy to actually blog about any of them. SO. I have just decided to attempt to post every single day of the month of February. I'm sure the one reader we have left will be shocked. Plus, depending on how much Lortab they put me on for my (possible) tonsillectomy, things could get a little crazy. At the very least, there will be a lot of drool. Something to look forward to.
3) Dripped pie filling had made a smoky mess in the bottom of my oven, so today I decided to run the self-clean cycle. It's been going for three hours so far, and everything in my house smells and/or tastes like burning. My eyes feel like burning. Nora actually asked to go down for a nap early--I'm guessing in self-defense. Moral: put a drip pan under the stupid pie next time, goofus.
4) I am presenting for your enjoyment photographic proof of my billboard doppelganger. She can be found on Highland Drive, directly east of the Home Depot, advertising the Generations Project on BYU TV. Uncanny, isn't it? I, for one, am completely freaked out.


January 10, 2010
Lisa: two great tastes
This summer's video re-creation project: Beyonce's If I Were a Boy character and Steven Seagal (:Lawman) are partners. Let me know if you want in on this incredibleness now.


December 24, 2009
Lisa: Jiminy Christmas
In an offering that's less spontaneous and funny than Sarah's interview from yesterday, but just as full of the holiday spirit, here's Jeremy's interview with me from Christmas 2007.
Holiday Interview
An emailed interview with other Loose Tooth, Lisa.
What an honor. Here you go!
1) What�s your favorite holiday cuss word?
Jiminy Christmas
2) What�s your best childhood present?
I think the Christmas I got my first flute was the most memorable. My parents were worried that I�d be disappointed if I only had one small present to open (even though it was expensive), so they let me stay up and help them put out the Santa presents for the other kids. It was so fun to be in on the surprise!
3) If you were in control of all things Christmas what would we see and what we we see disappear?
There would definitely be less working, and more time to make fun Christmas crafts or do holiday baking, or even just wrap presents.
4) There have been people concerned with Santa�s chubby image, that it might have an unhealthy effect on children. What do you have to say to that?
I think it is great to have a positive role model with a more �jolly� body type. And at least kids will have a realistic picture of what a diet of only cookies and milk can do to a person.
5) What�s the worst gift you have ever received?
Hmm. Probably the sweatshirt with handprints appliqueed over each breast. Thanks, Grandma! Also, it had been purchased six months earlier, so I could only get store credit�toward another appliqueed sweatshirt.
6) Everyone knows that Santa�s elves make the toys for billions of people across the world. How do you think they manage?
Well, luckily they have been bred especially for that purpose. I mean, they must have evolved to be the best, fastest toy makers around, right? I know that if I were a comely young she-elf, I would go for the most successful guy in the toy shop. Also, lots of coffee.
7) Do you have any last Christmas thoughts for our readers?
It doesn�t have to be perfect.
I hope that�s OK! I can�t wait for Sweeney Todd tonight.
Lisa
Thanks Lisa. We appreciate your time and your fantastic blog.
December 23, 2009
Lisa: The laws of mistletoe are unflinchingly rigid
At the funeral yesterday, Mallory pointed out that we should make sure our favorite of Jeremy's blog entries were archived somewhere, in case his Wordpress account eventually expires. In the spirit of the Christmas season, I thought you all might enjoy his interview with Sarah.
(Found here, as long as that link lasts.)
[10:44] hobbes8u: A Holiday Interview with Two Loose gal Sarah?
[10:45] Sarah: i�m game!
[10:45] hobbes8u: YES!!
[10:45] Sarah: yes!
[10:46] hobbes8u: So Santa has been caught steppin� out on the missus, to save Christmas how would you handle this tabloid scandal
[10:47] hobbes8u: I know I know I ask the tough questions
[10:48] Sarah: ha. awesome question. well i hear that the elves have an in-house marital counselor (polygamy can cause domestic strife, after all, and aren�t they like the smurfs with only one female?), so i�d rush the Claus�s off to some couples therapy.
[10:49] hobbes8u: great great
[10:50] hobbes8u: What�s the worst Christmas no-no?
[10:52] Sarah: hmm. knocking over the christmas tree or neglecting to leave cookies and milk and a little note for santa. also, one must always obey the rules of mistletoe. the laws of mistletoe are unflinchingly rigid.
[10:53] hobbes8u: I had no idea. I remember one time I did forget cookies and milk and the next day I found my father murdered. My mom cracked open a bottle of champagne and went to Cancun.
[10:53] hobbes8u: But that was cause she hated him.
[10:53] hobbes8u: Anyway
[10:54] Sarah: did daddy catch mommy kissing santa claus?
[10:54] hobbes8u: umm no I think it was the cookies. WAIT!! I�m interviewing you!
[10:54] hobbes8u: What is your favorite Christmas cuss word?
[10:54] Sarah: tis the season for BALLS!
[10:55] hobbes8u: It is a popular one
[10:55] hobbes8u: haha
[10:55] Sarah: yes, well christmas is all about tradition
[10:56] hobbes8u: Yes speaking of tradition, what is way to modernize the Christmas tree to really give it that futuristic look
[10:57] Sarah: tiny spaceship and alien ornaments would be cute. a hoverboard beneath the tree?
[10:58] hobbes8u: lovely
[10:58] hobbes8u: What is your very favorite childhood Christmas present?
[11:01] Sarah: the christmas i remember most vividly i received a desk and a clock radio. i felt so grown up! i wasn�t all business, though. i also received some pretty china dolls and of course clothes.
[11:02] Sarah: the dolls were a different year than the desk and radio. my parents aren�t loaded or anything. sheesh.
[11:03] hobbes8u: hahaha loaded as in drunks?
[11:04] hobbes8u: sorry I strike the question
[11:05] Sarah: well, they�re neither floating in beer nor in a pile of money like scrooge mcduck
[11:06] hobbes8u: I always wanted to swim in gold money. He always made it look so comforting. I bet it�s harder to save a person drowning from gold though
[11:06] hobbes8u: As a blogging celebrity, do you have any final words about the holidays?
[11:06] hobbes8u: You know for the kiddies
[11:07] hobbes8u: (the readers)
[11:08] Sarah: ha! you�ve made my day. i would say that christmas is about family and friends. if other details fall through the cracks, it�s alright! just enjoy your time with the people that matter. there, was that adequately cheesey?
[11:09] hobbes8u: It was delightful. Thank you and have a Happy Christmas!
[11:09] Sarah: you too!
November 30, 2009
Lisa: plus, he loves beards
Maybe you remember almost two years ago, when I mentioned David Malki! and his video, Me vs Comic-Con: Who's Better? Well, just in case you've forgotten, I'm mentioning him again. Like, for example, his comic? Wondermark? It's really funny and dry, and often makes me think for a moment, take a second look, and THEN laugh out loud. It's meticulously crafted with vintage engravings in Photoshop, too. I know that because I recently watched part of a Let's Make a Wondermark live stream. It was somehow funny, voyeuristic, fascinating, and slightly boring, all rolled into one. Plus, as a bonus, it reminded me how completely lacking my own Photoshop skills are.
But you know what I might like best about Malki!? His Twitter feed. Or maybe it's how he's offering a free sketched-in artist edition of his book, Clever Tricks to Stave Off Death, to ten of the bloggers who post about him this month. He's nice like that. You should check him out!
October 08, 2009
Lisa: Craft Lake City review
I find it's most helpful to review an event two months after it happens, so that everyone who might once have cared has already forgotten about it. That's why I'm telling you now how much I loved Craft Lake City!
The craft booths were everything I wished the disappointing shopping at Swiss Days and Peach Days would be. Instead of seeing the same vinyl cutouts and magnet boards at every booth, there were tons of alternative and/or slightly subversive crafts, and fun and unusual fabrics galore.
Here are photos of my (reasonably priced) booty:
1. A skirt for Nora for next summer, from Noelle O Designs.
2. A horse finger puppet from Nifty Kidstuff, which has the cutest details--like a bright green lining to match the bridle.
3. My mom shopped Nifty Kidstuff too, and found Nora a doll that she can practice fasteners on. Nora named her Betsy Buttons, after this book. (Seriously, this girl makes so many cute things. How much do I want this little fabric sewing machine for Nora?)
4. Grandma also bought Nora some cute hair ties with fabric-covered buttons, but unfortunately they didn't have any maker-identifying packaging.
5. I had a hard time tracking down these ribbon-covered hair clips online (they're just marked 'am'), but I think the buttons covered with Japanese fabrics are darling, and they inspired me to make my own ribbon clips.
6. This little yellow papier-mache bird was an impulse buy at Beehive Bazaar, and I love having him on my mantel.
I also loved the fascinators and headbands from Its The Little Things, but I didn't have enough cash to buy one at Craft Lake City. Instead, I grabbed one of her cards and bought a hat for Jillian's funeral on Etsy later.
The family rockabilly band that was so cute was Mad Max and the Wild Ones.
Here's more of Nora enjoying them:
Anyway, I hope that Craft Lake City becomes an annual event, and that they have even more awesome booths next year. If I had one suggestion to offer, it would be to the crafters whose great wares were for sale: make sure your packaging is branded, and list your website right on it if you have one. That way, the love can keep going long after the festival is done.
September 29, 2009
Lisa: Oh, Carmine.
Look I know he's in a wheelchair now and all, and is dealing with a lot of mental trauma, but could someone please cut poor Danny Messer's hair before he starts looking any more like Fisher Stevens?


It's got to be hard enough working with Gary Sinise every day without that kind of spectre looming.
September 17, 2009
Lisa: Tool of the Week
I'm probably going to sound really stupid on this one, but I don't care. This simple cable was enough of a revelation for me that I want to share it with any other idiots who might be in need.
What I'm talking about is a cable that has a headphone-style audio jack on one end, and RCA-style audio plugs (you know the kind, they're the red/white components of the standard red/yellow/white TV cables) on the other end. Something like this.
I have no idea where we got this handy-dandy cable, since I just found it in our cord box at a very opportune moment. It must have come free with something we bought in the past, because I had no idea it even existed until I was holding it in my hand, realizing it would be the perfect solution to our current problem.
Two ways I've used this cord in the last two weeks:
1) When we hook the laptop up to the TV to watch movies on the bigger screen, the Apple mini-DVI-to-video setup only sends the video signal to the TV (not the audio). In the past, I've had to unplug the speakers from our desktop computer, lug them up from downstairs and set them up on top of the TV cabinet, since the laptop's internal speakers aren't loud enough. This new cable allows me to feed the audio right into the TV as well, using the TV's built-in speakers that are controlled by the TV remote.
2) When Sarah and I were rehearsing a few days ago, we wanted to sing along with a background track that I have as an mp3 on my laptop and iPod. Since I don't have speakers for my iPod, and again the laptop speakers were too soft, I just plugged the iPod into the TV and used the internal TV speakers instead.
So. What seemingly obvious/inexpensive thing has made a huge difference in YOUR life lately?
September 14, 2009
Lisa: Chocolate Blues
While I was on tour with the Tab Choir, I visited a tiny yarn shop in Independence, Missouri. I bought a skein of pretty yarn as a souvenir, with the idea of knitting something for Nora when I got back home.
One skein isn't really a whole lot of yarn to work with, but it was just the right amount for one of the adorable hats from this book. I finished it off with pompoms made out of some of my leftover Ribby Cardi yarn for a little contrast.
I know, making a winter hat in July seems incongruous, and the photos of it on my sundress-clad daughter look ridiculous, but this was a quick and fun little project that got me kind of excited about knitting again. Maybe someday I'll even sew the zipper into my otherwise-totally-finished Ribby Cardi!
August 27, 2009
Lisa: buy my love
If get your Two Loose Teeth fix via a blog reader, you might not have noticed the new Etsy widgets in our sidebars. Instead of featuring books and movies that we never got around to updating, you can now see items from Sarah's Anderson Ink shop on the left, and the Two Loose Teeth shop (currently selling some toddler hair barrettes I made) on the right.
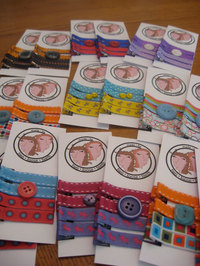
Mostly, I started making some clips for Nora, and then they were so fun and easy to make that I got carried away and made more than one two-year-old could ever wear. So. Do you know any little girls who need a set?
August 24, 2009
Lisa: Carla & Henriette
Some exciting new work developments and a general fog of ennui have meant that things at Casa Smith (and here at Two Loose Teeth) have been woefully neglected. Thankfully, the fridge now contains more than condiments and takeout boxes. The dishwasher, washer, and dryer are all running, and both bathrooms are almost painfully clean. It's just...I don't have any more energy left for being creative.
Luckily, it's Movie Monday, and I can skate by on the genius (and athleticism) of others much younger and more capable than myself.
August 14, 2009
Lisa: got my hair did
Twitter and Facebook are good times and everything, but I must admit they have contributed to the lack of posts around here. Luckily, I felt the following Facebook interaction deserved a little pictorial embellishment.
Lisa: New haircut: might be awesome, might be Three's Company.

Sarah: HA! I can't wait to see it. [Sarah knows that Three's Company also means Janette from SYTYCD, whose haircut I HATE.]

Angie: Might be Indigo Girls?

Lisa: Might be Kristen Stewart playing Joan Jett.


Dear readers, I will let you decide for yourselves.


July 15, 2009
Lisa: they grow up so fast
I meant to post these pictures on Sarah's birthday, and to tell you all what an awesome person she is and how proud I am of her. Luckily, I still feel the same way three days late.


Congratulations also to Mallory...


...and to Valori, who graduated at the same time! I love you guys.


I took some pictures of Nora, too. What do you want? I'm a mom.


June 15, 2009
Lisa: Total Eclipse of the Heart
Found via Dita Von Teese, who knows something funny when she sees it.
June 06, 2009
Lisa: The package goes in the box. If you know what I mean.
Some of you know that I work from home, sending out orders for my online business. Thanks to the wonders of Click-N-Ship, my mailman can pick these packages up right from my front porch (for free!) and get them on their way. When I first started doing this, I bought a clear plastic tub with a flip-up lid to corral the slippery Tyvek envelopes and protect them a bit from the weather. It worked fine, but wasn't doing much for the aesthetics of my front porch.
I clearly needed a prettier, more permanent solution. Here's what I came up with:
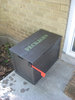
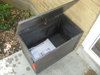
As a side bonus, the mailman and the UPS/FedEx guys deliver my incoming packages into the box now, so they're out of sight and protected from the elements as well. Materials and more details after the jump!
Base:
After a little research, I chose this unfinished toy box from JoAnn's. The size was about right, and I wanted a box with a hinged lid that could be raised from the top with one hand. On Sarah's excellent recommendation, I painted the pieces before assembly.
Paint:
Our new porch light, house numbers, and mailbox are all either oil-rubbed bronze or black, so I chose Hammered Dark Bronze Rustoleum spray paint. Supposedly, it's good for outdoor applications. I primed it first and put on a coat of clear polyurethane after I stenciled the letters on. I always forget how much spray paint it takes to cover something--this project used three full cans each of primer and paint.
Lettering:
I had some leftover Fern Green Patio Paint, which I already knew was weather resistant. I used that with some 2-inch block letter stencils I picked up at JoAnn's. I'm kind of a slapdash stenciler, but I figured that gives the box a pleasing rustic quality.
Flag:
I bought a mailbox flag replacement kit with an official-looking jaunty red flag at our local Ace Hardware, and adapted the instructions a bit for screwing it into wood rather than a thin metal box. As you can see in the photos, the flag is attached on one side, so when it is 'raised' it sticks out past the front of the box. So far, it seems to be an adequate system for signaling the mailman that there are items to pick up.
June 04, 2009
Lisa: Seriously Cute Crochet
My animals aren't as cute as Sarah's, and my photos certainly aren't as well taken, but I had to share the little amigurumi I've been making from the same book.

Next up: zombies, ninjas, and robots...unless I go with E's suggestion of crocheting Nora an amigurumi Halloween costume, in which case I'd better get started now.
May 27, 2009
Lisa: Tool of the Week (cheapo edition)
I'm sure only the most die-hard readers of our site remember when I featured Proactiv as a Tool of the Week back in aught-six. I still love Proactiv, but I've had a few problems with it that I thought warranted looking around for another option.
1) I never finished all three bottles of the set at the same time, and buying individual bottles at the mall kiosk in an attempt to even things out is insanely expensive.
2) They seem to have difficulty working out certain billing issues, which is important when their system is based on automatically deducting funds from your account and delivering the product right to your door.
3) They recently doubled the price of the regular 3-piece set, and justified the price increase by calling the same size of bottles a 2-month instead of 1-month supply.
The first imitation I tried was AcneFree, which does seem to have the same results as Proactiv. I found the textures of the products just different enough to be a little unsatisfying, though. The Proactiv cleanser is a little gritty and exfoliating, and AcneFree is not. The repair lotion is different, too--more opaque white and thin. Also, the bottles are identical in size (and design) to Proactiv, so I run into the same problem using them up unequally.
On my next trip to the skin care aisle, I decided to try Klear Action, another Proactiv clone. The slightly sketchy-looking cashier swore Klear Action works just like the real thing, and so far she's right. Plus, the set is sold with a bigger toner bottle (which should help even out the quantities) and the textures are much closer to the originals. Yay!
Both AcneFree and Klear Action are about half the price of Proactiv, and are available at my local RiteAid.
May 25, 2009
Lisa: Movie Monday
Sorry if you already saw this on Mighty Girl, but it is the most fun, relaxed, and out-and-out joyous wedding video I have ever seen. I wish it was mine.
Brian & Eileen's Wedding Music Video. from LOCKDOWN projects on Vimeo.
While we're on the subject of weddings, I should say that I'll be super jealous if you have yours at Treehouse Point (via Not Martha).
May 15, 2009
Lisa: Etch a Sketch
Inspired by this glass-etching tutorial on isly (found via this post on How About Orange), I decided to try etching a giant monogram (I love monograms) into my 9x13" pyrex baking dish, in an effort to make it prettier and more identifiable at potlucks.
All the background info and steps are after a jump, but here's the finished product:
I liked my finished baking dish so much (and making it was so fun and easy) that I made another one for my cousin as a wedding gift, this time with just the first initial of her new last name.
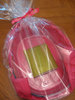
I admit, I felt a little less cool when I went to church the next Sunday and found out that etching glass baking dishes is our upcoming Enrichment Night craft. But at least mine isn't made with one of those precut vinyl dealies, right? It's still a LITTLE bit original. So. Want me to make one for you?
Materials:
Computer
Printer
Monogram font
Adobe Illustrator (or whatever program you like)
Scotch tape
Transfer paper
Contact paper (any pattern)
Pen/pencil/stylus
X-Acto knife (sharp)
Spatula
Armour Etch
Pyrex baking dish
Kitchen sink
Silicone baking spatula
Note:
The bottle of Armour Etch says it won't etch Pyrex, so I did a little checking around on the internet. I'm glad I did, because I learned two important things that were backed up by several sources. First of all, you CAN etch Pyrex (at least some Pyrex) with Armour; you just have to leave it on for 25 minutes instead of five minutes. Also, you don't have to just wash the etching cream down the sink when your time is up, like it says on the packaging--you can scrape it right back into the bottle and use it again! A little bit is still lost, but you'll get a lot more use out of that expensive bottle.
Steps:
1) I downloaded monogram kk from Abstract Fonts, and tooled around with my initials for a few minutes in Illustrator. I was hoping the large size of the monogram would make it feel more modern, and that at first glance it would just appear be a pretty, scrolly design. Once you've decided on your design, reverse it before printing. You'll be etching on the bottom side of the dish (so little bits of food don't get stuck in there), and you want to be able to read the letters through the bottom of the dish when it's right side up.
2) Cover the bottom of your baking dish with whatever leftover contact paper you have on hand (keep the color of your contact paper in mind when you're buying transfer paper). Use your fingers or the back of a spoon to smooth out any bubbles. Be especially careful around the logo/raised lettering on the bottom of the pan. It's REALLY important to make a good, smooth seal.
3) Tape your reversed, printed out design on top of the transfer paper, which is on top of the contact paper. Trace over all the edges of your design with a pen. Remove the transfer paper and printout from the contact paper carefully, making sure your entire design got transferred.
4) Use the X-Acto knife to cut out all the pieces of your design that you want to be etched. Don't stress out about this part. I hate cutting with an X-Acto knife on paper and cardboard, because the knife always goes zinging out of control at the worst possible moment and ruins my design, but it's really super easy to cut contact paper on top of glass.
5) Brush on the Armour Etch in a very thick layer (enough so it's opaque and white), making sure you cover all the parts of your design. Don't let any sneak off the edges of your contact paper outside the design area. Also, be REALLY careful not to get any etching cream on your hands, because that stuff burns like a mother. Set your pan (carefully!) aside and time it for 25 minutes.
6) Once time is up, take your pan into the kitchen and very carefully scrape off the etching cream with a silicone spatula. Scrape it into a funnel and then back into the jar, or just right into the jar if you're coordinated enough. Then peel off the contact paper and throw it away without gooing yourself with the creamy side. You might need your X-Aacto knife to catch the tiny bits of contact paper--you don't want to be scraping them up with your fingernail and get Armour Etch under there. Then rinse off the rest of the etching cream on the pan with water. Wash your hands and arms really, really well with soap and water, and wash the pan again really thoroughly before cooking in it.
May 14, 2009
Lisa: Lovin' it?
There is a matter that has been lying heavily upon my mind for some time. I think it is time to share this matter with you, and to use your responses as a balm for my troubled soul.
I HATE the McDonalds Playland.
It is horrible. Let me describe it for the uninitiated among you. The McDonalds Playland is a giant network of brightly colored plastic pipes. Some of these pipes lead to dead ends with clear plexiglass windows, while others lead up to larger, room-like openings or enclosed, spiral pipe-slides. There is usually one entrance to the entire structure, with a bank of cubbies next to it for kids' shoes. The whole mess is completely enclosed with a combination of plexiglass walls, locked chain-link-and-PVC-pipe gates, and nylon netting.
Maybe that doesn't sound so bad, but let me describe for you just a few of the problems.
1) Half the kids in there are carrying grubby little handfuls of soggy cheeseburger, or half-eaten Chicken McNuggets. These get dragged and squished along the sides and floor of the pipes during play (not to mention the kid with the overflowing diaper dragging his pungent little butt down each tube). Now, these pipes are kid-sized, and adults are not allowed inside the Playplace. You KNOW the employees aren't squeezing in there after hours, wiping down those pipes with any kind of regularity. The whole thing might be "sanitized" once or twice a year, but that's not doing much against day-to-day grimings.
2) Once your kid is past the entrance, there is no possibility for adult intervention of any kind. Did she climb too high, and is now unsure how to get back down? You'll just have to wait for her to stop crying and figure it out. Did some bigger kids corner her at the end of the blue pipe and start menacing her with their broken-off ice cream cones? I hope she remembers those self-defense lessons you've been giving her.
3) Forget getting your child out of the Playland before they're good and ready. They know you can't come in there after them, and they take advantage of that. There is always at least one mom outside the entrance of the Playland, hands on hips, half bent over and calling into the pipe in her sternest voice: "DEVIN! DEVIN! YOU COME OUT OF THERE THIS INSTANT!" There is a sign posted outside the structure detailing emergency procedures, which are basically that the parents are supposed to stay out of the structure, while McDonalds management "gets the children's attention and instructs them to leave the Playland." Right. I'm sure the kids will see giant flames through the plexiglass, hear an unfamiliar voice through a loudspeaker urging them to exit, and will calmly comply. None of them will get scared and huddle in the most hard-to-reach places.
4) Guaranteed, one kid is scaling the nylon netting on the outside of the Playland, while another kid is yelling, "Mo-om! The sign says No Climbing [which it patently does] and that boy is climbing!" There is no choice for the second kid's mother but to yell back, "Are you that boy's mother? No. He has a mother." Must we play out this tired scene again and again?
5) Please don't get me started on the aura of plastic-generated electrostatic that surrounds the whole place.
Nora, of course, loves it. Even when I have to pick pieces of broken Happy Meal toys out of her chubby little knees afterward.
April 24, 2009
Lisa: I know, it isn't Thursday
I think it's time...for some MAUDLIN PIX. (If you want to know more about this feature, you should ask Sarah, but she might be too busy over at her spiffy new blog to answer. Or you could take your cue from Andrea, who's been doing it better for longer.)
Here's one from the vaults. Obviously, part of what makes this photo so great is that it tells a story.

April 23, 2009
Lisa: little bunny foo-foo
It's hard for me to believe that Nora is old enough to notice what holiday it is and if she gets a present or not--but this Easter I had to face the facts. Since Blake is pretty adamant that Nora not eat candy (and I'm not actively encouraging candy either), I wanted to make her something special that would take her mind off the lack of chocolate eggs.
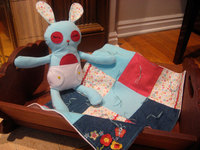
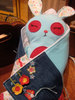
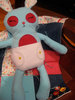
This little bunny and her blanket are made from this mmmcrafts pattern, and are sewn from some of Nora's outgrown baby clothes. I used felt, embroidery floss, thread, and batting that I already had, so the only thing I had to buy was the pattern itself. My dad made the cradle for me when I was a baby, and my mom brought it up from Spring City so that I could pass it on to Nora. Tender, right? I mean, I'm pretty much the best mom ever, wouldn't you say?
Unfortunately, my gift was completely overshadowed by the gigantic pink plush Care Bear Nora's great-aunt bought her at a secondhand store. Nora tackled that thing and rolled around with it, giggling and giggling. Ah, well. Maybe this sleepy little homemade bunny will grow on her.
(Oh, and if you think that I copied Angie's wedding colors, then all I can say is thank goodness I have people with really good taste to mooch off of.)
April 20, 2009
Lisa: I think this settles it once and for all.
As evidenced by this conversation, Blake and I have been arguing zombie apocalypse plans for years now. I can't even explain how gratified I was when I read that Mighty Girl's plan involves taking over a Costco too--not building a stupid walled compound. To my knowledge, Maggie has never been wrong before. Eat it, Babe!
If you like discussing zombies and the related contingency plans (which of course you do, because you are awesome like me) you might enjoy this article by Robert Brockway, brought to my attention by Dave T., who used to read this blog until we got boring. I laughed out loud four times, completely blowing my "I've just got to get this work done" cover story.
April 17, 2009
Lisa: Live Life to the Fullest
In October of 1992, my deepest aspirations apparently included:
1) Playing pieced-together sheet music on the flute
2) Graduating
3) Getting married
4) Wearing ill-fitting clothing
and let's not forget,
5) Becoming a tiger.

Ah, junior high school, with your ridiculous assignments and even more ridiculous students. We couldn't get to high school without you.
April 16, 2009
Lisa: Ur jus jellus!
Sarah documented the majority of our Britney experience (and I'm sure she'll share many unflattering photos here), but I thought you might like a little preview:

If you don't recognize immediately that those shirts are made according to the tutorial featurette on the Crossroads DVD, then that is why I am here. TO OPEN YOUR EYES.
April 10, 2009
Lisa: Mmm! The invigorating scent of "you may have vomited recently!"
Dear Crest,
Congratulations on Vivid White--a triumph, really. One question, though. Instead of Invigorating Mint, don't you think you should just come right out and say wintergreen? Then the people who wish they could brush their teeth with Pepto Bismol would know right away which tube is for them.
Oh, and would you mind passing on a message to your friends at Secret? A squishy goo that is pushed up through a grate when you twist the base can't honestly be referred to as a Conditioning Solid, am I right? Let's try to stay away from outright lies in our product copy.
Sincerely,
Sensitive Gag Reflex
March 23, 2009
Lisa: Jailhouse Pop
This feature brought to you by HK Magazine:
Jailhouse Pop
What's the worst thing about being an incarcerated Cantopop celebrity?
March 03, 2009
Lisa: comorbidity
Overheard in the movie theater restroom.
Woman 1: When I went to the doctor for my ear infection, there wasn't even a note in my chart about me being an addict. They could have prescribed me anything! I mean, there should be a NOTE!
Woman 2: I know, that's why I'm so mad I threw away those leftover Percocets.
W1: Hold on, let me take these real quick. [Drinks from the sink faucet.] I can't believe they gave me two 50s instead of one 100. The 100s are totally stronger than two 50s.
W2: Totally stronger.
W1: I told my doctor to write me a prescription for the 100s instead, because they're exactly the same, but she wouldn't. Like, I KNOW they're addicting. I'm an addict. But I have ANXIETY!!
March 02, 2009
Lisa: Silent in the Grave
One-minute book review of Silent in the Grave, by Deanna Raybourn.
Read it!
February 25, 2009
Lisa: Tool of the Week
Last week, Blake and I suddenly found ourselves in the market for a new vacuum cleaner. The Hoover we got for our wedding is now quite aged, and though it has served us well over the years, it recently stopped picking up much of anything at all. Since we now have a toddler who seems equally interested in holding up and inspecting every bit of debris she finds on the floor, and in carpeting our home with Cheerios, it's more important than ever that we have a functional vacuum.
On the strength of a glowing recommendation from E, we investigated and eventually purchased a
and so far, we love it. It's bagless, and watching that clear cylinder fill up completely with dirt, dust, and rug fuzz the first time we used it was simultaneously appalling and satisfying, in a way usually reserved for the popping of really juicy zits. Of course, it has a HEPA filter for making the air cleaner while you vacuum, but even more of a selling point than that is the attachments that actually WORK. You know that grody little line of dusty carpet at the edge of the baseboards, that the vacuum doesn't really reach? Yup. No longer a part of my life. And it may have been some kind of post-purchase-euphoria-related placebo effect, but Blake swore that the carpet even felt cleaner when he sat on it.
Some of the online reviews criticized the Bissell as being too heavy, but it doesn't seem to be any heavier than our old vacuum, so that didn't bug us. Plus, Blake does a lot of the vacuuming, and he doesn't mind lifting heavy things. It gives him a chance to flex his manly muscles.
If I had to complain about anything, it's that the Bissell is maybe a little bit too awesomely strong. It vacuumed (or at least enlarged) a small hole along a seam of our area rug--but it's nothing that can't be fixed.
Incidentally, my mom pointed out that the problem with our Hoover might be nothing more than a broken belt, and her suspicions were only strengthened when I looked at her blankly and just repeated, "Belt?" Apparently you're supposed to check and maintain these mysterious "belts" on a regular basis. Blake opened up the bottom of our old vacuum, and sure enough the belt was just hanging there, lifeless and snapped in half. I picked up a replacement at the grocery store (right next to the vacuum bags, which I've been buying for years) and we're going to fix the Hoover up and keep it downstairs. Win-win!
February 23, 2009
Lisa: Blood, Sweat, and Tears
Given Angie's idea of different angles for each day and my current penchant for Photo Booth, I thought I'd try out Movie Mondays. Sarah's not as jazzed about the idea, but I'm hoping I can win her over.
Here's today's offering--I think you'll agree that what I lack in talent, I make up for in enthusiasm. If you've seen me dancing, you know this already.
February 20, 2009
January 29, 2009
Lisa: 25 random things
1. Diet Coke allows me to be the best version of myself. This has been confirmed by outside sources.
2. I secretly believe that if you heat-style greasy hair, it sort of cooks the grease into your hair again, like a hot oil deep-conditioning treatment. That sounded less gross in my head.
3. My genuine laugh is too loud to be considered strictly ladylike.
4. Who am I kidding--even my normal voice is too loud. Someone once told my boss at the library that he should hire quieter employees.
5. The best (and arguably only) reason to own a gun is to be prepared for the impending zombie outbreak. Better make it a shotgun.
6. I have been blogging for the same ten readers for almost six years.
7. I'm sure your McMansion is very nice, but I'd choose a smaller, older home every single time.
8. I am incredibly clumsy (see current black eye). I have a very real fear that I will fall down the stairs while holding Nora and kill us both.
9. I can't remember a time, no matter the number on the scale, when I didn't want to lose ten pounds. It's nice to have a constant in life.
10. I make Blake change his shirt because I love him.
11. It's fine if you hate Obama. Seriously. Just don't tell me it's because he�s a Muslim who wasn�t even born in the U.S.
12. Just because something is in print (on paper or online) doesn't make it true. Check. Your Effing. SOURCE.
13. I desperately need a new water heater. Invigorating cold showers are starting to lose their appeal.
14. I am cripplingly intimidated by everything my mom can do.
15. I'm in love with my daughter.
16. I love routines. Someday I'll put all the right pieces together to form the ultimate routine, and it'll just be perfect week after perfect week from there on out.
17. There were three people before Blake who I believed I was going to marry. Don't worry, if you're reading this I can almost guarantee you weren't one of them.
18. If I had to choose, I'd say James Bond is hotter than Aragorn. Of course, Jim Halpert is hotter than both of them. Not sure what that says about me.
19. I think I could leverage my librarian skills and my natural stalker tendencies into being a damn fine private investigator. Maybe someday I'll find out for sure.
20. If your proposed activity includes a) dressing up fancy and going out, or b) sitting on a couch with a blanket and fuzzy socks, I'm sold.
21. If there are garters involved, I will buy it.
22. I love being asked for advice.
23. I go to church because I think it's important to have a spiritual aspect to your life, and to try to be a better person than you already are. Church is one possible framework designed to help you do that.
24. I can't wait until it gets warm enough to ride my bike again.
25. I have found that people usually turn out to be more awesome than you gave them credit for.
January 26, 2009
Lisa: Pork Roast
Remember how I'm trying to find main-dish recipes that I can memorize and make regularly? Well, I think this pork roast is easy and delicious enough that it might fit the bill. It's the first crock pot recipe I've tried that I'd classify as an unqualified success, and there's no sign of my pet peeve of crock pot dishes--the instruction to brown the meat before putting it into the crock pot. To me, the whole point of crock pot cooking is that the recipe is super easy and basically preps/cooks itself while you're at work or whatever. If you have to spend a bunch of time getting everything ready to go in the crock pot (including cooking things on the stove), then you might as well choose a regular recipe that doesn't take four hours to cook.
But I digress. Aside from adding a bit of cooking time--I think every crock pot is a bit different--and wishing I had one of those handy gravy-fat-separator dealies, I hardly had to think about it. If you decide to make this (and I think you should), save yourself a headache and cut the roast into nice slices with the electric knife when you're ready to serve. Also, see if you can talk Blake into making mashed potatoes to go with it.
Recipe from Simple & Delicious after the jump. My additions/changes are in brackets.
Pork Roast with Gravy, from Taste of Home: Simple & Delicious, February 2009
This home-style supper can be made [a day ahead]. Strain and skim the cooking juices, cover and store all in the fridge. Then reheat the pork to 165 degrees and finish the gravy in a pan [the next day].
1 boneless whole pork loin roast (3 to 4 lbs.)
1 can (14 1/2 oz.) chicken broth
1 cup julienned sweet red pepper
1/2 cup chopped onion
1/4 cup cider vinegar
2 Tbsp. Worcestershire sauce
1 Tbsp. brown sugar
2 tsp. Italian seasoning
1 tsp. salt
1 tsp. pepper
2 tsp. cornstarch
2 tsp. cold water
1. Cut roast in half; transfer to a 5-qt. slow cooker. In a small bowl, combine the broth, red pepper, onion, vinegar, Worcestershire sauce, brown sugar and seasonings; pour over pork. Cover and cook on low for [4-6] hours or until a meat thermometer reads 160 degrees and meat is tender.
2. Remove pork [and reserve some for another use if desired].
3. For gravy, strain cooking juices and skim fat; pour 1 cup into a small saucepan. Combine cornstarch and water until smooth; stir into cooking juices. Bring to a boil; cook and stir for 2 minutes or until thickened.
4. Slice pork; serve with [mashed] potatoes and gravy. Yield: 4 servings.
January 25, 2009
Lisa: diet
I ate hummus, which is totally good for you (+1)
On tortilla chips (-1)
By spreading it onto each chip individually with a knife (+1)
(My chips kept breaking (-1))
Eh. A draw. I think I've earned some cake.
January 24, 2009
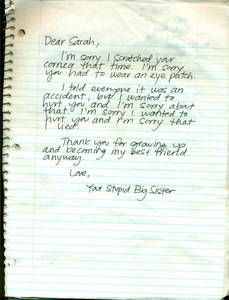
January 20, 2009
Lisa: no means no
Dear Walgreens cashier,
Please do not expose my one-year-old daughter to the sight of your plush caveman singing Do It Like They Do on the Discovery Channel. Similarly, hide away your mechanical puppy holding a valentine heart and offering an inappropriately sexual R&B message. In fact, maybe stay away from the animatronics altogether. She's saying "no" for a reason.
Sincerely,
Common Sense
January 10, 2009
Lisa: advanced
Lisa: Are you teaching her how to juggle?
Blake: Yep! Well, I'm trying to. She's totally going to impress all her kindergarten friends.
Lisa: Yeah she is. And her teacher.
Blake: She'll impress EVERYONE. Except Dave. Dave'll just be like, "I've been juggling since I was three."
January 08, 2009
Lisa: Loves getting a little lacy.
Ah, Victoria's Secret Semiannual Sale catalog. How I love thee.
For a mere thousands of pennies, I can send a box hurtling toward me through space containing something naughty, something nice, the very good, and the very bad. And by very bad, I mean horrendously pun-tastic catalog copy.
To wit: "The lace is on for frill seekers."
December 19, 2008
Lisa: it came upon a midnight clear
Christmas is in less than one week. I'm not sure how that happened, and my guess is that things are getting a little crazy for you, too. Too crazy maybe to stay caught up on reading your blogs. Shall we agree to just let each other off the hook for a few days? PHEWF.
November 28, 2008
Lisa: Echinoderms (the low lifes)
Thank goodness Blake's mom had the forethought to save this science assignment. That's right, my friend, it's a comic book in which the phylums battle it out for control of the world--and the echinoderms WIN.

Blake may not be able to take full credit for this masterpiece. There seems to be a dispute over authorship with his friend Brian. All I know is that I couldn't let that keep me from immortalizing it here.
November 27, 2008
Lisa: Turkey Day (And pie day. And roll day. And potato day.)
Happy Thanksgiving, everybody! I have to go slip into a food coma now.
November 26, 2008
Lisa: Lil' Brudder
When Dave and Angie got married, my parents placed upon my humble shoulders the responsibility of creating a life-size cardboard standup of our brother Jeff. He's in New Jersey until next summer and couldn't be at the wedding in person, so I guess they figured this was the next best thing.
Step one: have Jeff take an appropriate picture of himself.

Step two: purchase a ready-made cardboard standup of George W. Bush. Trust me, these things are readily available, reasonably inexpensive, and a lot easier than obtaining your own large-scale printout and backing it with cardboard. Print out Jeff's face and neck (No, really, W's neck is gross and not at all fitting for a healthy 19-year-old boy.) on a regular color inkjet printer and cut them out. You might want to do a few of slightly different sizes, so you can try them out and see what proportions look right. Glue Jeff's head over George's, getting creative with the neck and collar area. Slap a printout of Jeff's missionary badge on the jacket for verisimilitude.

Step three: scare yourself silly on at least five separate occasions, walking into a darkened room and catching a glimpse of Jeff's lurking, shadowy form out of the corner of your eye. Put a bright face on things when you help your baby girl become friends with an uncle she's never met.
Step four: secretly hope your parents get the standup out for Thanksgiving dinner tomorrow.
Miss you, Jeff! I can't wait to hug the real thing.
November 25, 2008
Lisa: a cardigan is not enough
I don't care how good her legs are for her age. You shouldn't let your grandmother go to the grocery store without pants.
November 24, 2008
Lisa: you could put your weed in there
Before it got too cold outside, I did a mass harvest of my herb garden, stuffed the spoils into ziplock bags, and marked them with their contents and the date. Now if I have the urge to make my own lavender-scented bath products or season a dish with fresh sage, I can just pull the ingredients out of the freezer. I felt like Ma frickin' Ingalls, putting away stores for the winter. Sarah had a different reaction when she saw my stash: "Um, Lisa? Did you know your deep freeze is full of marijuana?"
In other domestic news, for the first time in weeks I haven't had to spend Nora's naptime sewing or hot-gluing. At long last, I scraped, cleaned, and re-painted the bathroom ceiling. Woot!
November 23, 2008
Lisa: happy birthday to me!
Blake planned an incredible Twilight birthday party for me with Sarah's help, complete with blood-red drinks,
goody bags including glittery vamp-skin lotion,
and a huge cake depicting a vampire/werewolf battle.
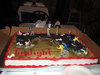
Oh, and of course we saw the movie, which was kind of awesomely serious and cheesy and mockable.
My only disappointment? Not getting to see Edward's enormous, satin-draped bed. Oh, and the fact that the restaurant staff somehow got the impression that I'm a rabid Twilight fan.
Edited to add pictures, courtesy of Sarah!
November 19, 2008
Lisa: last one!
I think I mentioned before that one of the costumes I get to wear in the Music Man is a ridiculous sailor-collared "athletic" outfit. I snuck mine home after rehearsal last night to alter it to fit a bit better. If you think that shirt looks baggy and shapeless now, you should have seen it before.
If you have never been in a play before, you might be blown away (as I was) by the level of characterization that even the most minor characters get. Not only is the newlywed Mrs. Squires (that's me) ridiculously in love, but she also married into money, and likes to show it off by wearing a million different expensive (and slightly insane) outfits. Anyway, the point is that I thought Mrs. Squires would add a little extra something to her gym uniform, so I borrowed a big Gerbera daisy clip for my hair from Sarah's collection.

Here's my final costume in action (pre-alteration). You can't see them in the photos, but those black bloomers are worn over opaque white tights and high-top Converse All Stars. Sexxaaay!
There's still time to change your mind and come see the show! YOU KNOW WHO YOU ARE.
November 14, 2008
Lisa: in the best Delsarte tradition
I told you! I get to wear a ridiculously decorated faux toga. Bonus: I decorated it while watching the season finale of Mad Men with Sarah. Now, every time I put it on, I think of Don Draper. Unfortunately, every time I put the toga on, I am also reminded that my hair will never be as awesome as Joan Holloway's.

In action:
We open tonight! I hope I see you there.
November 12, 2008
Lisa: I don't know how I can ever wait to see
Sorry if I've been a bit one-note, but practicing three days a week has sort of kept the play at the forefront of my mind. Anyway, we open this weekend, so it will all be over soon enough.
The shirt is from Steve & Barry's, and I made the skirt myself using this pattern. The humongous, tulle-topped hat is my favorite of the ones I made. It's not so great for tight backstage quarters, but there's a certain satisfaction in forcing your stage husband to bend down and peer under the brim in order to sing into your face.
[Edited to add a shot of the hat in action. It is fully three heads wide.]
November 09, 2008
Lisa: "Wow. That's really...bright."
As with the last ensemble, the outfit was provided for me, but I decorated the hat myself. (Good thing I've had lots of practice.) The blue tulle around the hat hangs down in front to form a veil around my face.
So, yeah. When you get to the church, I'll be the one in the pulsing, radioactive ball of blue.
[Edited to add a shot of this costume in action.]
November 08, 2008
Lisa: You've Got Trouble
What goes with a blue-and-shocking pink gown with padded-out hips? A hat featuring lovebirds in a love nest, of course.
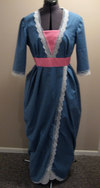
You know you want to be there.
November 06, 2008
Lisa: prop
This is but a preview of some of the costume-related entries to come. So many hot-glue burns, so much tulle, so much unbridled joy. Nora is going to have the best dress-up box ever.

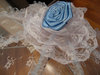
November 05, 2008
Lisa: change
After Nora and I rocked the vote in the freezing rain, we needed a treat. Just because she ate some of hers in the cart at the grocery store doesn't make it any less celebratory.

Don't worry, Nora's Obama onesie was safely covered up by her hoodie while we were at the polling location, as per Utah's anti-electioneering polling place rules.

I'm thrilled that Obama won so handily, and I'm really proud that the race was so close in Salt Lake County. WE DID THAT.
I'm scared, however, that over 20,000 people in Utah think that Super Dell should be governor.
November 03, 2008
Lisa: just doing my part
Blake arrived home from work and found me in my office, printing something out from my computer.
Lisa: Hey! How was your day?
Blake: Blegh. I spent all day neutralizing chemicals.
Lisa: Oh yeah? Well, I neutralized [whips finished Obama poster out of the printer and holds it up] THE OPPOSITION!
Don't forget to vote tomorrow, everybody!
November 02, 2008
Lisa: Today!
Sometimes you take stock of your life and realize all you do after 10 pm is lie on the couch playing Apollo Justice. Then you email your friends in a panic until they agree to get pretty and go out on the town with you. You choose the Tavernacle, of course, since there's something to watch besides each other AND it involves loud singing. Somehow your camera phone makes its way out of your purse, becomes self-aware, and posts the evidence of your debauchery on the internet. There, there, it's OK--Apollo Justice will be waiting on the couch for you tomorrow night.
Luckily my phone happened to catch a rare appearance of Mallory's WOW face.


And these are my new lacy stockings, which Mallory showed to the table next to us by pulling my leg up perpendicular to the floor.

And this account simply wouldn't be complete without a shot of Sarah's fiance and one of the piano guy with the hair getting his butt grabbed by an extremely inebriated woman of a certain age.

November 01, 2008
Lisa: Take Three
I know some people think that since Sarah and I write this blog together, it doesn't really count when we do NaBloPoMo, because we don't EACH post every single day. All I know is that we write more, better entries when we have a challenge.
Let the slightly more regular blogging begin!
October 28, 2008
Lisa: that's what they call a win-win-WIN
Before it becomes completely irrelevant, I should post these pictures from our VP debate party. Nothing goes with talking points and winking like nachos and Palin Bingo!


You can tell how much fun everyone's having by their eagerness to smile at the camera.
October 22, 2008
Lisa: clarification
Dear Everyone Ever,
Pro-Choice is NOT the same thing as Pro-Abortion. Protecting a woman's dominion over her own body is not synonymous with advocating or condoning baby murder.
Can this be the last time we ever talk about this?
Sincerely,
Lisa
October 13, 2008
Lisa: Tools of the Week
Meredith was not kidding, this little roller is a life-changer. It completely eliminates cutting in with a brush, and makes small areas a breeze. I'll never paint without one again.
By far the most impressively designed and packed piece of IKEA furniture I have ever purchased. A pleasure to build (yeah, I said it) and a handy little set of drawers, too.
October 04, 2008
Lisa: bittersweet
Today is my last day working for the library, at least for the near future. My feelings about this are so mixed, but I think excitement for the next phase of my life is winning out.
Thank you, thank you to Dawn for helping me find library science, to the University of North Texas for allowing me to earn an MLS without leaving Salt Lake (and Blake), and especially to the Salt Lake County Library System for hiring and training a brand new children's librarian (and for working around my pregnancy, delivery, and new motherhood for as long as they did). I consider this my career, and I'll be back, refocused and ready to work harder than ever in just a few years.
Thank you also to Concert Black, for making this change possible, and to my mom, whose vision, drive, and very hard work has made our little company run so well that instead of working on it "on the side," it can be my main job. I can hardly believe that I'll be writing myself a paycheck for filling those website orders from home.
Thank you most of all to my little Nora, for coming into my life so fortuitously. You have brightened it and made each day better in a way I could never have imagined. It has been hard for me to leave you every day (even with people who love you as much as Sir, Grandma, and your dad do) and I can't wait to be home with you to watch you changing and growing. I feel like I'm growing because of you, too. And of course, I'll be there to make sure you have on pants.
Phewf! Enough sappy stuff. See you all online.
September 30, 2008
Lisa: What, you don't have a decoupaged business card holder?
Before everything went insane, Jeremy, Marci, Mallory, and Sarah came over for a super Saturday craft day. We pooled our craft supplies and everybody brought treats, and it was awesome. Sarah came up with the idea to decorate office stuff, and I went a little crazy with Mod Podge and some scrapbook paper.
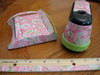
I promise, more real entries to come when it's not my last week at work.
September 16, 2008
Lisa: don't worry, he's not a democrat either
Before camera phones, we just had to tell our friends about the crazy cars we saw driving in front of us. Now, we can show a photo of said craziness to the entire world. Isn't this a magical time?
I'm not sure you can read the fine print there, but if you prove him wrong (presumably on ANY of the text written on his vehicle), he'll pay you $5. Not bad! Although you would have to talk to a crazy person. So...not great.
September 04, 2008
Lisa: Adieu, adieu, to yuh and yuh and yuh
Another thing I'll miss about summer: the fleet of strollers outside the door of our church on Sunday mornings. Yes, that's three double-wide strollers you see in the picture. Crazy Mormons.
August 29, 2008
Lisa: you can't hug a photograph
At the beginning of August, we went to an outdoor showing of Goonies that combined three of Nora's favorite things in the world: being outside, live music, and macaroni and cheese. Not to mention some of her (and my) very favorite people. Don't worry, I have already forgiven Sarah and Mallory for sticking pens in my hair while I was lying on the blanket.


The girls and I let Blake and Nora get to bed at a reasonable hour, then headed to Wal-Mart for midnight purchases of Breaking Dawn. Unfortunately, no one told me to take off my "I was bitten" pin before we went into the coffee shop, so I embarassed myself in front of the barista. Mew!


Farewell, Summer. I hardly knew ye.
August 27, 2008
Lisa: in the closet, that's my stuff
There was this incident. With the dish brush. And then I suddenly had to get rid of a bunch of stuff from our storage room. Maybe it's best not to ask.
If you're interested in any of these items, click on the picture to go to the ad or auction!


August 20, 2008
Lisa: does anyone want some herbs?
I don't know if anyone remembers our herb garden project, but I thought I'd post an update since things are going so well.
Here's a view of the whole garden, the HUGE comfrey plant (What does one use comfrey for? I guess I should have researched that before planting.), mint, sage, and our little champion tomato plant. We've picked ripe tomatoes four times now, I think. Sorry, I'm blocking the sun with the camera in some of these shots.


So, does this count as having a vegetable garden? I think so. Now, to find a way to use some of these goodies before they go to waste...
August 18, 2008
Lisa: This is going to be awesome.

I can see the resemblance:
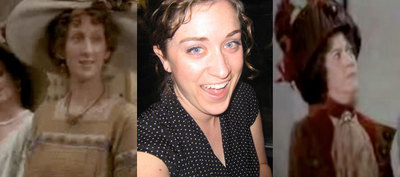
ETA: A few costumes I might have to look forward to.
August 08, 2008
Lisa: Red Dawn
Lisa: http://www.imdb.com/title/tt1234719/
Sarah: Ohmygosh.
Lisa: http://www.themovieinsider.com/m4854/red-dawn/
Sarah: They're remaking it?!
Lisa: A remake. Yes. I was seeing what movies were scheduled for 2010, in case it brought up any awesome costume ideas.
Sarah: WOLVERINES!
Lisa: Blake is going to plotz.
Sarah: Plotz?
Lisa: It's a real word!
Sarah: I don't doubt that, i suppose, I just don't know its meaning?
Lisa: PLOTZ: To burst, to explode, "I can't laugh anymore or I'll "plotz." To be aggravated beyond bearing.
Sarah: Hee. Awesome. Thank you.
Lisa: Thank the Dictionary of Yiddish Phrases.
Sarah: I wish I knew more Yiddish.
Lisa: plotz (pl�ts) intransitive verb
INFORMAL to be overcome with emotion; give way to excitement, anger, delight, etc. Etymology: < E Yiddish platsn, lit., to burst, explode < MHG platzen
Lisa: Are you going to plotz?
Blake: Absolutely.
August 05, 2008
Lisa: one man's garb is another man's...garbage?
Lisa: BS!
Blake: Hi hotness
Lisa: I am getting so excited about your costume for Comic-Con. So excited that I might condone you growing your beard out and putting beads in it.
Blake: What is my costume? I am not aware of what is going on.
Lisa: Well...I was thinking you could wear your kilt and dress as THE HIGHLANDER! What do you think? You could carry a sword?
Blake: Yes, I would be The Highlander. I would like to carry a sword and have a braided beard. But if I am to do that I need to start growing now.
Lisa: Hmmm. Well, what if it wasn't really BRAIDED so much as kind of scruffy? Maybe you could get beard extensions. Or have little beaded pigtails instead of true braids.
Lisa: So, what costume are you going to wear for Comic-Con?
Sarah: Hee. Sailor moon, of course.
July 29, 2008
Lisa: wait for it...
I have so much to tell you, Internet! I've been...
and so much more, really. Unfortunately, I should be spending my at-home computer time getting caught up on the accounting work I've been putting off. The only new content I have to offer is this ridiculous picture, made here. (Thanks for getting me through that last few minutes of the workday, angry chicken! How did you know I was looking for a way to more widely distribute photos of myself?)

See you next week!
July 23, 2008
Lisa: Feisty
Last Thursday, Sarah and I saw Feist at Deer Valley. She was AWESOME. I already thought her voice was unusual and cool, but it's even more unbelievable live. Plus, she kept teasing the Deer Valley crowd about their lawn chairs and their roasted red pepper caviar hummus with quail's eggs, which was good times. She also had a pair of amazing shadow artists performing behind her, projecting images onto the back wall of the stage--it was worth the hour's wait for dusk after the opening band.
As the icing on the cake, we ran into Andrea and her friend and made them come sit with us, and Dave and Angie even stopped by on their way to the fancy seats.


The only thing that could have made the night better is if Blake and Nora could have been there. Oh, well. I'll leave you with a message from Sarah:
Peace, bitches!
[Edited to add: I just noticed that the girl over Sarah's shoulder in that first picture is reading Twilight. Awesome.]
July 21, 2008
Lisa: This is why we are married.
I admit it: I got sucked into the Twilight books AGAIN. I thought I was too good for that, but the new one is coming out in a few weeks and I couldn't fight it. (For the record, I have actually liked them better the second time around. Don't you judge me.) Anyway, Blake saw me reading one the other day, and started asking questions about this particular vamp universe. You might recall that we've watched a few Buffy episodes and other vampire movies in the past...suffice it to say that each oeuvre comes with its own mythology. Well, I guess I could have just said, "I don't know" or, "who cares," but I'm a librarian. When faced with a reference question, I must find the answer.
Via email:
Blake,
I thought you might be interested in Stephenie Meyer's (the author's) answer to your question from yesterday.
Q: Is it possible that a human could kill a vampire?
A: Er, not really. A big enough bomb would probably be hot enough to burn a vampire, but the vampire would have to agree to hold still and let it hit him.
Lisa
--------------
Lisa,
Though I appreciate her answer in terms of mythology she just might as well have said it takes magic fairy dust to kill them. "No humans can kill vampires because they have a mystical force shield around them, or rather a miasma that defies the laws of physics."(haha) If it is a big enough bomb they wouldn't have to hold still they couldn't get away. It is not heat that does damage from bombs but rather kinetic energy so if we can determine how much kinetic energy it would take to pierce their skin then we can see whether or not a shot gun can produce enough kinetic energy. She does not understand thermodynamics and kinetic energy but I am preparing the equations just in case she ever asks me. Sorry I am a big nerd but am thankful for your e-mail.
Blake
--------------
Blake,
Well, I don't know about the laws of physics, but it's not a forcefield. It's because they're super hard, super strong, and super fast. Here's more:
Q: Why do they sparkle?
A: They sparkle because they have turned to substance that is somewhat like diamond. Their bodies have hardened, frozen into a kind of living stone. Each little cell in their skin has become a separate facet that reflects the light. These facets have a prism-like quality-they throw rainbows as they glitter.
Q: How about stakes through the heart? Reflections? Photographs? Holy water? Garlic? All that traditional vampire lore.
A: Bunch of garbage. I think all of them get addressed in New Moon except garlic and stakes. But you try shoving wood through granite.
Q: Do the vampires have blood in their veins even though their heart no longer pumps? What would happen if they were cut or injured in some way?
A: Most human fluids are absent in my vampires. No sweat, no tears, no blood besides that which they ingest-they don't have their own blood. They do sort of have saliva-the venom makes their mouths wet, at least. When they drink blood, it runs through their body and makes them strong. It floods through their old blood ways, though they don't have circulation anymore. It lightens their eyes and flushes their skin slightly. If a vampire were cut, there would only be blood if he/she had freshly drunk blood (and drunk a lot). Otherwise, there would only be a bit of venom. It would be like cutting into granite.
Lisa
--------------
Lisa,
I am already figuring out the necessary kinetic energy it would take for a thrust object or projectile to penetrate granite. The initial calculations do not bode well for most normal weaponry but several high powered rifles whose bullets reach teminal velocity in their descent can pass through almost 4 inches of granite. It still may not kill one but it certainly could ruin his or her day. Also interestingly enough a projectile like an arrow if propelled near the speed of sound can pass through 6 inches of granite assuming the arrow is made of a similar material. I guess I should invest in a shotgun for zombies and a guass rifle for vampires. But this is just my initial investigation. I am also looking at chemicals that will eat through diamonds. What about a diamond chainsaw blade hmmmmm, interesting. Can I get a chainsaw for Christmas?
Blake
--------------
Blake,
I love you so much. But also, don't forget the super speed.
Lisa
--------------
Lisa,
So true. I will have to develop a suit like Batman in a comic book set in the future where he had to square off against Superman. These vampires seem a little like Superman so that is what I should try to defend against, or say screw the whole thing and just hope they want to turn me instead of just eat me.
Blake
July 08, 2008
Lisa: no cruising yet
Bicycle Shop Gentleman: Hi, need a repair?
Lisa: Well, kind of, see--
BSG: Your front wheel's on backwards.
L: ...Yes.
July 07, 2008
Lisa: congratulations!
We love you, Angie and Dave!
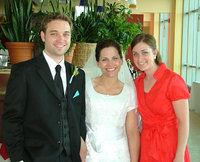
Back to our regularly scheduled programming soon...
June 23, 2008
Lisa: the fall
Dave: I'm calling to give you a movie recommendation: The Fall.
Lisa: Oh yeah?
D: Yeah. And this should mean something to you if no one else--it's by the same director as The Cell.
L: The Cell? Really? With Jennifer Lopez?
D: I mean, you loved that movie, right? Even though no one else did? Except, this one, instead of being ridiculous and stupid, is the best movie of the year.
L: ...Thanks. So, what's it about?
Angie: It's everything you could ever want in a movie.
L: Everything? Is there singing and dancing?
D: Yes.
L: SERIOUSLY?
D: Well, nobody's crunking [sic] or anything. But, yes.
L: Well, it sounds like I'd better go see it!
D: Take Sarah. She'll like it too.
Anybody want to go?
June 21, 2008
Lisa: Friends don't let friends wear men's golf shirts.
You know those golf shirts they ordered for everyone at work? Yours doesn't really fit, does it? Like, it's somehow simultaneously too big AND too small? Maybe because you are not six feet tall and shaped like a sausage? I think I can help.

First things first: find a good show on Tivo, so you don't get bored, and plop the baby in the walker. Hi, cutie!
Double-check your measurements against your trusty dress form (you can even make your own if you don't want to splash out for this invaluable tool).
Okay. Turn your golf shirt inside out and put it back on the dress form. Your shirt probably doesn't have side seams now--we're going to create side seams in order to give it some shape. The process is the same whether it already has side seams or not, really. Just grab the fabric at the side of the shirt, under the arm, and pin it together close to the dress form, keeping the pins marching in a fairly straight line down the side. If there's a place where the shirt is already somewhat snug, like at the hips or whatever, then you only need a tiny pin tuck to keep the illusion of a side seam going. You're going to pin the body of the shirt and then continue the line of pins around the curve at the armpit and along the bottom of the sleeve. Trust me, there's enough room in that sleeve to take out an inch or so.
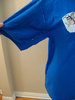
Unpick the ribbed material from the bottom of the sleeves. Just detatch it from the sleeve--don't unpick the stitching that keeps the cuff in a circle. Set those sad-looking things aside for now.
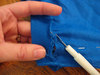
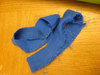
Time to start sewing! Don't bother cleaning off the table first; this is enough domesticity for one day, don't you think? Anyway, you should stitch along the line of pins you put in earlier, pulling them out as you go. After you do both side seams with a straight stitch, change your machine to a zigzag and add a row of that OUTSIDE the side seams. Trim off the extra fabric right next to the zigzag stitch. If you have a serger, this can all be done in one step (but...you are probably a very competent seamstress and don't need my help).
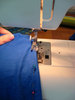
Let's address those monster sleeves. You can cut at least four inches of fabric off of each of those. This isn't an exact science; eyeball it, then fold over the fabric on top of itself as you go, using the cut-off bit as a guide so that you trim off a straight piece. Throw those pieces away, or make one into a headband a la 1990s Seventeen magazine featurettes.
Once you have the sleeves trimmed down to size, pin the cuff back on. Make sure you think this through before you start sewing! Right sides go together, and the underarm seams go together. If your shirt is still inside out, you will be pinning the cuff inside the sleeve. Then stitch a straight stich and zigzag stitch (like the side seams) right along the rough edge of the ribbing.
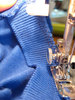
If you haven't tried your newly curvy shirt on yet, you might want to do that now to measure where the hem should be. Put the shirt on inside out, and pull the hem up over the shirt until you like the length. Pin it in four or five places so it'll stay in place while you pull the shirt back off.
The bottoms of knit shirts are usually finished with a double row of straight stitching. To copy this look, just sew around the hem twice with a straight stitch, picking a place on the presser foot to measure against for the second time around. When you're sure that you haven't hemmed your shirt too short, trim off the extra fabric.
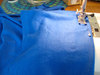
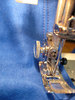
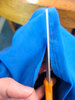
Voila! Isn't that better? You just lost twenty pounds, visually. Work will be 45% more bearable today!

June 20, 2008
Lisa: Friday, Fries, and Frolf
Last week, Nora and I had 45 minutes to kill before meeting my mom to shop for a Father's Day gift, so we decided to finally try the zucchini fries I've had my eye on at Woody's Drive-In.
After we got our food, we drove to Creekside Park for a picnic. Here's Nora, eating a quesadilla and trying to charm the nearby kids into coming over and making friends. It worked.

My raspberry shake was really good, and the zucchini fries were okay for a novelty food. They're strips of zucchini, battered and deep-fried--kind of like a heavier, wetter version of vegetable tempura.

There was some kind of frisbee golf tournament happening at the park; at least, I hope so. About fifty men in their twenties and early thirties--the majority of them unfortunately shirtless--were just hanging around, throwing frisbees at poles at 3:00 on a Friday afternoon. If it wasn't a tournament, I am terrified for my generation. Don't worry, though, I documented some of the half-naked frolfers for your viewing pleasure:
June 19, 2008
Lisa: I said who do you think you are
I went to the hair salon on Tuesday.
Stylist: "What's that paper? Aw! Did someone bring a picture?"
Lisa: "Um. Maybe. No making fun!"
S: "Let's see it! What do you want?"
L: (Hangs head in shame, unfolds printed-out Word document and thrusts it at the stylist.) "Pob me."
S: "Hee. All you had to say was 'Posh Spice.' Wow, you even cut and pasted these in here and everything! You're serious!"
L: (Laughs uneasily.)
I think it turned out OK, though.


Sorry about the mirrors--it's surprisingly difficult to photograph the back of your own head.
June 12, 2008
Lisa: how about I make you a nice sandwich, and we'll forget this ever happened?
I was innocently enjoying this unspeakably nerdy article on retconning in comic books when I stumbled across the words, "they like the taste of your sandwich."
I think it was lunchtime. "Mmm, sandwich," I must have thought. I made an immediate mental note to add this turn of phrase to my everyday speech. To my lexicon, if you will. I tried it out in several contexts:
1. In place of "I like the way you think"
2. In an "I find you adorable" sort of situation
3. As an "I'm picking up what you're putting down" substitute
4. As my Facebook status
I am saddened to report that I had a 0% success rate. People did not like the taste of my sandwich, if you know what I mean. I know, I know, you don't--that's the problem. It either came off as nonsensical or vaguely dirty, depending on the audience and the topic at hand. I'm afraid "I like the taste of your sandwich" will have to be retired (along with such gems as the exclamation, "that's over the COUNTER!").
Now, more importantly: ham and cheese or peanut butter?
June 06, 2008
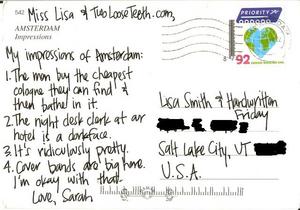
June 05, 2008
Lisa: practically zero calories
I couldn't resist these tiny 4.23-ounce Haagen-Dazs minis (with a little "spoon" inside the lid!) when I saw them on sale at Harmons for $1 each. They're the perfect size; you can eat the whole container in a satisfying way, but you get to skip the self-loathing that comes with polishing off an entire pint in a single sitting. Plus, there's the extreme cuteness factor.
Of course, I had to use a regular-size spoon for faster delivery.
June 04, 2008
Lisa: What would Freud say?
When my mom saw my new repurposed-thread-rack finger puppet display system sitting on my table, she exclaimed over the simultaneous cuteness and uselessness of finger puppets. We got to talking about them, and...I think this needs to be quoted directly.
Mom: Hee. A Freud puppet might be funny for intimate moments. [holds up one finger as a puppet, wiggling it] "Are you ready for some...therapy?"
Lisa: [condescending psychiatrist voice] "Does someone have an oral fixation?"
That's right, I took it to the next level. With my mom.
June 02, 2008
Lisa: raspberry almond blondies
I've been reading about Martha Stewart's Cookies: The Very Best Treats to Bake and to Share everywhere, especially on Angry Chicken, so I had to check it out from the library and see it myself.
All of the recipes sound amazing, but you have to start somewhere, right? I went with the raspberry almond blondies (recipe after the jump).
Fresh raspberries were a ridiculous $7 a box at the grocery store, so I bought frozen rasberries instead. I thawed and rinsed them, but I think frozen fruit still has a significantly higher water content than fresh fruit. I'm pretty sure this was the problem with my lemon blueberry yogurt bread, too. The blondies came out great, but took 30 minutes longer to cook than the recipe called for.
Martha's Raspberry Almond Blondies
makes 16
9 tablespoons (1 stick plus 1 tablespoon) unsalted butter, room temperature, plus more for pan
1 2/3 cups all-purpose flour
1 teaspoon baking powder
3/4 teaspoon coarse salt
1 cup packed light brown sugar
2 large eggs
1 teaspoon pure vanilla extract
1 cup sliced almonds (about 3 ounces), toasted (I just spread them out on a cookie sheet under the broiler and turned them with a spatula once they started getting brownish on one side.)
2 2/3 cups raspberries
1. Preheat oven to 325 degrees F. Butter an 8-inch square baking pan. Line with one longish piece of parchment paper, allowing 2 inches to hang over two sides. Butter parchment.
2. Whisk together flour, baking powder, and salt in a bowl.
3. Put butter and brown sugar in the bowl of an electric mixer fitted with the paddle attachment. Mix on medium speed until pale and fluffy, about 3 minutes. Or cream in a large bowl with a hand mixer. Add eggs and vanilla; mix until combined. Mix in 3/4 cup almonds.
4. Pour batter into prepared dish; smooth top. Scatter berries and remaining 1/4 cup almonds over batter. Bake, rotating dish halfway through, until a cake tester inserted into center comes out with moist crumbs, 55-60 minutes. If you use frozen berries, plan to add about thirty minutes to your cooking time, checking often.
5. Let blondies cool 15 minutes. Transfer blondies to a wire rack, and let cool completely. Cut into 2-inch squares. Blondies can be stored in single layers in airtight containers at room temperature up to 3 days.
May 26, 2008
Lisa: this should cover it
Sometimes you just have to use your camera phone to take a picture of the car in front of you.

In case it's hard to read the individual 2-inch letter stickers adhered to the back of this mini-van, they spell "A SIGN OF DISTRESS/NOT OF DISRESPECT." This confused me for a few blocks, until I saw the white sticker in the lower left corner of his rear window. You can't tell in the photo, but the sticker has a drawing of an American flag flying upside down, along with the same slogan. I'm not going to get into a discussion of proper flag etiquette, but this gentleman's message inspired a blanket-statement bumper sticker of my own:

May 24, 2008
Lisa: sour cream chocolate chip coffee cake
For our Mother's Day dessert, I made chocolate-chip sour cream cake (recipe from the Boston Globe, after the jump). It was tasty with the chocolate chips, but I think it would be really good without, also--as a regular coffee cake, or with raspberries or something swirled in.

Yum! We had ours with a scoop of vanilla ice cream on top.
CHOCOLATE CHIP SOUR CREAM CAKE
Makes one 9-by-13-inch cake
1 stick of butter, at room temperature
2 cups sugar
3 eggs, separated
16 ounces sour cream
1 1/2 teaspoons vanilla extract
3 cups all-purpose flour
1 1/2 teaspoons baking soda
1 teaspoon baking powder
1/2 teaspoon salt
1 teaspoon cinnamon
12 ounces chocolate chips
1. Have ready a greased 9-by-13-inch rectangular baking pan. Set the oven at 350 degrees.
2. In a large bowl, cream butter and 1 1/2 cups sugar, then mix in the egg yolks, sour cream, and vanilla.
3. In a medium bowl, sift together the flour, baking soda, baking powder, and salt. Stir into the butter mixture.
4. Beat the egg whites until they hold stiff peaks, then fold into the batter. In a small bowl, mix the cinnamon with the remaining 1/2 cup of sugar and the chocolate chips.
5. Pour half of the cake batter into the pan. Sprinkle the top with half of the cinnamon-sugar mixture. Pour remaining batter on top, then cover that with the remaining cinnamon-sugar mixture.
6. Bake 40-50 minutes or until a tester comes out clean.
Adapted from Deb Perelman
May 23, 2008
Lisa: no more nougat
Ants ate my Toblerone. This is the universe telling me that I am too fat to be eating a Toblerone.
On the other hand, I won the Toblerone in a drawing at work. I never win things. So, that could be the universe saying, "Go ahead. Eat a Toblerone. You've earned it!"
STOP MESSING WITH MY MIND, UNIVERSE! I am feeling very fragile right now. Yes. What? Yes! Because ANTS. ATE. MY FRIGGIN TOBLERONE.
May 22, 2008
Lisa: orange rolls
I thought orange rolls would go nicely with our American potluck, and boy, was I right. The jello was fun and everything, but this pull-apart concoction was so amazingly, evilly good. It may become a Christmas morning tradition at our house.

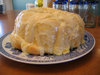
It's easy, too--and if you don't have four hours to let the rolls rise, you can follow the quick-rise directions on the roll package. Recipe (from add to desired taste) after the jump. Reader beware: only make this if you have a lot of people to share it with, or if you want to gain approximately ten thousand pounds. Because you will eat the entire thing.
Easy Orange Rolls
1 package frozen rolls (Rhodes)
1/4 cup melted butter
5 Tablespoons sugar
2 Tablespoons orange peel
Preheat oven to 350. Mix butter, sugar and orange peel in large bowl. Add FROZEN rolls, stir to coat. Spray bundt pan with nonstick spray. Pour rolls into bundt pan, making sure all of sugar mixture is on rolls. Cover with towel and let defrost/rise, about 4 hours. Bake for about 15-20 minutes, until golden brown. Turn out onto serving plate immediately and pour frosting over top.
Frosting:
1/4 cup butter
2 cups powdered sugar
1 Tablespoon orange juice
1 Tablespoon orange peel
Mix with mixer until smooth.
May 21, 2008
Lisa: and the path leads...to puke
Yesterday I was tooling around online, looking for retro jello recipes to link, and I found a posting from someone looking for recipes for their fifties-themed bridal shower. "Ooh! A fifties-themed shower," I thought to myself. "Fun! I love fifties things!" That made me think of Avocado Memories, and I spent a while there, remembering the awesomeness of Wes's family home and getting caught up on stuff he had posted in the last few years. One of his recent additions was a tribute to the Spirograph, a toy I also had as a kid--and that, in my mind, will forever be associated with puke.
Once upon a time, when I was still little enough to ride in the basket of the shopping cart, my dad was pushing me around the store while he got some shopping done. I started feeling queasy, but before I could get Dad's attention, I threw up. I held my mouth closed as tightly as I could so I wouldn't make a mess, tugged on his sleeve, and pointed frantically at my mouth. Dad, thinking I was playing some wacky little-kid game, puffed out his cheeks and pointed at his own mouth, nodding his head. Unfortunately, at that moment, another heave hit me, and it was more than I could hold in. Puke sprayed out of my mouth, and probably all over me and whatever else was in the cart. I've blocked that part of the story out, because it is disgusting. What I do remember is that my dad felt so bad that he bought me Spirograph, which I played with happily all afternoon in bed.
He also made me a puke-catching system out of nested paper grocery bags, which my mom promptly threw out and replaced with a proper barf-bucket when she got home.
Anyway, thanks for taking care of me, Dad! Sorry about the mess.
May 20, 2008
Lisa: Ruby Red Layered Jello Salad
When I was assigned a side dish for our last Freaks and Geeks potluck (American-themed in homage to Sarah's impending departure), I knew I had to make jello salad. What's more American than jello salad?
This salad sounded perfectly gross-yet-delicious. An inch-thick layer of pure sour cream? It cuts the sweetness of the fruit jello perfectly. A whole can of cranberry sauce in the top layer? What is jello anyway, if not jellied fruit sauce? Spoon it up. Best of all, it's pretty and translucent and unnaturally red, as jello salad should be. (Recipe from Ping on GroupRecipes, after the jump.)
Ingredients
1 (3 ounce) package raspberry flavored gelatin mix
2 cups boiling water
1 (10 ounce) package frozen raspberries
1 pint sour cream
1 (3 ounce) package cherry flavored gelatin
1 (8 ounce) can crushed pineapple, drained
1 (16 ounce) can whole cranberry sauce
Directions
1) Dissolve raspberry gelatin in 1 cup hot water. Add frozen raspberries, and stir until well mixed. Pour into a glass bowl. Refrigerate until almost firm, about 30 to 60 minutes.
2) Spread sour cream over firm gelatin. Refrigerate.
3) Dissolve cherry gelatin in 1 cup hot water. Stir in crushed pineapple and cranberry sauce. Chill until partially set, about 20 to 40 minutes.
4) Spoon cherry gelatin mixture over sour cream layer. Chill until firm, another hour or two.
Note: This salad is most attractive when made in a crystal bowl so the various layers can be seen.
May 19, 2008
Lisa: I can't drink that
Sarah and I were loitering in the drink aisle of the grocery store, trying to find the perfect flavored lemonade, when we spied some very appealing packaging.
It was a small, dark blue glass bottle, with little bumps on the sides and a silver screw-top. "I'd buy this one just because the bottle is so pretty," one of us said, turning the drink around so we could read the name.
"Oh. Never mind."

I think the marketing person who chose the name Bawls and the marketing person who designed the bottle are two separate individuals--and the person designing the bottle knew he had to do some of his very best work to overcome that name. A noble effort, too--it was almost successful. Unfortunately, the problem is compounded because Bawls Guarana Exxtra (now with more energy, perhaps?) comes in a white version of the same bottle. If you want the original, you have to request the "blue Bawls."
Thank you, but...no.
May 18, 2008
Lisa: apple tart
In an effort to use up a bunch of overpriced apples I had purchased for a library program, I found myself searching Tastespotting for good-looking apple recipes. Somehow I still ended up at Smitten Kitchen, with the Simplest Apple Tart.
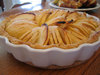

The tart turned out gorgeous AND delicious. The only trouble I had was with the dough--there just didn't seem to be enough of it. I rolled it so thin that it kept tearing, but it still barely made it to the edges of the dish. There wasn't enough dough to wrap up over the tops of the apples, and it certainly wouldn't have worked galette-style. Or maybe my dish was too big, and I had too many apples. I don't know.
Recipe after the jump.
Alice Waters�s Apple Tart
INGREDIENTS:
For dough:
1 cup unbleached all-purpose flour
1/2 teaspoon sugar
1/8 teaspoon salt
6 tablespoons (3/4 stick) unsalted butter, just softened, cut in 1/2-inch pieces
3 1/2 tablespoons chilled water
For filling:
2 pounds apples (Golden Delicious or another tart, firm variety), peeled, cored (save peels and cores), and sliced
2 tablespoons unsalted butter, melted
5 tablespoons sugar
For glaze: 1/2 cup sugar
MIX flour, sugar, and salt in a large bowl; add 2 tablespoons of the butter. Blend in a mixer until dough resembles coarse cornmeal. Add remaining butter; mix until biggest pieces look like large peas.
DRIBBLE in water, stir, then dribble in more, until dough just holds together. Toss with hands, letting it fall through fingers, until it�s ropy with some dry patches. If dry patches predominate, add another tablespoon water. Keep tossing until you can roll dough into a ball. Flatten into a 4-inch-thick disk; refrigerate. After at least 30 minutes, remove; let soften so it�s malleable but still cold. Smooth cracks at edges. On a lightly floured surface, roll into a 14-inch circle about 1/8 inch thick. Dust excess flour from both sides with a dry pastry brush.
PLACE dough in a lightly greased 9-inch round tart pan, or simply on a parchment-lined baking sheet if you wish to go free-form, or galette-style with it. Heat oven to 400�F. (If you have a pizza stone, place it in the center of the rack.)
OVERLAP apples on dough in a ring 2 inches from edge if going galette-style, or up to the sides if using the tart pan. Continue inward until you reach the center. Fold any dough hanging over pan back onto itself; crimp edges at 1-inch intervals.
BRUSH melted butter over apples and onto dough edge. Sprinkle 2 tablespoons sugar over dough edge and the other 3 tablespoons over apples.
BAKE in center of oven until apples are soft, with browned edges, and crust has caramelized to a dark golden brown (about 45 minutes), making sure to rotate tart every 15 minutes.
MAKE glaze: Put reserved peels and cores in a large saucepan, along with sugar. Pour in just enough water to cover; simmer for 25 minutes. Strain syrup through cheesecloth.
REMOVE tart from oven, and slide off parchment onto cooling rack. Let cool at least 15 minutes.
BRUSH glaze over tart, slice, and serve.
May 16, 2008
Lisa: Hand-drawn Friday
We had our Bon Voyage party for Sarah and Marci at the Crown, and I felt the occasion called for a little festive headwear. I did an image search for some of the famous landmarks they'll be seeing in Europe, and drew simplified versions onto colored paper. Voila! Crowns at the Crown. It's not the first time, but it might be one of the best.


Canal houses in Amsterdam

Parliament building in Budapest

London's Tower Bridge

Tyn Church in Prague

Roman Coliseum

Hairy Coo from Scotland
I miss you guys!
May 15, 2008
Lisa: lemon blueberry yogurt bread
This bread tasted great and looked pretty good considering what a hard time it had coming into the world. The recipe (from Ina Garten via Smitten Kitchen, after the jump) calls for a cup of yogurt that makes the bread super moist. Knowing this, I didn't worry when--after cooking for 50 minutes--the knife I used to test the center of the nicely browned loaf came out clean, but wettish. I soaked the bread with lemon juice glaze, let it cool in the pan for ten minutes, then turned it out onto a cooling rack. Immediately, the uncooked, heavy, wet center of the bread broke through the top crust and started dripping out onto the counter. I quickly slipped the pan back down over the bread, held the rack to the pan and flipped the bread back in, and popped the whole mess back in the oven for another TWENTY MINUTES. The edges got quite brown, but the center seemed to have firmed up. After the bread was cool and I sliced it up, it looked pretty good--I only ended up throwing out two slices from the very middle, where the crater at the top was most visible.
Anyway, I probably wouldn't make this again, at least not without keeping a very close eye on the baking time and temperature. If you're trying this recipe, I might suggest a lower temperature for a longer time. Other changes: I used a little more lemon zest than called for, and regular frozen blueberries instead of miniature wild blueberries (because, seriously?).
Smitten Kitchen's Lemon-Blueberry Yogurt Loaf
Adapted from Ina Garten
1 1/2 cups + 1 tablespoon all-purpose flour (if you�re skipping the fruit, you can also skip the last tablespoon of flour)
2 teaspoons baking powder
1/2 teaspoon kosher salt
1 cup plain whole-milk yogurt
1 cup plus 1 tablespoon sugar
3 extra-large eggs
2 teaspoons grated lemon zest (approximately 2 lemons)
1/2 teaspoon pure vanilla extract
1/2 cup vegetable oil
1 1/2 cups blueberries, fresh or frozen, thawed and rinsed (miniature wild blueberries are great for this, and pose the least risk of sinking)
1/3 cup freshly squeezed lemon juice
Preheat the oven to 350 degrees F. Grease an 8 1/2 by 4 1/4 by 2 1/2-inch loaf pan. Line the bottom with parchment paper. Grease and flour the pan.
Sift together 1 1/2 cups flour, baking powder, and salt into 1 bowl. In another bowl, whisk together the yogurt, 1 cup sugar, the eggs, lemon zest, vanilla and oil. Slowly whisk the dry ingredients into the wet ingredients. Mix the blueberries with the remaining tablespoon of flour, and fold them very gently into the batter. Pour the batter into the prepared pan and bake for about 50 (+) minutes, or until a cake tester placed in the center of the loaf comes out clean.
Meanwhile, cook the 1/3 cup lemon juice and remaining 1 tablespoon sugar in a small pan until the sugar dissolves and the mixture is clear. Set aside.
When the cake is done, allow it to cool in the pan for 10 minutes before flipping out onto a cooling rack. Carefully place on a baking rack over a sheet pan. While the cake is still warm, pour the lemon-sugar mixture over the cake and allow it to soak in (a pastry brush works great for this, as does using a toothpick to make tiny holes that draw the syrup in better). Cool.
May 14, 2008
Lisa: quirky
Jessica of How About Orange posted six of her "unremarkable quirks", and I felt inspired to do the same.
1. The sound of a spoon clonking around the inside of a glass blender jar is one of the nicest sounds I have ever heard. It's at least 30% of the reason I make blended frozen drinks.
2. I really like stalking. And spying. And covertly collecting information on people of interest. Not in a creepy way, of course. But, you? Yeah, you with the hair? I have Googled you.
3. Figure skating (singles, pairs, ice dancing, whatever--give me a spangly costume featuring illusion netting and someone swooping around effortlessly balanced on two tiny blades, and I'm sold) is the only sport I really enjoy watching on TV. Are there community ed skating classes for old people? Do you want to sign up with me?
4. Serial killers fascinate me. If I start looking things up in the Crime Library, I get sucked in for hours. I don't let myself read much true crime, because I'm afraid it would become a habit--and there are probably more uplifting (and better written) things I could fill my mind with. Maybe four years old was too young to start listening to Sweeney Todd...no, I jest, you can never be too young for Sweeney Todd.
5. I love typing, and when I get going, I can type almost as fast as I can talk. It's like talking with my fingers, and for some reason that's a little thrilling. Maybe in another life I'll get a job as a court stenographer--but I'd want to do the voices when I read back the transcripts, and I'm pretty sure that's frowned upon.
6. I have written and published on the internet a three-chapter piece of fan-fiction. It may or may not be romantic in nature and was recognized as a featured story on the site. I am simultaneously proud and ashamed. Try to find it at your own risk.
May 12, 2008
Lisa: herb garden
It took us at least three Saturdays, but Blake and I finally finished the herb garden we started a month ago (and have been planning since January). It turned into a much bigger project than we anticipated, but I'm really happy with how it turned out. The idea was that the garden would fill the triangular space created by the edge of our patio meeting the angle of the driveway. It's an awkward space to mow, and I thought a raised garden bed would solve that problem AND look nice there.
First, I mapped the whole thing out on paper and took all the measurements. Then I marked off where the garden would go, using a makeshift system of skewers and the ugliest yarn I own, Mr. Brown. We were out of string. You can see in these pictures that there are a few weird features in this corner of the yard, including two different types of wrought iron (the fence and the posts holding up the awning over the patio), two different types of cement bases for the posts, and some little braces connecting the fence to one of the posts--I assume to give stability to the fence. I was hoping the garden would sort of camouflage some of these idiosyncracies.
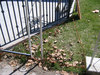

Blake cut the sod out of my marked area...

...and we picked up some redwood decking at Home Depot for the sides of the raised bed. The guys at the Depot cut it to the lengths I had measured and everything. Blake had to do a little extra cutting to make a hole for one of the wrought iron braces to go through, but that's it.
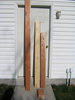
The corner brackets are made by a company called Frame It All, and I found them at a garden store in Bountiful called J&L Garden Center. The brackets are great, because they allowed us to build something that was much more complex and nice-looking than our carpentry skills would have allowed otherwise. You can use them with any 2x6 wood, too, not just the plastic stuff sold by Frame It All. A few caveats, though:
1) The included instructions only work if you're putting your garden (or sandbox, or whatever) out in the middle of an open lawn. Otherwise, you'll need to figure out the installation on your own.
2) There are two types of brackets--Anchor Joints and Stacking Joints. I think you'd only need the Anchor Joints if you have really loose, sandy soil. If you have rocky clay, like we do, give yourself a break and use the Stacking Joints for both levels. Trust me, that six-inch stake will be stable enough.
3) The copy on the box says that the joints adjust to any angle. This is not exactly true. There is a minimum angle, which is why they recommend using at least a four-foot timber between each joint. Our first layout had a very narrow angle at the top of the triangle, which was too small for the Frame It All brackets. We changed the layout a bit, picked up a few more brackets to accomodate the jog around the post anchor (and a few more boards), and ended up with a shape that I think I like better anyway.
After we cut out another strip of sod, we laid out the boards and anchors where they would ultimately go, to make sure everything would work. Luckily, I had measured things right!


Blake and Sarah helped dig the holes for the stakes, and we got the boards and joints all in place and screwed together.


We took three trips to the garden store for bags of dirt, because we completely underestimated the amount of dirt it would take to fill up the garden. I think it was ten bags of compost and potting soil all together.
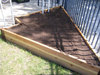
After the fresh, smooth dirt was in, it was quick work to plant the herbs and things we had bought. There's parsley, two kinds of sage, rosemary, thyme, two types of oregano, comfrey, two different mints, and I think a few others, plus several sweet williams (a Mother's Day gift from my mom) and a couple of the strawberry plants we got from the Turnbulls.
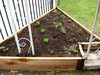
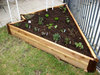
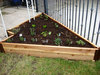
We left a little space to plant something that will climb up the post that is inside the bed. Now, if we can just manage to keep everything alive and looking nice! One of the lawn sprinklers is inside the new bed (Blake added some pipe to make it taller), so at least our efforts shouldn't be foiled by a lack of watering.
May 08, 2008
Lisa: Strawberry 100%
From the back of a book I checked in this morning:
EXT. ROOFTOP OF A SCHOOL BUILDING
SUNSET
The hero (me, Junpei Manaka!) sneaks up to the roof to see the sunset. When he opens the door, he startles a mysterious beauty. She panics and runs away, but not before Junpei has caught sight of her adorable strawberry print panties...in EXTREME close-up. With that vision forever burned into his memory, Junpei embarks on a quest to find the girl, and the panties, of his dreams!
FADE OUT
Oh, Junpei. We've all been there. May your quest for the perfect strawberry print panties be fruitful.
May 05, 2008
Lisa: headboard
The other day, I started vaguely considering a minor bedroom-revamping, and I priced some upholstered headboards online. That morphed into looking for instructions on making your own upholstered headboard, and then suddenly all the raw materials were at my house, waiting for me to do something with them. Funny how that happens.
Anyway, one day while Nora was down for a nap, I brought the baby monitor outside, dragged the chipboard and foam out of the garage, and got started.
I got the foam pieced together and glued by the time she woke up. I hadn't really thought about how I was going to glue the foam together, but I remembered from Cockeyed that contact cement might work. I wasn't sure what contact cement was, and I knew I didn't have any, so I googled it. Hmmm. That container looks kind of like blue glue, doesn't it? I dug the blue glue out of Blake's bag of sprinkler stuff and used that--it's stinky, but it worked fine. It didn't take much to get the edges to stick to each other.
For the headboard's arch, I traced a template I had found online, printed out, and taped together. After I had the shape marked, I used Marci's RotoZip saw to cut it out. This is the perfect tool for this kind of application. The RotoZip is basically a drill, but with a little guard added around the drill bit, and an extra handle on the side for stability. you put the guard right up against whatever you're sawing, and then move the drill wherever you want, making a freehand cut. So, it's not intimidating to use for anyone who has used a drill before. It doesn't make a perfectly smooth or straight cut (especially in a material of varying content, like chipboard), but that's OK when you're planning on covering your cut with thick layers of foam and fabric, and you just need the right overall shape. Thanks, Marci!
Meanwhile, Nora was being a superchamp, yelling back at the saw and thinking we were playing an awesome new game.
Once I had the wood cut out, I wrestled it on top of the foam and traced it with a sharpie. I used my trusty electric kitchen knife to cut the foam. That's what the instructions said to use, and when the lady at JoAnn's used an electric knife to cut the length I needed, I figured it was the way to go.
Nora thought the knife was almost as fun as the saw.

After I brought Nora inside and got her set up with some toys, I laid out my fabric, right side down, and lugged the wood and foam inside and centered the foam on the fabric. I trimmed the extra fabric a bit.
I got some big covered button kits (the only kind sold at JoAnn's) and made some buttons with the scraps I had trimmed off. I pinned the fabric loosely to the back of the foam, flipped it over, and figured out where I wanted to place the buttons. Then I sewed the buttons through the fabric and foam, and through another button on the back side to keep the thread from pulling through the foam. Here's the thing. In my experience, tufting with buttons is harder than you think it should be. For one thing, if you're using a covered button, the loop that your thread has to go through is on the back of the button. If your button is pulled into the foam really deeply, how do you get your needle back through that loop for another pass? It doesn't seem like one thickness of thread would be strong enough to keep the button tight against all that foam, either. And the first time you're pushing the needle through, it's tricky (and hurts your fingers) to push the needle in as far as you can while simultaneously compressing the foam to get the needle to poke through the other side far enough so that you can grab the tip and pull it out. I am convinced that the pros have a different set of tools to use when they're doing deep tufting--possibly including a very large needle, very strong thread, and some kind of button system with an open-faced (?) button on each side of the foam, which is easy to pull tight and allows for a decorative covered button to be snapped on afterward. Anyway, my buttons aren't as deep as I'd like, but they look OK.
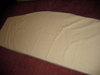
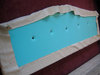
Once I had the buttons sewn in, I unpinned the fabric from the back of the foam, laid the chipboard down on top of the foam, and stretched the fabric as tightly as I could around the back of the board, stapling as I went. In a few places I had to pull the staples out, smooth things out a bit, and staple again, but it worked pretty well. I'm really glad I believed the part of the instructions that says to glue the board to the foam ONE INCH BELOW the top of the foam, even though they are cut to the same size. This allows the top of the foam to curve back around the board, making a nice round edge at the top of the headboard, instead of a slope ending with the hard edge of the board. With the headboard being so big and heavy, it was hard to get the fabric pulled tightly enough while keeping things smooth. Maybe enlist a strong person to help.
Speaking of strong people, I got Blake to help me prop up the headboard above our bed so that I could take this extremely anticlimactic picture of the final product. I don't know what's going on with the focus and the lighting and the colors here, but I'll post some prettier pictures when the whole revamping is done.

foam: $40
fabric: $18
button kits: $10
chipboard: $8
Everything else I already had or made Sarah dig out of her storage unit.
Total: $86
If I were going to do this over again, I'd use a lighter but still rigid material (MDF?) instead of the chipboard and a slightly thinner foam covered with a thin layer of quilt batting to soften the edges of the foam. I think I'd also cut the foam a bit larger than the backing, so that it would wrap around the edges more. I'd definitely try to figure out some way to get the buttons sewn in more deeply. All in all, though, I'm happy with it--and it was certainly cheaper than buying one readymade.
April 29, 2008
Lisa: chicken & broccoli quiche
Soon after I had Nora, my awesome friend Gabrielle brought over dinner. It was SO GOOD, you guys. It was a salad with homemade dressing (in a container that I complimented so much that she got me one for my birthday), and a deep-dish quiche with broccoli and chicken. Blake loved the quiche so much that he called Gabrielle and told her so. Possibly more than once. Gabrielle thoughtfully included a handwritten copy of the quiche recipe, and I finally got around to making it last week. Why didn't I do it before? I'm kicking myself, because it is so easy and so delicious. Anyway, this is definitely going to be one of the ten recipes I memorize.
Gabrielle's recipe is after the jump. Things I added are in bold. If you want to kick the whole thing up a notch (both in taste and in difficulty), make it in the homemade crust of your choosing.
Edited to add: I only have one glass pie pan, so I made the second quiche (which wasn't eaten yet by the time I took pictures) in a square baking dish. It worked fine, but the crust--which started out round--looks a little funny. Don't you judge me.
Gabrielle's Chicken & Broccoli Quiche
Serves 6. Cooking time 35-40 minutes. Preheat oven to 375 degrees.
1 unbaked 9" pie shell (I use Pillsbury) These are in the refrigerated section near the Pillsbury crescent rolls in the tube. Get the rolled up refrigerated kind instead of the kind in the freezer section that are already in a pie tin, because then you can bake the quiche in your own dish and crimp the edge yourself so that it looks more homemade. Tricky! They come two to a package, so you might as well make two quiches at once.
2 cups fresh broccoli, cooked and drained
1 whole chicken breast, cooked and chopped Or chopped and then cooked, which is how I did it since I was in a rush. Small pieces = faster cooking, plus they don't have to look pretty because they'll be covered with delicious, delicious egg and cheese.
6-8 ounces Swiss cheese, cut into 1/4" cubes When I was buying the cheese, I forgot I was doubling the recipe, so I bought an 8-ounce brick. When I figured out my mistake back at home, I threw in 4 additional ounces of cheddar that I had on hand. The cheddar was tasty in the finished product, and I ended up with about 6 ounces of cheese per quiche. Disaster averted.
3 eggs
1 cup heavy cream I also only got enough cream for one quiche, but I added a cup of milk to make up the difference in volume (skim is what I had on hand). I didn't notice a difference, and there was a little less fat, so...whatever. Your mileage may vary.
2 tablespoons lemon juice
1 teaspoon salt
1/8 teaspoon pepper
chives (green onions) to taste
Leave the pie shells out of the fridge for 15 minutes or so before unrolling. Unroll pie shell and place in pie pan while you prepare the other ingredients. Sprinkle broccoli in bottom of the shell. Top with chicken, then cheese. In a small bowl, using a whisk, beat the eggs, cream, lemon juice, salt, and pepper until blended, but not frothy. Pour over cheese mixture; sprinkle with chives. Bake in 375-degree oven for 35-40 minutes or until knife inserted in the center comes out clean. (If you have some extra, sprinkle grated swiss over the top for the last 15 minutes of cooking.) Let stand at least ten minutes before cutting.
Since I made two quiches but only needed one, I pulled the other out of the oven at 35 minutes and stuck it in the freezer. The interwebs tell me I can warm it up in a 375-degree oven for 20 minutes. I'll let you know how that turns out.
April 28, 2008
Lisa: potato leek soup
We tried our second recipe from Everyday Foods a while ago, and it was a definite improvement over the last effort. Blake cooked while I held Nora and dispensed unhelpful advice, and he was very competent and patient. The soup was good, but not good enough to bother heating up and eating later, apparently--we ended up throwing the leftovers out a week later. If you have a recipe for a main dish you think I should try, please let me know. I can always find a dessert recipe that sounds good, but I struggle more with the main course.
Recipe after the jump--things I added are in bold.
Potato-Leek Soup
serves 4 * prep time 15 minutes * total time: 45 minutes
6 medium leeks (about 2 1/4 pounds), whites only, halved lengthwise and thinly sliced crosswise, cleaned
2 cans (14.5 ounces each) reduced-sodium chicken broth
1 baking potato (8 ounces), peeled and diced We used two potatoes, and I'm glad we did. The soup was still fairly thin.
Coarse salt
3/4 cup heavy cream
1/2 cup snipped fresh chives mental note: chives are green onions, dummy
WASHING LEEKS:
Leeks can be extremely dirty and are best cleaned after they've been trimmed and cut. Soak cut leeks in a bowl of cool water; lift them out, replace the water, and repeat until no grit remains at the bottom of the bowl. Drain on paper towels. Good luck "lifting out" chopped up leeks. I think we used a colander.
1. In a large saucepan, combine the leeks, broth, potato, 2 cups water, and 1 teaspoon salt. Bring to a boil; reduce the heat to medium-low, and simmer until the vegetables are very tender, 20 to 25 minutes.
2. Working in batches, puree the soup in a blender, transferring it to a clean bowl as you work. (To prevent splattering, fill the blender only halfway, and allow heat to escape: Remove the cap from the hole in the lid, and cover the lid firmly with a dish towel.) Blend a little longer than you think you need to, so the potato blends in well and isn't still grainy. Stir the cream into the pureed soup, and season with salt. Garnish with the chives. Serve immediately.
3. If desired, chill the soup: Cover loosely with plastic wrap, adn chill until cold, at least two hours and up to two days. If necessary, thin with water, and season with salt. Serve the soup in chilled glasses, garnished with chives.
Cook's note:
Depending on the weather, serve this comforting soup hot or cold. You can quickly chill it by placing it into a metal bowl set into an ice bath; stir frequently until the soup reaches the desired temperature.
April 25, 2008
Lisa: Sorry, Mom.
I thought I'd kick off Handwritten Fridays with a few truly useless but laboriously handwritten items that have (against all reason) survived for THIRTEEN YEARS since their creation.
You see, kids, in the dark days before text messaging, public school students annoyed their teachers by passing long, detailed notes to each other, expounding upon the controversial topics of parental injustice, how close they were to failing Bio, and the heartbreak of unrequited love.
If that student of yesteryear were lucky enough, the object of her unreturned affections might pass her a sweet, encouraging note like this:
(Yes, since you ask, I had a crush on him for five years. Can't you see why?)
April 10, 2008
Lisa: they put the "bling" in sibling
Some of my innate awesomeness obviously rubbed off on my brothers and sister, because...
David is trying to decide between the architecture programs at Columbia and Virginia Tech (assuming his dance career doesn't work out), and I couldn't be more excited that he and Angie just got engaged.
Sarah (as you know) is on her way to Europe for a study abroad program, and will graduate from the U with a major in Being Completely Awesome next fall.
Jeffrey is serving selflessly in the slums of New Jersey for one more year, and then will return to his school for slightly socially awkward geniuses.
I'm so proud of you guys! I could just sit on you and poke you in the ribs all day.
(Happy Sibling Day, everybody!)
April 05, 2008
Lisa: Marathon Stats
All this looking back reminded me that I intended to collect all the numerical data from our marathon entries, put it into Excel, and generate some kind of graphical representation. Because I'm a nerd and I like stuff like that.
Anyway, here it is at long last:

For each data series, you can see a line linking the actual data points (the jagged line) and a smooth line indicating the overal trend of the series. In general, as we added more distance, our spead decreased. We might have gotten in better shape, but that improvement was obviously directed toward distance, not speed. My weight stayed pretty much the same over six months of training, but my body fat percentage did exhibit a small downward trend. Now you know.
April 04, 2008
Lisa: five years
I can hardly believe it's been five years since we started this thing. I don't think we've really reached my initial goal of "being awesome just like Defective Yeti," but it's been fun and, you know, full of self-discovery (or at least self-indulgence).
How else does a terrible scrapbooker document her travels to the exotic locales of California (Several times, I guess. Hee.), Massachussets, Maryland, Illinois, Southern Utah, Scotland, and England?
Where in real life would I find someone willing to hear about me learning to knit or starting to cook? Suddenly caring about politics?
And you know I would have forgotten exactly when and how I did some of the stuff on my 29x29 list, like buying a house, going to grad school, starting my career (where I meet such interesting people), finishing a marathon, and having a baby.
Five years of Two Loose Teeth means a few entries I read again and smile. I'm glad there is published proof of Scrabble pee, my feelings on personal grooming, an attempt at instant messaging without a keyboard, Thanksgiving panties, humiliation at the car dealership, waxing philosophical about books and religion, feeling a mom's love for the first time, or just sharing the good times and the not so good.
Most of all, it means five years of blogging with the best pal a gal could have. Thank you, Sarah, for being my same-brain-sister and my best friend, even though I was totally mean to you twenty years ago. Here's to the next five.
April 01, 2008
Lisa: Do this, don't do that--can't you read the sign?
Quite a prodigious collection of passive agressive notes for one 8'x10' break room, don't you think?
This one reads: "If you make a mess on the table, sink, or in the frig or microwave, Please use these wipes and clean up after yourself immediately. Thank you. [smiling sun]"
I especially like the escalating comment penciled in on the bottom corner here: "I didn't know water made a mess! [signed,] Deeply offended Jean"
These two should be viewed as a set--the sign asking people not to leave coats at the table, and a sweater left at the table. The sweater's owner has been flaunting her disregard for that sign for weeks. Well, days.
Let's round out the set with a sign-up sheet for cleaning (only 7 of our 20 employees took the bait on that one), a "helpful" warning that personal belongings deemed objectionable will be thrown away by an anonymous judge, and a notice of paper towel machine changes (I don't even know).
March 28, 2008
Sarah: LOLisa
Because we like to join internet phenomena long after their "best before" date, Lisa and I (and Mallory and Marci) have long joked about LOLCats, their ridiculousness, the mystery surrounding their charm, and so on. I suppose I've already hinted at this schtick here.
Perhaps because we'd already joked about it, a string of emails from Lisa first confused, and then utterly charmed me. See, i could just picture my adorable sister giggling uncontrollably over her keyboard as she wrote these messages. You should imagine a similar image. It greatly enhances the experience when you know how much she was cracking herself up:
Date: March 5, 6:40 pm
Subject: You can thank me later.
Body: LolCat Bible
Date: March 5, 7:48 pm
Subject: I don't think there are enough thank yous in the world.
Body: 
Date: March 5, 7:52 pm
Subject: Obviously this is a sickness.
Body: 
And then, weeks later, the best email yet:
Date: March 27, 9:55 pm
Subject: LOLNora
Body: Nora has a message for you.

Awesome.
March 27, 2008
Lisa: lemon bread
I've been looking for a dessert recipe that sounded fresh and spring-y, but that would mail well so I could send a treat to my brother Jeff. A coworker suggested a quickbread, and after a little looking around, I thought lemon bread sounded perfect.
The recipe I used is from Muffins & Quick Breads, from the Williams-Sonoma Kitchen Library (recipe after the jump).
I finished baking the bread at around midnight, and turned the loaves out on the racks to cool. I considered leaving them out all night, but after puttering around for half an hour, I decided the bread was cool enough and wrapped one up in foil and sealed it in a padded mailing envelope, and put the other one on a plate with foil over it (because doesn't lemon bread sound delicious for breakfast?). The bread smelled so good, I had to slice a piece off the second loaf and eat it right then. It was delicious. The crumb wasn't as fine as it looked in the picture in the book, but that might be because I didn't chop the almonds fine enough, or because I cut it with a dull knife while it was still warm. Anyway, thank GOODNESS I tasted a piece (and took pictures), because...the ants.
The next morning, when I came into the kitchen, I noticed a thick trail of my tiny nemeses emerging from the edge of the cabinet by the dishwasher and leading across the front edge of the countertop, directly to the foil-covered plate of lemon bread. After shouting "oh NO!" loud enough to wake up Sarah, I whipped off the foil, and confirmed my fear that my newly-baked loaf was swarming with ants. Stupid little sugar-loving bastards.
Anyway, there was some crying. Some yelling. Some detective work. Some poison spraying. But we lived, and Jeff's (antless) loaf got mailed off all right. Thanks, Mom and Blake, for your help with all of that.
Shall we remember the bread that was?
Lemon Bread
Ingredients
1/2 cup (4 oz/125 g) vegetable shortening
1 cup (8 oz/250 g) sugar
2 eggs
1 1/4 cups (5 oz/155 g) all-purpose (plain) flour
1 teaspoon baking powder
1/2 teaspoon salt
1/2 cup (4 fl oz/125 ml) milk
1 tablespoon finely grated lemon zest
1/2 cup (2 oz/60 g) chopped pecans
FOR THE LEMON SYRUP:
1/4 cup (2 oz/60 g) sugar
3 tablespoons fresh lemon juice
Preparation
Preheat an oven to 350 degrees F (180 degrees C). Grease and flour a medium (8 1/2-inch/21-cm) loaf pan.
In a large bowl combine the shortening and sugar and beat until blended. Add the eggs, one at a time, beating well after each addition. In a medium bowl stir and toss together the flour, baking powder and salt. Add to the shortening mixture, along with the milk and lemon zest, and beat until blended and smooth. Stir in the pecans. Spread evenly in the prepared pan. Bake until a thin wooden skewer inserted in the center of the loaf comes out clean, about 1 hour.
While the bread bakes, make the lemon syrup by combining the sugar and lemon juice in a small bowl. Set aside, stirring occasionally; don't worry if the sugar does not dissolve completely.
Remove the bread from the oven and, using a fork, gently poke the top in several places. Stir the syrup, then slowly drizzle it over the hot bread. Cool in the pan for 15 minutes, then turn out onto a wire rack to cool completely.
Makes 1 medium loaf
Cooks' note:
This recipe carries a double dose of lemon: grated zest in the batter and lemon syrup poured over the bread after baking. For a heavenly dessert, bake it in 2 miniature loaf pans, then top the slices with berries and whipped cream.
March 22, 2008
Lisa: tortilla soup
As my mom pointed out the other day, I haven't really turned out to be much of a cook. ("You're more of a career woman!" was how she softened the blow.) That said, I think it's really important when you have a family with kids to sit down at a table for a homemade, nutritionally sound dinner every night and talk to each other. Well...now the theoretical kid has become an actual kid who is starting to eat solid foods, so I guess I'd better get this cooking thing figured out.
I checked out a cookbook from the library, and I'm really excited about it. It's called Everyday Food: Great Food Fast from the kitchens of Martha Stewart Living. The photos are gorgeous as always with Martha, and the recipes sound tasty and easy, using regular supermarket ingredients. I got Blake to go through the Spring section with me, and we marked all the recipes we thought would be fun to try. We're going to make a new one each week.
This week's effort was tortilla soup (recipe after the jump), and it was okay. The soup itself is super basic, just chicken broth with shredded, boiled chicken in it. The interest is all in the toppings you add--even the "tortilla" part is a topping. Also, garnishing a brothy (as opposed to creamy) soup with cheese is a little odd. The cheese doesn't blend in and make the soup creamier; it turns into melty self-contained globs floating in the broth, or glomming around bits of chicken or your spoon.


What I wish I'd known beforehand: The instructions as written require you to own two pots large enough to hold more than 8 cups of soup. I only have one pot that big, which meant some last-minute improvising, leading me to momentarily forget about the tortilla strips burning in the oven.
Verdict: The soup was fine, but I probably won't make it again.
Tortilla Soup
Serves 4 * Prep time: 30 minutes * Total time: 30 minutes
For the soup
4 skinless chicken thighs (about 1 1/2 pounds)
1 can (14.5 ounces) reduced-sodium chicken broth
1 jalapeno chile, diced (with seeds for more heat)
6 corn tortillas (6-inch)
3 tablespoons canola oil
Coarse salt
For the garnish
1 cup shredded Monterey Jack cheese (5 ounces)
4 large scallions, thinly sliced (about 1/2 cup)
1 green bell pepper, ribs and seeds removed, diced
1 avocado, peeled, pitted, and diced
1/4 cup cilantro sprigs
1 lime, cut in wedges
1. Preheat the oven to 400 degrees F. In a large pot, bring the chicken, broth, jalapeno, and 8 cups of water to boil over medium-high heat. Reduce the heat to medium; simmer until the chicken is cooked through, about 15 minutes. Transfer the chicken to a plate; let cool.
2. Brush both sides of the tortillas with oil, stacking them as you go. Cut the stack in half, and then slice crosswise into 1/2-inch strips. Place the strips on a rimmed baking sheet; bake, tossing the strips occasionally, until golden, 15 to 20 minutes.
3. Using a large spoon, skim the fat from the surface of the broth in the pot, and strain the liquid through a sieve into a clean pot (you should have about 8 cups). Shred the chicken with a fork or with your fingers, and return it to the pot. Stir in 1 teaspoon salt. Divide the soup among serving bowls, and add the tortilla strips. Garnish as desired.
PLANNING AHEAD
The chicken can be cooked up to a day in advance; cool, then store the chicken and cooking liquid separately in the refrigerator. Shred the meat just before using. You can also use the leftover or store-bought roasted chicken in this soup; use two quarts homemade or reduced-sodium canned chicken broth instead of the cooking liquid.
March 20, 2008
Lisa: 29 x 29
When I was making my list of things I want to do, I started thinking about the things I've already done. I think everyone should do this--we all need a little pat on the back and a reminder that we've experienced some pretty cool things.
In the last 29 years, I have...
1. Backpacked through Europe
2. Become a regular at a restaurant
3. Bought my own house
4. Chosen a pumpkin from a pumpkin patch
5. Collected trilobite fossils
6. Cooked with fresh herbs I grew
7. Danced in the rain like a crazy person
8. Earned a Master�s degree
9. Finished a marathon
10. Found the best recipe for chocolate chip cookies
11. Given birth
12. Hung my own art in my home
13. Landed a job in a career I love
14. Laughed until I peed my pants
15. Married someone who thinks talking nonsense as I fall asleep is charming
16. Performed in front of an orchestra (four times)
17. Picked fresh raspberries
18. Printed using an old-fashioned letterpress
19. Seen the Grand Canyon
20. Shopped for honey at a Trappist monastery
21. Spent the night on a train
22. Started my own business
23. Stayed up all night reading a book
24. Stood in four states at once
25. Swam with a sea turtle
26. Touched a stalagmite
27. Tried water-skiing and snow-skiing
28. Worn something I knitted
29. Written a blog featured on Boing Boing
March 19, 2008
Lisa: 35 x 35
I'm turning 30 this year, a milestone that I think typically comes with a lot of soul-searching and maudlin whining about getting old. Time is going by faster than ever, and I was starting to get concerned about waking up one day as a sixty-year-old, having no idea how I'd gotten there and wishing I'd done more along the way. When I saw Maggie's list of 100 Things to Do Before I Go, it seemed like the perfect way to take control of the next few years of my life and accomplish some things--big and small--that I want to do for myself. Instead of 100 things to do before I die, my list is 35 things I want to do before I turn 35. I work better with a deadline.
1. Appear as an extra in a movie
2. Attend a fancy-dress ball
3. Be debt free
4. Build a tree house
5. Buy a new car with cash
6. Eat off the fancy china more than twice a year
7. Find the perfect signature scentB&B White Citrus
8. Fly first class
9. Give homemade Christmas gifts December 2009
10. Go on a photo safari in Africa
11. Help someone learn to love to read 10/29/12
12. Ice skate at Rockefeller Center 12/31/09
13. Inspire someone to become a librarian 3/20/08
14. Make Nora the Halloween costume of her choice, like my mom did10/22/11
15. Meet an honest-to-goodness celebrity
16. Memorize (and regularly use) ten main-dish recipes
17. Order room service in a five-star hotel 3/23/09
18. Own a fabulous designer bag or pair of shoes
19. Paint every room in my house a different color
20. Quit my job and work from home9/4/08
21. Rent a scooter in Greece
22. Reupholster a piece of furniture myself
23. Sew Nora�s baby clothes or Christmas pajamas into a quilt 4/12/09
24. Sign up for a pottery class December 2009
25. Sing in a musical 11/14/08
26. Spend money only on essentials for one month June 2010
27. Start a vegetable garden 8/20/08
28. Stop needing validation from other people
29. Tailor all the clothes in my closet so they fit just right
30. Take ballroom dance lessons
31. Teach Nora to knit or sew
32. Walk along the Great Wall of China 3/29/09
33. Wear a bikini on the beach without being embarrassed
34. Weave a rug on a loom
35. Write and publish a book
March 11, 2008
Lisa: local flavor
Just Cook It
A month or so ago, some friends brought over a meal from Just Cook It, and we all made it together. It was some kind of Thai chowder with chicken, and it was DELICIOUS. The idea is that you sign up for however many meals you want (certain dishes are only served on certain days), and the groceries and a detailed recipe calculated for the right number of people will be delivered to your door. The groceries were beautiful and fresh, and we got just the amounts we needed. Just Cook It serves a very limited area (eastern Salt Lake City), and the meals aren't much cheaper than dining out, but if you enjoy cooking but hate the shopping and meal planning aspects, or if you want to look like a much more accomplished chef than you really are, it's worth a try! I think it's a great option for a date or social gathering where the cooking is part of the activity.
So Cupcake
When a cupcake bakery opened up less than two miles from where we live, Sarah and I had to go check it out. The bakery is called So Cupcake, and it's a very cute little shop in a very ugly building. The cupcakes have cutesy names like "So High the Moon Lemon," but we ignored that and got several to try: red velvet, lemon, mocha, and carrot cake. They were all tasty, but my favorite was carrot cake, followed by the lemon. The cupcakes themselves were moist and good, but it was the frostings that really stood out. Tasty--and how fun to have them so close! I figure that if we walk there, we can justify the calories of the cupcakes...
Mighty Leaf Tea
Mighty Leaf isn't local, but you can purchase their tea online or at a nearby Wild Oats. After seeing a recommendation on Mighty Girl, I ordered a sample pack of different herbal teas, and so far they've been really good. As Maggie said, they're a definite step up from most bagged tea, but you still have the convenience of the tea bag. I'll let you know which one's my favorite one I get through the whole selection.
March 08, 2008
Lisa: Kudos on your correct usage of "amongst." Ugh.
I use plenty of long and arguably obscure words in conversation, so I'm not sure why I got irritated the other day when someone I was talking to used "amongst." I was all ready to find out he was using the word incorrectly, but a little research turned this up instead.
among vs. amongst
Dr. Grammar: "Both are correct and mean the same, but among is more common."
Columbia Guide to Standard American English: a few minor but confusingly-worded differences, such as "amongst has a rather dusty-genteel quality...among is often followed by a singular collective."
Blurtit: "the word "among" should be applied to contexts when people, or things are stationary (they remain in one place), while "amongst" is used more frequently for people or things that are in a state of motion."
Consensus: Among is more modern and colloquial, where amongst is more formal and British. Other than that, they're pretty much interchangeable. So...if you use amongst in regular conversation, you will be correct. Pretentious, but correct.
I was similarly foiled when I tried to find justification for my smirk at the large "KUDO" hand-written on a printout of an email posted in the back room at work. Although I did find kudos in the Merriam-Webster dictionary as expected ("praise given for achievement"), there was also an entry for kudo. To wit:
Some commentators hold that since kudos is a singular word it cannot be used as a plural and that the word kudo is impossible. But kudo does exist; it is simply one of the most recent words created by back-formation from another word misunderstood as a plural. Kudos was introduced into English in the 19th century; it was used in contexts where a reader unfamiliar with Greek could not be sure whether it was singular or plural. By the 1920s it began to appear as a plural, and about 25 years later kudo began to appear. It may have begun as a misunderstanding, but then so did cherry and pea.
So, there you go. Dumb people are allowed to just make their own words. And that is why you'll find me watching Cops in the evenings, pencil in hand, taking notes ON OUR FUTURE.
March 05, 2008
Lisa: it's easy being green(ish)
I'm not going to try to justify my choice to use disposable diapers for Nora, but I will admit that I feel a guilty twinge every time we take a bag full of the little bombs out to the trash. I figure the least I can do is try to balance things out a bit by lessening our environmental impact in other ways. As we all know, white people love saving the earth without having to do that much, and I'm no exception. We're not single-handedly halting global warming or anything, but these things are super easy AND make me feel better about myself.
1. Reusable grocery bags. We have enough plastic shopping bags under the sink to last until we die. Last time I was at Trader Joe's, I bought a cute grocery tote made of oilcloth. It's super sturdy, and big enough to hold a decent amount of groceries. We're getting better at remembering to bring it to the store with us, too.
2. Seventh Generation laundry detergent. Our local market now sells high-efficiency Free & Clear detergent, which is fragrance-free and vegetable- (instead of petroleum-) based. I bought my first bottle the other day, and as soon as I try it out, I'll let you know how it is.
3. HP print cartridge recycling. When I was replacing the print cartridges in our Photosmart printer at work, I noticed that the new cartridges now come with postage-paid envelopes so that you can send in the old cartridges for recycling. I sealed those babies up and dropped them in a mailbox the next day. Easy peasy!
4. Reusable soap dispensers. Instead of buying new pumps for the kitchen and upstairs bathroom every time we use up the soap, I got some refillable pumps at Target and a giant refill bottle at Costco. I had a slight misstep with a metal soap pump that corroded from the inside out, but now we have two glass soap pumps (and a matching lotion pump for the kitchen) and all seems to be well. Theoretically, it's cheaper this way, too.

5. Refillable metal water bottle. I have a hard time drinking enough water when I use a cup. I don't know why--it's stupid, really. I don't mind the taste of tap water, but I just don't get around to drinking water out of a glass. When I was pregnant, I'd buy those big flats of water bottles at Costco, and have a bottle with me all the time--convenient and effective, but wasteful. It's supposedly harmful to keep refilling the same disposable bottle, and even Nalgene bottles are apparently leaching chemicals now. Then I read about SIGG bottles on ljc, and they were just so cute I had to go get one at REI ( Blake waited very patiently while I dithered around, choosing the perfect one). My only complaint is that the cap has so many threads that it takes forever to unscrew the silly thing. Ah, the sacrifices I make for my principles!
So, there you go. Five easy ways I'm being a little more responsible. What else should I be doing (within reason)? What do you do?
March 03, 2008
Lisa: Babies for Obama
Since Nora had so much fun voting for Obama on Super Tuesday, I thought she might like a campaign shirt of her very own. I designed a graphic to look like his other swag and had Zazzle (who I've (used previously) print it up for me. I got it a little big, so that she can wear it this summer when the election's closer.


Don't be jealous. You can buy one too! I think I get like a dollar for each onesie sold--and I'll donate any proceeds to the campaign.
Zazzle's changed their site around, so here's the fancy new link to my gallery:
February 28, 2008
Lisa: thanks for the heads up
This morning, I finished up helping a middle-aged gentleman on one of the public computers, and then walked back to the information desk. The other librarian on duty was helping a customer at the desk.
Librarian: You might want to wash your hands.
Me: O...Kay...
Librarian: (hands me a canister of Clorox wipes)
Customer: He's filthy.
Me: (wiping my hands) What?
Customer: I saw him sneezing into his hand and then licking it. Over. And over.
February 25, 2008
Lisa: tender mercies
Why are cashiers trained to give you your change with the dollar bills on the bottom and the coins balanced precariously on top? Why? This may seem like a convenient setup for the person offering the change (all parts visible and in one hand), but for the recipient it's a disaster waiting to happen. The customer must grasp the end of the offered dollar bill without touching the hand of the cashier, and then hope they've grabbed enough of the limp paper to maintain the slightly curved structure that will support the much heavier coins. If the customer is in a car at the drive through, then they must carefully navigate the bills and their coin payload (which they must only guess at the presence and exact location of, since the drive-up window is six inches above the customer's head) carefully down through the car window without tilting it too much to one side, thus allowing the coins to slip off their perch and tumble down under the car, never to be seen again. If this happens (heaven forbid), the drive-through attendant invariably looks down at the ground between the building and the car and says "Oh." They do not offer to replace your lost coins.
HOW DO WE CORRECT THIS TRAVESTY, you cry? I am happy to report there is a simple and painless solution. After removing your change from the till, cashiers should:
1) drop coins directly into your palm, then
2) offer paper bills.
See? It's actually faster for the cashier because she doesn't have to combine the coins and bills (which she had to grab from separate little bins) into a stack before handing them to you. Everybody's happy.
February 22, 2008
Lisa: afternoon delight
Sarah: Note to self: stop saying "afternoon delight." It is weird and unfunny to everyone but you.
Lisa: Afternoon delight=creepy. THEY ARE HAVING SEX.
Sarah: So you think sex is creepy?
Lisa: That song is creepy. Surely you cannot argue with that.
Sarah: I know what I know. I have disassociated the song from the phrase. Now I just use it willy-nilly, though, which is frowned upon.
Lisa: Well, of course it is. Because you are conjuring up pictures of adults home in the afternoon, having sex.
Sarah: Adults? Why is it worse with adults?
Lisa: Hee. I don't know, but it is. Because...they should be at work? Teenagers are expected to sneak home in the afternoons and be having sex. The adults are just being lazy! BESIDES THE PHRASE AFTERNOON DELIGHT IS JUST GROSS. It's like a dessert name, but then you realize what they're talking about! Sunny Delight. Turkish delight. Old men saying young girls are "a delight." When is the word delight ever used besides in those situations?
Sarah: Looks like it IS a dessert:

February 21, 2008
Lisa: give, said the little stream
Nothing makes you feel more virtuous than giving a little of your hard-earned money away to a worthy cause. If you want to feel better about yourself and about mankind and the future of your country, try donating a few dollars to...

The Dewey book drive, organized by Pamie, sends books to libraries in need--and has been going strong for five years.
OR...

Barack Obama's campaign is close to reaching one million donors. As he says,
If we can reach our goal of one million donors by March 4th, we can send a powerful message that the Washington establishment and big-money interests cannot ignore. As one million people with one voice, we can tell them that their days of dominating Washington are coming to an end -- the old politics are crumbling and a new voice is breaking through. Our voice.
Or, if you're strapped and can't give anything yourself,

read this story about a little girl and her family who were given the gift of words. Then go about your day, feeling good about the kind of people that give tangible support to a family they've never met, or an ordinary man who became an extraordinary father, or a girl whose spirit and determination can overcome incredible obstacles and will touch your anonymous heart right through your computer monitor.
February 19, 2008
Lisa: mystery man
Several weeks ago, my neighbors erected this papier-mache figure in their front yard. You can see, it's impressively large...but what is it? Or, who is it?

Is it a bizarre tribute to President Hinckley and his puckish nature? Saint Valentine or an elderly cupid? A tribute to the sculptor's grandfather, who loved acting in community Shakespeare productions?
February 08, 2008
Lisa: window shopping
People make such pretty things. If you already bought everything on Mighty Goods and need a few more ideas, try these:
Zhivago Capelet
Pollen earrings
Mavis softie
artisan undies
Floral Dots tee
Gummy Bear Necklace
Zombie Escape Plan journal
Little Teapot onesie
Howdy key-ring pouches
screen printed wall art
I found a lot of these sellers in Craft and ReadyMade (which is now carrying its own printable shrinky sheets--buy them here!).
Lisa: calling all Mormons
Now that your beloved Mitt is out of the race, might you consider voting for Obama? What if Utah went Democrat this year? Let's blow America's minds, people.
February 05, 2008
Lisa: I'm just saying...
To Whom it May Concern:
If you complain to my boss about my appallingly loud voice and even go so far as to suggest that vocal volume should be taken into account during the hiring process, I may be less inclined to help you with your computer problem.

February 02, 2008
Lisa: Claremont
I've been missing my baby brother, Jeff. After a year away at Harvey Mudd College, last May he left for a two-year missionary stint in New Jersey. Sarah and I drove to California to pick him up from school, and he took us on a tour of the gorgeous Claremont Colleges while we were there. I thought I'd post some pictures of the campuses because 1) they're pretty and 2) they make me think of Jeff.
Harvey Mudd is where Jeff found his people. It's a small, private college that focuses on math, science, and engineering. Bill Nye the Science Guy is speaking at their commencement next year. The architecture has some kind of proto-Aztec vibe, featuring decorative "warts," where the students hang their unicycles. Really. Here's Jeff's dorm (Case), the dining hall, and the man himself. There are a few more pictures after the jump.


Pitzer College has xeriscaped gardens and the buildings are covered with murals (many painted by students). Here is the Grove House restaurant, the Interhueman mural, and some kind of tower. More pictures after the jump.


Claremont McKenna is one of the larger of The 5Cs, and is big on the social sciences. We caught them setting up for graduation festivities.


Pomona College is where Real Genius was filmed (but the movie is based on CalTech, a Harvey Mudd rival). Their mascot is a chicken. I know Jeff told me more about all the colleges when he was showing us around, but this crap is what I remember. More pictures after the jump!


At Scripps College, the women's college, we met up with Jeff's friend Sally for an insider's tour. Scripps is beautiful, and is full of little walled gardens and things, so I took a ton of pictures (lots of which are after the jump). The center picture here is the common room of one of the dorms, if you can believe that.
If you read World War Z (WHICH YOU SHOULD), you might remember that a bunch of Claremont students barricaded themselves inside Scripps and fought off thousands of zombies. When I got to that section of the book, I stopped reading and yelped to Blake, "Jeff survives!" He had no idea what I was talking about.


The five Claremont Colleges are on one contiguous piece of land, and share a central library:


More from Harvey Mudd:


More from Pitzer College:


More from Pomona College:


More from Scripps College:


January 30, 2008
Lisa: yard work
Blake and I never had a yard before moving into our house, and it has been kind of a rude awakening. I thought about the furniture we'd need for our new place, but not rakes and shovels and fertilizer and lawnmowers and all of that. I also underestimated the time it takes to keep things looking really nice over the entire growing season.
The previous homeowners thankfully had a pretty low-maintenance system going. I always intend to weed everything on a more regular basis, but we've been able to keep things basically in control between the automatic sprinklers, one or two pruning sessions, and a (usually) weekly lawn-mowing. But who doesn't want to improve on the status quo, right?
Spring 2005
I bought some planters on clearance at JoAnn's, and filled one with flowers and the other with herbs. The herbs hung outside our kitchen door (theoretically for easy cooking access)...


and the flowers beautified our (non-functional and somewhat hideous) lamp post. I was totally proud of myself for buying some black chain at Home Depot and improvising a hanging system for this planter.


Spring 2006
I picked up two more planters for herbs, and added one on the other side of the kitchen door and one around the corner over our trash cans, to counteract the delicious warm-garbage aroma. I really liked the look of the planters flanking our kitchen door, but they had to get watered every day or they'd dry out in the bright summer sun. That just gave me an excuse to buy a cute watering can and feel all domestic!
We also bought two lilac bushes for the empty corner of our back yard that gets tons of sun and had previously been planted with tomatoes (turning the soil acidic). One of the bushes is doing great, while the other looks sickly and will probably have to be replaced.
Spring 2007
I had really ambitious yard plans last year, but I got pregnant. We started off well, ripping up about half of the black weed-blocker fabric under the top layer of dirt in our flower beds and tilling out the weed-infested area behind our garage for a future vegetable garden. We even cut down the bizarre eight-foot-tall bush-tree at the corner of the house (you can see it on the right of the top picture here) and let it grow back as a regular bush. Soon, however, lifting heavy things and bending down in the heat was mentally and physically out of the question--and I didn't even pull out the planters again.
Spring 2008
This year maybe I'll be able to get to the projects I meant to do last year--a vegetable garden and a raised herb plot off the back patio. The vegetable garden will go behind the garage, where there is a separate sprinkler station so that we can set the timing however we want. There's plenty of sun back there, and the weeds are thriving, so I think it could be a good place for it. The herb plot will go in the weird triangular space between the back patio and the fence separating the yard from the driveway--it's really hard to get the lawnmower in there anyway. LJC is my inspiration for both of these. I want the herb plot to be in sort of a raised box, like this, and I love her four-square veggie garden. I think I'll plant our vegetables in rows, though, since the area behind the garage is more of a rectangle than a square. Maybe when it gets warmer, Nora will love spending time outside and can keep me company while I work on the garden. Who knows?
Spring 2009
Sometime down the road I want to put in a little flagstone patio with a pergola over it on the side of the garage, to make some shade in that end of the yard. I also want to replace the aluminum awning over the back patio with a pergola, and get new (possibly fabric?) awnings for the front and kitchen doors. Onward and upward!
If you've done any of these things before, please share your tips with me in the comments. Assume I know nothing.
January 23, 2008
Lisa: fiat
fiat:
From the Latin fieri, "let it be done."
1 : a command or act of will that creates something without or as if without further effort
2 : an authoritative determination : DICTATE "a fiat of conscience"
3 : an authoritative or arbitrary order : DECREE "government by fiat"
(via Merriam Webster Online Dictionary)
Fiat:
January 15, 2008
Lisa: news of the nerdy
Like every self-respecting librarian, I have the comic Unshelved emailed to me every day. It's a little like Dilbert, in that its humor lies in the everyday follies and frustrations of the workplace--but the workplace is a library instead of a cube farm. I don't want you to think it's just a Dilbert knockoff that only appeals to librarians, though--Unshelved is hilarious in its own right. The authors also do something I love with their Sunday strip: the characters "talk about a book they've read in full-page full-color comic strips" that often mimic the style of the featured book. The authors call it the Book Club.
In a tenuous segue...
One day back in August, I was reading my daily installment of the Unshelved blog (for those of you hoping to up the nerd quotient of my entry, this blog was accompanied by a strip featuring Jayne hats), and came across a mention of the comic Wondermark, its author David Malki!, and his video Me vs. Comic-Con: Who's Better?. Since I hadn't yet encountered the time vortex, I gave my curiousity the reins and watched the 16-minute video. If you have the time, and you like things that are funny, I recommend clicking that link. I discovered an intense love for comic book nerds that I didn't even know I had. I shouldn't be surprised, I guess, given my penchant for nerds of all kinds, including...
Johnny Lee. Blake came home from work today and blew my mind with these Wii remote projects (which you have probably already seen if you read more tech blogs than I do). Using the technology of the Wii game system, Lee has created a head tracking system (making the 2-D TV screen appear 3-D), a low-cost interactive whiteboard or tablet display, and finger tracking (so you can control the computer by waving your hands in the air a la Tom Cruise in Minority Report). Something is wrong with the world if Johnny Lee isn't handed an amazing job or a lot of funding.
I can't even force a segue here, so I'm going to stop pretending this is a linear narrative. For those of you who live in Salt Lake, Ken Jennings (who I interviewed here!) is appearing thanks to the King's English bookshop on Thursday, January 31st to host a trivia challenge and sign his Trivia Almanac, which came out today.
Also announced today was the MacBook Air, a disgustingly thin and gorgeous new laptop perfect for people who are always on the go or who want a portable addition to their desktop system. Considering the jaw-dropping Macworld keynotes this year and last year with the iPhone, I'm hoping next year Steve Jobs will be announcing the introduction of the disposable paper cellphones you can buy from a vending machine like on (the absolutely terrible) Ultraviolet.
January 09, 2008
Lisa: In case you were wondering...
Despite being married to a high school football-playing jock, I have no interest in football--I didn't in high school, and I don't now. And forget watching football on TV; on Superbowl Sunday, I only watch the halftime show. That said, I have fallen in love with Friday Night Lights.
As a relative newcomer to high school football culture (and certainly to the all-encompassing version that surrounds Texas high school football), I suddenly found myself needing to know the difference between a cheerleader and a rally girl--and whichLyla Garrity is.
Exhibit A: In FNL's first episode, Lyla says she has to go to "rally rehearsal," so I figured she was a rally girl.
Exhibit B: At the end of episode 2, the Dillon rally girls are shown delivering baked goods to their Panthers in a sequence that ends with Lyla bringing Jason a cookie in the hospital. Is this because she's his rally girl, or does she do it (and does he forego the services of a rally girl) because she's his girlfriend? Incidentally, (just like Wallace's spirit boxes on Veronica Mars) treat-bearing rally girls apparently do exist in real life.
Exhibit C: The show definitely considers cheerleaders and rally girls to be two separate things. Lyla notes their uncharacteristic alliance (and by implication, their accustomed rivalry) in making Jason's banner. The casting calls for extras support this, noting that 'cheerleader' is a specialty role, while rally girls (though required to be "super cute") receive standard pay.
Exhibit D: The Wikipedia entry on cheerleading doesn't mention rally girls at all, but I love that the neutrality of the article is in dispute.
Exhibit E: TWoP forum participants know all. BananasFoster explains that being a cheerleader is more prestigious and exclusive, while anyone can be a rally girl. TexasTumbleweed agrees, adding that the rally girls are indeed the providers of spirit boxes and banners. It sounds like rally girls are a lot like what we called "pep club" at my school.
Verdict 1: I think Lyla must be a cheerleader. She's often shown on the sidelines of the game, cheering in the uniform and with pom-poms, just like my school's cheerleaders. Plus, she was dating the star quarterback--clearly a role only a cheerleader can fill. "Rally rehearsal" must have meant practicing for a rally, not practicing with her fellow rally girls.
Verdict 2: I have spent too much time thinking about this.
Verdict 3: I love the internet.
January 05, 2008
Lisa: I flew there in a miniature plane
In an effort to...
1) clear out the old "draft" entries that have been hanging around, cluttering up the back end of our blog, and
2) celebrate Sarah's love of CSI and the miniature killer storyline,
I'm posting these "model village" pictures I made almost two years ago, inspired by this post on LJC.


The instructions to make your own fake model village pictures can be found here. Happy Photoshopping, to the two of you out there who haven't tried this yet!
December 31, 2007
Lisa: chocolate chip cookies
As part of the splurge that precedes every good diet, I made chocolate chip cookies. Not just ANY chocolate chip cookies, mind you--these cookies from Gourmet on Epicurious, found via Super Eggplant. These cookies are by far the best I have ever made. They are big, chewy without being too thin or raw, and completely delicious. Blake ate three, which is saying something considering his usual abhorrence of sweets. The recipe is kind of finicky (yes, I actually measured out 1 3/4 tablespoons of an egg), but I followed every step except for flattening the mounds of dough with a moistened palm. Gross, right? Anyway, they spread out just fine on their own. [Recipe after the jump in case that link ever dies.]
Thanks, Sarah, for your help--and for the use of your hand mixer after mine ingested its own power button. On a completely unrelated note, does anyone know how to get melted butter out of clothing? Washing it in cold just makes little butter balls on the surface, and I'm afraid hot will just melt it back in again.
For those of you who are much more domestically advanced than I am (and I don't kid myself, that is probably most people), regular chocolate chip cookies might seem too elementary. To you I give Bacon Chocolate Chip Cookies with Maple Cinnamon Glaze. You're welcome.
Chocolate Chip Cookies
Gourmet | October 2003
Adapted from Carla Rollins
Active time: 35 min Start to finish: 2 hr
Servings: Makes about 28 large (4 1/2-inch) cookies.
Ingredients
3 cups all-purpose flour
1 1/2 teaspoons baking soda
1 1/2 teaspoons salt
2 sticks (1 cup) unsalted butter, melted and cooled slightly
1 1/2 cups packed light brown sugar
1 cup granulated sugar
3 large eggs
1 1/2 teaspoons vanilla
2 1/2 cups semisweet chocolate chips (16 oz)
Preparation
Put oven rack in middle position and preheat oven to 375�F. Line 2 large baking sheets with parchment or wax paper.
Whisk together flour, baking soda, and salt in a small bowl.
Beat together butter and sugars in a large bowl with an electric mixer at high speed until pale and fluffy, 2 to 3 minutes. Lightly beat 1 egg with a fork in a small bowl and add 1 3/4 tablespoons of it plus 2 remaining whole eggs to butter mixture, beating with mixer until creamy, about 1 minute. Beat in vanilla. Reduce speed to low and mix in flour mixture until just blended, then stir in chips.
Scoop 1/4 cup batter for each cookie, arranging mounds 3 inches apart, on 2 baking sheets. Flatten mounds into 3-inch rounds using moistened palm of your hand. Form remaining cookies on additional sheets of parchment.
Bake, 1 sheet at a time, until golden, 13 to 15 minutes. Transfer cookies to a rack to cool and continue making cookies in same manner using cooled baking sheets.
Cooks' note:
Cooled cookies keep in an airtight container at room temperature 3 days.
December 26, 2007
Lisa: a stake of truth
Blake: (Science talk)
Lisa: ...
Blake: Sorry for being a wonder killer.
Lisa: You're like a non-wonder killer. You kill the wonder I wasn't even wondering about.
Blake: I'm like a vampire slayer, but my stake is the truth!
Lisa: HA! Aw, I wish you could kill vampires with the truth. (Voices) "You use too much hair gel." "Aaah! I'm melting!"
December 22, 2007
Lisa: Muffuletta
This year, the girls exchanged gifts at Jason's Deli, a chain that prominently features the muffaletta on its menu. No one in our group wanted to order the muffaletta, because we didn't know what it was (and no one wanted to ask what it was, for fear of looking dumb). Also, we couldn't bear to involve ourselves in a dialogue including the words "whole, half, or quarter muff."
Thanks to Wikipedia, I can now report that the muffaletta is a huge sandwich defined by its bread (a round, foccacia-type bread, not a muffin or English muffin as some of us guessed) and by the presence of a spread made of olives.
In other Jason's menu news, a Po'Boy is a sub sandwich made on a baguette, and "Spud au Broc" joins "Moons Over My Hammy" and its compatriots in the category of "menu items too embarassing to order by name."
December 20, 2007
Lisa: Free Rice
If you enjoy...
a) Word games
b) The self-satisfaction that comes with having a higher vocabulary level than other people
c) Wasting time at work
d) Ending world hunger
e) Flashbacks to the ever-increasing-difficulty structure of the GRE exam
OR
f) All of the above
...then you should go play FreeRice. They give 20 grains of rice to the UN World Food Program for every word you get right.
(Thanks, Shifted Librarian!)
Lisa: another man's treasure
I can never resist the seasonal aisle in the grocery store, mostly because of atrocities like this:

Yes, you are reading that right. Holiday. Hip-hop. Doberman. Who dances and raps Jingle Bells. Who twists and moves to the groove. Thank goodness I am not the first person to document this. I'm not sure why this toy is so specific--why is it not enough just to be a holiday doberman? Or a hip-hop doberman? Or a holiday hip-hop...person? The good news is that if you are in the dog-owning hip-hop-blasting christian kitschy-animatronic-singing-toy-loving demographic this product targets, the Holiday Hip-Hop Doberman can be yours for only $14.99. Brought to you by your friendly neighborhood grocer!
December 15, 2007
Lisa: A Satisfied Ewe
1) I hate the word 'ewe.' I don't know why, exactly. I think it's picturing the spelling of the word while I say it, since I don't have an aversion to saying 'you.' It's just so completely NOT spelled phonetically. It is saying, "Just try to sound me out, young reader! I am ready to trick you, HAHAHAHA!"
Whatever, shut up. It's distracting.
2) I appreciate a good pun as much as the next person. Puns in product and/or business names can be clever, incorporating multiple relevant meanings. But a pun for no reason is just using the WRONG WORD.
Case in point:

Mutton is not on the menu, and this restaurant's clientele does not include sheep. So...why? And this is just gratuitous:
That said, their Navajo Tacos are tasty.
December 14, 2007
Lisa: Can I fluff your pillows?
All of Sarah's holiday domesticity reminded me to post about the pillows I made for our living room. Blake and I gave each other two leather armchairs for Christmas this year, and I wanted to celebrate finally having adult furniture with the addition of some pretty new throw pillows. Nice-looking throw pillows are surprisingly expensive, but I thought I could make some on the cheap using the upholstery fabric I had left over from making my needle case. $75 worth of pillow forms and fancy trims later, I got all the pieces cut out and ready to sew. Four simple seams, right? Zip, zip, zip zip, turn it inside out and stitch it up, right? Well, sort of. It is really tricky to hold the trim tight enough against the zipper foot and keep all the layers lined up straight. If I were doing this again, I'd sew the trim onto the right side of one of the pieces of fabric first, like my mom suggested.
Here are the finished pillows:


[ETA: These pictures looked fine on my monitor at home, but on my work computer they're super dark. I'll try to take some more with all the lights on!]
November 29, 2007
Lisa: let it snow
Now that snow is finally falling outside, things are looking all Christmassy! I thought it might be time to get out the tree and the decorations.

I forgot one of the garlands, and some sections of the lights aren't working (which means some tedious bulb-by-bulb checking), but it's still festive!
November 27, 2007
Lisa: happy macbook to me!
I'm finally getting all moved in to my pretty new MacBook. It is so much faster than my old PowerBook!

Leopard has some nice upgrades, too, but also some things that are different enough to take some adjusting. There's been only one downside so far: all of a sudden the text in Safari started acting all crazy and overlapping or not appearing at all. I took this screencap so that I could ask all of you geniuses for help.
Anyway, it's all fixed now with some thingy I did in Terminal that I didn't understand, found on this thread. Hurrah for Google!
Unfortunately, now I'm slightly worried about the magnetic power cord connection. I set my computer down on the couch and left the room for a second. I heard a popping noise coming from the living room, and when I came back, the twist-tie keeping my camera's USB cord neat had been sucked up against the empty port. This seems bad, somehow...an electrical socket that pulls small bits of metal into itself. It's almost like my computer has become self aware and is TRYING TO BURN DOWN MY HOUSE!!! Almost.
November 15, 2007
November 07, 2007
Lisa: accessory clips
When I hung up the letter hooks in Nora's bedroom, it started an addiction that could only be fed by adding more hooks. Blake hung some little brass hooks in my craft closet for me that are now holding gift bags, and I ordered three more hooks from Restorers (through Amazon) for Nora's room.
I knew I wanted to hang her blessing dress and the gorgeous handmade blanket she got from her anonymous "secret grandma," but that left one empty hook and a long narrow space in the middle. With Sarah's help, I brainstormed an accessory holder.
Here's the result:
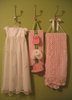
![]()
I'm really happy with how it turned out, and the whole thing took less than two hours to make. Endless variations are possible to suit your needs and tastes. Instructions and the materials I used are after the jump, if you're interested.
Materials:
Steps:
1. I cut the cardboard to the width I wanted, getting rid of the bent-up corners in the process. Then I set the cardboard on my fabric and cut around it, leaving plenty of extra fabric to wrap around the back.
2. I pinned the dark green ribbon down the center of the right side of the fabric, and just stitched right down the center with the sewing machine. Easy peasy.

3. The next step was a little bit tricky for me, since I'm not really a good spatial thinker. I centered the cardboard on top of the fabric and ribbon, and marked the top center and bottom center of the cardboard with a pin. Then I messed around with the clips, the light green ribbon, and some pins for a while, until they looked right. The idea is that the light ribbon threads through the clip rings, which are held in place by one pin through all three layers in the center of the loop. These pins will be replaced with stitching in the next step.
4. Next I replaced the pins with stitching. I slid the rings on each side away from the pin, carefully removed the pin without letting the ribbon slip, and backtacked over the light green ribbon a bunch of times.
5. I cut a piece of batting a bit smaller than my fabric.
6. Then I plugged in my trusty hot glue gun, and while I was waiting for it to heat up I ironed my fabric so the final product would be nice and smooth. Placing the fabric right-side down, and the batting centered on top of it, and the cardboard centered on top of that, I folded the two ends over the cardboard and glued them down. I took special care to make sure the ribbon stayed centered on the cardboard, and pulled each end of the ribbon tight while pressing it into the glue. Don't burn yourself--hot glue hurts like a mother.
7. Folding the corners like wrapping a present, I pulled the sides in tight and glued them down, too. While the glue was still warm and slidy, I turned the project over to the right side and made sure things looked smooth and not puckery from the front. Then I took the leftover light green ribbon and glued it in a loop to the back side of the top edge. If I'd wanted to get fancy, I could have cut a panel from the leftover fabric, ironed the edges under, and glued it to the back of the project to cover the empty cardboard and rough edges. Nora was getting hungry, so I bagged that idea, but I might still do that sometime if it starts bugging me. It would definitely look more professional and finished that way.
8. Ta-DA! I used five of the curtain clips for optimum future flexibility. I'm only using three of the clips now (see the top picture above), but in the future I might want to display different items, and I wanted to be able to accommodate various sizes.
October 30, 2007
Lisa: Tools of the Week
#1: IUD
Target didn't have the annoyingly-packaged silver Pure Pigment Shadow Stick I usually get, so I bought Molten Metal in Scene Steel-er to try instead. It is AWESOME. The packaging is totally pleasing, with a lipgloss-style foam tip applicator. You shake together two layers of clear liquid and silty pigment, and then swipe it on. It's shimmery but not too heavy, and stays on all day. I'm totally converted--no more scratching my eyelids with the plastic edge of the Shadow Stick!
October 24, 2007
Lisa: meeting of minds
Lisa: Adam Baldwin is by far the best looking Baldwin. It's not even a contest.
Sarah: I didn't realize he was even really one of the Baldwins. He looks different enough.
Lisa: Yes, he is one of the brothers. [ETA: Sorry, Sarah. He is NOT one of the brothers. I apparently completely skipped over the words "no relation" in his IMDB bio.]
Sarah: Plus he doesn't have the slicked hair. The Baldwin helmet.
Lisa: Good point. Or that bloated, drunken smirky look! So. I was reading IMDB, as one does, and I couldn't help but notice that one of the comments on his profile was titled "his butt." So...I clicked on it. Because, OBVIOUSLY.
Sarah: mmhmmmm
Lisa: The thread was completely bizarre. The first commenter was all, "Has anyone seen his butt?" And someone replied, "Yes, in some show (blah blah), it was nice."
Sarah: lol
Lisa: And then the first commenter said, "So...was it soft and squeezable, or hard and muscly?"
Sarah: HA! Why didn't she just see for herself, since she needed such detailed descriptions??
Lisa: So then another commenter was like, "Um. That's a weird question. It's hard to tell from TV, but it looked pretty muscly. HERE'S A PICTURE."
Sarah: Well? did it look muscly?
Lisa: It did indeed.
Sarah: That's weird. That's the sort of investigating you do on your own.
Ten minutes pass.
Lisa: Admit it, now you're curious about Adam Baldwin's butt.
Sarah: Vaguely. Are you wanting to send me a picture?
Lisa: No. As you said, that is research that should be done on your own.
Sarah: Well, at least not with STRANGERS.
Ten more minutes pass.
Sarah: So are you going to show me Adam Baldwin's butt, or what?
Lisa: Ha! It is linked from his IMDB comments. Or you could probably Google it. But boy, will your face be red when you get fired for Googling "adam baldwin butt!"
Sarah: lol
30 minutes pass.
Lisa: So, did you look it up?
Sarah: No. I don't want to be fired!
Lisa: Probably wise.
October 19, 2007
Lisa: your secret is safe with me
Lisa: Can I just say that big sweaters cinched in with little belts never looks good in real life? Just on the models in the Victoria's Secret catalog.
Sarah: Yes.
Sarah: Lisa. I might buy leggings soon. I'm apologizing in advance.
Lisa: NO. SARAH.
Sarah: I CAN'T HELP IT. I'VE BEEN RESISTING THEM FOR OVER. A. YEAR. They've slowly broken down my defenses.
Lisa: It is a slippery slope!
Sarah: What if I never wear them as if they're pants? What if I wear them with little shrugs and heels, and cut little holes in the backs where they rest on my calves?
Lisa: You are sentenced to watching Chocolat again to remember the flattering timelessness of 50s fashions, because blousy shirts and skinny jeans/leggings are NOT FLATTERING.
Sarah: NO ONE SAID ANYTHING ABOUT BLOUSY SHIRTS! I would not wear leggings with a long shirt. I hate you for suggesting that. This conversation is over. Just know that when i show up somewhere with leggings, you were warned beforehand.
Lisa: What are you going to wear them with?
Sarah: I would wear them with dresses, not blousy shirts, bitch.
Lisa: What about opaque tights instead?
Sarah: Opaque tights run. Plus, you can't wear open-toed shoes.
Lisa: Um. Leg coverings are worn in winter. Winter is not the time for open-toed shoes. I am just saying this for your own good.
Sarah: I am not fighting with you anymore about leggings.
Lisa: I was only fighting you because you ASKED ME TO A YEAR AGO.
Sarah: Okay, well now i am just saying that it might happen and there's nothing more to be done.
Lisa: OK. You have released me from my obligation. Also, what are your feelings on sweater dresses?
Sarah: Ummmm, I like them in the VS catalog, but they can be lump-magnifying.
Lisa: "Pleated cami has a luster so bright you'll radiate at every angle." I don't think that is a good thing.
Sarah: No. Not unless you're that one super hot model. Not Giselle, the other one. The brunette! Who's super hot! But not Adriana Lima, she of the huge lips.
Lisa: Hee. Oh, THAT one.
Lisa: Can i just say that a tube top should not have pockets?
Sarah: Now, with extra middle-widening!
Lisa: Also, an easy way to pull the top RIGHT OFF YOUR BOOBS.
Sarah: hee
Lisa: Do you know how many times i have almost bought that oxford shirt bodysuit?
Sarah: So many times.
Lisa: It's wrong. I know. It has a thong bottom.
Sarah: My question is, do you really want your nice oxford shirt to be wedged in your ass crack all day? I think not.
Lisa: I know! Thank you. But...it looks so cute and sleek and stays tucked in to your low-rise Marisa-fit butt-lifting pinstripe pants!
Sarah: I'm not arguing that with you. But...the ass crack. On your shirt.
October 09, 2007
Lisa: calorimetry
Instead of going to the yarn store like I wanted to last week, I forced myself to dig out an unfinished project I already had. The girls and I all bought yarn to knit Calorimetry together, but after a few introductory knitting sessions, our impetus kind of fizzled out. I thought I could finish mine pretty quickly, thus satiating my need to knit AND allowing me to figure out any tricky bits in advance so that I can help the girls with the pattern if any of them ever decide they want to work on it again.
Here's the finished product, which (in spite of the unflattering picture) I really like. Basically, it's a sort of headscarf that buttons at the back of the neck, so that your ponytail or whatever can stick out the back.

The pattern says "It is very important to obtain the correct gauge for this piece," so instead of just skipping the boring gaugeing altogether, I went ahead and knit the little square with 5mm needles and the yarn thickness that the pattern calls for. My square was too big, so I figured that if I knit the whole thing on 4.5mm needles instead, it would turn out about the right size. I didn't bother gaugeing again, which was a mistake. My first product was the humongous thing in the photo below.
I started again, but this time cast on 80 stitches instead of 120. The pattern uses short rows, working in a 2x2 rib until a certain number of stitches remain on the end of each row. I knitted 7 instead of 15 of the repeated decrease rows, and just did enough increase rows so that I had the right number of stitches on the end of the row again. That probably makes no sense if you don't knit or haven't read the pattern, but suffice it to say that this was a pretty easy pattern to knit and to alter. My second attempt was a success--the version on the bottom of the photo below turned out to be exactly the right size. I found a button in my tin that fit the buttonhole, stitched it on, and it was ready to go!
Knitting time (if you only knit the smaller version): four hour-long dramas with no commercials.
September 28, 2007
Lisa: maybe if i just put a picture of myself next to the doorbell, that will scare them off
When I read Mindy's rant about door-to-door salespeople, I remembered how I felt when we first moved in to our neighborhood. I'm not normally a fan of door signs, and the 'no soliciting' signs you can buy are pretty hideous. On Gabrielle's recommendation, I took advantage of a trip to Color Me Mine with the girls to make my own. The colors are a little off in this picture, but here's the result:
Anyway, it works like a charm on everyone who knows what "soliciting" means.
In other Perschon-family reading, I tried the Celebrity Morph that Charles posted about, but after the site tried to match my face with Dave Navarro, Lance Bass, and Robert DeNiro, I gave up. Sarah, you don't still think you're the mannish one, do you?
September 19, 2007
Lisa: all you need is love
Nora of mine,
When I hold you and look into your eyes, sometimes I feel a surge of confidence and empowerment. Sometimes I feel a debilitating sense of self-doubt and inadequacy. But every single time, I feel love unlike anything I have ever felt before. I'm pretty sure that that love means I will do everything in my power to take care of you.
We'll be okay, baby.
September 01, 2007
Lisa: career day
I love being a librarian, don't get me wrong, but we all have days when we think we might want to try out another profession, right?
Here are a few I think might be fun:
August 30, 2007
Lisa: Can you dig it?
If we lent you our VHS copy of Shaft, will you let me know? I was totally planning to pack that bad boy in my hospital bag.
August 28, 2007
Lisa: In which I try to bore you to death with completely insignificant details.
For better or worse, the nursery is pretty much put together! It feels good to have that task done. The polka-dotted fabric bin on the lower shelf of the white table holds board books and tub books. You can see the Boppy pillow hanging out on the seat of Blake's grandpa's rocker.
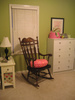
The dresser is full of baby clothes and linens that have been washed with Dreft, folded and sorted by size, and put into labeled drawers. The IKEA frog is sitting in a Bumbo baby seat next to George and Martha and a sweet little baby sock sorting thingie I found at HomeGoods. I made the print over the dresser in my letterpress class--it features my favorite quote from Peter Pan.
The top two shelves of the bookcase are full of baby supplies, and the bottom shelf is picture books. The art is two pages from an advance copy of You Were Loved Before You Were Born, written by Eve Bunting and illustrated by Karen Barbour. The book is due out in January.

Under the window you can see the gift Marci got us--the first baby item Blake and I picked out together. Above the crib are the letter hooks I talked about here. Since I took these pictures, I got some big clear totes at Target to go under the crib: one for extra diapers, one for blankets, and one for stuffed animals. We're still waiting for our Sophie bumper and crib skirt to arrive from Pottery Barn.

The light must have been a bit different for this photo, because the wall color here looks closer to how it looks in real life. Anyway, you can see we've been messing around with the toys on top of the bookcase and on the shelf above it. We swapped out the fancy (and arguably creepy-looking) dolls I had when I was younger for the Cabbage Patch Garden Fairies I adopted in college. And of course we had to dig out my Boo doll and press her belly a bunch of times. The soccer-playing Build-a-Bear was a gift to Blake from the girls he coached one year, and the other one is Olivia, who Blake gave me for our anniversary three years ago.
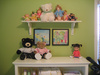
TA-DA! She'd better friggin' love it.
August 27, 2007
Lisa: Buy a shredder. Now.
If, like me, you don't take identity theft that seriously, you should probably read The Torn-Up Credit Card Application, from the genius who brought us How Much is Inside. Rob tore up a junk-mail credit card offer, then taped it back together and filled it out, requesting a change of address and using a cell phone number. The helpful folks at Chase sent him a brand new credit card, no questions asked. Friggin' terrifying.
August 21, 2007
Lisa: Through Any Window
Jenna Fischer is such a babe. Read about her experience shooting the video on her MySpace. And the video is directed by the nerdy guy from Lane's band!
August 16, 2007
Lisa: I knew I hung on to those hideous socks for a reason...
So, if you live nearby, I have an odd request. I'm trying to collect (as cheaply as possible) costume pieces that 8-year-old boys could use to make themselves a superhero outfit. I bet some of you might have appropriate things lying around, such as...
If you don't have costume stuff to share, or live far away, I'd love more ideas of cheap, commonly available items that I could use!
August 06, 2007
Lisa: There was no "giant pregnant stomach" body type.
About a month ago, when ljc posted her Simpsons avatar, I checked out the Simpsons Movie site and tried making a few. The Simpson avatar maker is like a less-sophisticated version of the Mii-maker; you choose facial features, hairstyle, etc. that you think match your own. I came up with a fairly decent one for Blake, but I didn't think there were enough options to get a real likeness, so I didn't make one for myself.
![]()
Burger King's Simpsonizer supposedly takes a photo and actually morphs it into a Simpsons-like character. I'd seen a few surprisingly good likenesses, so I thought I'd give it a whirl. You still get to choose skin color, hair color, accessories, and body type, but it's in the guise of tweaking your Simpsonized photo, instead of starting from scratch. I tried it twice. The first time, my Simpson-self was a middle-aged black woman. The second try was a lot closer, but had long, glamorous dark red hair. Here's what came out after a bit of messing around:

Not too bad, I think! I mean, completely ridiculous of course, but not bad!
August 04, 2007
Lisa: Kudos! (mmm. kudos.)
My parents finished the vast majority of the work on their amazing property in Spring City in time to show it off at Jeff's farewell party in May. I stole some before pictures from a few of Sarah's old entries so that you could see the difference side by side.
Here's the side of the big stone barn before:
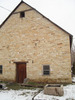
And here's what the barn looks like now:

You can kind of see my sign hanging over the trellis in front of the door. The back of the barn is gorgeous, too, with giant glass french doors looking out over the back yard. Like Sarah said, my parents cleared out all the stalls and things so the barn can be used for summer parties. Now I just need to convince them to buy a Thelma's Frozen Lemonade machine to keep out there.
Here's the slightly sketchy-looking entryway of what we call the "big house" before:

And here it is after:


Here's what the top of the turret on the corner of the big house looked like before:

And here's the turret in all its current glory:

This doesn't show it to its best advantage, but here's the gorgeous new kitchen in the big house:
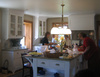
I couldn't find a before picture, but here's the vastly improved "little house:"
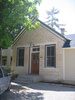
The little house got fixed up first, and it's where my parents have been living during the bulk of the remodel. It's tiny (just a kitchen/living room, one bedroom, and a bathroom) but darling, and my parents uncovered and highlighted some great period moldings around the huge windows. Now that the big house is fixed up, they've moved in there and the little house is now a guest house for when we come to visit!
August 02, 2007
Lisa: my love is like whoa
I thought I was already a pretty big Office fan, but my Mindy Kaling love has grown by leaps and bounds since I found Things I've Bought that I Love, to which she is a frequent contributor. TIBTIL was linked on not martha, and I was thinking "this girl is awesome and hilarious and I want to be her" and then there was a picture and it was Mindy Kaling and my brain exploded.
(You can thank me later.)
Lisa: you almost make me forget about tacos
Happy anniversary, Blake! Thank you for being so sweet and patient with me over the last six months. You're going to be a great dad. Congratulations on the job offer!
August 01, 2007
Lisa: after

I got my car back a few weeks ago and it's all pretty and whole again. Thank goodness for car insurance, because I sure didn't have $6000 to fix it.
July 31, 2007
Lisa: hooked on phonics
Back in June I mentioned that I bought some letter hooks for the baby's room. I got them hung on the wall over the crib soon after that post, but it's taken me a month and a half to download the pictures from my camera. AT LONG LAST, here are the hooks in their natural habitat:

Here's a closeup of the hooks. I want to get some prettier hangers, but these work for now.

And this is why everyone keeps asking me if I'm having twins:

July 27, 2007
Lisa: you'll laugh, you'll cry, you'll ride your cruiser to the grocery store
Find out the Walk Score of your neighborhood (via not martha). Our neighborhood got a 65, which I figure is pretty good for the suburbs. This is a fun tool, but I think that (like the Hotspotr wifi map) its accuracy and ultimate usefulness depends a lot on individual businesses updating their listings.
I didn't know I needed to read a presidential debate in YouTube comments, but I did. You do too. Thank you to the always hilarious Matt from Defective Yeti, who inspired me to start this blog in the first place.
And thanks to Mallory, who emailed me this awesomely horrible fan art and poetry. Yes, the evil Hot Topic-managing hag Carissa's nemesis is now a published writer.
And this is here mostly so that I don't lose the links before I get around to these projects, but maybe they'll be of interest to you, too: How to Digitize Cassette Tapes, and a few software possibilities for making photomosaics, all on Lifehacker.
July 19, 2007
Lisa: Jack Bauer would get this all straightened out.
When Gabrielle's good friend Anne flew to Oregon to visit her parents last month, her husband (a German citizen and a Muslim) was detained by U.S. Customs and then sent back to Germany with no explanation. Anne and her family have no rights here, and the situation may never be resolved. Please spread the word if you can.
Here's the article from the local paper in Eugene.
July 18, 2007
Lisa: practical knowledge
I was in Provo last week for another children's literature symposium, and here's what I wrote in my notes:
Venison is the least nutritious meat you can eat. It is 11% protein at best, and always wormy. Beaver is the most nutritious meat you can catch in the wild--it's very high in protein, and tastes a lot like beef.
I would trust Gary Paulsen on that.
July 16, 2007
Lisa: I just don't know how to feel
I just got poked in the stomach repeatedly by a 13-year-old boy.
Him: (POKE.) Are you pregnant?
Me: Ha! Yes.
Him: (POKE. POKE.) Can you help me on the computer?
July 07, 2007
Lisa: you can have what's left of me
A little bird named Sarah told me that SOME people have been complaining that I never blog anymore. That is because I have forced my usually razor sharp brain to become banal and empty.
There are important things I could be thinking (and blogging) about, but I choose not to. Delivering a baby? Avoid. Breast-feeding, or worse, breast PUMPING? Avoid. Finding a way to reduce my work hours? Figuring out a childcare plan? Changing my entire life to become a parent? Avoid, avoid, avoid. Why? Because these things are simultaneously the most stressful (to me) and most boring (to you) subjects in the universe.
Here are a few things that are left among the cobwebs. Worth blogging about? Maybe I'll let you decide.
June 19, 2007
Lisa: state of the nation
I kind of can't believe how much bigger my belly has gotten in the last three months. (for comparison purposes)

Lisa: upping our Google count for "knobs"
I've been working on painting our hand-me-down crib and dresser white to match the new side table for the baby's room, and I wanted to get some knobs for the drawers that would tie everything together. I decided on some cut glass knobs from Anthropologie, and while I was there I couldn't resist these letter hooks.
I am afraid buying decorative knobs might be addicting. Now I want to replace all the drawer pulls and doorknobs in our house.
June 11, 2007
Lisa: Why don't you give me a nice papercut and pour lemon juice on it?
The preliminary estimate for the damage on my car is $4500, so it might be considered totaled. Oh, and the other driver is claiming that his car isn't safe to drive. Awesome.
June 07, 2007
Lisa: I saw the sign
I finally finished my dad's Christmas present--just in the nick of time for Jeff's farewell party Memorial Day weekend. It's a sign that will hang outside the big stone barn on my parents' property in Spring City. My dad had the shape cut out of wood, painted it with chalkboard paint, and screwed in some hangy-hooks. My job was just to paint the lettering on each side.
This side is for when there are special events in the barn--they can write in the name of the event with chalk.
This side is the side facing the street most of the time--when there's not a special event going on.
I used stencils and a special weatherproof paint. As always with a new craft project, the most time-consuming part was going to different craft stores to track down the supplies. I found Patio Paint on the JoAnn's website, but not in the store itself. Roberts had Patio Paint, but not the stencils I wanted. I went to Michael's last, and they had by far the best selection of stencils and stenciling supplies. NOW YOU KNOW.
Lisa: ouch.

If they wanted a birds-eye-view diagram, they should have been more specific.
Thank you, Marci, for rescuing us. Sarah REALLY had to pee by the time you got there. Thank you, Blake, for taking care of all the insurance phone calls. Thank you, other driver, for being nice to the pregnant lady who couldn't stop crying.
June 05, 2007
Lisa: You will NOT be assimilated. Sorry.
Can I just say that I hate (HATE) those little bluetooth ear-clip phone thingies? There is no faster ticket to Tooldom. If you wear one while you drive to avoid accidents, fine. If you work in a call center and your company has those instead of wired headsets, fine. Wear it at work. No one (NO ONE) needs to wear one all the time. If you must wear one while tooling around your own home, so be it--but for the sake of all that is good and holy, take it off when you venture into the public realm.
June 04, 2007
Lisa: and stay away from my frozen burritos
In case you didn't already see it on mimi smartypants, Passive Agressive Notes has compiled a collection of real notes that is awesome in both size and content. I think my favorite is still the note from Sarah my parents found after a night out:
Dear Mom,
David and Jeff are mean and horrible [or other random tattling]. Please tell me that I am adopted and not related to THOSE PEOPLE.
Sarah
If you aren't as creative as Sarah, and are stuck not knowing exactly the right words to skewer your nemesis, try these cards from Glarkware.
June 01, 2007
Lisa: try to catch me ridin' dirty
I think I'm going to sell my mountain bike and buy a cruiser. With a basket and a bell. I'm not really the daredevil off-roading steep-hill-loving uneven-terrain type, you know?
Anybody want a practically new Diamondback Traverse?
May 08, 2007
Lisa: what to expect when you're expecting a vampire baby
Blake and I watched two episodes of Heroes last night, which brought up some very important issues that had to be resolved before we could go to sleep.
1. If you could have any mutant power, what power would you choose?
2. Are Magneto's powers stupid?
3. If the baby could have any mutant power, what would you want it to be?
4. If the baby could be any horror-movie creature, what would you want it to be?
These questions were tricky to come to a consensus on, particularly because Blake answered in this highly irritating fashion:
1. Magneto's powers.
2. No. They are AWESOME.
3. The power to make sound waves into light. (I was able to bargain him into controlling the weather.)
4. A vampire.
May 07, 2007
Lisa: people who try not to laugh out loud at their computer monitors at work (cracker division)
I heartily endorse Sarah's addition of How About Orange to her favorite sites. Without How About Orange, I would never have found Threadbared, and I would never have been so delighted by vintage patterns with wacky captions that I started reading right at the beginning, and I would never have found this family on their way to the weekly meeting of the Racist Memorabilia Collectors Club (Cracker Division).
My life is so much better today than it could have been. Thank you, Sarah.
May 03, 2007
Lisa: voila
In our fabulous language, there is sometimes a gap between a written word and its spoken equivalent. Spanish doesn't have this problem--each vowel is said the same way, every time. Their rules of pronunciation are simple and finite. Not so with English. English is full of EXCEPTIONS to the rules. Some of the rules even have exceptions built right in: "I before E except after C or when sounding like "ey" as in neighbor and weigh." What kind of rule is that?
This gap presents a problem for readers and non-readers alike. People who have read the word but not used it in conversation often betray their ignorance with an incorrect pronunciation, while people who have heard the word used out loud might stumble when it comes time to write the word down--and no amount of dictionary searching will help BECAUSE THE SPELLING DOESN'T MAKE SENSE. See "segue." I think the French are usually to be blamed for this.
Imagine my embarassment when I read Imogene's Antlers out loud to my mom as a child, and in the crucial scene where the fancy (French) milliner reveals a new hat he has created to hide Imogene's offending appendages, I confidently exclaimed "VIOLA!" Like the string instrument. I'm sure Mom was very nice about it, all "Heeee. Oh, sweetie, it's pronounced WA-LA!" I could have shrugged it off, or nodded in comprehension. I chose to be mortified.
Now. Let's all learn from my childhood mistake, shall we? When you look at the words "wa la" on the screen after typing them, your instinct tells you that these are not real words. FOLLOW YOUR INSTINCT. Type "voila" instead. Use italics to indicate a foreign language. Smirk to yourself about how smart you are.
April 23, 2007

April 20, 2007
Lisa: one track mind
While I was setting up the auditorium for our "War of the Worlds" No Girls Allowed program, a four-year-old boy wandered in and gasped with delight at the alien party streamers I was draping around the edge of a table. He picked up a stuffed puppet.
Boy: "Look! Two zombies on there!"
Lisa: "I think those are supposed to be astronauts."
B: "Astronauts! And they're in a planet!"
L: "Um, I think that's a space ship."
He picked up another stuffed toy.
B: "This one is a zombie!"
L: "That one's an alien."
B: "..."
L: "Do you know what an alien is?"
B: "Aliens aren't even real! They live in space! They couldn't be on Earth because that would be CRAZY!"
L: "Yeah."
B: "So why are you decorating with all these zombies?"
L: "And astronauts and aliens?"
B: "Yeah!!"
L: "Well, because we're having a program today about aliens and outer space."
B: "AND ZOMBIES????!!!!"
April 19, 2007
Lisa: buy me some peanuts and crackerjack
Spring means baseball.
And baseball means Marci and Mallory eating the world's biggest hot dogs...

...with radioactive relish.
And finding out Sarah's true feelings for me.

Goodnight, boys. Let's play again sometime.

April 18, 2007
Lisa: stone cold sober
This is why we are all glad that I don't drink. And before you ask, yes, my jeans are screenprinted with a silver design featuring glued-on rhinestones.

Thank you, Mallory, for bringing this moment of glory to my attention.
April 17, 2007
Lisa: word to the wise
When I am in the middle of helping someone else,
1) Do not slam your hand down on the counter and shout, "WWWWWWWWWAKE UP!!!!"
2) Do not follow that up with an enthusiastic statement about how people don't have to be quiet in the library anymore.
3) When I turn my attention to you, do not ask me an asinine question about whether we have a certain tax form that you already know we don't have ON THE DAY TAXES ARE DUE.
4) Do not finish our interaction with an exhortation to "SMILE!!!"
See, I normally give exemplary customer service. I pride myself on it. But when you hit me with all of the above, I have no alternative but to give you the bitch stare of death through the fog of rage that has suddenly enveloped me. Two other customers rushed over and immediately started empathizing with me, which means that either you JUST WENT TOO FAR, or that they took pity on the pregnant lady who looked like she was going to burst a blood vessel.
Either way, please, don't do those things.
April 15, 2007
Lisa: help
I have a couple of things I need to get done in the next few weeks.
April 12, 2007
Lisa: research
The labor stories of other women are alternately hilarious, reassuring, and terrifying. Here are a few I've read lately:
Mighty Girl
Superhero
Dooce
Fussy
Here's what I know:
1) Women have been doing this for thousands of years. My body is made to do this.
2) I will be giving birth in a hospital, not at home with a midwife whose idea of an amenity is shaping the umbilical cord into a heart.
3) The epidural is my friend.
4) Blake and Sarah and my mom and dad got me through the end of the marathon. They can get me through this.
April 11, 2007
Lisa: perilous pastilles
I think Tootsie Rolls were originally developed as a weapon, or at least a joke candy. See, if you start to eat a Tootsie Roll that's too big (as most of them are), they glue your teeth together until you start to choke on the copious amounts of chocolate-flavored spit that have suddenly been produced out of nowhere. This should be a deterrent, right? The funny thing is, Tootsie Rolls are so delicious that when you finally stop coughing, your hand automatically reaches into the bag for another piece. My theory is that when the would-be pranksters wouldn't stop eating the tasty morsels themselves, the makers shrugged, all, "Huh...well...the customer knows best!" and started marketing them without the irony.
And don't get me started on the delectable danger that is Dots.
April 06, 2007
Lisa: Bunnies, bunnies, it must be bunnies!
As Andrea mentioned, we read The Miraculous Journey of Edward Tulane for book club last month. Because it was a kids' book, and because I'm a little craft-obsessed, I had everyone make a bunny out of felt. I was hoping to make these little guys, but I couldn't find the book in time. Instead, I printed some of blue by you's photos for inspiration.
I love how all the bunnies came out so different and so fun.
Meet my rabbit, Randall:
April 02, 2007
Lisa: Internet, work your magic.
It seems like all the books I can find on decorating a baby's room or making baby-related crafts are super cheesy and overdone, syrupy-sweet, or just plain hideous. Itty-Bitty Hats is an exception, and I can't wait to get started on the pumpkin hat.
Can anyone recommend other titles for me that won't bring back the morning sickness?
March 31, 2007
Lisa: office, redux
Since the office next to our bedroom is eventually going to become the baby's room, last weekend we moved the bookcases and desk downstairs to the family room. I was worried it would feel too crowded down there, but actually I think it's an improvement--it's looking like a real room instead of just a few stray furniture rejects in a weirdly long space. Here's what the family room looks like now:


In the first and last pictures there, you can see a big set of white louvred doors behind the black office chair. A while ago, with inspiration from various design magazines, catalogs, and books on organization, I made the inside of the closet (which is quite deep and included outlets for power and telephone lines) into an office. It's not as pretty as the mini-office I linked, but it's functional and I can close the doors on the whole thing to make the room look neater. I do all my work for Concert Black from there. Before and after:


With the furniture out of the way, it was a lot easier to repaint the office/nursery. The old paint color was like Kermit after a hearty meal of radioactive waste, and we don't want the baby to go blind or anything, so we painted over it with a much softer, more minty green I had already bought for the downstairs hallway. An improvement, don't you think? And I still like how the green looks against the other paint colors in the nearby rooms and hall.
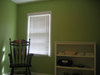


Thanks, Blake and Sarah, for all your hard work and help!
March 30, 2007
Lisa: corndog karma
A few nights ago I got corndogged. In case the name isn't enough of an explanation for you, corndogging is a prank in which the pranksters obtain a large quantity of frozen corn dogs and drive them into the prankee's lawn stick-first in the middle of the night. With any luck, by morning the corndogs have defrosted, and have become a smelly and tantalizing treat for the neighborhood pets.
The first problem with the fact that I was the victim of this harmless but irritating attack is that corndogging is my signature prank. I INVENTED IT.


Secondly, this meager attempt barely qualifies:

THIS, my friend, is corndogging:
Live and learn. Oh, and stay off my lawn!
March 28, 2007
Lisa: dental hygiene is so hot right now
Sometimes the Fergie-bot says some stuff that the kids out in the suburbs can't understand. This time, the confusion-causing lyric was found in Glamorous:
Livin' my life
In the fast lane
And I wont change
By the Glamorous, oh the flossy flossy
Investigation was obviously called for. After verifying that the lyric is indeed "flossy flossy," I checked the sometimes helpful (but always offensive!) Urban Dictionary. There were two helpful definitions that actually predated the song:
1. Extremely flashy or showy.
2. Someone who is hot, sexy, or banging.
Yahoo! Answers also chipped in with:
3. Ornate or showy in a flashy, often almost vulgar way.
Now I'm wondering if Jennifer Lopez wasn't just talking about dental floss when she said "if I wanna floss I got my own." Thoughts?
On an eerily related note, Sarah bought me a toothbrush that plays Let's Get it Started by broadcasting sound waves through my teeth and directly INTO MY BRAIN. That's what the package says, anyway. It's awesome--now I in the mornings I shake my thang AND brush for a full two minutes!
March 27, 2007
Lisa: dude looks like a lady
Is it possible that hot rollers induce mannishness? One would assume that artificially curling one's hair would result in a more feminine appearance. Strangely, no. Each time I catch a glimpse of myself in a reflective surface, I am somewhat stunned by the incongruous man-face peering out from the center of a soft cloud of curled hair. A dark day for all of us.
March 17, 2007
Lisa: checking in


March 09, 2007
Lisa: Tool of the Week
Over the last 15 years or so, I've tried a lot of mascaras. Luckily, I wasn't makeup-age during the era of the colored lashes, but I've tried every tube my mom ever bought (Clinique, Arbonne, and various other high end stuff), every brand they sell at the drugstore, and some things in between.
By far, the best mascara I've ever used is...
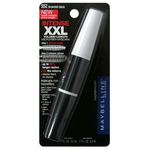
MAYBELLINE INTENSE XXL VOLUME + LENGTH MICROFIBER MASCARA.
The tube is divided in half, with one end being a whitish "lengthening primer" and the other end the black top coat. No lie, this mascara does make my lashes look significantly longer and more full. My natural eyelashes are barely average, but when I started wearing Intense XXL...
This is obviously no ordinary mascara. Try it! And tell me about your favorite beauty product in the comments!
March 06, 2007
Lisa: well-heeled
Sometimes people question why I spend time or money on 'unneccessary' grooming procedures. Other people ask, "how can you stand to walk in those things" or, "why are you always all dressed up?"
THIS IS WHY.
Excellent grooming goes a surprisingly long way to make up for a lack of natural beauty. Our friend Jennifer Aniston can testify to that. "Excellent grooming" means a regular regime of waxing or shaving, moisturizing, finger- and toenail care, hair upkeep (cut and/or color), daily hairstyling and makeup application, and making sure that whatever clothes you put on constitute an "outfit." You don't have to spend a lot of money on any of it, and it shouldn't be overdone (if all the makeup you need is lipgloss and mascara, great), but it has to be done. I've talked before about showing respect for your body by taking care of it, and I hold to that, but I think for me it's mostly about being prettier.
Why skirts and heels? Well, quite simply, I think the Fifties look of heels and a skirt with a nipped-in waist is just the most flattering for a traditional female figure. Plus it's easier to pull off a classy, old-school glamour thing than to follow trends--especially when you're no longer 16 years old, over 98 lbs, or don't maintain the figure of an 11-year-old boy.
Heels look feminine and graceful. They make your legs look longer and more shapely, and change the contour of your butt for the better. Plus, you look like you're putting just THAT much more effort into looking nice.
Like all of you, I wear pants when the activity calls for it. However, for a woman with hips, a skirt is more flattering than a pair of pants EVERY TIME. And contrary to popular argument, I find that skirts are often more comfortable than pants, due to the lack of restriction around the lady bits.
Yes, you have to be slightly more conscious of your body when you're wearing heels and a skirt. Wearing a skirt forces you to be ladylike--keep your knees together or risk exposing yourself a la Britney. THIS IS A GOOD THING. What's so bad about comporting yourself like a lady? Sitting with your legs wide apart in jeans still looks vulgar, even if your panties aren't technically visible. Walking in heels, feeling a skirt brushing against your legs--it makes you feel your femininity. Own it.
I think I dress like a 50s TV housewife for another reason. Even though I consider myself a feminist, deep down I still think I should do (or at least be able to do) everything June Cleaver did. But...I don't really cook much. I'm not the best housekeeper. I'm not always sweet and kind and unruffled, waiting, martini in hand, for my husband to get home from work.
But I CAN look the part. I can be the best at walking in with a skirt and heels, a smart-looking coat, and a pretty bag. And you know what? We can eat take-out. We can hire someone to clean our house. But it's still frowned upon to pay someone to be sexy for you. So...I figure I picked the most practical of the three.
March 02, 2007
Lisa: street smarts
Q: When is a good time to take my car to the dealership downtown for an oil change that is 3000 miles overdue?
A: 7:00 am, before the streets are plowed, during a blizzard.
Bonus points: Remind the service guy that a part needs to get installed. When he asks you what part, tell him you have no idea. Watch while he looks up the record of your last visit, where someone painstakingly typed in all caps, "CUSTOMER STATES SHE HIT SOMETHING VERY HARD, AND NOW THERE IS SOMETHING DANGLING DOWN BY THE TIRE. SHE SUGGESTS JUST TRIMMING THAT PART OFF BECAUSE MAYBE IT ISN'T IMPORTANT."


March 01, 2007
Lisa: Thank you?
I never know what people are going to say to me at the information desk. I think some people don't know what a librarian is, while other people are just strange. I try not to take it personally.
"Gosh, you're so bright--why do you work at the library?"
"So are you all volunteers?"
"Gee, you'd make such a great secretary. Maybe I'll offer you a job!"
"You have a master's degree? Really? Seriously? So...did you always know you wanted to be a librarian?" (No. Actually, I got my undergraduate degree in music.) "What do you play?" (The flute.) "Oh. I...don't play the flute."
"You're the smartest girl in the world. And not only that, you're pretty good lookin'! I can say that because I'm old, so it's not a threat."
"Did you know your thyroid gland is enlarged?"
"Can I ask your advice? Do you think half a stick of dynamite would be enough to blow up this whole library?"
Edited because I just had to add one more from today:
"You always look so nice when I come in here. I prefer brunettes with white shirts and black skirts, and you always look very nice."
February 28, 2007
Lisa: There is someone here inside
Until recently, my family owned a Scrabble game with light pink letter tiles. A special collector's edition? No. You see, in the early 1980s, Scrabble was sold in a dark red fabric-covered box. The letter tiles were plain wood, just like always. One day I was doing whatever it is kids do to entertain themselves, when I felt a vague need to pee. Sure that this inconvenient urge would eventually just go away, I remained ensconced on the throne I had built by cushioning the Scrabble box with a decorative throw pillow. Perhaps you have already guessed that I eventually peed through the pillow and through the red box, transferring the dye from the box to the tiles WITH MY URINE. Gross, I know. Arguably grosser? The fact that my mom just washed the whole thing off and we played with that Scrabble game for years.
The problem in this instance (and, to be honest, throughout my entire life so far) was that I didn't "listen to my body." In fact, I HATE listening to my body. Even as an adult, I always wait too long before I give in and run to the bathroom. I don't sleep. I drink Diet Coke instead of water. For some reason I feel the need to constantly assert the fact that I am in charge. My body is not the boss of me and I'll do it 'cause I want to and not 'cause my body tells me to! Obviously this is very self-defeating behavior, but what can you do?
Well, my body is getting the last laugh. For the past several months, all I've done is listen to my body and try to anticipate and fulfill its every physical need. Why? Because now my body has the leverage it has always lacked: puke. Don't get enough sleep? PUKE. Don't eat enough? PUKE. Don't eat the right thing? PUKE. Don't eat at the right time? PUKE. Move too suddenly or in the wrong direction? PUKE. (Can you hear the maniacal laughter coming from the vicinity of my stomach?) Nothing says "I am not in charge of my own body" like a good round of vomit, especially when you hate throwing up as much as I do.
Say it with me: one more week. I've been in charge for 28 years--I guess I can listen to my body for one more week. I'll even throw in six more months of above-average consideration.
But if you see a pleasantly pink-tinted Scrabble game at D.I., think twice before buying it.
February 26, 2007
Lisa: I'd like to thank the Academy
Helen Mirren always looks amazing at awards shows--gorgeous and sexy but age-appropriate. I'm so glad my favorite act of the Oscars recognized her hotness too. Here's to aging gracefully! I don't know about you, but I plan to stick a picture of Ms. Mirren to my bathroom mirror.
February 13, 2007
Lisa: hint, hint
Normally I hate Valentine's Day with the fire of a thousand suns, but don't you think these would make a great V-Day present?

Besides, if you have to wear this knit jersey tent, the least you can do is put on a pair of kickass sexy red heels with it, right?
Lisa: tick tock
Because it is my life's mission to copy Maggie in every possible way, I had to get a pregnancy countdown ticker. Mine looks like this:

It'll be at the very bottom of the main page of our site until I get tired of it.
February 12, 2007
Lisa: the secret is out
Maybe some of you already know, and some of you have already guessed, but I am having a BABY. Yes, that's right, I am GROWING A WHOLE SEPARATE PERSON INSIDE OF ME. From SCRATCH. It's kind of blowing my mind. Here's how it went down (conception excluded [obviously]):
1) Four weeks ago I stopped drinking Diet Coke because I thought I was getting an ulcer.
2) Three and a half weeks ago I thought my reproductive organs had shriveled and died, possibly crumbling into a black powder.
3) Three weeks ago I was getting really tired of having the stomach flu.
4) On January 23rd I finally figured out what was going on and took a pregnancy test. I broke the news to Blake by walking into our bedroom at 6:00am brandishing the test. "Um. Blake? This stick says we're going to have a baby."
5) Two weeks ago our immediate families found out through the postal system--a tiny slip of paper wrapped around a little plastic baby and stuffed into a small mailing tube with tissue paper. I was too shy to call everyone.
6) Last week we started referring to it as Las Plagas, which of course makes me The Infected.
7) This morning I had my first prenatal doctor's appointment. Not only did I get to HEAR the HEARTBEAT, but I saw a little blob wiggling around on the ultrasound screen! It is confirmed: something is definitely in there.
This isn't a blog about a baby, so I'll try not to get obnoxious or too boring, but having a kid is going to be kind of a big thing for me. You may be hearing about Las Plagas from time to time--consider yourself warned.
February 09, 2007
Lisa: appetizing
You know what sounds good to me today?
What? I'm completely normal. No, really.
January 22, 2007
Lisa: not in the best of taste
My stomach has developed a sudden and inexplicable (but nonetheless vehement) hatred for bile. I have tried explaining that bile and my stomach should just get along, that they could in fact work together in perfect harmony, but to no avail. Whenever my stomach detects the presence of its arch enemy, the offending bile must immediately be expelled. Alas.
January 14, 2007
Lisa: Supercharged
Every electronic gadget we buy seems to come with its own proprietary charging cord and adapter. I've been wanting to make a charging center to hide the resulting ugly and inconvenient cord soup residing in the bin on our kitchen counter. At first, I was thinking of a painted wooden box, with holes drilled in it for the cord ends to poke out of. Then I got inspired by these ribbon boxes, and Sarah helped me develop the final idea.
Here's what went into it:
As with most craft projects, shopping for the supplies took far more time than the project itself. It seems like I used to see those cardboard photo boxes everywhere, but maybe they've fallen out of fashion. Once I got the stuff, all it took was cutting the holes in the box with the X-Acto knife, and attaching the bookplates around the openings with the brads. I was initially planning on using grommets or eyelets (like in the Martha Stewart version), but I couldn't find any big enough for all the plug ends to fit through.
Here's the result!


January 12, 2007
Lisa: Maybe there could be a point system for sins.
Sometimes I think the church is simply a program engineered with the lowest common denominator in mind, aimed at corralling the largest percentage of people possible into heaven. It's kind of like Weight Watchers.
If you follow the program, Weight Watchers works--there's no question. But...it's not the only way to lose weight, right?
January 11, 2007
Lisa: M-F-E-O
Lisa: I think I need more Tim Gunn in my life.
Sarah: Hee. Don't. We. All.
Lisa: In my head I just imagined his voice saying "Where's Andrae?" and I started giggling.
Sarah: Andrae= googley-head, which adds hilarity.
Lisa: TOTALLY. I think Tim Gunn would make me sack up and offer me some much-needed direction in all areas of my life.
Sarah: It's possible. He's good like that.
Lisa: Plus, I can picture him looking at my hair and sort of shaking his head with his hand on his chin, all "Well.....make it work!"
Sarah: Speaking of hair, I really liked [our cousin] Heidi's and I've been wanting to dye mine ever since we saw her at Christmas.
Lisa: It was so pretty! But...your hair is already dark? And her hair is straight but with enough wave/body to make it do the swoopy styled thing.
Sarah: Yeah, but I want to dye it darker. Plus, it's growing out anyway. I have to do something with it.
Lisa: OH MY GOSH.
Sarah: What?
Lisa: Nothing. I temporarily went insane and was like "We could have twinner sculpted Jetson hair! Just alike!" and then I had to remove that part of my brain with a scalpel. Apparently I left some bits.
Sarah: Don't make me giggle out loud. I love that part of your brain. Can I keep it? Maybe in my pocket or on a saucer somewhere in my house?
Lisa: Hee. I have it in a jar and keep it in the back of a very dark drawer, pulling it out only occasionally to bark "BAD BRAIN" at it. Then I shake the jar a little before replacing it.
Sarah: Oh, that makes me sad.
Lisa: Don' t feel bad for the Jetson-hair-twins part of my brain. It should be punished.
Sarah: No, no! If you don't want it, let me have it!! It needs sunlight, Lisa. I can give it WHAT IT NEEDS. Plus, I love Jetson hair. Many of the side ponytails of my youth were inspired by the Jetson daughter.
January 10, 2007
Lisa: Bored Now
I think the girls are getting tired of me taking their pictures at Crown Burger every week. Does that mean I will stop? NEVER.


January 03, 2007
Lisa: Wax On
Factoid: it is surprisingly difficult to take a picture of your own eye. But aren't my brows fabulous?

Today on my lunch hour I went to the spa for a bit of judicious waxing, and I got to thinking about why more people don't wax. Here are the common obstacles I see:
1) It hurts.
Well, yes. It does hurt. BUT BEAUTY IS PAIN. No, I'm just kidding--if it was too painful, obviously it wouldn't be worth doing. Look at it this way: have you ever groomed your brows with tweezers? You know how much it hurts when you pluck just one hair? Well (and if you haven't waxed, you'll just have to trust me on this), if you yank out a whole section of hairs at once, it hurts about the same amount as plucking just that one hair.
Admittedly, most of us do not go after our bikini lines with tweezers, and that skin is certainly more sensitive--but what's the alternative? Shaving, with the associated razor burn and immediate prickly regrowth? Waxing the bikini line hurts, a lot, for about one second per cloth. That's six to ten seconds of pain, total, for two weeks of clean skin. Compare that to one or two days of clean skin followed by a week of itchy discomfort.
There's also anecdotal evidence that each time you wax, it hurts less. I don't know if that's from gradual desensitization, or because there's less hair to deal with each time (pulling hair out by the root often damages the root and a new hair won't grow there), or if it's just less scary because you know what to expect. Your mileage may vary.
1.5) Something will go wrong and it will RIP OFF MY SKIN/BURN ME/AIIIIIIIEEEE!!!!
Well, I guess if you were bleaching your own hair you could potentially give your scalp a chemical burn and your hair would all fall out. This is why we leave it to the professionals. Your waxer should be a licensed aesthetician who has gone through hundreds of hours of classroom training and clinical application.
2) I don't want someone else all "up in my business."
Okay. That can be kind of uncomfortable--but it's not as bad as going to the gynecologist. For one, you get to keep your panties on. And your waxer will be super professional; if she wasn't, she wouldn't get any repeat business.
2.5) I am embarassed to have a stranger see what I look like.
Trust me, your waxer has had clients who are much fatter and hairier than you are. Also, if you DO wax, those areas will look better and you'll be less insecure the next time!
3) It costs money.
Yes, services cost money. Just as you can dye your own hair or paint your own nails, you can wax your own brows or whatever area suits your fancy. There's going to be a quality tradeoff, though, due to inferior commercially available products, a lack of expertise, and your not being a contortionist. Also, I personally have never had the guts to do my own waxing--but a stranger won't chicken out before ripping off that strip!
Any hair-removal regime is going to cost something, whether it's razors and shaving cream, depilatory cream, or waxing supplies. You have to decide if the benefits of going to a professional are worth a few more dollars from your budget.
4A) My brows look fine naturally.
Yeah, maybe they do. But...they could look better. Even if you stay with your natural shape, there will be hairs that are "outside the lines." Get closer to the mirror. Yes, other people can see those. Brows are one of the most overlooked facial features, but one that can make a huge difference to the appearance of your eyes and your whole face. An aesthetician can help you determine a brow shape that will flatter your face, and will help you achieve that shape without overplucking.
4B) No one sees my bikini area anyway.
Maybe no one sees you naked. But what if you get invited to go swimming or hot-tubbing? What if you get in a car accident and the doctors have to cut off your clothes?
More importantly, YOU see your bikini area. Just like wearing pretty underwear that no one else sees, you will know when you are well groomed and you'll feel sexier and more confident. Plus, that pretty underwear will look even prettier without unsightly hair sticking out of it.
And...ladies, it must be said: if you are married or in a committed sexual relationship, then sack up. Your husband/boyfriend sees your bikini area, and even though he loves you no matter what, he will appreciate your grooming efforts. Keep the romance alive!
4C) Only sluts wax their bikini lines.
No. Clean and well-groomed women who have respect for their bodies and take care of them wax their bikini lines. You don't have to go Brazilian, and you don't have to shave in your boyfriend's initials. Your lady bits are not inherently dirty. Admitting that you have a bikini area and taking proper care of it doesn't mean you're showing it to all the boys.
4D) I am a dirty hippie.
I can't help you there.
December 29, 2006
Lisa: I am just hoping that they don't have sink pudding.
In the drive-through line at McDonalds this afternoon, I made a startling discovery.

McDonalds? Lives. In. Squalor.
December 27, 2006
Lisa: The Illustrated Librarian
Thanks to Santa, I am wearing a temporary tattoo that says "Read or Die." How awesome is that?
December 26, 2006
Lisa: good advice
As if I needed another reason to love Ken Jennings:
If both time and money are in short supply this winter, use your body. Romance a lonely librarian. As the movies have taught us, when librarians take off their dowdy glasses and let their hair down, some are real lookers.
(Thanks, Dave!)
December 23, 2006
Lisa: No, I haven't written my Christmas cards yet. Why do you ask?
We met Sarah at the delicious Sampan at South Towne after work for a gift exchange with the girls. I'm doing my part to beautify the internet by posting some of the pictures.
Here's the lovely Sarah...


And the awesome wind-up sumo wrestler set she got from Mallory...
And here's Mallory, looking fetching as usual...


And of course, the ravishing Marci.

Merry Christmas, ladies! I love you.
December 22, 2006
Lisa: Boogie Woogie Santa Claus
As promised, I'm posting pictures of our Christmas lights...


Also as promised, Mallory took us to see the light show in Murray that is animated and set to music. When we got there, a long line of cars was inching along, each waiting for their turn to see the show. I passed the time by taking pictures, of course.
Blake was the first to be blinded by my flash--which was probably poor planning on my part, since he was the one driving the car.

Even though I was obviously taking the lion's share of the flash's assault, Jeffrey was so blinded he couldn't even open his eyes. Amateur!

In that last one, imagine Jeff's face looks like this (the only picture from the bunch in which he toughened up and pried his sensitive little peepers open):

I'm not sure how Mallory escaped the photographic onslaught--possibly because she was in the passenger seat right in front of me and was shielded by the headrest.
The house right before the one with the animated show sported some serious lights, too.


Finally, we got to "Christmas Utah," and it was worth the wait. Let's just say there was quite a bit of undignified clapping and squealing coming from our car. It was really hard to get decent pictures when the lights kept flashing on and off, but you get the idea--and if you want to see it in motion, try the link above.

Thanks, Mallory! I think this will be a new Christmas tradition.
December 21, 2006
Lisa: Huh. So, I guess smart people...read books?
The Shelf Life newsletter with my Ken Jennings interview has finally been published!
Here's the interview as I submitted it:
----------------------------------
Local Jeopardy champion and Brainiac author Ken Jennings took time out from his book tour to answer a few questions.
Do you have a memorable library experience you could share?
My mom is actually an elementary school librarian in Utah County. But my most memorable library experience probably happened in fourth grade. We had gym class before recess some days and after it on other days, and I got the schedules confused and accidentally skipped gym to sit in the library reading Encyclopedia Brown books, thinking it was recess. It took me about 45 minutes to realize that I was missing, not recess, but the fourth-grade mini-track meet out on the soccer field. My assigned partner for the three-legged race was ticked.
So, the only time I ever cut class in my life (well, until college), I wound up in the library. Nerd!
How many books do you read a week?
A week? Wow, that's ambitious. You guys do know that some people, like, have jobs and TVs and stuff, right?
Actually, I've been traveling a lot lately for the Brainiac book tour, which is a great chance to catch up on reading. I'll read five or six books in a week if there are enough cross-country flights in that week. If I'm home, I'm lucky to get through a book a week.
What book is on your nightstand right now?
Umberto Eco's The Mysterious Flame of Queen Loana. And in the same stack, also unfinished: that new Brian Wilson biography and a collection of old Little Lulu comics.
What is your favorite genre to read?
Novels, especially ones with that faintly literary sepia-photo cover you see on Vintage Books trade paperbacks. That way I look really highbrow when I'm reading on a plane.
Is there a book that has changed your life? How?
Monetarily, it's Mike Dupee's How to Get on Jeopardy!...and Win! by a mile. But more personally, I think back to the books that changed my sense of humor, like Decline and Fall by Evelyn Waugh or (especially) Cat's Cradle by Kurt Vonnegut. I read that when I was fourteen and it blew my mind. I wrote and talked like Vonnegut for the next three years.
Who are your favorite authors?
Writing today, nobody's better than Ian McEwan or Haruki Murakami. Going a little further back, George Eliot. Dostoyevsky. Fitzgerald. Poe. Too many to name. It's like choosing between your children, if your children were only witty, insightful geniuses all the time.
Do you remember a favorite book from your childhood?
I remember every favorite book from my childhood. To this day I could draw you a diagram of Professor William Waterman Sherman's unique hot-air balloon gondola in The Twenty-One Balloons or tell you every secret entrance to the junkyard headquarters of the boy detectives in "The Three Investigators." But I was also the kind of information-sponge kid who would pore over The World Almanac when the new one came out every November, which is, admittedly, a little weird.
What product would you love to endorse if the opportunity should arise?
Not to toot my own horn too much or anything, but I'm pretty much a genius on the Etch-a-Sketch. Portraits, landscapes, abstracts...I can do it all. I think I should be the celebrity spokesperson for Etch-a-Sketch.
Will you be writing any more books?
Absolutely. I had such a great time traveling the country meeting trivia nuts and putting together their story in Brainiac...I definitely plan to keep writing. Probably a book of trivia, now that I've written the book about trivia. After that--well, part of the curse of being a trivia buff is that you find yourself interested in virtually everything, so that means there's no shortage of subjects I'd like to write about.
What advice do you have for aspiring writers?
I don't feel like I have any how-to-break-into-writing advice, except that a 75-game streak on a major syndicated quiz show is a pretty good way to get a book deal. But when it comes to process, I guess the lesson I learned from Brainiac is that almost any subject, no matter how abstruse, is fractal in nature: it becomes endlessly interesting if you just look close enough. If a book about American trivia culture, for crying out loud, can be successfully received, then anything can. So have the courage of your convictions, authors. The things that obsess you will also interest others--if you can just figure out the right way to present them.
----------------------------------
I assume that when the printed version is posted online, it will be found here.
December 20, 2006
Lisa: in the name of all that is holy
Blake put up Christmas lights on the outside of our house for the first time this year, and they look awesome--he screwed in little hooks and everything! I'll post a picture soon to immortalize his efforts in pixels. Meanwhile, our humble little light display got me thinking about the gloriously wasteful festival of worldly excess that is American Christmas, perfectly epitomized here. I think every American dad aspires to a holiday light show like this one. As he should.
(Video AND INSTRUCTIONS via Lifehacker.)
December 12, 2006
Lisa: Tired
I went to Maryland to help with a friend's wedding last week, and I put 500 miles on my rental car. Here's how (not in chronological order):
1. Washington, D.C.

2. Silver Spring
3. College Park


4. Laurel
5. Bowie

6. Millersville


7. Odenton


8. Gambrills

9. BWI Airport

10. Glen Burnie


11. Woodberry
12. Baltimore


13. Westfield Hills
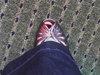

14. Annapolis

Congratulations, Auntris! But...it's good to be home.
December 11, 2006
Lisa: Where are the elves when you need them?
This is what Blake wants for Christmas. I think the insanity is actually a selling point.
P.S. If any of Santa's little helpers (that's you) see a Wii for sale anywhere, let Santa (me) know, OK?
December 01, 2006
Lisa: Book Festival
Now that everything is covered in snow and ice, I'm really starting to miss the fall. It's my favorite season, but it always seems to rush by so fast! In honor of the Season That Was, I thought I'd post a few pictures from a day of perfect fall weather.
A month ago, Sarah and I went to the annual Great Salt Lake Book Festival at the downtown library.
Since I'd never done it before, the first thing we did was to walk down the skywalk. It's a great place to take pictures of the city.
This is on the roof of the library:

At the tippy top of the skywalk, we found this at the beginning (or end) of the stairs. I think more things should have words on them.


Can you make out the Beehive Bail Bonds sign? I don't know why I love that sign.

At the bottom of the skywalk, there's a plaza that offers a nice view of the City and County Building, which you can see behind Sarah.

My favorite part of the Book Festival by far was the hands-on stuff sponsored by the Book Arts program at the University of Utah. We made paper out of jeans:
...and put together these really neat little notebooks. I think I need to buy a bone folder, an awl, and an X-acto knife so I can make more of these at home.
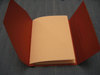
For lunch we headed up the street to Cafe Rio, where we tried to determine if this gentleman in front of us in line was in Halloween costume or not. Thoughts?
Then it was back to the Book Arts area to make another book, this time featuring a secret message compartment and a very saucy witch.
Lest you think I completely avoided the educational parts of the festival, I also got to see Shannon Hale demonstrate how to use a slingshot.
Blake, Marci, Charles, Mindy, and Charlie joined us for dinner, and I managed to hold Charlie for almost five whole minutes before he heard his dad's voice and started to cry. All in all, a success!
In other bookmaking news, we made these at a recent library program. The covers are cut out of pastel-colored manila folders, and the pages are just regular printer paper folded in half and tied in with a narrow ribbon. Easy peasy!

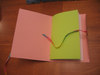
November 30, 2006
Lisa: make like a tree and leaf
I finally finished the Branching Out scarf I started last May, and I wore it for the first time today! I actually finished knitting it quite a while ago, but I lost motivation before weaving in all the ends. Here's to finishing a project! And here's the finished product:

The color is much closer to the picture with the flash, but the picture without the flash shows the detail much better, so I included that too. It really wasn't that complicated to do the lace pattern once I got the hang of it. Next up, blocking the Ribby Cardi!
November 29, 2006
Lisa: Wanna read? (If you could hear my voice, you'd know that was a Willow reference.)
If you're looking for some fun, easy reading for the holidays and you're interested in helping out a glamorous but approachable librarian (that'd be me), I'd love it if you'd consider reading one of these kids' chapter books and letting me know what you think!
Grimoire: the curse of the Midions, by Brad Strickland
Moose's Big Idea, by Stephanie Greene
Shamer's Daughter, by Lene Kaaberbol
The Fairies of Nutfolk Wood, by Barb Bentler Ullman
Ugly, by Donna Jo Napoli
Wabi: a hero's tale, by Joseph Bruchac
They're all possible nominees for the Beehive Award for children's fiction. Here's the official review form (it's a Word document), but just leaving your rating and a short comment in the comments area here would be great.
ETA: Who am I kidding? It would be MORE THAN GREAT! Feel free to leave a request for your reward of choice in the comments area too.
November 27, 2006
Lisa: Tales of Eternia
Sometimes when I get in bed feeling a little stressed, I ask Blake to tell me a story to take my mind off things. Here's what happened last night:
Lisa: Tell me a story.
Blake: Okay. (Thinks for a minute.) Once upon a time, in a magical land, there was a boy who was a prince. And he had a cat.
Lisa: A pet cat?
Blake: Yes. And it was a scaredy-cat.
Lisa: Hee. This sounds like a good story. What was the cat's name?
Blake: Cringer.
Lisa: That's a good name for a cat! What was the boy's name?
Blake: (Pause.) Adam. And Adam had lots of fr--
Lisa: Wait! Did Prince Adam have a friend who had no legs but wore a dress and a hat and could fly?
Blake: HAHAHAHA! YES! HOW DID YOU KNOW?!?! (More uncontrollable laughter.)
Lisa: (Punching Blake in the arm) You tricked me! You tried to tell me the story of He-Man!
Blake: (Laughing) I thought you'd figure it out by the time I got to Castle Grayskull!
Then we told each other the stories of several cartoons, discussed the irritating Snarf/Thundercats and Pluto/Goofy dichotomy at length, and I tried to explain the plot of the Smurfs movie with the magic flute (which I was very fuzzy on) and how it was disturbingly different from the TV cartoon.
Thanks, Blake! It might have been He-Man, but your story did the trick.
November 26, 2006
Lisa: you can take my breath away
Real men sing karaoke.
...And apparently wear very shiny suits. Rawr.

(Thanks, More Than That!)
November 24, 2006
Lisa: two hearts that beat as one
Since Sarah and I are pretty much the same person, we've been sending each other text messages as mental notes to ourselves. Here's what we wanted to remember tonight:
November 22, 2006
Lisa: go on and teas me
I think non-tea-drinkers who are considering becoming tea-drinkers need a guide to help them through the process. I know I could have benefited from such a guide.
Why you want to drink tea:
Why you don't want to drink tea:
What you can do:
Happy drinking!
November 20, 2006

November 18, 2006
Lisa: I hate you so much right now
Advertisers must be wary of association with the scandal-fest that is Nip/Tuck, because FX seems to play the same two commercials over and over during the show. One (a set of trailers, actually) is for Dirt, starring Courtney Cox. The other causes me to involuntarily gouge out my eyes with the nearest sharp implement, shrieking ineffectually at the TV screen, "A SHRUG IS NOT A SHIRT!!!!!!!!"

It is hard to watch Nip/Tuck with no eyes. FX, have mercy!
November 16, 2006
Lisa: I told you so.
So, remember when I was talking about how I thought there was a Ghostbusters cartoon with a gorilla, and how everybody thought I was insane?
While I was looking for the answer to that mystery, I came upon this rather complete listing of cartoons from when I was a kid which not only made me sing the Thundercats song out loud but also serendipitously gave me the answer to another puzzle.
Now when I say, "Remember that cartoon with the animals with words on their shirts? And the words were like...what they were THINKING?" you'll know what I'm talking about. So, no more glazed looks, guys, ok? Guys? HELLO?????
November 14, 2006
Lisa: share the wealth
Don't you think my little brother Dave (a.k.a. "Mr. Moneybags") should buy me a nano for my birthday so that I can play the running game with him? When I suggested as much to Dave, he merely scoffed. I guess he just doesn't love me 150 dollars worth.
When Sarah and I intimated that he could be our benefactor or patron, David pointed out that we would have to do something for the money. I think his exact words were, "What are you going to do? Blog?"
I think I need to get myself some hobbies.
November 12, 2006
Lisa: a week in pictures
I had a hard week this week, but the best girlfriends in the world kept me busy and helped me through it.
Tuesday, I voted (here I am at my polling location)...

and then Sarah and Marci met me at Crown Burger before Nip/Tuck. Mallory couldn't join us because she was listening to Pete's concession speech.


Sarah was concentrating very hard on drafting our proposed changes to Crown Burger's wikipedia entry. I'll let you know when we post them BECAUSE IT WILL BE AWESOME.

Wednesday, Molly and I started watching Firefly.
Thursday, we ate at The Pie and Marci treated us to Pride and Prejudice at Pioneer Theater,
where I wore my new shoes...
and we were told we had no class by these fine denim-clad people.
Friday, we went to the Ben Lee concert at Saltair, where we heard Under the Influence of Giants,
Rooney (otherwise known as the band from The O.C. fronted by the guy from Princess Diaries),
and Ben himself, who was adorable and awesome and wearing a suit made of gold glitter.
I hope Sarah talks more about the concert, because (Mallory's hate of Rooney notwithstanding) it was really fun.
Saturday was wallow day. I met Sarah at her apartment with egg burritos and we watched music videos and assorted mindless MTV programming pretty much all day. Mallory and Marci joined us after dinner for Newsies. It probably goes without saying, but we sang along. Loudly.
Thanks so much, ladies, for being there when I needed you. You are fun and funny and smart and beautiful, and you make life bearable.
November 10, 2006
Lisa: I'll be seeing you
I tend to find something I like and stick to it. I like routines. I revel in traditions. I am a creature of habit. I know you think that doesn't sound exciting, but you will be jealous. Why? Because I am about to tell you about one of my favorite traditions. And that tradition is reading City Weekly's "I Saw U"s at Cafe Med.
First, you have to understand the awesomeness of Cafe Med.
I think the awesomeness of the "I Saw U"s speaks for itself:
malibu barbie
I called you malibu barbie. You looked so annoyed. I definetly was not trying to insult you but I am not very good with words. So lets try again. You are a fine looking woman. Will you go out on a date with me?
When: Friday, October 13, 2006.
Where: maverik
You: Woman
Me: Man
Mr. Green Lexus!
Hey you Mr. Green Lexus with black and red rims! I saw you @ 3300 south and 300 East. I would love to meet you and take you for a crazy ride! Please let me know you are available. I look like Angelina Jolie...but bigger lips! Interested?...meet me at Bad-Ass coffee co. Friday after 3:00pm, Ask for Kelly.
When: Tuesday, October 10, 2006.
Where: 3300 S. 300 E.
You: Man
Me: Woman
November 07, 2006
Lisa: my crybaby you'll be
I told Sarah about the Children's Book Club blog that I'm a part of, and asked her if she had any book suggestions.
Sarah: You should write about that "my baby you'll be" book, because it is GUARANTEED to make you cry every time you read it.
Lisa: I know. It's like the Butterfly Kisses of books.
Speaking of ridiculous songs that make you cry, 'tis the season again for the "when Mommy meets Jesus" song, so prepare yourself. I find keeping a few fast-food napkins in the glove box of the car is adequate. On the other hand, if you like being manipulated into tears, maybe you should read this book series BASED ON THE SONG.
Sorry, I just had a rage blackout.
In other timely topics, don't forget to vote today! If you live in Utah and want to check your polling location, try this handy site.
Edited to add: read the recap of the Jesus Shoes MOVIE here.
November 04, 2006
Lisa: Turkey Dinners
Background: Sarah has the charming but somewhat inexplicable tradition of buying Christmas panties from Old Navy every December. She wears them all year round. I think it is obvious to everyone that I, as part of my sisterly duties, am obligated to tease her about said Christmas panties.
Sarah: I HAVE A BAGGY WEDGIE AND IT'S PISSING ME OFF.
Lisa: I am so sorry about your baggy wedgie. You should stop at Old Navy for some Thanksgiving panties.
Sarah: I hate you.
Lisa: No, I was serious! You should! And I'm sure the Halloween panties are on supa sale.
Sarah: Dude... DO YOU THINK THAT OLD NAVY WOULD HAVE PANTIES THAT HAD A FAN OF MULTICOLORED FEATHERS ON THE BACK?? Because that would be cute. Plus, then you could shake your tail feathers. I'm just saying.
Lisa: HA! That? Was brilliant. Victoria's Secret sells holiday panties with like Santa fur and stuff on them. They should totally sell Thanksgiving ones with feathers.
Sarah: And they could also sell a... sexy pilgrim hat? A bra with some sort of pilgrim collar?
Lisa: Heeeeeee. Besides, Puritan lingerie is the ultimate oxymoron!
Sarah: Yes, like someone says "is nothing sacred?" And we say NO!
Lisa: Do people really care about keeping the Puritan tradition sacred? Just wondering.
Sarah: Lisa. We could make a whole line of Thanksgiving underwear. A pair could just say across the butt, "You SHOULD be thankful!"
Lisa: Or it could say, "Thanks but no thanks!" Or, "No, thank YOU!" Or, (OR!!!!) "Thanky Panky."
Sarah: I hope you are saving all of this somewhere.
Lisa: Seriously.
November 02, 2006
Lisa: This is thriller, thriller night
Oh, how the mighty have fallen.
I guess I did say I wanted to do something more low-key for Halloween this year, but working until 9 and then going to Crown Burger might be a little lower than I anticipated. There was no Zuul. There was no Leia. Pretty much we sat around taking pictures of each other...taking pictures of each other. I think all that partying (or, you know, campaigning, or school, or work, or whatever) has taken its toll.


Not that it wasn't awesome, because it was! Plus, after Crown Burger we headed to Nip/Tuck night at Marci's, complete with midget sex (sorry you missed it, Mal!), murder by omission and the associated kidney thievery, Alanis as a controlling lesbian, and plenty of snarky debauchery from our pal Christian.
I just wish I'd worn a costume.
October 30, 2006
Lisa: Rack
Last week, Mallory asked me if the expression was "rack your brain" or "wrack your brain," and I was forced to admit that I didn't know.
A ridiculously small amount of research turned up this excellent answer by Joann Hill at Random House. The whole thing is quite interesting if you like that kind of thing (which I do), but here's the relevant paragraph:
The word rack in racking (one's) brain is thus spelled. That is because it derives from the rack, the medieval instrument of torture on which a victim was slowly stretched. (This stems from the familiar rack 'a framework'.) This rack was used as a verb meaning 'to torture on the rack', and hence in the transferred sense 'to torture', and then figuratively 'to stretch or strain', which is the sense in rack (one's) brain.
Fortuitously, 'rack' is also my favorite euphemism for breasts.
October 23, 2006
Lisa: Calling all Brainiacs.
What should I ask Ken Jennings when I interview him for the library newsletter? Should I try to do something humorous (like the Onion's A/V Club) or high-concept (like questions in the form of answers, Jeopardy-style)? I'm afraid I will come across as either too boring or too dumb.
So...what do you want to know?
October 21, 2006
Lisa: not a bad day
After I got yelled at by an old man in the Harmons parking lot (the note he left under my wiper: "the fact that you didn't see even see me tells me that you need to WAKE UP") and then accidentally honked at a cop, I needed a pick-me-up. Mallory and Marci came through.
One of Mallory's favorite things to do is go to the Friday-night Gallery Stroll, and I'm always glad when she convinces us to go. This week we started at Finch Lane, since they were showing Shawn Rossiter's 90-foot Tiamat, which circled one whole room of the gallery. I'm a Shawn Rossiter groupie, and I loved Tiamat and the idea behind it, but I am still disturbed that on November 4th it will be cut up and sold for $50 per square foot. I get it, but...it still seems wrong. Besides, someone has already spoken for Adam's groin.
Then we went to the Rio Grande train depot gallery where Simon Blundell, Mallory's mentor, had some photos being shown. The pretty art people in their glamorous clothes were out in force, and so were the sesame seed sugar cookies. Awesome.
Blake joined us for dinner at Paradise Bakery, where I almost had to throw down with a lesbian couple who were insulting my salad, and then we all met Maureen at the theater to watch the brain-meltingly awesome The Prestige. Between that and Little Miss Sunshine, I am regaining hope for American cinema--I think the last time that I enjoyed a movie so much was two years ago.
October 20, 2006
Lisa: ouch.
Something is very wrong with my neck.
I think I slept on it funny, and then I turned my head in a weird way while I was leaning over putting my shoes on this morning, and something went "ping." In my neck. Now whenever I move my head there is a sharp pain at the base of my skull and sort of a pulling feeling down the left side of the back of my neck. I keep sort of pushing on the area of greatest discomfort, but I don't think it's helping.
Suggestions?
October 19, 2006
Lisa: Tool(s) of the Week
I don't find infomercials to be a particularly pleasant or effective marketing technique, but I must admit that there are some good as-seen-on-TV products out there. Especially...
and
It's hard for me to admit, but Jessica Simpson and Diddy sold me on Proactiv. That ridiculousness aside, now that I've tried it, I don't think I'll ever go back to another skincare regimen. My skin is softer and clearer and more glowy than it ever has been, and new boxes magically appear on my doorstep when I need a refill. The only downside is that my purple towels now have giant pink bleached spots from the benzoyl peroxide--but it was time for new towels anyway, and I was already planning to replace them with white. Problem solved!
It's only been a few weeks since Marci introduced me to Turbo Jam, but so far I am loving it. The routines are relatively easy to pick up, go by quickly, and leave me completely sweaty (which I figure has to be good). I can't wait for my "ripped, rock-hard abs."
Lisa: there is beauty all around
Some days, the little things feel extra special.
That, ladies and gentlemen, is what is called nerdy hot. Do not underestimate the power of the nerdy hotness. Do you see those garters? The miniskirt? Who can say that knitting is just for grandmas now?
Edited to add a link to this adorable knitting animation, found via Heather. For those of you at work, it can be watched without sound .
October 14, 2006
Lisa: When she was good, she was very, very good
Yesterday I got a real haircut and it was AWESOME. Ann Marie at Sacred Roots was recommended as someone who specializes in curly hair, and for good reason. She first looked at my hair when it was dry, paying attention to my hair texture, type of curl, and which areas were more or less curly than others. She cut the general shape of the desired style while my hair was dry. [For those of you who don't have curly hair, this is important because sections of hair with different amounts of curl can be cut to the same length when wet (and straight), but bounce up to different lengths when the hair is dry.] Then she shampooed me (complete with head and neck massage!) and neatened up the cut on my wet hair. Then she dried my hair with a diffuser, all the while giving me tips on styling and products. Ann Marie had read the books and websites I had read, and was familiar with the anti-shampoo philosophy--but encouraged me to do whatever worked for me. She is even going to a workshop in New York with Lorraine Massey next month. Plus, Ann Marie was super nice and the right amount of chatty and kept telling me how great my hair was. It was like a beautiful dream.
As an added bonus, afterward I got to put on a fancy dress and eat fondue at The Melting Pot for Molly's birthday. It totally made up for the four hours I spent cleaning on Friday morning (yay, me!). The question now is what should I do tonight when Blake is out with the guys? Block the sweater I finally finished knitting? Paint the sewing room?
Edited to add this picture of my haircut, taken the day after I posted this entry:

October 12, 2006
Lisa: La Coquette
Elyse, I am sorry that you never blog anymore. Truly sorry. But you have forced me to transfer my love to another expatriate in the fashion industry: La Coquette. Not only does she have amazing taste and alluringly frenchy anecdotes, but it seems we are kindred spirits as well. To wit:
It's in those mid-nightiest, I-bet-I-get-hit-by-a-bus moments that I start to think about all the ways my life could be better. I could use a little Topher Grace, for starters. I bet you're thinking we all could all use a little Topher Grace, but have you ever stopped for a moment at 3 am to think why? Have YOU ever thought about how his humor and boyish charm belie his emotional depth at 3 am in the morning? I'm just saying I could probably use a little Topher Grace more than you could, that's all.
Thank you, Andrea, for the recommendation! Plus (as Andrea pointed out), Elisabeth looks a lot like Marci, so I am predisposed to a bit of a girl-crush.
October 10, 2006
Lisa: roll me in designer sheets, I'll never get enough
I heartily endorse Sarah's addition of Not Martha to her favorite sites. I stopped reading when Megan hit a bit of a dry spell, and I am so glad to find out she started blogging regularly again and is (to my view) better than ever! Here are some of her links from the past few months that I have been enjoying:
October 02, 2006
Lisa: scared straight
It is no secret (and nothing to apologize for) that Mormon culture values abstinence before marriage. Teachers working with young people in the church have been known to resort to all kinds of object lessons (such as The Clean White Handkerchief) and mantras (like Choose the Right) to reinforce the importance of this principle. Back in the day, I wore a CTR ring and even had a card tacked up near my bed that read "Don't trade what you want most for what you want at the moment." I have no problem with any of this. Unfortunately, those well-intentioned teachers sometimes went a bit too far. Those who know me may have guessed that I am talking about the lesson of The Tainted Muffin, which goes something like this:
At the beginning of class, the teacher holds up a giant, delicious-looking muffin. I don't know why it has to be a muffin. I can't imagine that the teachers, with their pure minds, chose it for any specific reason. ANYWAY, the teacher asks if anyone would like to eat the muffin, and of course everyone raises her hand. The teacher then starts passing the muffin around the class. Each girl is instructed to touch, poke, lick, spit, step on, or otherwise violate the muffin. Once the muffin has made its way back to the teacher, she holds it up again, and again asks if anyone would like to eat the muffin. Predictably, no one wants the disgusting thing now. Then the teacher goes on to painstakingly explain how no one will want us if we allow our "muffins" to become...ahem...tainted. Let me clarify for those Young Women leaders out there who may have found me by mistake: THIS IS A HORRIBLE OBJECT LESSON. Where does repentance fit in? Forgiveness? Our intrinsic self-worth? I am afraid that this lesson contains more than just a little bit of dog poo. I only wish that I had known about the Twenty Dollar Bill at the time, so I could have beaten these teachers at their own game. Instead I picked up a few more unhealthy thought patterns. But hey--I guess it worked! At least THIS virgin bride wasn't stuck handing her husband a bare stem on the wedding night! (Thanks, mimi. It's not a sore spot or anything.)
September 28, 2006
Lisa: Just too white and nerdy
Blake braved the wilds of the Internet today to forward me this Weird Al video. His sacrifice was not in vain.
It's funny because it's true. And the Donny cameo doesn't hurt, either.
September 27, 2006
Lisa: I'm...sorry?
I just tried to help a charming young girl seeking to further her education.
Baby Momma: "Do you have the GED study guide for 2006?"
Lisa: (I look it up.) "Well, we own a few, but they're all checked out. Would you like to put one on hold?"
BM: "I'm in kind of a hurry. Do you have 2005?"
Lisa: (I look it up.) "Yes, but it looks like those are all checked out too. I could put one of those on hold...?"
BM: "I have to take the GED next week."
Lisa: (Sympathetic noise.) "They probably have some online study aids."
BM: "I don't have a computer."
Lisa: "Well...we do have computers here that you can use." (I point to the public computers.)
BM: "OK." (She stares at me. She obviously doesn't like this answer.)
Lisa: "...They might have some study guides checked in at the City Library System or at a school library."
BM: "Like, what school?" (She smirks. Obviously I am dimwitted because if she is taking the GED that means she dropped out of school.)
Lisa: "The University of Utah library might have study guides like that."
BM: "I don't have a car." (She just stares at me. I am obviously supposed to fix this problem.)
Lisa: "OK. Well...I know there are a lot of bus routes that go up to the University."
BM: (Kind of rolls her eyes and keeps staring at me.)
Lisa: (I stare back.)
Baby Momma's friend rescued me by coming over and telling BM that her dad might have a study guide from last year if he hadn't sold it on Ebay yet. Otherwise I don't know how I would have gotten out of that one.
September 26, 2006
Lisa: potty mouth
I like to focus on the hard-hitting issues. You know, those relevant, timely matters that require extensive research. The subject I have chosen for today is automatic-flush toilets. I can only assume that the automatic flush feature was intended to create a more sterile public restroom environment. I'm sure the sequence of events is supposed to go something like this:
1. Enter bathroom stall, closing and locking the door behind you.
2. Lower trousers and sit down firmly on the toilet seat, to avoid the seat-splattering that inevitably comes with hovering. (YEAH, I SAID IT. YOU KNOW WHO YOU ARE.)
3. Do your business.
4. Stand up and reposition clothing.
5. Exit stall without touching anything except the locking mechanism of the door, giving nary a thought to the unsightly contents of the toilet behind you, which will be effortlessly whisked away as you leave the bathroom stall.
Unfortunately, the sequence of events I have encountered in real life often goes more like this:
1. Enter bathroom stall, closing and locking the door behind you.
2. Lower trousers and begin to sit down, only to hear the toilet start flushing. Jump back up in an undignified fashion to avoid getting splashed. Wait with pants down for the flushing to be over so that you can sit down. Hopefully you didn't wait too long before you decided to go.
3. Do your business, accidentally moving slightly as you carry out normal bathroom functions, setting off the sensor that in turn activates the flush. Make a split-second decision whether to endure the possible splashing or to raise yourself off the toilet before your business is 100% complete. Repeat several times if the sensor is faulty, which it usually is.
4. Stand up and reposition clothing. Look down at the toilet, which has apparently used up its quota of flushes and is now resting in a dormant state, ready to display its contents to the next user. Wave hand in front of sensor, to no avail. Look desperately around the plumbing apparatus at the back of the toilet for a button or lever that will manually activate the flush. If you find one, press it gingerly and proceed to step 5. If not, lift the toilet seat a few times, hoping that will somehow set off the sensor. When it doesn't, do a little dance in front of the toilet (remember, no one can see you). When the toilet doesn't respond, mime sitting down and standing back up. Glare angrily at the toilet bowl for a few seconds, then shrug when it finally flushes with no apparent impetus.
5. Exit stall having touched not only the locking mechanism, but also the toilet seat and possibly a squishy plastic button that you know never gets cleaned.
Am I alone? Does everyone else love automatic-flush toilets? Because I am afraid this is an instance of embracing new technology just because it is new, not because it is better.
CNN, call me if you ever need programming ideas.
September 25, 2006
Lisa: I am the gatekeeper
I was thinking about dressing as Pam for Halloween, but after seeing the original Ghostbusters last night for the first time, I'm thinking Zuul is the way to go. Seriously, how hot is she?

Also, I might have fallen in love with Egon. So...I'm attracted to nerds. This is not news.
Assignment for the internet:
Until I looked it up just now, I was pretty sure that on the Ghostbusters cartoon, one of the team members was a gorilla. Wikipedia shows no evidence of this. Maybe there was a show on around the same time that featured a gorilla and a man wearing a khaki jumpsuit? And the gorilla and the man might have ridden down some kind of slide during the opening sequence? The first person to figure out what show that was gets a very special prize. Until then, this is going to drive me to Snorks levels of pseudo-memory-driven insanity.
September 24, 2006
Lisa: We're bringin' Buffy back
Luckily, Sarah suggested we bring along a few props when we stopped at Crown Burger before heading to Darby's for the newly-reinstituted Buffy Night.


If you look carefully, behind me in this picture you can see the guy who visited the men's room approximately 50 times during the course of our meal.

September 23, 2006
Lisa: cuff 'em
I am powerless against french-cuffed shirts and the links that go with them. Mighty Goods never fails to showcase cufflinks that are unusual but understated and tasteful. My latest favorite is this set of Phillips-heads. They're great for a guy who is handy but still likes to dress up, or as good-taste maven Maggie so delicately puts it, "a not-so-subtle commemorative gift for when you're ready to take this relationship to the next level."
Actually, if you need a thoughtful gift for anyone on your list, Mighty Goods is the place to find that perfect item she never knew she always wanted.
September 21, 2006
Lisa: size isn't everything
Blake should know better than to ask me about upcoming library programs while I'm falling asleep.
Lisa: I think Charlotte and the spider from Arachnophobia should have a Celebrity Deathmatch.
Blake: But...the spider from Arachnophobia is like 100 times bigger!
Lisa: But Charlotte is clever.
Blake: But...it's just so much bigger than she is!
Lisa: Blake. She writes words in her WEB. Haven't you ever heard that the pen is mightier than the sword?
Lisa: Tool of the Week
Even though I've had my Powerbook for years, I never took advantage of one of its handiest tools:
Until now, that is. My awesome new phone is also equipped with Bluetooth, which means I can wirelessly browse the files (read: self-portraits) on my phone, copy them to my computer, and post them here for you fine people to see.

See? Everybody wins.
September 20, 2006
Lisa: deal breakers
I was just reading the comments for Heather's post on 'red flags' in dating, and it got me thinking about some of the guys I wasted my time on back in the day. One gem in particular comes to mind. Someone who I thought was worth dating just because he read interesting books. This guy...
Believe it or not, I let him dump ME. My self-esteem was just that low. Thank goodness, I wised up and married someone who was crazy about me. I love you, Blake! And thanks for not taking me on an NFL cruise.
September 19, 2006
Lisa: she did it!
It looks like my role model Pamie, who inspired me to start training for my marathon, has run hers. Now why didn't I think of Maui?
September 18, 2006
Lisa: maybe a new pair of shoes would help
Do you ever find yourself wanting to stomp and scream and cry a little bit, because life just isn't fair? But then, because you're a grownup, you smile and go out and do your job like everything is fine? And then maybe you realize that you ARE fine, or at least no different than you were before, except a tiny little piece of your soul might have died, but the piece is really so small that probably you wouldn't have even noticed if you hadn't been looking for it? And after that, if you are feeling really maudlin, you might start wondering how big your soul used to be? Or what happens when it's completely gone?
No? You don't? Yeah, me neither. I don't even know why I brought it up.
September 17, 2006
Lisa: somehow it's weirder than the accordion
That, my friends, is photographic evidence that Dave's band has added a saxophone as part of their new song, Kimono and a Fan. I think I'm getting acid flashbacks to my days as a jazz band groupie. Good song, though.
Canadians Among Us played at Kilby Court last night before Maritime (who were awesome, check them out).
Lisa: All growed up
Congratulations to our friends Grady and Charles, who both found out they passed the Utah State Bar exam yesterday.
We're proud of you guys!
September 15, 2006
Lisa: Hashed
It is always a bit disturbing to discover you've been using a phrase incorrectly for decades. The phrase I have in mind today describes the little parallel counting marks one writes, usually in groups of five with the fifth mark crossing over the other four and sort of grouping them into a pleasing, easily counted bundle. What have I been calling these marks?
Hatch marks.
"Hatch marks" does not exist as a phrase at all. I don't know if I just made that up, or if it's related to "hatching" (the use of fine, parallel lines drawn closely together to create the illusion of shade or texture in a drawing), or what. The phrase I was probably originally going for was "hash marks," but both the sports meaning and the mathematical one ( though both dealing with parallel lines) are a bit of a stretch. It looks like the phrase I should have been using all along is "tally marks" (there's even a little picture there to seal the deal). I guess that does make sense, what with "tallying" meaning "counting" and all. And the term "tallywhacker" is suddenly more clear.
For extra learning power, "little counting marks" are actually called a "unary numeral system," and the five-mark bundles are referred to as a "five-bar gate." Try whipping those bad boys out at your next cocktail party.
September 14, 2006
Lisa: Growth Industry
Recently, a "friend" suggested that, if I really wanted to start making more money, I could become a crack whore (Thanks, Wikipedia! Think Brittanica has an article on that?). I took this kind bit of advice to heart, and have formed a new life plan (complete with easy-to-follow steps!):
1) Become crack whore. Give sex for drugs, but then sell the drugs instead of taking them myself, thereby earning enough money to...
2) Finance plastic surgery, allowing for...
3) Upgrade to high class "escort," trading sex for money (cutting out that annoying "crack" middleman) and making myself available to...
4) Find a rich but lonely businessman with a heart of gold, a la Pretty Woman and...
5) Get him to fall madly in love with me, which shouldn't be too difficult considering we have so much in common. Of course we would...
6) Get married, in which case I would have so much money and spare time on my hands that I would naturally...
7) Start a foundation to help crack whores like myself get started.
I think this plan has some real potential, don't you? Aren't friends great?
Lisa: Fight! Fight! Fight!
The Wall Street Journal Online posted an awesome article Tuesday contrasting Encyclopaedia Brittanica and Wikipedia, and featuring an email exchange between Jimmy Wales (Wikipedia founder) and Dale Hoiberg (Brittanica editor-in-chief). They each have great points, but my favorite part is when they get heated, all "I can only assume Mr. Wales is being ironic." and "Fitting words for an epitaph!" and "Sneaky? I beg to differ." If you have ever found yourself doubting the reliability of the Wikipedia model or participating in a debate over the use of traditional vs. new reference formats (and what librarian hasn't), check it out. Fine family fun!
September 11, 2006
Lisa: breaking the silence
We here at Two Loose Teeth have created a strong foundation of superficiality, bolstered by hundreds of entries completely concerned with the asinine and banal details of our own tiny little lives. When Hurricane Katrina hit, I was worried about a prediliction for the Spice Girls. Previous September 11th anniversaries were commemorated with unintentionally crude signage, Vanessa Carlton, or not at all. I shudder to think at what I have called apocalyptic in the past.
I would like to think that I don't mention the really big things because others have already said it better, or that the shallow details I immortalize here are part of what makes me human--part of what it is to be an individual, a woman, white, twenty-something, LDS, from Utah, a U.S. citizen, whatever. That my superficiality is somehow culturally relevant or part of my identity, and something that I have to hold on to in the face of adversity or attack. I would like to think that. The truth is probably that I am just shallow.
In the interest of having a soul, I would just like to state for the record that some things are worth remembering. So, here's to those who did say it better. And thanks also to those who work every day to make it possible for me to live in my comfortable little cocoon. When you're ready to get your mind off the serious stuff, come on over and get a good, healthy dose of the things that don't matter. There's enough here to go around.
September 09, 2006
Lisa: It's 11:30 and the club is jumpin, jumpin
The girls and I got dressed up and went dancing last night. Aren't my friends pretty?


Sarah was looking so sultry, I had to encourage her and Mal to go for the fake makeout. Luckily, Sarah's enormous hair disguises the fakeness, so everybody wins!
Photographic proof to the contrary, Sarah was not drunk.

See, here she is looking perfectly normal!

Here I am with the lovely Marci...

After a regrettable accidental car-flirting incident, we made it downtown. I tried to take some pictures inside the club with my phone, but fortunately for everyone, they turned out dark and blurry. You'll just have to take my word for it: a booty-shaking good time was had by all.
September 06, 2006
Lisa: Heigl's Dialectic
The newly bloggerific Mindy brought to my attention the fact that Katherine Heigl grew up LDS. How did I not know this? It isn't mentioned in her rather extensive IMDB bio (which does happen to mention that she dated Joey Lawrence), so perhaps I can be excused. As Sarah so insightfully asked, WHY ARE WE NOT FRIENDS WITH HER YET?
September 05, 2006
Lisa: Labor Day (It's a Holiday)
Sarah, Marci, Mallory, and I spent most of the lovely Labor Day holiday shopping. I promised Marci I wouldn't post the picture of her holding up a giant pair of tummy control panties, but I'm sure she won't mind if I post this super cute picture of her at lunch instead, right?

Isn't Marci the cutest? Don't you want to date her? I know I do. Here I am with Sarah:

I promised Sarah I would crop out any evidence that the camera flash rendered her shirt transparent in this one. Plus, seriously? Stop trying to ogle my sister's breasts. It's creeping me out.

But enough lunch. There were shoes to be salivated over!
Thanks, ladies! You're the most fabulous friends a girl could have.
September 04, 2006
Lisa: Just another priceless work of art/In his gallery
This weekend Blake's parents cleaned out their storage shed, and Blake got to bring home a bunch of his old toys, including a fairly impressive collection of Battle Beasts...
![]()
and M.U.S.C.L.E. men.
I'm not sure what he's going to do with them now. Perhaps reenact Shakespeare plays or Austen novels?
September 02, 2006
Lisa: good intentions
The plan after the marathon was to keep running three times a week to maintain my conditioning and avoid reverting into a complete heifer. The plan has failed.
NEW PLAN:
Use the elliptical trainer already IN MY BASEMENT to exercise 45 minutes a day, four times per week. That's one episode of Alias. Manageable, right? Plus, no waking up super early to drive somewhere and run in the blistering heat/freezing cold.
I'm hoping that posting this resolution on the Internet will obligate me to follow through somehow. That worked great for the marathon and arguably the diet, but no so much for the schedule. I think I went too far with the schedule, though. I was being too bossy and was forced to rebel against myself. Besides, I want to settle gently and organically into a pleasing and comfortable routine, not join the damn Marines.
ANYHOW, I would love to hear your self-motivation ideas. Pass them along in the comments.
August 30, 2006
Lisa: Heartbreaker, got the best of me
Monday morning I was blissed out in front of a Grey's Anatomy rerun on the TiVo, when this promo caught me unawares. I admit I teared up a little. It was nothing compared to the Sobfest of May Ought-Six, which almost got me banned from TV-watching entirely. ("But what about Dean and OTHER Dean??? SOOOOOBBBBBB!!!!!!") And at least I wasn't the only one rendered emotional by one ridiculous minute of old footage.
Apparently I'm also not the only one who has noticed that Katherine Heigl is the perfect woman. She is so gorgeous and glowing, and not all skinny and brittle like most of Hollywood. She looks like a real woman, but the most perfect real woman who has ever been born. She is totally on my list. Ahem.
September 21st is either going to be the happiest or saddest day of my life.
August 25, 2006
Lisa: a long time ago we used to be friends
I survived my ten-year high school reunion.
Blake was a good sport and came with me to the dinner part on Friday night. Here we are with Melissa (left) and Emily.

Here I am again with Charles, whose endlessly capable wife Mindy planned the whole reunion. In this picture I look about one-fourth as freaked out as I felt about the whole thing. My dress was pretty hot though--Sarah pointed out it was even worn to the premiere of Step Up by Arielle Kebbel, who played Dean's wife on Gilmore Girls.
Saturday morning we had a picnic so that everyone could bring their kids. Below: Jaak, Molly, me, Blake (not MY Blake), and Marianne.

The main thing I learned at the picnic was that all babies hate me. Seriously, I would try to hold them and they would look at me and scream, violently flail away from me, turn into a limp noodle in an attempt to slither down to the ground, or some combination of the three. I think they can sense my complete non-emanation of any kind of mothering vibe. Don't worry, Charles the 4th (below) was much bigger when I tried to hold him, so there was no actual breakage.
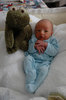
Saturday night I felt somewhat redeemed because these kids don't hate me.

They love me. But at least part of that is because I will draw pictures on the table-paper on demand. A tiger? A snake? A giraffe? Abraham Lincoln? You got it.
A tiny baby monkey? There's nothing I'd rather do right now than draw that for you.
In other but not less self-absorbed news, I now own a magenta RAZR phone. It is the awesomest phone of all time AND its camera has a special function just for taking self-portraits. That's right. Maybe I will use all of these...

to make one of those photomosaics where all the tiny pictures (of my face) make up one giant picture (of my face). Maybe then the gods of vanity will be appeased. You can only hope.
August 24, 2006
Lisa: I have admitted I am powerless over TWoP
I am quitting Television Without Pity cold turkey--at least the Office forums. Please suggest alternative but less addictive pastimes in the comments.
Sob.
August 21, 2006
Lisa: TOOL OF THE WEEK
I know everyone already knows about
but seriously. Where else can you find the Osmonds completely rocking out, Mormon-style (thanks, Heather!)? Or the worst music video ever? Or D-Bo dancing on Angel? And all on the same website?
Thanks, YouTube, for improving my quality of life.
Lisa: BookCrossing
The awesome and hilarious illustrator Lane Smith mentioned BookCrossing in his latest blog, and I had to go check it out. Basically, the idea is that you register a favorite book with the site, then leave it somewhere. If someone finds the book, they read it, comment about it on the BookCrossing site, and then leave it for another reader to find.
The site is a little heavy on the italics and hyperbole, and I think public libraries and charity shops essentially already meet this need, but the idea is still fun. The most exciting part to me would be to track who gets your book or where it ends up. Plus, you can take a picture of it next to some goats!
August 15, 2006
Lisa: TOOL OF THE WEEK
So, you know how sometimes clothes are made of spandexy material? Especially exercise clothes? And you know how when you exercise, you might sometimes sweat? If you're doing it right? Well, have you ever noticed that clothing made of spandexy material sometimes has a...stank...to it that doesn't go away with washing and just gets worse and worse the more you sweat in it? No? Well I have noticed the stank.
Mariko noticed it too, and recommended Win detergent, which is apparently available not far from me at the Salt Lake Running Company. The thing is that my washer uses high-efficiency detergent, and besides I was hesitant to buy special expensive detergent from the expensive running store for only a few items.
I have been unimpressed by Febreze in the past, but when I was at Harmons the other day, I couldn't help but notice a new flavor: Antimicrobial. I bought a bottle and gave it a try. No more stank! Success! And I can continue to use my regular high efficiency detergent and only target the stinky items.
FEBREZE ANTIMICROBIAL: It Gets the Stank Out.
P.S. I hope Sarah doesn't mind that I hijacked her category. But seriously, you should try this stuff.
August 09, 2006
Lisa: I love you, Fitzy
Pride and Prejudice retold with dolls.
Shh! Shhhhhh!
Go read it now. You will thank me.
August 06, 2006
Lisa: everything in its place
Several months ago, someone Blake occasionally works for hired me to organize his wife's office while she was out of town. Risky, I know, but I think the results were worth it. And for some reason I'm more motivated to organize other people's stuff than my own (who knows, maybe it's the fact that I got paid).
Here's the desk area before...
And after.

Here's the inside of one of the cubbies in the hutch of the desk.
The other end of the room has a window flanked by two armchairs. Here's the area before...
And then after!
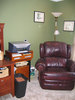
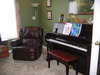
We got a table/file cabinet thing that would hold legal-size documents to go under the window.

For good measure, here's the newly organized interior of the office's 'supply closet.'
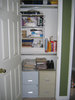
So...if you know anyone else who needs help getting organized, let me know. I'm no Megan Benson, but if it involves drawers or bins or labels of any kind, I'm your girl.
August 04, 2006
Lisa: there but for the grace of god
If I had a myspace, this would totally be my profile picture. Because I would be the type of person who has a myspace.

In other news, the apres running pictures obviously were filling some kind of deep-seated need I have to plaster the internet with my face. HI, INTERNET!!!! IN CASE YOU WERE WONDERING THIS IS WHAT I LOOK LIKE!!!!!!!! But at least I don't have a myspace, so thank goodness for small favors.
Edited to add: Ugh.
August 02, 2006
Lisa: pants only, please
At the Alexander McCall Smith thing I went to (which was awesome), I couldn't help but immortalize the vest I found in front of me. I am so happy to get to share that experience with all of you fine people.
A few days later, at Chili's (that mecca of up-to-the-minute fashion), I saw these two shirts:
At first I thought the shirt on the left was just patriotic, but upon closer inspection it turned out to actually be patriotic MICKEY MOUSE. Good times.
Suddenly I understood what must have been the intended purpose of this sign i found in the basement of the Conference Center.

Lisa: haircut
On Sunday I went insane and hacked off a bunch of my hair. Sarah helped me even it out, and this is what we ended up with:

Could be worse. Oh, I colored it myself on Sunday, too. Feel free to psychoanalyze my sudden need to change everything about myself. Or my ongoing need to take pictures of myself.
P.S. Happy anniversary, Blake! I love you.
July 21, 2006
Lisa: waiting for people to die
Last week I attended my third children's literature symposium at BYU, and as usual came away energized and more excited about my job. Seriously, they are geniuses to send us to these things.
Shannon Hale, local author and Newbery Honor winner for her book Princess Academy, was my favorite speaker. Her subject was 'reading for pleasure.' She talked a lot about high school reading curriculums (curricula?) and how people often feel obligated to read the classics, which can make reading more of a chore than a pleasure activity. Shannon had a ton of energy and was hilarious. Here are a few of her points that I jotted down:
Other quotes heard at the conference...
Nancy Farmer was really fun to hear from too, and I was so excited to get P.J. Lynch to sign my copy of Melisande (now out of print in hardcover)!
In other news, I have accepted a job at a new library. I am sad to be leaving Whitmore, but I think it's a good move for my career. Wish me luck!
July 19, 2006
Lisa: Grizzly Man
You would think a documentary about a man who gets eaten by a grizzly bear would be exciting enough to keep Sarah and David awake. You would be wrong.
Lisa: freezer paper stencil
Sarah sewed me a tote bag for no other reason than that she is super nice. All that was left to do was add a decorative element. I decided to try out the freezer paper stenciling Mariko mentioned, and I used some screenprinting ink Sarah bought for another project (because I am just a moocher like that). In keeping with my current Office obsession, I decided to use am image from the show's credits. I figured only fans of the show will know what it is from. Linds20 helped me find a screencap of the image, which I just cut out of the freezer paper with scissors. I'm not too skilled with X-Acto knives. Once I had the design cut out, I ironed the freezer paper to the fabric, stippled the screenprinting ink on with a brush, let it dry a bit, and then peeled off the paper. Then I heat-set the ink with the iron, so it should last through washings and stuff if necessary.
Here's the bag:
And here's a closeup of the stencil/screenprint:
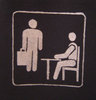
I love how it turned out. Thanks, Sarah!
July 10, 2006
Lisa: bedroom
The painting adventure continues! This time I painted the master bedroom a dusky purple color. I love it! Here are a few before and after pictures.
Before:

After:

Before:
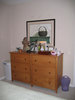
After (Obviously, there is a lot of supernatural activity going on here. I might need to call the Deans.):
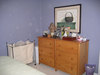
Before:

After:

Again, one of my favorite parts is seeing the colors in one room from another room. Here's the bedroom wall against the yellow hallway:

July 06, 2006
Lisa: he always leaves ME satisfied and smiling
I have never known TV love like this before. Dean is nothing to me. Adam Brody's show has become an unwatchable mess. Topher isn't even on TV anymore, although he does look hot in the Spiderman 3 trailer. Wentworth Miller may sing a capella and have graduated from Princeton, but his middle-distance stare is losing its charm. Angel--as much as it pains me to say it--was overrated, and Agent Booth...well, he hasn't been showing up on my TiVo this summer and I have to admit I haven't really missed him. But...Jim? and Jim and Pam? Some coherent analysis may be in order but I am finding it hard to type while in puddle form.

June 15, 2006
Lisa: Marathon
Words cannot express how supportive and wonderful our familes and friends were during the marathon. I can only echo what Sarah said and add a big ME TOO. Thanks, you guys! I wouldn't have made it to the end without you, and I certainly wouldn't be considering running again next year (am I insane?). Thank you, Blake. Thanks, Mom and Dad for running us in to the finish line. Most of all, thank you Sarah for getting me through the months of training, putting up with my bossiness, and for being my best friend. I love you all.
For the record, here are our average speeds, based on my pages to Blake as we passed various mile markers:
Miles 1-3: 11.5-minute miles
Miles 3-5: 12-minute miles
Miles 5-8: 13-minute miles
Mile 8: 14-minute mile
Mile 9: 12-minute mile
Miles 10-14: 13-minute miles
Miles 15-16: 14-minute miles
Miles 17-18: 17.5-minute miles
Miles 19-20: 17-minute miles
Mile 21: 21-minute mile
Mile 22: 17-minute mile
Mile 23: 18-minute mile


Mile 24: 14-minute mile
Final time: 6:16:57
Place: 156 of 160 in my age group, 1866th overall (Hey, we got to the end! No mocking.)

Here are the pictures the official marathon photographers took. I haven't decided whether to order any yet, since the thumbnails are SO TINY. Also, I think we might have been too late to get a finish line photo.
130.5 lbs, 25% body fat (with wet hair)
For an extra gross-out, here are my humongous blisters. I wore these special socks that have two layers and are supposed to prevent blisters, and I didn't get any blisters at all EXCEPT on the outsides of both big toes.
June 02, 2006
Lisa: T-Minus 11 hours and counting
The marathon is tomorrow morning. If you would like to send a bit of support or encouragement our way, send a text message to (number removed) between 6 and 11:30 am Utah time.
AAAAACCCCCKKKKKKKKKK!!!!!!!!!!!!!!!!!!!!!!
May 30, 2006
Lisa: Training, week 15 to the end!
5/23/06
I ran 3 miles at Sugarhouse Park, which took about 45 minutes. I think the shorter runs are to let our bodies heal up as much as possible before the marathon. It hurt to run, and I have to say that it felt more like injuries than just muscle soreness.
131 lbs, 28% body fat

5/27/06
Sarah and I mapped out a five-mile route on Gmaps Pedometer, which is a handy little tool. The only bummer part is that the maps don't show elevation, so we ended up running uphill quite a bit. It was no biggie, since the weather was gorgeous, sunny, and cool.
5/29/06
On Monday I ran eight miles along Highland Drive and back, which took roughly an hour and a half. I wasn't too sore, which was good, and the weather was chilly but nice.
5/30/06
On the Tuesday before the marathon--the last pre-race run!--I took 45 minutes to run 3 miles at Sugarhouse Park. The run wasn't bad, but it still didn't feel easy. I think those long runs really took a toll.
131 lbs, 26% body fat

May 23, 2006
Lisa: office
Continuing the painting saga, I painted our office a few weeks ago. The color is a bright grass green, and it turned out REALLY bright. I like the color a lot, but I'm still getting used to it. It's very invigorating, which I guess is good for an office--maybe I will be lots more productive.
Here are some before and after pictures for you:


I do like how the green looks against the yellow of the hall.

When I saw the green paint with our red desk, I realized the colors matched our stuffed George and Martha perfectly! Not that there are any little Smiths on the way at the moment, but wouldn't a George and Martha nursery be AWESOME? Keep an eye out for George and Martha merchandise for me, would you?
May 22, 2006
Lisa: Training, Weeks 12-14
5/7/06
On Sunday, Sarah and I ran from the beginning of the marathon route to my house. We were supposed to go 18 miles, but only made it nine. We ran in the hottest part of the afternoon, which was dumb, and Sarah was feeling pretty sick and dehydrated. It took us 2 hours to go the 9 miles. Even though we didn't get the whole way, we still rewarded ourselves afterward with Funfetti cake.
5/9/06
On Tuesday I ran five miles at Sugarhouse Park, which took me an hour. The horrible stick-leg/bloody stump phenomenon strikes again!
5/10/06
Sarah and I ran five miles along the marathon route, from the top of 21st South to La Puente. It took us an hour. 131 lbs, 28% body fat.


5/13/06
On Saturday, we ran 18 miles: our longest run before the marathon! It took us three hours and fifty minutes to get from La Puente to the end of the marathon route. The last few miles were pretty hard, but we did surprisingly well! I think breaking up the run into two-mile segments really helps. Thinking about adding another eight miles is a bit daunting, though. Anyway, after the run, Sarah and I shored ourselves up with shakes and fries at Canyon Rim Park. 130.5 lbs, 29% body fat.

5/16/06
I ran 5 miles at Sugarhouse again, and again my legs felt like sticks.
129 lbs, 27% body fat
5/17/06
On Wednesday, I ran four miles down Highland Drive and back, past the Cottonwood Mall, for a total of eight miles. Not a bad run at all, if lacking in scenic appeal.
5/18/06
Thursday morning I went to Sugarhouse Park, but I only made it once around the 1.4-mile loop! I don't know if it was stiffness or injury, or because I had half a jar of low-carb peanut butter on celery for dinner the night before, or what, but I could barely move my legs. It was like I had no muscle tissue at all, just little tiny tendons trying really hard to pull my leg bones around. Ugh.
5/20/06
Saturday's run was SO much better. I was in California with my mom, and I ran nine miles along the beach from Asilomar to the Monterey Bay Aquarium and back. The weather was ideal and the views were amazing. My legs were still pretty stiff, but the air felt rich and the run was totally manageable. It took me a bit less than two hours all told.
May 06, 2006
Lisa: Training, Weeks 9-12
I have not given up on the marathon training, or on blogging--I promise. But it has been a bit of a bumpy road.
4/11/06
Sarah and I ran four miles at Sugarhouse Park.

4/12/06
Sarah and I were supposed to run 7 miles along Highland Drive, starting at my house, but she fell asleep downstairs in the cave bedroom, I fell asleep on the upstairs couch, and Blake fell asleep on the downstairs couch. There was no functional, alarm-regulated sleep to be had by anyone. Ugh. Once we woke up, we ran as far as we could along Highland while still getting to work on time. It ended up being about five and a half miles.
4/14/06
We may or may not have run four miles at Sugarhouse Park on Friday. Neither Sarah nor I has any recollection of this, but it is on the schedule and I choose to believe that we went.
4/15/06
On Saturday morning, Sarah and I ran from the church on Holladay Boulevard to the end of the marathon route, which makes fourteen miles. Running on Saturday morning instead of Sunday night was good, but I think we both felt pretty crappy by the end. The crappiness was compounded by the fact that we figured out several days later that we should have checked the calendar, because instead of going 12, 13, and then 14 miles, we were supposed to have done 12, 14, and then 16. DOUBLE UGH.
For our carb-rich treat, we had Jamba Juices and bagel sandwiches from Einsteins. Delicious, but I felt a bit sick afterward.

4/20/06
We ran five miles at Sugarhouse Park, which is three and a half times around. We haven't figured out a better five-mile route to run regularly, so for now we are just walking across the center of the park back to the car once we finish the last half-lap.
For the rest of week 10, we decided to take a break. We were both busy, but more importantly I think we were feeling pretty burned out and discouraged. We were hoping that if we took a few runs off, we would return for week 11 rested, rejuvenated, and recommitted.
4/25/06
On our first day back on schedule, Sarah and I ran our five miles at Sugarhouse Park.

4/27/06
On Thursday night, we ran eight miles along the marathon route, starting at the beginning and finishing up at La Puente. I felt great! At the beginning, the running felt natural and easy, and I felt like I was really able to push the pace for the first time in a while. It was a great confidence builder to have a good longish run again--I think this was one of my top two runs, along with the five-miler on March 10.
129 lbs, 27% body fat
4/28/06
Just like that run on March 10, we followed the great evening run with a short run the very next morning, which is a bad idea. We knew what we were getting into this time, but because of scheduling issues this was the best plan we could come up with. Anyway, we were supposed to go five miles at Sugarhouse, but since I felt like I had about five tiny, simultaneous sideaches and a broken knee, I only made it 2.8.
4/29/06
On Saturday morning Sarah and I ran sixteen miles (back on schedule!) from La Puente to 9th South and State Street. We decided in advance--before Thursday's run, actually--to incorporate some walking in a structured way. We walk two minutes after every two miles. This worked out great, because the two-mile chunks seemed really manageable, especially when compared to the entire run. We were still running by the time we got to the car! Unfortunately it took us about four hours to run the sixteen miles, which seems really slow. I felt that we were keeping a pretty good pace, though, so I'm not going to worry about it too much.
For our carb-rich treat we had fresh raspberry shakes from Shivers. Yum!
5/3/06
To start off week 12, I ran five miles at Sugarhouse, which took about an hour and five minutes. My hair was too unbelievably hideous to be photographically archived, so instead you get to see one of the beautiful trees that was in blossom along the loop.

April 26, 2006
Lisa: Boston, Day 3
On Wednesday morning (March 22nd), after running, Janell and I took the bus (a 5-minute ride) to the convention center for the second day of our Early Literacy workshop. We left the workshop a bit early to see Nancy Pearl speak, but when we got there the huge auditorium was already packed. We ended up sitting on the floor along one wall. Unfortunately, the program ended up being mostly publishers introducing some of their new titles, but Nancy did introduce them and she was hilarious. She shared a few things I wanted to pass on:
People clap before a speech out of faith and hope; they clap at the end out of charity.
--Bishop Sheen
She also told a hilarious story about finding herself locked, naked, in a hotel bathroom with a broken door handle. Her first thought was, "I am locked in the bathroom of the Mallory Hotel...and I have NOTHING TO READ." Instead of panicking, she then said to herself, "what would Nancy Drew do?" She got busy with a nail file and soon sprung herself from her prison. Only then did she look back into the bathroom and see the telephone next to the toilet.
The publishers did introduce a few books that I added to my list of books to read:
Anyway, Laura joined us for the afternoon, and we took a bus to Harvard Square where we couldn't resist taking a few pictures on the Harvard campus...


...and had lunch at a sort of mongolian BBQ place called Fire and Ice. Then we headed up to the Harvard Museum of Natural History (miraculously arriving during their few free hours) to see the glass flowers. We walked around Cambridge for a while, going in lots of fun shops, and then walked back to the hotel. Along the way back I took a picture of this building...

...which is next door to the Cambridge city hall. Back at the hotel we split up, and after dropping of some of our things, Janell and I took the T to Park Street, where the Loews theater is. One of the ladies from the library had gotten us tickets to see the premiere of Hoot, a movie based on the Carl Hiaasen book. We ate paninis (with more hot tea--BRRR!!) at the nearby Emerson Cafe (Which brings up a problem we kept having in downtown Boston: where do people eat? If you don't want Dunkin' Donuts or Au Bon Pain, I think you have to have a secret insider's map of the city.) and then ran through the wind over to the theater. Hoot was pretty cheesy (and approaching Ferngully levels of environmental consciousness), but kind of cute and funny too. Plus, Luke Wilson!
Yesterday
Tomorrow
April 25, 2006
Lisa: Boston, Day 2
It has taken me awhile to get around to posting about the rest of my trip to Boston, because things have been super crazy at work and at home. But better late than never, right?
On Tuesday morning (March 21st), Janell and I decided to walk from our hotel in Cambridge across the Harvard bridge to the convention center in Boston proper. The walk wasn't long, but it was freezing cold. The good news is that when we were crossing the bridge we got to see the MIT women's crew team out practicing...


...as well as some of the Smoot markings.

Once across the bridge, we stopped at a convenience store for some hot tea, string cheese, and a blueberry muffin (Yes, I actually ate a muffin. And it was DELICIOUS.). Almost every person we saw walking around Boston was carrying a travel mug or take-out cup of a hot beverage, and as soon as I got my own it was obvious why. The cup serves as the best hand-warmer money can buy, and then when you are waiting for the bus you can take a few sips and warm your belly, too. Just make sure you have a cup with a lid that fastens securely, or you will slosh scalding tea all over your hand on the bus, like I did a few days later.
Janell and I were in a conference on Early Literacy all morning, but on lunch we walked past Copley Square...


...to the Boston Public Garden, hoping to see the Make Way For Ducklings statue.
After seeing the ducklings (the rest of the park was pretty bare and muddy), we had lunch at Au Bon Pain, which we don't have in Utah but that was everywhere in Boston. After lunch, we headed back to the Hynes Center for more conferences. At the end of the day, we walked next door to the biggest, most convoluted mall ever (well, biggest might be an exaggeration) and ate at the Cheesecake Factory. Not really an example of local cuisine, I know, but it was tasty and they do have sugar-free cheesecake.
After dinner, we stopped at Trader Joe's (another chain that hasn't hit Utah yet), which was AWESOME. I got Blake some of the fruit slice candies he loves (Which I found out are called Boston Fruit Slices and I ended up seeing all over Boston. Curse you, Utah, and your lack of fruit slice candy!) and these low-carb tortilla chips made of soy and flax seed, which were actually really tasty. Too bad they don't sell them online!
We took the bus back to the hotel and then stopped at the Star Market, which was ATTACHED TO OUR HOTEL, for breakfast groceries and more snacks. The only bummer part of the day was that I completely killed my feet by walking everywhere in stiletto boots.
April 11, 2006
Lisa: Training, Week 8
4/6/06
On Thursday morning I ran four miles at Sugarhouse Park, which took about 50 minutes. 131 lbs, 27% body fat

4/7/06
Friday I ran from my house to Murray Holladay Road and back, which was about six miles. My knee started really bothering me when I paused at stoplights, but it felt OK as long as I kept running. I decided to get a knee brace before my long run.
4/8/06
Saturday afternoon I ran at Sugarhouse again, and it was sunny and hot and packed with people. I went four miles in 48 minutes which makes for a 12-minute mile. Not very fast, but nothing to be totally ashamed about either, right? 131 lbs, 27% body fat

4/9/06
Late Sunday night (we started about nine) Sarah and I ran along the marathon route for 13 miles, starting at the beginning of the course and finishing up at the Cotton Bottom. We had to walk a few times because Sarah's arch was hurting really badly, but we got to the end in about three hours and ten minutes. I felt much better than last week, probably partly because I got a knee brace, Superfeet insoles, and a little belt thingie that could carry drinks and snacks.

April 06, 2006
Lisa: No, I'm your tiny dancer
Sarah, Mallory, Marci and I tried to go see Take the Lead last weekend, but it wasn't out yet. We ended up renting The Craft instead, a movie I always wanted to see but was never allowed to. But I digress...
Sarah: Speaking of things that are crazy, Mal just texted me
Lisa: Oh, crazy Mal!
Sarah: and said that Jeff Vice (movie reviewer for the Deseret News) gave Take The Lead a decent review! (I could find no physical evidence of this.)
Lisa: whoa
Sarah: Which means... WE TOTALLY WATCH HIGH QUALITY MOVIES!
Lisa: Hee. This would be the first one.
Sarah: Plus, it's supposed to be heartwarming! And who DOESN'T need a warmer heart? I ask you.
Lisa: It would warm my heart even if it was about cold-blooded dancing criminals.
Sarah: HA HA HA. As long as they were dancing. That's why you love West Side Story so very, very much.
Lisa: Well, that is because of the singing and the snapping IN ADDITION to the dancing.
April 03, 2006
Lisa: Training, Week 7
3/29/06
Last Wednesday I ran three times around Sugarhouse Park to get up to 4 miles. Everything felt totally weird. It felt weird to be running outside in the morning back in Salt Lake. It was really light out by the end of the run, which was weird. My feet felt weird, like running on permanently high-heeled Barbie feet. My lungs felt weird, like I couldn't get a deep breath. Anyway, other than the weirdness the run wasn't too bad. The last lap went by especially quickly.
130.5 lbs, 28% body fat

4/1/06
On Saturday morning, Sarah and I ran six miles along the marathon route, starting at the pharmacy and finishing up at Ivy Place, home of Spoons N' Spice. No big deal, except we agreed that running along Van Winkle always makes us feel dirty and gritty. The geese were next to the car at Ivy Place when we finished--Sarah was hoping they could stand in for a picture of her this time, so I'll give her a pass.
130.5 lbs, 28% body fat


4/2/06
WORST. RUN. EVER. Sunday we ran 12 miles for the first time. Blake thinks I might have been severely dehydrated, but anyway I felt like crap by about five miles in, then got up to the high point of "I might be OK" at about eight miles. I had to walk the last few blocks (we ran from 62nd South to the Gateway), and felt pretty shivery and pukish all the way home. I threw up in the privacy of my own bathroom, but I plan to stay better hydrated in the future to avoid a repeat performance.
For our carb-rich treat, Sarah got us McFlurries from McDonalds, and after showering I ate mine in front of Grey's Anatomy and started feeling better.
March 31, 2006
Lisa: This is why doves cry
After checking out the 1977 Frederick's of Hollywood catalog recommended by the Manolo (here's my favorite page), I saw on the same site this tour of the Gobbler, the most awesomely 70s-tastic motel ever built. I have never seen so much shag carpeting.
The parent site (the Institute of Official Cheer) reminds me of the Weight Watcher's recipes I found a while ago with a little bit of Avacado Memories mixed in. Good times.
March 28, 2006
Lisa: I heart Agent Booth
I think there were enough reasons in the Two Bodies in the Lab episode alone to make any hot-blooded female viewer fall in love with Agent Booth.

Seriously. How much can one woman stand?
Edited to add: bonus photo of D-Bo and Emily Deschanel
March 26, 2006
Lisa: Training, Week 6
3/22/06
It was way too cold in Boston to run outside in the mornings, so I ran on a treadmill in the hotel's exercise room. It was my first time training indoors--I wasn't prepared for how hot and sweaty I got! I'm glad I will be able to gradually acclimatize to the heat before the marathon in June. Anyway, I went four miles, which took about 50 minutes. The TV in the gym was set to a lame-o sports station without closed captioning, so I was a little bored and resolved to bring a magazine the next time. I weighed myself (with clothes on) at 134 lbs.

3/25/06
I got up at five again to run five miles on the treadmill, and this time I came prepared with a $1.99 gossip magazine. I set it up on the little shelf so that it covered the distance display, and when I was finished with the magazine I only had another half mile to run (plus I was totally caught up on whether or not Jessica Simpson has had a boob job or not)! It took me 66 minutes to run the five miles.
3/26/06
On Sunday, Molly joined me and Sarah on our first 11-mile run. We started the marathon route again, and made it from the Olympic Bridge all the way down to the Holladay Pharmacy, my favorite store for book toys, finger puppets, zipper purses, and all kinds of fun gifts and accessories. I drank a few ounces of Gatorade before and after, and made sure to stretch. I have to say, I felt a lot better than I did last week when we ran ten miles! The run took about 2 hours and 15 minutes.
March 21, 2006
Lisa: Boston, Day 1
This week I am in Boston for the Public Library Association national conference. Here's my first daily report!
Security was terrible at the Salt Lake City airport, which meant that I barely made my plane, and that my luggage did not. Nevertheless, I got to the gate in time and everything was fine. Janell (another children's librarian from Whitmore) and I watched Pride and Prejudice on my laptop on the plane, but the battery crapped out with ten minutes still to go (wah!). We got to Boston around 4:30 pm, and successfully found the hotel via bus and subway.
We stayed at the Hotel at MIT, which was AWESOME. I couldn't resist taking a few pictures...

Here's sort of a dark close-up on the throw blanket:


A wall sconce out in the hallway that resembles a microchip:

The lounge downstairs:


We ate a tasty dinner at the Asgrave, a sort of Irish pub right next to the hotel, and then walked down to Harvard Square. Most of the shops were closed, but we were able to go into the Harvard Bookstore, the Harvard Coop, and Urban Outfitters. We took the subway back to the hotel to get out of the cold and got into bed. My suitcase got delivered at about 1:30 am, alleviating my fear that I'd have to go to workshops the next day with no makeup, wearing the dirty clothes I wore on the plane.
To be continued!
March 20, 2006
Lisa: Training, Week 5 (and assorted ruminations)
3/16/06
Thursday Sarah and I ran in the evening along the marathon route, starting at La Puente and finishing at the Cotton Bottom. We went five miles, and it honestly didn't feel too bad.
3/17/06
On Friday night, we ran our three miles at Sugarhouse Park, as usual. It was cold, with snow seemingly being driven directly into our eyes. We are seriously so tough.
3/19/06
On Sunday after Jeff's recital, we ran TEN MILES, from the Cotton Bottom all the way to Liberty Park. After the first five miles, I felt great, but the last two miles felt really hard. I definitely hit a wall--the last couple of miles were just a test of will. It took us about 2 hours and 15 minutes.
I have been feeling a little bit less motivated lately, now that the runs are getting longer and harder and the newness and excitement has sort of worn off. I decided to buy a copy of the book to read on the plane. I figured it might get me more excited about running again, as well as giving me some more helpful info (about stretching, hydration, etc.) now that we are getting into the longer runs. Here's what I've been thinking about:
So. Put all of THAT in your back pocket.
March 19, 2006
Lisa: Painting: upstairs bathroom and hall
ljc's house painting projects inspired me to go ahead and start on the painting I've sort of vaguely planned on doing around my house. Our paint is in good repair, but it's all beige and white and blah. I was especially impressed by ljc's willingness to try bold colors, so after thinking about the colors I might want in each room, Sarah and I went to Home Depot and picked up a whole bunch of paint chips. I stuck my favorites up on the walls and lived with them for a few days, and then took Blake on a tour and got him to sign off (according to GLP standards, of course) on the colors he approved of. Here are my first two finished areas:
Upstairs Bathroom
Here's what the bathroom looked like before:

You can't see terribly well in that photo, but the wall the sink and toilet are on was covered with wallpaper in a large floral heavy on the burgundy and navy blue. The other walls were beige. Sarah helped me strip off the wallpaper, and after a LOT of scraping and patching, the wall was ready to paint. The other walls just needed a quick wipedown with TSP. I taped off the trim and ceiling and got started.
Here's the result:


I was going for a bright Tiffany blue, and I LOVE the color. I really like how it makes the white fixtures look brighter and the chrome shinier. The color is Ralph Lauren's "Aegean Blue," but I had the guy at Home Depot match it in Behr paint, which costs about half as much. Actually, I had the first guy try to match it, but he just put the Ralph Lauren formula into the Behr paint base, which totally didn't work. The awesome paint guy at the store on Highland exchanged the ruined paint for new paint that was color-matched to the RL paint chip. I am definitely going straight to him next time.
Upstairs Hall
I don't have a before picture of the hallway, but it was a dark beige with a really ugly ceiling fixture involving yellow glass. I decided I wanted the hall a sunny, buttery yellow, so I chose Behr's "Cornmeal." Once I got it all painted and turned on the light, I realized that yellow paint + yellow walls = oven. It was a good excuse to choose a new light fixture for the hall. Blake and I went to Lowe's, which seemed to have the widest selection of reasonably-priced fixtures. Along with the new hall lamp, we got new shades to replace the flowery granny ones on the bathroom sconces, as well as new towel racks for the bathroom that matched the faucets more closely. These small changes made a huge difference in both areas. Yay!

I love how the yellow looks next to the blue of the bathroom when you're walking by...


I had to put all the paint stuff away before leaving for Boston, but I'm excited to get going again when I get back!
March 17, 2006
Lisa: You know, I'd feel your thigh, but I'm so full of decency
Dear Beyonce and Company,
Gluing a sparkly piece of jewelry to the top of your butt crack does not actually disguise the fact that said butt crack is visible. I think the solution you're looking for is taller pants.
Sincerely,
Contusion G. Mammalian
March 13, 2006
Lisa: Training: Week 4
3/8/06
Last Wednesday morning I ran three miles at Sugarhouse Park. I made a conscious effort to step up the pace, but disappointingly it still took me about 40 minutes.
129 lbs, 28% body fat

3/10/06
On Friday evening, Sarah and I ran five miles along the next section of the marathon route. We started at 45th South and 5th East and finished at Liberty Park, which was flat all the way and felt easy peasy. We kept up a pretty good pace except during a short bathroom break at 21st South. The whole thing still took an hour and ten minutes.
128.5 lbs, 27% body fat
3/11/06
On Saturday morning, about 12 hours after our five mile run on Friday night, Sarah and I dragged ourselves around Sugarhouse Park for three miles. I consider it an accomplishment that we never stopped to walk--12 hours was definitely not enough time to recover. You can see we are not happy...


3/12/06
Sunday night Sarah and I started the marathon route again to get our full 8 miles in. We ran from the bridge to the intersection of 20th East and 33rd South. That's the hilliest section of the course, and we were basically at a survival pace. It took us an hour and fifty minutes to run the whole distance in the freezing cold. I think we would have been better off with our usual rest day before the long run.
130 lbs, 29% body fat
March 06, 2006
Lisa: There is a "biblioblogosphere." Who knew?
I have gotten a lot of emails lately with links to librarian blogs, wikis, etc. There is some quality stuff here--of interest mostly to librarians, but I think with some general appeal. Here are a few of the latest:
Lisa: Training: Week 3
2/28/06
Last Tuesday morning, Sarah and I ran our 3 miles at Sugarhouse Park. Sugarhouse is becoming our default location for 3-mile runs, because the distance is easy to calculate and it's pretty close to both of our houses. Also, Sugarhouse is hilly and so we're forcing ourselves to train a bit harder. It took us 40 minutes.
130 lbs, 28% body fat
3/2/06
Somehow on Thursday we ran a mile longer than we were supposed to. The schedule had us running four miles, but we apparently miscalculated the section of the marathon route we ran, so we went 5 miles. We didn't figure it out until later, because it only took us an hour. No wonder the run seemed so hard! We ran from Sugarhouse Park to Holladay Boulevard, ending with the section of the route we had run before. We decided it was much better not to have to stop at the midpoint and run back to the cars. When that's the plan, it feels like you get to the end of the route and then have to do the whole thing over again. When we have a car stationed at each end of the route, the end is really the end (if that makes sense).


3/5/06
On Sunday afternoon we ran the next seven miles of the marathon course, from Holladay Boulevard to 45th South and 5th East. This section of the course was mostly flat and downhill, but was probably my least favorite so far. Most of the roads are pretty busy, have no sidewalks, and often don't even have shoulders to run in. It took us about an hour and a half to finish, but I think we both felt better than we did after last Sunday's six miles, and possibly better than after Thursday's five. The weather was perfect--warm enough to run in just a t-shirt and pants, but cool enough that we didn't get too hot from the exercise.
130.5 lbs, 29% body fat


February 27, 2006
Lisa: Marci Darci
Marci has an Etsy shop with her super cute crafts. Check it out, and support her study abroad if you can!
Lisa: Training: Week 2, Days 3 & 4
2/24/06
After an unfortunate sleeping-in experience, I ran three miles at Sugarhouse Park. Afterward, I even did a few of the stretches I made Blake show me! Nothing crazy involving sitting on the ground or anything, but there was some toe-touching and a tiny bit of calf-stretching. I'm pretty sure that the guys running by while I was stretching my calves thought I was trying to push my car, but tra-la-la! I was going to take a picture, but my camera battery died.
2/26/06
Sarah and I started at the top of the marathon route at the Olympic Bridge, and ran six miles--finishing with a loop around Sugarhouse Park. We parked one car at the end of our path and drove the other one up to the beginning so that we wouldn't have to backtrack. Six miles doesn't seem significantly harder than five miles, but it was still pretty killer. It was sunny and (relatively) warm, which made me sorry I had bundled up in gloves, a headband, and a jacket. Anyway, the point is that we made it! I think it will be fun to run segments of the actual marathon course instead of the same old parks.
February 22, 2006
Lisa: Training: Week 2, Days 1 & 2
2/21/06
On Tuesday, Sarah and I both ran at Sugarhouse Park, but got there at different times and so didn't run into each other even once. It was super freezing--I didn't even get warm enough to take off my gloves by the end of the run, and my lips were totally numb. The good part is that three miles is seeming totally manageable now! I went a little over twice around the park, which took me 45 minutes.
129.5 lbs, 30% body fat

2/22/06
Sarah was a champion yesterday and mapped out a four-mile route for us along part of the marathon course. We ran along 2300 East for about an hour, and I have to say it was better than circling a track 16 times or even going several times around a park. It was fun to have new landmarks, too. Four miles still seems pretty far, though!
128.5 lbs, 28% body fat

February 19, 2006
Lisa: Training: Week 1, Days 3 & 4
2/17/06
To get up to three miles on Friday, I went a little over twice around Sugarhouse Park. It took about 45 minutes.
129.5 lbs, 30% body fat

2/19/06
Today Sarah and I ran five miles! I have never run five miles before in my life, so I consider this kind of a big accomplishment. I couldn't believe how long it took us--an hour and 20 minutes to go four times around Liberty Park. We did walk for two minutes halfway through the third lap, but other than that we jogged the whole time. Go, us!
I think Sarah is doing the best she can just to form her mouth into some semblance of a smile:


February 17, 2006
Lisa: shrinky
As you know, Sarah and I have been talking a little bit about selling the things we make, on Etsy and elsewhere. We have been thinking about packaging as well. I designed a round version of our logo, and I think we are going to investigate getting some stickers made to seal poly bags or to stick on top of marble tins. Then I came up with the brilliant plan of making tags with our logo out of shrink plastic (remember Shrinky Dinks?). They make sheets of shrink plastic that you can put in an inkjet printer now, and I've been wanting to try them out for a while. After striking out at JoAnn's, Office Max, and Michaels, I finally found the printable shrink plastic at Roberts, but there was only one brand to choose from: Grafix Arts.
The first thing I did was make an Illustrator file with our logo repeated as many times as I could fit it on the page, while allowing for 30% shrinkage. We tried it on paper first (sorry about the flash--the glue stick is in there for scale).
That looked okay, so I set the printer to Draft (colors intensify with shrinking) and printed on a sheet of the plastic. I cut all the circles out, punched holes near the tops, and popped them all on a parchment-lined cookie sheet. Let me just say right now that the instructions on the Grafix Arts website have been updated since they printed the instructions that came in the package we bought. For instance, now they say the final product will be only 20% of its original size. This is information that would have been helpful to have. They also listed a wide temperature range for baking: 250-400 degrees.
I chose a temperature roughly in the middle (325), and put the circles on the sheet matte side up (mainly because then the printing was readable, so they seemed "right side up"). As I watched the shrinking action through the oven door, I kept waiting for the pieces to flatten out again. This is as close as they got:
I did try flattening them out with a spatula while they were still warm, without much luck. I also decided that I wanted to read the text through the shiny side of the finished piece, so I reversed my Illustrator document so that everything was backwards, and printed out another sheet of plastic. I also read the instructions again more closely, and noticed these tips: 1) "lowering the temperature will slow the absorption of heat, resulting in longer shrink time and reducing distortion," and 2) "curling and sticking can be minimized by putting a piece of heavy weight vellum or parchment paper on top of the piece while baking." Armed with this new information, I set the oven to 250 degrees and covered the pieces with another piece of parchment. Just for kicks, this time I tried baking the pieces matte side down, so that the words were still "right side up" on the cookie sheet. I figured the first way didn't work out, so this could only be better. I was so wrong. Here's what the second batch looked like:
First of all, I couldn't see the pieces through the parchment I had put on top, so I didn't know the extent of the problems until they had been in the oven quite a while. The pieces stayed much bigger, and curled up so tightly that flattening them out after cooling was completely impossible.
Determined not to waste another sheet of plastic, and kicking myself for not trying this right at first, I made several little test pieces out of scraps. I turned the oven back up to 375, and tried one matte side up and covered, one matte side up and uncovered, one matte side down and covered, and one matte side down and uncovered. The best piece was the one that had been baked uncovered and matte side up (like my first batch).
I steeled myself and printed a new page of tags on the plastic. This time I only baked three or four at once, so that I would have time to flatten them all out before they cooled down too much. I kept the oven at 375. Since the pieces never truly flattened out, instead I waited while they curled up like cups and then curled back down into little arches. Then as soon as I took them out of the oven, I turned them all upside down and smashed them down as flat as I could. Here's the final result:
They are still quite distorted--they started out as perfect circles, and now are decidedly oblong. Also, I feel a bit sheepish that it took three sheets of the film to get eight usable tags. Anyway, I think I have figured out the best method for this brand of film, but I'm still a bit disappointed. Shrink experts, advise me!
February 16, 2006
Lisa: Training: Week 1, Days 1 and...1 1/2
2/15/06
In a strange and disturbing turn of events, Sarah was there to run at 5:30 on Wednesday morning (our first day of real marathon training), and I was the one who slept through it. I went as soon as I got up, though--braving a parking lot full of actual students at Olympus High School. I ran 3 miles, which took about 40 minutes.

130 lbs, 29% body fat
2/16/06
This morning was the biggest blizzard of the year so far, but I braved the unplowed roads to get to Olympus by 5:00 am to run our 4 miles. Unfortunately, the track was covered with the same pristine FOOT of snow as the roads. I tried running, but it was like running in sand with weight strapped to my legs. After a mile, I called it quits. Here's the path I tramped for myself:

So, not a great start to the "real" 16 weeks of training. Hopefully the weather will warm up soon and we won't have any more days that are so snowy they actually prevent running. Otherwise, does anyone want to trade their treadmill for my elliptical trainer until June?
130.5 lbs, 30% body fat--but I look thinner, I swear!
February 13, 2006
Lisa: Pre-training: Week 10
2/7/06
Sugarhouse Park
2.2 miles, 30 minutes
130 lbs, 29% body fat

2/8/06
Liberty Park with Sarah
2.19 miles, 35 minutes
131 lbs, 30% body fat
2/10/06
My neighborhood with Sarah
42 minutes (because I suggested we go on a wild goose chase to find a mysterious nearby school)
129.5 lbs, 28% body fat
2/13
Liberty Park
2.5 miles, 37 minutes

February 07, 2006
Lisa: Can you handle my truth?
I have been needing a new flute bag for a while. Strangely enough considering how much I used to play, I have never had a real flute bag. I have used various backpacks, messenger bags, and tote bags to lug my instruments and music and stuff around, but I never wanted to spend the money for a real flute bag (one made for that purpose), and besides I hated the idea of carrying a huge flute bag AND my backpack for books and whatever else around campus. Also, the bags designed for that purpose are technically called gig bags, a term which I abhor. These days I don't need a backpack and textbooks, and something a bit more professional-looking is probably in order. Anyway, a flute bag must conform to a few specifications. It has to be big enough to fit a flute and piccolo and the necessary accessories, and black enough that it can remain under my chair during orchestra concerts--because woodwind players get to do that (Eat your hearts out, string players!).
The whole point of this is that I have been keeping an eye out for potential flute bags each time I go shopping, especially at Target. A few days ago I found this bag, meant to be sort of an oversized hobo shoulder bag. It was only $14.99, so I was willing to overlook the sheer stupidity of the bag's handle.
Trust me, this picture from the Target website looks much better than the bag actually looks in person. The handle is so short that you can't even get it out of the way when you want to unzip the bag--it just sort of blocks the bag opening. I know the sides of the bag are supposed to come up and form part of the handle, but it just wasn't working out. Something in the design process had gone amiss. I decided to get the bag anyway, and just replace the handle. How hard could this be?
I cut off the old handle (seen here in all its ridiculous shortness)...
![]()
...and first tried braiding some leather-ish vinyl strips ($7) I found at JoAnn's into a handle. That was much too wimpy, and the braid wouldn't lay flat and look right. I decided webbing was my best bet. After some false starts at fabric stores and online, one of Dave's bandmates suggested REI, which sells climbing rope and webbing by the foot. I chose a 2" tubular nylon webbing. They cut four feet for me with their hot cutter (sealing the ends so they wouldn't fray), and charged me only $2.50. I got some snaps and a snap-setting tool at the fabric store ($8) and put the whole thing together. Easy peasy!
Here's the finished product:
I added a few buttons for extra cuteness power. In this picture, my flute is inside the bag, so you can see that there's plenty of room. At the broadcast on Sunday, I just tucked the handle under the bag. Success! As usual, the hardest part of this project was finding the right supplies at different craft and fabric stores.
February 06, 2006
Lisa: HDNSMWHR
On my way to work a few days ago, I spotted this Hummer H2 with the vanity license plate HDN4HVN. I had to read it out loud to myself before I figured out that it said "Headin' for Heaven," and then I couldn't help but shake my head. Um, no, I don't think so, Buddy.

A few minutes later, I saw the following license plate frame on the back of a giant Caddy: "Nothin's lackin' when you're Cadillackin'". For some reason I kind of believe that guy.
February 05, 2006
Lisa: Pre-training: Week 9, Days 2-4
2/2/06
On Thursday I ran alone at Sugarhouse Park. I forgot my gloves, which was a bummer since it was snowing--little flakes at first, and then the huge ones that land on your face and melt, leaving rivers of cold water running down your cheeks. About ten minutes into the run I got warm enough that I stopped wishing I had my gloves, so that's not too bad. I ran a little bit more than once around the loop; I tracked it as 2 miles on my car's odometer. 30 minutes feels easy after last week's 50 minutes, and I actually felt great when I was done!

129.5 lbs, 29% body fat
2/3/06
Sarah and I ran at Liberty Park on Friday morning. Again, I know we're running further without a break, but it still feels a lot easier than two sets of 20 minutes. Anyway, we went about 2 miles.


129.5 lbs, 29% body fat
2/5/06
Sarah and I ran at the Olympus High track on Sunday afternoon, and it was sunny and warm--almost too warm for jackets. For some reason, 30 minutes is feeling hard again, like we haven't run for weeks. We dragged ourselves nine times around the track, which is 2.25 miles.
130 lbs, 27% body fat
January 31, 2006
Lisa: A Dukedom Large Enough
It is hard for me to talk about the serious stuff unless I surround it with a sort of superficial duck blind. Nothing to see here!
SUPERFICIAL
There is a girl in her early 20s at the library dressed completely in pink. Baby pink shearling coat over a hot pink cowl neck sweater; baby pink belt; baby pink jeans tucked into hot pink knee-high ruched stilletto boots. I think she is channeling Madonna? Otherwise I have no explanation for that kind of behavior.
SERIOUS
Instead of going to work last Saturday, I got to attend a children's literature conference at BYU. Authors Katherine Paterson and Kimberly Heuston and illustrator Eric Rohmann gave really excellent presentations. Admittedly I was a bit emotional that day (Possibly overtired? Sorry if your teacher thinks I'm a freak now, Jeff.), but several of the things they said rang true for me. I even took notes! Here's what I wrote down:
Eric Rohman:
Kimberly Heuston:
Katherine Paterson:
SUPERFICIAL
Two Saturdays ago I was assigned to help out at the KUED Super Reader Party. The library's booth had a Texas theme, and I spent most of my time there folding these "cowboy" hats. I'm thinking of using the extras in a "pimp" storytime.
P.S. Extra credit to anyone who gets my incredibly obscure title reference.
Lisa: Pre-training: Week 9, Day 1
This morning Sarah and I slogged through two inches of slushy snow at Canyon Rim Park. The regimen for this week is 25 minutes of jogging followed by 5 minutes of fast walking. That's it! No repeating. I think that's the only thing that kept us going up the hill to the top of the park each time. We ran once around the park, twice around the park and the church, and then walked a shorter loop around part of the park to finish up.
130 lbs, 28% body fat
Sarah was not enthusiastic about getting her picture taken...

January 30, 2006
Lisa: Pre-training: Week 8, Days 2-4
It looks like the marathon group has dwindled to just me and Sarah. It's weird, but I think we feel more committed than when there were five of us. If one of us doesn't show up, it's guaranteed that the other person will be training alone. It also means we can be a bit more flexible with training times and locations.
1/27/06
Sarah and I braved a snowstorm to run at the Highland High track. Apparently one end of the track is always in shade, and consequently was covered in snowdrifts. We stuck it out, though, going 13 times around for a total of 3.25 miles.
128.5 lbs, 29% body fat
1/29/06
We couldn't face hills again on Sunday, so Sarah and I ran at the Olympus track. We went 13 times around again (3.25 miles). The second 20-minute session was pretty horrible, but we made it!
132 lbs, 31% body fat (but I had just eaten, so whatever)
1/30/06
This morning Sarah and I met at Liberty Park. Our 50 minutes took us 2 1/2 times around the park (3.13 miles). This week is the first week my legs have felt sore after every run. That's got to be good, right? I'm starting to get a little paranoid that the muscles on one side of my body will be longer or something, since we always run counterclockwise around the tracks and parks. I'm afraid that if there are any right turns on the marathon path, I won't be able to turn that way and I'll veer uncontrollably off the path to the left and crash into a laundromat. I guess I could take care of the problem by running clockwise once in a while, but that just seems so wrong.

130 lbs 29% body fat
January 27, 2006
Lisa: Zazzlin'
If you love the redesign as much as we do, buy a shirt from Zazzle to commemorate the occasion. HAHAHAHAHA! Sorry. Anyway, I did make a few more shirts--one with the new TLT artwork, and one for Concert Black.
January 26, 2006
Lisa: There's so many things I need to know
Utah is kind of a weird place. I'm sure this isn't news to anyone. I guess I should say that the culture of the predominant religion is what is weird. Not bad, just a little odd. The church places a big emphasis on youth programs, including what they call "seminary" (taking a Sunday School class as part of your high school schedule) and a sort of sleep-away camp called "Especially For Youth." Seminary teachers and the EFY counselors and speakers are placed in the awkward position of entertaining teenagers and teaching gospel principles at the same time. Let's just say that sometimes they resort to...interesting techniques to get kids to pay attention.
FOR.
EXAMPLE.
High School Boyfriend and EFY Devotee: "You know that Styx song, Crystal Ball?"
Me: "..."
HSB&EFYD: "Anyway, I have a tape of it. When you listen to it, substitute the words 'Book of Mormon' for 'Crystal Ball' in the chorus."
Me: "Book of Mormon?"
HSB&EFYD: "Yeah, it's awesome! It really fits."
Me: "..."
Fast-forward ten years. Whenever Crystal Ball (actually a rockin' song, by the way, so I'm glad I was introduced to it) comes on, Blake and I always yell out "Book of...MOR! MON!" over the chorus and laugh maniacally. Good times.
Lisa: Pre-training: Week 8, Day 1
Yesterday morning I ran at the Cottonwood Park with the ball fields. We are now on 20 minutes of running followed by 5 minutes of fast walking, repeated once. The good news is that 20 minutes feels about the same as 15 minutes. The bad news is that the similarity lies in the fact that they both feel really long. None of the other girls were there, but luckily I wasn't lonely as I was befriended by a friendly but masked man with a dog and a nearly unintelligible accent. I think he was enthusiastically telling me that his dog wanted to run "All around!" but I am not completely sure.

128.5 lbs, 29% body fat
January 23, 2006
Lisa: Pre-training: Week 7, Days 3 & 4
On Saturday, Sarah and I ran at Liberty Park. We got about 2 1/4 times around the park, which makes 2.8 miles. Now that we are really starting to run, we are starting to see photographic evidence of the phenomenon my "friends" like to refer to as "tomato face."

Yesterday, Marci and I ran on the killer hills of Sugarhouse Park. We went exactly twice around the loop in our 40 minutes, which is 2.8 miles (woot woot!). At the end of our run we were right behind this couple walking two dogs. Almost immediately after passing this sign...

...admonishing dog owners to clean up after their pets, the bigger of the two dogs pulled over for a dump. The man just waited until the dog was finished, and then moved on. No picking up of the crap was even considered! If you recognize this couple, please ask them to be more civically minded. Bags are even provided in the dispenser below the sign!

1/21/06: 128 lbs, 29% body fat
1/22/06: 129 lbs, 29% body fat
January 20, 2006
Lisa: Pre-training: Week 7, Day 2
Who: Just me

When: EARLY-ASS O'CLOCK
What: Running for fifteen minutes, fast walking for five minutes--twice--for a total of 40 minutes. I went ten times around the track (2.5 miles).
Where: Well, the schedule said we were supposed to meet at Cottonwood Regional Park. That is code for Wheeler Farm. There is one lit parking lot right at the front of the park/farm (see diagram), but I remembered vaguely from the website that the walking trails were somewhere at the back, where I could see nothing but a pool of inky blackness.
The whole place was freaky, dark, and deserted except for (I assume) barnyard animals, so after waiting for the other girls for a while I absconded to Cottonwood High's track. It's not too far from Wheeler Farm, and the track is well lit. Unfortunately, by the amount of ice on the track I can only assume they are preparing for a speed skating competition of some kind. Walking was a lot scarier than running, though--I guess your feet spend more time in contact with the ground. There were a few skiddy moments, but I didn't actually fall down. My knees hurt for the first time this morning, but I think it was more from the cold than any kind of strain or injury.
I would be willing to try Wheeler Farm again when it is light outside and/or if I have the map with me. It's pretty far away for a weekday run, but might be a good option for Sundays when Mallory joins us.
January 19, 2006
Lisa: Pre-training: Week 7, Day 1
Yesterday I met Sarah and Jessie at Liberty Park for our first-ever 5:00 am training session. 5 feels much, much earlier than 5:30. I set my alarm for 4:30, a time I think most humans should never, ever have to see. You can tell by my eyes how much more tired I am than usual:

This week we started doing two sets of running for 15 minutes, then fast walking for 5 minutes. 15 minutes of running also feels significantly longer than 10 minutes, but we ignored what our bodies were telling us and got through it just fine. 40 minutes took us exactly twice around the park, for a total of 2.5 miles.
128.5 lbs, 29% body fat
January 17, 2006
Lisa: miscible
In fifth grade I was a spelling machine. Our teacher held a class spelling bee to determine who would participate in the school's competition. She even promised to take the top two spellers in the class out for ice cream at the local Leatherby's. Now, I was not my teacher's favorite student. In fact, for some strange reason she hated me. This may have had to do with the fact that she hated my mom. ANYWAY. One of my good friends was my teacher's favorite student, and I think she offered the ice cream prize with that particular student specifically in mind. Imagine her chagrin when a male classmate and I earned the top two spots! Her favored pupil was number three, so the ice cream party was expanded to include her as well. But I digress.
I held my own at the school-wide spelling bee (against sixth-graders!), but stumbled on the word miscible:
Pronunciation: (mis'u-bul)
--adj. Chem., Physics.
capable of being mixed: miscible ingredients.
Ironically, I spelled a homonym, missable.
I redeemed myself somewhat in seventh grade, at my junior high spelling bee. I took second place after losing to my crush, who couldn't understand how I could not know the word nemesis.
January 16, 2006
Lisa: Pre-training: Week 6, Day 3
We had a smaller Sunday group yesterday because of the snow, but Sarah and I toughed it out at Sugarhouse Park. We clocked our distance with her car's trip counter afterwards. It's 1.4 miles around the road that circles the park, and we went 1.7 miles. It's not as far as we have been going lately, but Sugarhouse has several killer hills that make it a much harder place to run than Liberty Park or a track.
I forgot to take our pictures until we were almost home.


128.5 lbs, 29% body fat
January 14, 2006
Lisa: Pre-training: Week 6, Day 2
Blake (who is training for a triathlon) and I ran at the Olympus track tonight. The track of course isn't lit, and I was trying to time my sessions with song lengths on the iPod again--the problem is that I haven't figured out how to turn on the backlight. I could only check my times at one spot on the track where it was light enough to see the screen. Anyway, I went nine times around, so about 2.25 miles. I think I started off a bit too fast, because I had a small sideache during the first ten minute running session. Of course, I hadn't warmed up or anything, so that probably didn't help. Even considering the sideache, why do two sessions of ten minutes seem so much easier than three sessions of five minutes?
128 lbs, 26% body fat
January 12, 2006
Lisa: Hello, Sailor
I posted some of my marble magnets in our Etsy shop. So far I've just got one set listed, since the photos didn't come out very well, but it's eight color-coordinated magnets in a round tin. Go check it out!
Lisa: Triptych
Once I got my super cool Jamaica Trinnaman oil paintings for graduation, and put the big one up in the living room (I will try to remember to take a picture of it), I didn't think the print we had hanging over the couch went so well in there anymore. Plus, we had a blank bedroom wall where the print would go perfectly. I moved the print into the bedroom, leaving the wall over the couch blank.
Now, the over-the-couch area is tricky, because it is so wide. Whatever you hang there has to be big enough to visually balance the couch, or it looks dinky. I used some leftover inspiration from Vern on Trading Spaces, and decided to make sort of a triptych of abstract red oil paintings. The idea was that they would be simple and relatively easy to do, but create a visual impact and mesh with the more modern oil painting by the real artist hanging nearby.
Here's the living room before, with the print Blake gave me for Christmas last year. He remembered that five years ago in a print shop I said I liked it! Anyway, it looks right at home in the bedroom.
I bought three canvases on sale at JoAnn's. They're the kind that don't have visible staples on the edges, so they don't have to be framed. Then I painted them quick-and-dirty in three slightly different styles, and sprayed some varnish stuff over the top. Easy peasy! Here's the result:
Should I hang them further apart?
January 10, 2006
Lisa: Pre-training: Week 5, Days 2 and 3; Week 6, Day 1
1/7/06:
"Diane, it's 7:44 on the morning of Saturday, January 7th, my mom's birthday. I just got to Memory Grove, which is where we're running this morning. It took me a lot less time than I thought it would to get here, probably because of the lighter morning/weekend traffic. I left the house at 7:28, so it took me about 16 minutes. Anyway, I've got a while to wait for the other girls, so I'll keep you posted on how the run goes."
"Well, I did it. I ran this morning, but it was kind of a fiasco. I got here at about 7:45, and we were supposed to run at 8:00. I knew I had a while to wait, so I started doing my Sudoku puzzles. By eight THIRTY, no one was here except me. I don't know why I waited that long, except that I was busy doing my puzzle and also couldn't believe that when we were running at EIGHT people would sleep in, but whatever. Anyway, I started, and the first two five-minute running sessions were hideous. The third one wasn't so bad. The problem was that after the first running session, I got the feeling that my key wasn't in my shoe anymore. I didn't want to wear my huge coat, and my little jacket doesn't have any pockets, so I decided to time my five minute segments with the song lengths on my iPod, which I carried in my hand. (Coughing.) For lack of a better way to carry it, I took my car key off my keychain and put it in my shoe. Somehow, I guess it flew out while I was running. That was genius. I kept an eye on the trail on my way back since I couldn't feel the key in there anymore, but didn't see the key lying anywhere. I got all the way back to the beginning again, and checked my shoes, but my key wasn't in there. I started retracing my steps, and ran into these nice people with dogs. They said they had seen a key on the little plaque about the park right by the entrance, so I went back there and sure enough there it was--about TEN FEET away from my actual car. So, criminals, follow me running, and you'll totally get a free car with lots of sweet stuff in it. Luckily, my car was still there with all the sweet stuff still inside. I guess all's well that ends well. It's 9:11, and I'm heading home to get ready and then to go run errands for Mom's party. There you have it--half an hour behind schedule but I guess none the worse for wear."
"Memory Grove was a pretty nice place to run. It wasn't too crowded and it has a sort of paved road, most of which is not accessible to motor vehicles. It was flat but with kind of a gradual incline on the way into the canyon. I saw lots of other runners and dog walkers at the entrance to the park, and some people over on the trail that runs parallel to the paved path, but most of the time when I was running I was alone. You know, and then there are those nice key-finding elves. So, that's got to be good, right?"

1/8/06:
Sunday, Marci and I ran at the Olympus track. We went 8 times around, which makes 2 miles.
129 lbs, 28% body fat
1/10/06:
"Diane, the date is Tuesday, January 10, 2006. The time is 5:46. I'm at Liberty Park on the south side. I got up this morning for running, but accidentally snoozed! I woke up at about 5:15, hurried my butt over here, and was in the parking lot by just a few minutes after 5:30. I got a text from Sarah right around the time I got here, saying she was on her way, so I will stay here until she arrives."
"Well, Diane, it's now 6:24. Sarah showed up just a couple of minutes after I talked to you last. This week we started doing two sets of running ten minutes and then walking five minutes, for 30 minutes total. It wasn't too bad. The first five minutes actually went by really fast, so the first ten minutes almost felt like the first five minutes used to feel. We went all the way around the park and back to the cars once, but we weren't done yet, so then we went about a quarter of the way around again and then back-tracked to the cars, but we still weren't done. We kept back-tracking around to the corner and then went back to the cars. I think we did about two minutes extra walking on the whole thing, but I'm going to draw a picture when I get home so that I can figure out how far in distance that we went."

I figure we went around the park 1 3/4 times. The path around the park is supposedly 1.25 miles, so that means we went a total of 2.19 miles!
129.5 lbs, 29% body fat. I hope there's an overall downward trend, because there seems to be a lot of fluctuation up and down.
January 06, 2006
Lisa: Amputees are so hot right now
Something strange was afoot at Wendy's. Possibly at the whole chain. When I went to my work conference in Provo, we stopped for lunch at a local Wendy's. It must have been near a high school, because soon after we were seated, the restaurant was flooded with high school students. One of these groups of students was clearly jocks. What made these particular jocks notable was that over half of them were wearing immaculately clean football jerseys. These were not jerseys that had been played in. These were not mesh affairs worn over t-shirts. These were blindingly white, shiny, stiff game jerseys with extra room in the shoulders for the pads and everything. But they weren't wearing pads. And the jerseys, which taper in quite a bit at the waist, were paired with jeans pulled down low to expose a variety of underclothing. The jeans ended ungracefully at giant puffy white athletic shoes. This was one of the most hideous ensembles I had ever seen, but I was forced to come to the conclusion that it was FOR SOME UNFATHOMABLE REASON considered attractive and/or desirable among the jocks' fellow students.
I blissfully forgot this incident for several weeks, until I met Sarah and Mallory at the Wendy's near the library where I work. Right on schedule, as soon as we sat down with our food, the line filled up with high school students. And FIVE of them were wearing the jerseys. This time I had the presence of mind to get Sarah to take a picture of one of them with her camera phone. Maybe they think the puffed sleeves make it look like they have bigger muscles? Or perhaps legs have become undesirable to high school students, so they want to downplay them as much as possible?
Careful, kids, you're only a short step away from some K-Fed-style manpris and a wife-beater.
January 05, 2006
Lisa: More Adventures in Millinery
I made beanies to go with the girls' Christmas presents this year. They were inspired by a beanie I saw at Anthropologie last winter. I couldn't find a picture of the beanie online anywhere, so I just had to go from memory, but I think they ended up pretty close. If you bought this beanie and recognize it, let me know!
Anyway, here's the yarn I used. It's a lightweight worsted yarn, made of easy-care acrylic and nylon, but it is really soft and feels a bit angora-y. Two skeins was more than enough for five hats. I could have gotten them all out of one skein if I hadn't kept the giant, loose version I made first.
I used YLI 4mm silk ribbon (which I finally found at the Stitchin' Station) to do the ribbon embroidery. My mom showed me the stitch for the rose and what she called a "lazy daisy" for the leaves.
Here's the finished product! Unfortunately, the photo is crap, but now I've given them all away so I can't take another picture. Maybe I'll force Sarah to model hers so I can get another shot.
The embroidery part was surprisingly really easy. What also surprised me was that I had such a hard time crocheting the hats. I used a simple double-crochet beanie pattern (I'll post the link later if I can find it), but I had several problems. First of all, I don't think I really understand crochet patterns. I mean, I know what all the stitches are, but there are still some confusing things. For instance, why does the pattern want me to close off each row with a slip stitch, chain a few stitches, and then start the new row? Why can't I just crochet the whole beanie in a big spiral? Anyway, the first time I tried the beanie with the recommended yarn weight and hook size, it came out humongous. I guess I am a loose crocheter. I tried a much tighter version, which hurt my hand, but that turned out like a little skull cap that ended above the ears and looked ridiculous. I ended up adding a few extra rows of DC above the SC edging, and just ignoring the row separations--I did it in a spiral. After I got all that stuff figured out, each hat took about 2 1/2 hours to crochet and then the embroidery took about 20 minutes.
January 04, 2006
Lisa: I dip, you dip, we dip
I am officially a grownup. Proof: I was given a food assignment for an extended-family Christmas party! My aunt asked me to bring bean dip. I know, it's not homemade rolls or anything, but you have to start small.
Here's the fabulous dip I made. I arranged the tomato and green onion in stripes for extra festivity.
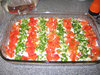
You can see from the cross-section that I achieved the proper beans-to-other-goop ratio. The pitfall of too few beans is all too common. The layers are (from the bottom) refried beans, salsa, grated cheese, sour cream, and tomato/green onion. Yummy!
January 03, 2006
Lisa: Pre-training: Week 4, Days 3 & 4; Week 5, Day1
If I am going to keep track of each training session this way, I really need to stay on top of it better. Three at one time is crazy. Anyway.
Week 4, Day 3:
After I got off work on New Year's Eve, Sarah and I went up to the Red Butte Gardens area to check out the trail we were supposed to try the Tuesday before, when I stayed home sick. We ended up parking behind one of the corporate buildings in Research Park that had an entry point to the Bonneville Shoreline Trail. When we got up to the trail, it was totally muddy and full of puddles but we kept going anyway, heading north up past Red Butte (which was closed) toward the hospital. The trail seemed to end behind the cancer center, so we turned around and headed back to the car. It turned out to be great timing, because our 45 minutes was up right when we got back. We probably went a bit slower than usual, because we had to keep navigating around sinkholes. Our previously pristine running shoes got covered with red mud, but it was nice to be out walking in the daytime when we could actually see the great view from the trail. This part of the Bonneville trail will be good to try again when it is either colder, so that the ground is frozen (but not snowy), or warmer, so that the ground is drier.
Week 4, Day 4:
Unfortunately, Jessie had to work on Sunday afternoon (New Year's Day), but Sarah, Mallory, Marci, and I met at the 48th South entry to the Jordan River Parkway and headed south. It was a gorgeous day, and the paved trails and wooden bridges made for easy and fast walking. This part of the Parkway is quite flat, but the area is really pretty and I think it will be a good place for us to run--especially on Sundays when Mal is with us. We saw the most people that we have seen at any of our running locations yet, but that is probably because we went at a time of day when regular mortals are actually awake.
Week 5, Day 1:
This morning Marci and I met at Big Cottonwood park. We started actual jogging this week instead of just fast walking, and it was kind of a nasty shock. I was feeling so great with the walking, and I guess I thought I was in better shape than I actually am. The schedule was jog 5 minutes, walk 5 minutes, jog 5 minutes, walk 5 minutes, jog 5 minutes, and walk 5 minutes (for a total of 30 minutes). The worst jogging section was the first one; after that we kind of got used to the fact that jogging is a lot more painful than walking. In our 30 minutes, we circled the baseball fields, then did a big figure-8 around the rest of the park, finishing up with two more loops around the ball fields. A few minutes into our session it starting raining pretty hard--our first true running-in-bad-weather experience! We are so hardcore.

1/1/06: 130 lbs, 29% body fat
1/3/06: 129.5 lbs, 29% body fat
P.S. HAPPY BIRTHDAY, MALLORY!
December 31, 2005
Lisa: forte
The other day someone whose intelligence I respect insisted that the preferred pronunciation of the non-musical forte is "fort." I had never heard this before, and frankly thought it sounded wack, but I figured I should do her the courtesy of at least looking it up. It turns out we were both sort of right.
From Merriam-Webster online:
forte
2 : one's strong point
usage In forte we have a word derived from French that in its "strong point" sense has no entirely satisfactory pronunciation. Usage writers have denigrated \'for-"tA\ and \'for-tE\ because they reflect the influence of the Italian-derived forte. Their recommended pronunciation \'fort\, however, does not exactly reflect French either: the French would write the word le fort and would rhyme it with English for. So you can take your choice, knowing that someone somewhere will dislike whichever variant you choose. All are standard, however. In British English \'fo-"tA\ and \'fot\ predominate; \'for-"tA\ and \for-'tA\ are probably the most frequent pronunciations in American English.
Far be it from me to suggest that because something is common it is correct, but I think I will be sticking with the majority of my American compatriots and pronouncing the E. Anyway, "fort" just SOUNDS wrong.
December 30, 2005
Lisa: Pre-training: Week 4, Days 1 & 2
On Wednesday morning, Sarah, Jessie, and I met at Canyon Rim Park at 5:30 am to start the first of our 45-minute sessions. Besides a few dog-walkers, we had the park to ourselves. The basic sidewalk loop around the park took us about 12 minutes to walk, and we explored a few longer variations around the church next door and Canyon Rim Elementary School on the other side of that. We managed to completely freak ourselves out when we were walking around the side of the school through a little alley. Just as we were talking about spooky things you start thinking about when you're alone in the dark, the only streetlight in the alley went out, plunging us into darkness. OOOoooooOOOOO! Anyway, the only snag was that I didn't bring my headband thingie because I thought I'd be warm enough without it. I wasn't. Sarah lent me her scarf to wrap around my head, which looked awesome I'm sure. I think Jessie's new pedometer said we had gone about 2.2 miles.
Here are Jessie and Sarah:
Note my obvious chagrin that they are so photogenic so early in the morning:

This morning we were supposed to meet at the Parley's Crossing section of the Bonneville trail. I waited for a while in the little parking lot at the south end of the crossing, but eventually set off alone. The whole point of this section of the trail is to allow bikers and pedestrians to cross the mouth of Parley's canyon, which otherwise is traversed only via a triangle of interlacing freeways going in and out of the canyon and across the canyon opening. The trail is parallel to freeway most of the way, so there is some ambient light, but there are no lights specifically for the trail itself. I would bet the crossing is one of the coldest trails in the valley, since runners are unprotected from the winds blowing out of the canyon almost the whole way. Luckily, this time I remembered my headband, coat, and gloves. There is also a wicked incline at each end of the trail, getting into or out of the canyon area. It took me a good 25 minutes each way to walk the whole length of the crossing, but I had plenty of graffiti to read. It was the usual stuff, like "Sheriff got a shotgun," "Beta Theta Pis think Delta Gammas are hot" (news flash!), and "Rotting human flesh this way."
Here I am back at my car. I even put on tinted chapstick to combat that no-lipped look I apparently favor in the cold pre-dawn hours. I still have the giant, self-portrait-induced nose of doom though, so there should be something comfortingly familiar for you.

12/28/05: 130 lbs, 31% body fat
12/30/05: 128.5 lbs, 31% body fat
December 23, 2005
Lisa: They still haven't found/What they're looking for
I thought it was time for a few more treasures from the search keyphrases in our site statistics. And since I am a librarian by trade, I thought I would try to hook these people up with the information they were actually looking for when they found us instead.
Good luck, wacky but intrepid searchers! May you find what you seek.
Lisa: Pre-training: Week 3, Day 3
I snoozed my alarm for the first time on a running day this morning! Don't get me wrong, I am no stranger to the snooze button on regular days, but so far I have been good about hopping out of bed on training days when the alarm first rings. Maybe the fact that Sarah and I stayed up until 1:30 am watching Rounders after my concert had something to do with it. (Matt, call me!) Anyway, Sarah and I got to Tanner Park to meet Marci about 15 minutes late. The loop around the park is paved, and took us about seven minutes to walk all the way around at our "fast walking pace." Needless to say, it is not a big park. It was pretty dark, especially on the side of the loop furthest from the parking lots, and there were some muddy puddles to navigate around. I think it will be a good place for us to train once in a while, though, because it is so hilly. Also, if it weren't so dark I bet the view would be nice. The best news about this morning is that it was SO warm. I didn't need gloves or my coat! Not very Christmassy, but much better for early morning running.
130.5 lbs, 29% body fat
December 21, 2005
Lisa: Pre-training: Week 3, Day 2
WHO: Lisa and Sarah
WHEN: Today at 6 am. Do you realize how dark it is in December at 6 am?
WHERE: Sugarhouse Park
WHAT: Walking around the road that circles the park took about 25 minutes, and then we explored some little sidewalks around one of the picnic areas for the last five. The street was pretty well lit and clear of snow. We saw one or two other runners, but the park was pretty deserted. I think we'll be back here!
129 lbs, 31% body fat
December 20, 2005
Lisa: Pre-training: Week 3, day 1
This morning Marci, Jessie, and I walked at Cottonwood High. At first we couldn't find the track, so we walked around the school instead. Actually, that worked pretty well because the school was well-lit and the snow had melted off the sidewalks. When we got around to the back of the school, we could see that the football field and track were sort of sunken down--the top level of the bleachers was even with the road behind the school. We found an open gate, headed down the steps, and went around the track four or five times. We are now at "fast walking pace," and I have to admit that it felt great--I could have kept going a while longer. It was more like exercise instead of some horrible punishment. I'm sure it helped that it was about ten degrees warmer than any of our previous training sessions. Anyway, yay us!
December 16, 2005
Lisa: Pre-training: Week 2, Day 3

Unfortunately, when I go running alone everyone is subjected to an unflattering self-portrait. This is good for no one, people! This morning we were supposed to meet at Liberty Park, but due to extenuating circumstances involving alarm clock malfunctions and Lortab, it was just me.
Verdict: the sidewalks at Liberty Park were totally cleared, and going all the way around the park took almost the whole 30 minutes, so I think it will be a great place for us to train. It's a little scary alone in the dark, but no one menaced me or broke into my car or anything, so it was probably mostly in my head. Also, I still need to look into the fleecy pants option, because legs=cold.
129.5 lbs, 31% body fat
December 13, 2005
Lisa: Pre-training: Week 2, Day 1
This morning Marci and I walked on the track at her alma mater, Olympus High School. The track was dark and covered with bumpy, crunchy snow, but close to both of our houses. It was much warmer today than on Sunday, and we got around the track six times in our 30 minutes. Unfortunately Sarah was unable to join us due to her extremely painful unidentified floating tumor situation.
131.5 lbs, 30% body fat
December 11, 2005
Lisa: Pre-training, Day 3
Today we had the most people yet! After some slight confusion as to which parking lot we were supposed to be waiting in, Mallory, Marci, Sarah and I met at the Olympus Hills Park for our walk. It said "closed for winter" on the signs, and the paths were snowy, but we decided to stay. There were several people walking their dogs, and some runners who were much more hardcore than we are were on the trails as well. It was cold when we started, but going up hills and up several sets of stairs soon got our blood going. We sort of did a figure 8 around the park's trails to get up to 30 minutes. Yay, us!
131 lbs, 31% body fat
December 09, 2005
Lisa: Twinkletoes
Ever since Dance Dance Revolution came out for the Playstation and XBox, I have been bugging Blake every time we pass a game store to go in and ask if they're coming out with a dance pad for the GameCube. Of course, the game store employees always responded with a flat "No." Obviously they are hardcore gamers who do not consider DDR worth their valuable time.
Imagine my surprise when we were walking through the GameCube area at Best Buy last year, and there was a dance pad and a dance game just sitting right there on the shelf! It wasn't true DDR (it was a near-clone called MC Groovz Dance Craze), but it had to be mine. Honestly, the game was a bit disappointing, but I played it anyway, and I am excited to have the pad to use for the awesome Karaoke Revolution Party and as a second pad for the upcoming Dance Dance Revolution: Mario Mix.
I soon became fascinated with the fact that the Mad Catz dance pad has almost all the buttons of a standard 'Cube controller, and functions like a controller during gameplay. I wondered if the dance pad could be used to play other, non-dancing games. Recently, Sarah and I took the only course of action we could imagine: we challenged the GameCube master, Blake, to a dance-off. Of course, Blake absolutely refuses to play MC Groovz on the dance pad, so we had to be careful in how we posed the scenario.
Here was the setup:
Challenge #1: In the two-player dance mode on MC Groovz, Sarah and I (on the dance pad) faced off against Blake (playing on a regular controller).
Result: Sarah and I were strongly in the lead before Blake figured out how to perform some of the steps on the controller. For example, green arrows on the screen mean that you stomp on both of the indicated areas of the dance pad simultaneously. Since you can't move a joystick in two directions at once, Blake figured out (after some trial and error) that you have to move both the joystick and the c-stick, one for each foot. Once he figured these things out, he started closing in on our lead and we quickly moved on to Challenge #2.
Challenge #2: In the two-player mode on Soul Calibur, Blake (on the dance pad) was pitted against Lisa and Sarah (alternately, using controllers). We thought we would have this one in the bag, because although Blake has mad Soul Calibur skillz, playing on the dance pad would surely be a tough handicap to overcome.
Result: After an adjustment period of about three fights, Blake was using all kinds of combination moves and totally kicking our trash. He was hopping around on that dance pad like crazy, much how Pamie described Stee:
We are all horrible at the dance mat. And by that I mean "stee is awesome in ways we can't understand because his feet are bigger than the squares he's supposed to hit, and we don't understand why he can dance on this thing like a small boy trained in acrobatics, but the rest of us lumber through the 'easy' mode, hoping we don't look like total tools, knowing full well that we do."
Conclusion: You can take the controller away from the GameCube champion, but you can't...um...but he will totally slaughter you anyway. Also, I see now how Blake earned his high school nickname.
Lisa: Pre-training, Day 2
WHAT: 30 minutes of walking in the freezing cold
WHEN: At six am, when I might mention it is extremely cold. I think I need to get some fleecy pants to wear over my running pants. Like a coat for my legs.
WHO: Lisa, Sarah, and Jessie (Yay! I was not alone! Jessie was on time, and luckily Sarah was sleeping at my house so I could wake her up and force her to come with us.)
WHERE: The neighborhood around my house, where the streets are quiet, flat, and relatively well-lit. Good for short distance walks/runs, but the area is probably too small for longer-distance sessions.
131 lbs, 32% body fat
December 06, 2005
Lisa: Pre-training, Day 1

This morning was officially the first day of pre-training for the marathon. Thirty minutes of walking at a moderate pace, so no big deal. We were supposed to meet at the Skyline HS track at 6 am, but unfortunately I was the only one who actually showed up. Not an auspicious start, LADIES. I got in to the track with no problem, but it was pretty dark and covered with a thin layer of crunchy snow. Luckily students started trickling in to the nearby buildings not long after I got there, so I didn't feel too freaked out about being alone in the dark in the middle of an empty field next to a deserted park and a gully. I don't know if the track is going to be a great place for us to train this winter, but I did notice there was a fairly well-lit sidewalk around the practice field that looked like it had been cleared. That path might be worth checking out. Anyway, I got around the track five times in 30 minutes at my "moderate" pace. My blue warm-up pants aren't remotely insulating, but the rest of my outfit kept me warm enough, especially once I got going. I did wear my parka over my fleecy jacket. Next time I am definitely bringing my iPod. I had Madonna's Like a Prayer stuck in my head the whole time.
132.5 lbs, 33% body fat
December 05, 2005
Lisa: Dino-mite
I always intend to post cute or fun stuff I do for the library, so that I can remember it, but then I usually forget. (See how that works? It's a vicious cycle.) This time I remembered to take pictures, so you lucky people get to hear about my dinosaur storytime!
Here's the chair where I sit when I read the stories, and you can see the books and stuff that I have set out there. This time we read Find-A-Saurus, Ten Terrible Dinosaurs, How Do Dinosaurs Say Goodnight?, and the awesome Dad's Dinosaur Day.
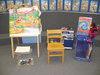
I set out a bunch of other dinosaur books for the kids to check out, too.
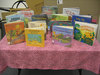
We always do songs and rhymes between the stories, and then usually one crafty project. On this website, I found a recipe for making dinosaur eggs, which I thought sounded fun.
You start with a mixture of flour, salt, used coffee grounds, and sand.
Then you add water to the mixture, to make it stick together.
I gave everyone a small plastic dinosaur (which were really hard to find for some reason--I finally had to get some at Toys R Us) and a scoop of Dino Dirt, and we packed the dirt around the dinosaurs. The eggs are supposed to look like rocks.
We let the eggs dry out for a whole week, until they were really pretty hard and rocklike, and then broke them open at the next week's storytime. Cute!
A few more helpful sites for dinosaur storytimes:
It's Storytime
SurLaLune Storytime
Milwaukee Public Library
BayViews Storytime Ideas
The Best Kids Booksite
December 04, 2005
Lisa: All Geared Up
I have been shopping around for the last few weeks, trying to find affordable running gear. Here are the basic outfits I came up with. The sports bras and tops are from Target, as are two of the pairs of pants. The other two pairs are from ShopKo. No cotton! Apparently, cotton is evil (at least as far as running in winter is concerned). Also, I refuse to wear those hideous running tights, unless someone gives me a really good reason why I have to.
I also wanted to make sure I had several options for different weather. I already had the green shorts...
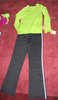
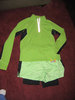
and I had the windbreaker, too.
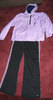
I found some good running shoes at the Nike outlet. The heels have some kind of spacey looking spring-esque cylinders, but the shoes feel pretty comfy. I'll give them a whirl. I got three different kinds of socks at Target, since I had no idea what I would like.
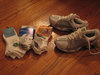
I already had this fleecy jacket from Old Navy that I think will work for staying warm, but I splurged on new gloves and a headband made from some special hi-tech material. They are just for runners, and they better be frickin' awesome.
So, I think I am all set! I hope I will be prepared for weather contingencies, etc. I'm sure as it gets warmer I'll have to get more shorts. Anyway, pre-training starts on Tuesday. Here's our schedule (a Word document) if anyone is interested.
December 03, 2005
Lisa: 'Tis the Season
Last year we had just barely moved into our house, and I didn't really have my act together enough to put up any Christmas decorations besides the tree. Well, this year I am the master of my domain and I had the decorations up by the end of Thanksgiving weekend! I love how festive everything looks.
Here's the tree by the fireplace. We put it in the corner of the living room this year, instead of in front of the window, because we ended up bringing up the futon from downstairs for more seating. There just wasn't room for the tree in front of the window without major furniture rearrangement.

Here's the dining room table. I figure since its function is largely decorative anyway, having a large semi-permanent centerpiece will not be a problem.
I wanted to get a close-up on the ends of the runner, since I like it so much. I found it at the new HomeGoods attached to the T.J. Maxx near my house. Obviously, it's made for a bigger table, but we intend to get a bigger table eventually so that all works out.
On the IKEA cabinet under one of the Jamaica Trinnaman paintings I got for graduation, I put a bowl filled with cranberries in water. There are little oil lamps floating on top.

At HomeGoods I also found some garlandy stuff with red glass beads, and I strung it up on the dining room chandelier.
Last year, I bought a bunch of Christmas lights, but when we went to put them up, there were no plugs on the outside of the house! We asked our neighbors about our conundrum, and they recommended a little thingie that you screw in to a light-bulb socket that converts it into a plug. We used one during the summer to switch out our bare-bulb patio light for a string of lanterns:
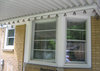
Anyway, the same thing worked like a charm for the Christmas lights on the front porch! We just swapped out the light bulb in the porch light and went crazy.

Super fun! Plus, now I don't feel like all the neighbors are wondering why they let such undesirables move in.
November 19, 2005
Lisa: Save the date
I am going to run the Salt Lake City marathon on June 3rd, 2006. This book, which I found through Pamie and Laura, says one of the first steps is to tell people I'm planning to do it. I guess it's an accountability thing. ANYWAY, I am going to RUN a MARATHON. I know, it's blowing my mind too. Training starts December 6!
November 18, 2005
Lisa: and may a flock of angels sing thee to thy rest
For us, Girls' Night was built on the foundation of Alias Night. We have been faithful viewers, and have even been known to watch in costume once in a while.

Unfortunately, Alias has become less and less enjoyable for many reasons, not the least of which is the loss of Vaughn and Agent Sean. We ultimately agreed to forego Alias in favor of Girls' Night activities we might actually enjoy, but we couldn't just stop watching without ceremony. Naturally, we decided to hold one final Alias Night: a funeral. And who, I ask you, can hold a TV funeral without fancy hats? Sarah bought the material and me made the hats while we watched. Awesome!


November 14, 2005
Lisa: Halloween Festivities
A year after I was inspired, I finally got around to making the cute Halloween lanterns from Laura Land. I cheated a bit by using the library's Sizzix machine to cut out the shapes, but I think they turned out pretty cute anyway. I used one strand to decorate our mantel, and a few more (Sarah helped!) as decorations for our Halloween party.
As always, the best part of a Halloween party is the costumes. Here are the girls:
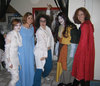
Sarah, in the middle, is a mad scientist (obviously).
Here are Dave and Jess. She's a semi-sexy mummy, if you couldn't tell. I'm not sure what David represents. He borrowed our dad's Nigerian traditional, and then when we got to the party we added a fake mustache from the Target dollar-bin multipack. Somehow, I think the whole of his costume is greater than the sum of its parts.
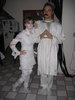
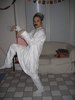
Marci was a semi-sexy devil, and Mal was Sally from Nightmare Before Christmas. Awesome costume, eh?
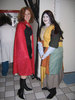
Here I am with Blake. I'm wearing the Princess Buttercup costume I made for the library, and for him we improvised a Dread Pirate Roberts/Westley costume at the last minute.

It turned out pretty well, don't you think?
Anyway, the party was fun, but I think next year maybe I will opt for something a bit more low-key. Plus, if I go to another costume party involving strangers college-age and up, I am going to have to devise some kind of sexy faux-stume. I felt somewhat ridiculous dancing to R&B in a princess costume.
October 31, 2005
Lisa: Bildungsroman
Since we have about a thousand books in the library system under this subject heading, I thought I'd better find out what it means.
Bildungsroman:
a novel which traces the spiritual, moral, psychological, or social development and growth of the main character from (usually) childhood to maturity.
Thank you, Wikipedia. The world is a smarter place today because of you. Here are some alternate (but very similar) definitions via OneLook.
[slight tangent]
You know, you have to quit using the words segue and eschew. All right? They sound French.
--Seeley Booth
[/slight tangent]
October 18, 2005
Lisa: Obviously, I didn't win Blake over with my extensive sports knowledge.
Lisa: So, I was watching an Angel episode with Molly, and Lilah was all "4th and something blah blah what do you do?" and someone else was all "punt." And I was like "I don't get these baseball references."
Mallory: lol
Lisa: And Molly looked at me like I was the biggest idiot. "You mean...football?"
Mallory: Hey, at least you knew it was a sport comment.
Lisa: Yeah. I had to shrug, all "Whatever. Sports!"
Lisa: I guess I was confusing punt with bunt, which is really stupid, I know. I DO know the difference.
Lisa: Punt = kick, right?
Lisa: yeah
Lisa: And bunting is when you hold the bat out funny instead of swinging at the ball. Right?
Mallory: lol. Yup.
Lisa: See, I am not SO much of an idiot.
Lisa: And I know that 4th and whatever is like 4th down and however many yards to go. But there could also be a 4th ... inning?
Mallory: Yeah. There can be a million innings if nobody scores. But there are usually 8 or 9.
Lisa: right
Lisa: See, I totally knew that.
Mallory: It depends on the home team and if they've scored or some weird rule. One summer my friend Cynthia and I decided to learn all we could about sports so we could go to sporting events and meet guys.
Lisa: Hee. How did that work out for you?
Mallory: We learned a lot about sports...but didn't meet very many guys. We were mostly like "Hee, we know football!" And the guys were like "ughsa;dkdfj," which is code for meat heads.
Lisa: Lots of grunting?
Mallory: Exactly, so we were like EW YOU'RE GROSS and went away.
October 17, 2005
Lisa: Time for Milking
Yesterday in sacrament meeting I drafted a daily schedule for myself. I have been feeling a bit overwhelmed (even though I only work 30 hours a week and SOME PEOPLE think my job is a joke) and a bit like I didn't have enough time to get done all the things I want to do. So I wrote down all those things and how much time I thought they would take, and this is what I came up with.
Schedule 1 (for days I work 8-5)
Schedule 2 (for days I work 12-9)
That leaves Wednesday, alternate Fridays and Saturdays, and Sundays unscheduled. I'm thinking that way I will be less likely to rebel and/or go insane.
The good part is that if I can stick to the schedule, I will already be accomplishing a lot of my smaller goals:
Anyway, I'm willing to give this a try. I got up and exercised this morning with Sarah, but the rest of the morning schedule sort of got preempted by sleep. I'm thinking if I go to bed on time tonight, I'll start the schedule for real tomorrow. The next thing I need to do is to create playlists for the entire day with music that fits the mood and length of time of each task. Suggestions welcome!
October 10, 2005
Lisa: The Greatest of All Gifts
Past protests to the contrary, I love bacon--extra-crispy bacon fried in a pan. Don't even think about using the microwave. No jiggly, glistening fatty bits should be visible. If it even looks too much like actual meat it is no good. But bacon cooked the way I like it...there's almost nothing better.
That said, I think joining the Bacon of the Month Club would be taking that love a bit too far.
October 06, 2005
Lisa: colored contacts for my house
So, a while ago the cellular fabric blinds in our kitchen broke. I don't know when this happened--in fact, they might have been broken when we moved in. Basically, there was just no string coming out of the string hole. You know, the string that is supposed to pull the blinds up? So the blinds could not be pulled up. To add insult to injury, the blinds had been let down too far, so that they hung over the window sill, like so:

Anyway, it had been bugging me for a while, but A) we couldn't afford new blinds, and B) our neighbor's house is really close on that side, so I didn't want to just take the blinds down and have a naked window. Gabrielle suggested these window clings that imitate stained glass, so I picked up a few at Home Depot and went to town with the Exacto knife, a little soapy water, and my Costco card.
Much better, huh?
We had a similar situation in the bathroom. The blinds weren't broken, but they were those fabric shades. Since our bathroom seems to stay really steamy a lot, I was getting kind of freaked out about the possibility of mildew. Anyway, I decided to put the window clings up in there, too!
Here's the bathroom before.
And here's the window halfway done--you can tell the view is super great from this window, too...

Ta DA!
Anyway, I think the window clings are a pretty good temporary solution. You can tell up close that they're not really stained glass, but if you're not looking for it, it's not bothersome. And the light shining through to the inside during the day and to the outside at night is really pretty. Plus, they are totally temporary and easily removable, unlike the window frosting spray I put on the windows in my side door, to mixed results.
October 04, 2005
Lisa: For heaven's sake, please leave them on. No, seriously, we don't need to see your toes.
It looks like the Etiquette Grrls have already covered this topic for me, here. Here it is, edited only to remove a few instances of Cutesy Affected Capitals that distracted from the intelligent and reasoned response.
Dear Etiquette Grrls,
I get sooooooo aggravated... I mean extremely... on-the-verge-of-a-nervous-breakdown aggravated when people wear shoes in my house. I have put up signs on the front door (which may not be the most proper thing to do, but it worked) telling them to PLEASE remove their shoes before entering. That worked, but then we moved. I thought that by then everyone who ever was a guest in my home knew that I did not like shoes in the house, so I didn't place another sign. My in-laws don't get the picture. My mother in-law, father in-law, brother in-law, and even his wife still wear their shoes in my house. I have made comments, I have asked nicely... they have to know how I feel about this. It literally drives me insane if I am sitting in the same room with someone who has their shoes on! My husband tells me it is rude to ask someone to take off their shoes. Personally, I feel it is rude to not take off your shoes! I don't live outside in the dirt, and animal doo-doo, and I certainly don't want to bring it into my house! What can I do? And am I being rude?
Thank you,
K
Dear K,
Oh, Dear Reader, we are sure you won't be happy to hear this, but we cannot agree with you on this one. It is perfectly normal to wear shoes indoors. When the EGs go to a party, we wear nice shoes-- pretty Kate Spade slingbacks, say. We would be shocked and appalled if someone were to request, nay, DEMAND that we remove them and walk around in our stockings all night! The EGs would have spent a long time deciding which shoes would go with our outfit, and it would be just silly to leave them at the door! And furthermore, would you really want us to stub our toes or get runs in our stockings? Dear Reader, we'd probably walk out the door and celebrate somewhere else where our nice slingbacks were made welcome!
Dear Reader, the EGs would like to ask gently if perhaps you are over-reacting, just a wee, wee bit? Of course, we would be utterly horrified too if someone who had apparently been traipsing through sewers tried to wander into the Etiquette Flat, tracking filth everywhere. But Dear Reader, honestly, we are sure your in-laws do not, as you have put it, actually live outside in the dirt, etc., etc. It's more than slightly insulting to them for you to imply this. The EGs can only respond to your question from our own perspective, and we have offered our opinion on the matter, as you asked. However, we just want to say that if you find you're obsessed with this issue-- if you truly feel in actual Nervous Breakdown Range-- you might want to talk with a professional who has experience helping folks with issues like this. You shouldn't have to worry so, Dear Reader!
With best wishes,
The Etiquette Grrls
September 26, 2005
Lisa: Supernatural
My Tivo thoughtfully recorded for me the first two episodes of Supernatural, starring Jared Padalecki. In a selfless tribute to my beloved Gilmore Girls, I watched part of the pilot episode during lunch today. The promo spots I've seen on the WB weren't particularly informative, so I thought I'd do our readers a service and give a little overview of the show's premise.
Mr. Padalecki stars as Sam, one of two impossibly good-looking brothers (the other confusingly named Dean) whose mother was killed by some kind of supernatural ghostie/poltergiesty entity when they were very small. Their father raised them as supernatural-entity-fighting warriors, living on credit card scams and THEIR WITS. When Sam left this life of luxury for college, his father told him never to come back. A few years later, Dean comes to Sam (now a genius law school hopeful) to ask for help finding their father--who has disappeared on one of his ghost-hunting missions. They start retracing their father's steps, with the caveat that they have to be back by the next Monday morning for Sam's "law" "school" "interview."
Anyway, some pretty spooky special effects and horror-movie tactics were enjoyed by all (in this case, me). I'll let you know how the rest of the episode turns out.
Verdict: Suspended until further viewing.
September 24, 2005
Lisa: in Dante's ninth circle of Hell, the central of Lucifer's three mouths is reserved for Judas Iscariot
I have to come clean. I have shuffled the order of my Tivo season passes so that Bones has a higher priority than Gilmore Girls.
Let me explain why this is wrong. When two shows are on at the same time (as Bones and Gilmore Girls are), Tivo decides what to record based on the order of the shows in the season pass manager. Higher priority shows are recorded first, and then the Tivo might pick up reruns of the lower priority show if they're available and don't conflict with other season passes.
Basically, moving Bones up the priority list ensures it will be recorded at the expense of Gilmore Girls. But Gilmore Girls is supposed to be my beloved quality drama with excellent writing and acting, especially from Lauren Graham. I buy the DVD sets! I am an advocate for the show with non-believers! I have serious brand loyalty to Gilmore Girls. Furthermore, David Boreanaz is supposed to be my guilty pleasure. Plus his show is new and unproven (other than the fact that I liked the one episode I've watched so far).
The thing is that Gilmore Girls has been annoying and full of angst lately. Rory and the townies have grown menacing instead of lovable. I haven't even gotten up the energy to watch the season premiere yet. But...Bones...I watched it right away, and it was funny, and I actually found myself thinking that D-Bo's acting was good (in other words, I didn't think I was watching Angel)...
And it must be said: D-Bo looked smoking hot. Like, season two of Buffy hot. Not all bloated face and boufy hair, but lean and ripped with the cheekbones...and his shirt was tucked in. Plus, you know that Lauren Graham and Amy Sherman-Palladino are watching Bones.
Anyway, Tivo's opinion of me be damned! I'm going to go ahead and record the show I will actually enjoy watching, even if it is a guilty pleasure. I only wish I had had this epiphany earlier so I could have chosen So You Think You Can Dance over Lost reruns.
September 20, 2005
Lisa: California and IKEA
It's a good thing Mallory covered our trip to California, because Sarah and I have obviously lost the will to blog. I took a few lame-o pictures at the beginning of our trip, but that was it. Anyway, here they are:
From our first stop for gas, at a Chevron next to the Garden of Eatin'

Our super-glam hotel

Hollywood & Vine

Here's the lamp I bought for our dining room at IKEA!


Sarah and I installed it on Saturday, our super building day. We used it to replace this lamp

which will be for sale on eBay if anyone's interested.
On our super building day, we also finished assembling the workbench from hell (Blake's anniversary present)

and built Sarah's IKEA bed and coffee table.
September 08, 2005
Lisa: Freddy
Today I checked out a new workout video from the library for me and Sarah to do. To get her pumped up and excited about it, I started instant messaging her the copy from the back of the box. Obviously, I am not concerned about annoying her while she is at work.
Lisa: Urban Street Heat: dance fitness for beginners, with MaDonna Grimes
Lisa: More fun than a dance party!
Sarah: hee
Lisa: Hot moves you can take to the clubs!
Lisa: Hip Hop routines challenge every muscle!
Sarah: SWEET
Lisa: From the back: Who knew getting a full-body, cardio workout could be so much fun! Urban Street Heat is more like a dance party than an aerobics class. MaDonna Grimes makes working out fun in this fresh and funky Dance Fitness for Beginners program.
Sarah: It is... funky fresh?
Lisa: I KNOW
Lisa: SPECIAL FEATURES:
Lisa: presented in normal frame and anamorphic widescreen (seriously, because the cinematography on this WORKOUT VIDEO is awesome)
Lisa: dolby digital 5.1
Lisa: interactive full-motion menus
Lisa: bonus workout
Lisa: workout to music without narration
Lisa: chapter selections
Sarah: hee
Lisa: photo gallery
Lisa: trailers!
Lisa: wardrobe courtesy of freddy, www.freddy.com
Sarah: Dude. That guy is WAY gross. Super slick.
Lisa: What guy?
Sarah: The guy on freddy's site.
Sarah: Dude. FREDDY?!
Lisa: Hee. Did you watch "the new freddy video"? I think you can watch it without sound no problem. Like, the sound isn't integral to the video.
Sarah: hee
Sarah: Um, no.
Lisa: it has that k-fed lookin guy
Sarah: ew
Lisa: But it has a bunch of Mao-lookalikes who he inspires to rip off their uniforms through his aerobic guidance!
Lisa: And some are girls! Shocking! And some of them are having FUN! There are others who do not approve and who do not rip off their uniforms. I don't know what their problem is, but they obviously have not discovered the fresh fun that is freddy.
Now YOU can discover it for yourself.
August 29, 2005
Lisa: Oh, Utah.
This past weekend I went to the Timpanogos Storytelling Festival for work. On Thursday I attended a workshop with Charlotte Blake Alston about using rhythm and music in storytelling. She played us a lot of examples of traditional African drumming and songs with polyrhythms. This is all fine. The problem was that the workshop attendees were largely the whitest, squarest, and yet most enthusiastic hippie librarians on the planet. Out of the 24 attendees, six wore Birkenstocks or Tevas, and eight others wore sandals. These fourteen individuals were flexing and wiggling their long, ashy, and (need I say it?) poorly-manicured toes wildly in only the barest approximation of the beat. Many others were also bobbing their heads in obvious enjoyment mingled with musical idiocy. I held still while still trying to look like I was having a good time, in an attempt to balance out the behavior of my fellow participants.
August 27, 2005
Lisa: This Week's Sign That the Apocalypse is Upon Us
I just caught myself whistling the Spice Girls.
August 25, 2005
Lisa: I love your dentifrice
Ever since we performed it at my high school, I have had a soft spot in my heart for Bye Bye Birdie. Something made me think of it the other day, so I impulsively checked it out from the library (the library rocks!) and I watched it again last night. As the movie played, my mind wandered to what I'm sure it thought was a brilliant idea--a remake of Bye Bye Birdie starring Lindsay Lohan as Kim (played in this version by Ann-Margret)! With Topher Grace playing Hugo! And George Clooney and Catherine Zeta-Jones playing Albert (the Dick Van Dyke character) and Rose, respectively! And then I got sidetracked, because who should play Kim's dad, replacing the guy who so adequately voiced Templeton in Charlotte's Web? The guy who voiced Flounder? Pumba? Mr. Potato Head?
And then I slapped some sense back into myself. Because those kind of thoughts are just not responsible. And what would we have if someone actually listened to my idea? A travesty, that's what. Anyway, Topher would never agree to do it.
On the other hand, Rose (Janet Leigh) had some killer dresses in that movie. It reminded me of that dress Diane Lane wore in Under the Tuscan Sun [disclaimer: that movie is crap] that I really liked. I want to make a cute fifties dress with a cinched waist and a super-full skirt! Sexayy, yet not revealing! I found a pattern I like, Simplicity 3068, but of course since it is actually from the fifties it is not currently available. Ideas?
August 13, 2005
Lisa: Advantage: Lohan
Normally, pop-princess vehicles and movies heavy on the singing and/or dancing teens are prime choices for girls' night. However, I fear that last night we went too far. By this I mean that we checked out Hilary Duff's Raise Your Voice from the library.
Keep in mind that our standards are low. The critically-acclaimed Bring It On (starring the aptly-anagrammed Dr. Sunken Tits) has happily shared TV time with One Wonky Eye's straight-to-DVD Drive Me Crazy. Even so, Raise Your Voice was by far the worst of its genre I have ever seen.
And what was John Corbett doing there, with a 10-pack-a-day voice, plaid flannel shirt/leather vest with side lacing/leather pants combo, and frizzy Kenny G. ringlets? John, honey, if you really don't have anything more interesting to do, come home with me. I think we can figure something out and get that hair problem taken care of at the same time.
Edited to add: Even the Olsen twins' New York Minute was more enjoyable. Plus, it had Jared Padalecki doing the robot. Disclaimer: I am not recommending New York Minute.
August 11, 2005
Lisa: Reason #156 why being a librarian is the best job ever
A few weeks ago I attended the BYU Symposium on Books for Young Readers for work. Most of the events were held at the Provo library (below, swarming with librarians and schoolteachers):

While we were there, we checked out their children's area for good ideas. Here are some display cabinets we liked (but aren't going to get approval for in our budget):
And here are some letters that I think we are definitely going to copy. They are foamcore wrapped with felt, with felt cutouts and pipe cleaners glued on. I'm not sure if they were following templates or what, but maybe we can at least use the general idea.
![]()
There were a bunch of authors and illustrators at the conference, giving workshops and signing autographs. They're listed on the page I linked above, but most relevant to this entry is the author Garth Nix. I just read his Abhorsen trilogy for the first time and loved it, so I was excited to hear him speak. I am totally fifteen years old, because he is from Australia, with the cutest accent, and has this dry sense of humor, and he is cute in a slightly nerdy way...
OK, so that picture is really bad because I took it all stealthily so he wouldn't think I was a crazed fan and I didn't want to take another picture and call attention to myself. I'm sure he would have posed for a picture with me if I had asked, but I was too embarassed. But I did get a chance to ask him questions at one small Q&A session, and he autographed four books for me with my name.
Anyway, I decided he is added to my nerdy boyfriend collection. I now have a nerdy musician boyfriend, two nerdy TV boyfriends, and a nerdy author boyfriend. Please feel free to suggest new categories and candidates in the comments.
BONUS:
I wanted to post a picture of the castle I made for the library before we have to dismantle it or throw it away. It was originally for a beanbag-toss game, but we have kept it up as a decoration in the story room for the whole summer. Basically, I drew a picture of a castle on a piece of paper, traced it onto a clear piece of plastic from the laminating machine (in lieu of an actual overhead sheet), and used the overhead projector to project the image onto several big foamcore sheets. I copied the projected lines onto the foamcore with pencil, then laid it down and traced the pencil lines carefully with permanent marker. I painted the castle with Crayola paints, let it dry, and then cut out the pieces and window openings with an X-Acto knife. I taped the pieces together with packaging tape on the back side, anchored it to a big sign-holder thing so that it would stand up, and added the stars with the point values for the bean bag game. The stars are Cafe Rio take-out lids cut out with a Sizzix machine. Yay! I think it turned out really cute.
July 29, 2005
Lisa: UK trip, day 14
6/24
On Friday we had time to eat breakfast at the hotel before we had to get going for the airport, and it was tasty--but served in a basement dining room that was a bit hectic.
We hiked up the stairs, grabbed our bags, and hiked back down the stairs and to Victoria station to catch the Gatwick Express to the airport.
We had plenty of time and places at the airport to spend our last few pounds--in between about five security checks! "Heightened security" at U.S. airports is nothing compared to what we saw at Gatwick. Maybe we looked especially shady or something.
On our long flight from London to Dallas, they showed The Notebook for the in-flight movie, and Molly and I (along with most of the women on the plane) were weeping silently with our headphones on by the end of the show. I think Blake thought we were somewhat insane. Unlike our trip into London, my legs were really painful and my ankles and feet swelled up. Maybe it was the slightly smaller plane that made the difference.
Our flight from Dallas to Salt Lake was pretty uneventful. I think all of us slept the whole way (we had been up for 24 hours at this point, after all). Then it was back home and back to the daily routine. I even had to go to work the very next morning!
All in all, it was a wonderful trip. I hope rereading this journal and looking at the pictures we took will provide great memories for a long time to come--at least until we save up enough money for another trip!
July 27, 2005
Lisa: UK trip, day 13
6/23
We got up quite early this morning so that we could catch our train for London at 8 am. The owners of Dunedin House left out some breakfast food for us, which was nice, so as soon as we were packed we hopped on to the city bus and headed to Waverly Station. We felt like experienced bus travelers by now--no need to call a taxi!
On our train ride back to London, a train in front of us broke down, causing a delay, and we picked up some of their passengers--making our very HOT train car also very crowded. The plan for the night (after checking in to our last B&B) was to divide and conquer. We each wanted to see three museums in differing amounts: the Victoria and Albert, the Natural History Museum, and the British Museum. Since they all close around six, we wanted to try to see as much as we wanted of each of them before then. My plan for after dinner was to try to track down the toiletry bag I had left at the Garden Court Hotel.
Unfortunately, Thursday night didn't work out quite as we had hoped. The train just got hotter and hotter, and more and more full, and the automatic door between our seats and the smoking section kept opening and letting out smoke on us, and we just got more and more misterable. When we finally got to London, we were hot, sticky, and starving. We grabbed some overpriced sandwiches in the King�s Cross station and ate them standing up (because for some reason the English don't believe in seats in their train stations, not to mention garbage cans) before dragging our luggage onto the subway to Victoria Cross station, close to our last B&B, the Elizabeth Hotel (not nearly as pleasant as it looks on their website).
When we got there, our room was up three flights of stairs and was tiny and not air-conditioned. I didn't think I'd ever cool down!
Blake wasn�t feeling too well, so he opted to take a shower and spend the afternoon in the room, but Molly and I headed out to the Victoria and Albert museum as planned. We split up so that we could each see the sights we were interested in, and agreed to meet back at the room so we could go to dinner together.
I spent most of my time at the Victoria and Albert looking at the fashion exhibits. There was an amazing exhibit of the clothing of Queen Maud of Norway.
After I was done at the V&A, I took the subway over to the Garden Court Hotel. I had left my toiletry bag there on the previous Friday, and had several subsequent frustrating phone conversations with the staff there, trying to track it down and get it back. At first I was hoping they could ship it up to the Dunedin House in Edinburgh. I thought that it could be waiting for me when we got done with our Highland tour, and then I could use my regular toiletries and take my medicines and everything for the last four days of our trip. Unfortunately, I overestimated the competence of the hotel staff, and probably the speed of the UK postal service as well. When the bag still hadn't appeared by the time we were leaving Edinburgh, I called the Garden Court again to see if the bag had been mailed. The woman working at the desk had no clue, of course. I told her to leave a message for her manager that if they hadn�t mailed the package yet, they shouldn�t mail it--and that I would stop by on Thursday night to try to pick it up. Long story short, the bag was waiting there for me on Thursday (with no explanation as to why it hadn't been mailed). Anyway, I was happy to have the bag back to take home, at least.
On the way back to the subway stop, I stopped at Boots, a sort of drugstore that sells all kinds of toiletries and things, and is ubiquitous in Britain. Kate (from our Cornwall tour) told me that Sol-Tan, the Boots-brand sunblock, was the best ever--so I had to get a bottle (or two, since there was a 2-for-1 deal)!
Then I tried to get back on the Underground to go back to the Elizabeth Hotel, only to find that there were massive delays on the Circle Line. I had to take THREE very hot and crowded trains to get back to Victoria station, and it took me about an hour. When I got there, Blake and Molly were waiting to head out to dinner, so I turned around and we walked over to a place recommended by the hotel. After we ate, we stopped at a convenience store for necessities: specifically water, candy, and pints of Ben and Jerry's ice cream!
After the ice cream and a cool shower back at the room, I felt much better. We settled in for the last night of our trip, which turned out to be (in the grand tradition of that whole day) noisy and hot.
July 26, 2005
Lisa: UK trip, day 12
6/22
On Wednesday morning, we had a great breakfast at Dunedin House again before taking the city buses to Ocean Terminal to see the royal ship Brittania. We looked around the small museum, and then Molly and I toured the boat itself.

It was really neat to see the royal quarters,

(drawing room)
as well as the kitchen, laundry, and other more 'behind the scenes' areas on board. Everything was so compact, but organized and shining clean!
Afterward, we collected Blake (who had been reading on a couch while we were on the boat) and took the bus back to Princes Street. Our first stop there was the National Gallery of Scotland, which was great. It wasn�t too big--the perfect size for an art museum, really--and there were a lot of wonderful paintings there.
We grabbed some takeway lunch at Marks and Spencer, and ate lunch on a bench in Princes Street Gardens. Our next scheduled stop was the Museum of Scotland, near the top of the Royal Mile but a few streets over on the opposite side from the gardens. Before we headed there, though, Blake wanted to stop at a whisky shop on an errand for a friend of his at work--and the good whisky shop was near the bottom of the Royal Mile. By the time we got back up to the museum, we were all pretty tired. In our Rick Steves guidebook, the museum got a rave review, and (to be fair) it looked like they had some amazing things there. However, we were a bit frustrated with the layout of the museum, which didn�t really lend itself well to a single path that takes you past all the artifacts, as well as with the confusing and non-linear audioguide. We decided we were just too tired to appreciate it, so we headed back to Dunedin House for a nap.
It was still quite light when we got up and headed back out, so we decided to ride the bus over to New Town to try to find a cool-looking cemetery we had seen over the rooftops from the Royal Mile.
When we got off the bus, Molly walked us basically right to it (yay!) and it turned out to be really interesting.

(sign outside)

(The obelisk is for some guys who were influential in creating the Scottish parliament, if I remember correctly.)

(the base of the obelisk)

(Those turrets you can see in the background are next door on the property of the governor's residence.)
Among the old-fashioned headstones and vaults was David Hume's grave

(Blake with his buddy Hume)
and a monument to Scottish-American soldiers who died in the American Civil War.

(Yeah, that's Abraham Lincoln up there.)
From the cemetery we could see some other monuments up on a hill,

(That's the City Observatory that you can see.)
so we walked over to check it out. It turned out to be a monument for Admiral Lord Nelson, the City Observatory, and a sort of neo-Classical collonade of pillars that I couldn't discover the significance of.

It was a fun place to walk around, though.

(I told Molly and Blake to strike a saucy pose, and this was the best they could do.)

(looking back down over the city from the observatory)
For dinner, we headed back to an Indian place we had seen on the Royal Mile, which was tasty but crowded, and then returned to Dunedin House to repack and go to bed for the night.
July 25, 2005
Lisa: UK trip, day 11
6/21
On Tuesday, we got up and enjoyed the "breakfast" part of "bed and breakfast" (finally!) and took the city bus up to the top of the Royal Mile so we could be at Edinburgh Castle when it opened. At the castle, we saw the Scottish crown jewels, the royal apartments, St. Mary's chapel,

(the altar inside St. Mary's)
and the War Museum, which was very cool.

(outside of the war memorial)
We had some lunch at the castle's caf� before setting off down the Royal Mile.

(You can see these statues of Robert the Bruce and William Wallace as you leave the castle. Those people are totally not with us.)
Views of the city from the castle:


Blake was a very good sport on Tuesday, as the Royal Mile mostly means shopping! We found lambswool scarves in the Smith and Anderson tartans for our dads for Father's Day, and got a few things for ourselves too. Most importantly, Blake got a kilt and a Scotch thistle kilt pin!

We did also stop at St. Giles Cathedral

(stained glass in St. Giles Cathedral)


(St. Giles' organ pipes)
and a museum covering the history of children's toys. When we got down to the bottom of the Royal Mile, to our dismay we found that Holyrood House was closed because the royals were in residence!

(outside Holyrood House)

(the new Parliament building across the street)
Instead of spending time there, we walked up to Canongate Church and checked out the little cemetery behind it,

and then trekked over to the Princes Street Gardens. I decided to climb to the top of the monument to Sir Walter Scott,

which meant climbing over 275 steps up a narrow and quite claustrophobic spiral staircase--

(There I am at the top! That's as far as Molly could zoom in.)
but the views of Edinburgh from the top were amazing!

(Waverly Station)

(toward the Royal Mile)

(overlooking the National Gallery)

(over Princes Street and New Town)
We walked back across Waverly Bridge to have dinner at an Italian restaurant on the Royal Mile, and then headed up to Warriston Close to the office of our ghost tour: The Real Mary King's Close. They took us down into the close, which had been built over with the new parliament building in the 1800s. The guides were in character, and they had some little scenes set up down there. It was a bit campy and cheesy, but it was also really interesting to see how closely together (and in what filth) the people of Edinburgh lived at that time.
After our tour, we headed back to our room to relax and read for a while before turning in for the night.
July 24, 2005
Lisa: UK trip, day 10
6/20
On Monday morning, we started on our way back to Edinburgh. After crossing the Skye Bridge for the last time, we headed up to Loch Ness for some photo opportunities. Our first stop was at Urquhart Castle. We didn�t go into the castle, just took pictures of it with Loch Ness behind.


![]()
Then we stopped at the cheesiest Loch Ness gift shop ever, where there was an underpass we could take to get down to the water of the loch itself.

After Loch Ness, we drove through Inverness (where Frazer claimed all the people were ugly and inbred) and stopped at the Culloden Battlefield where the Jacobite rebellion was quashed.
(That's us in front of the cairn commemorating the dead Jacobites. NOT a flattering picture, but what can you do.)

(That's the battlefield itself--well, part of it.)
For lunch, we stopped at a pub called the Tipsy Laird in the town of Kingussie.
Our last stop of the tour was in Dunkeld,

(Molly and Blake in front of the Cross, a memorial to the Dukes of Atholl.)
where we visited the Dunkeld Cathedral

(outside of the cathedral)

(organ pipes)
and saw the sarcophagus of a horrible psychopath called the Wolf of Badenoch.
Of course, we didn�t touch his coffin, as that would have been VERY bad luck.

(the ruined section of the church)

(grounds outside the cathedral)

(more of the grounds)
Then it was back to Edinburgh and the Haggis office! When we got back to Edinburgh, unfortunately it was time to do laundry again. At least we already knew where the launderette was! We stopped there on the way to our B&B, and Molly and I found some doorstop sandwiches in a nearby shop. Blake tracked down a Greek pizza shop, so he was happy.
Our suitcases full of clean clothes again, we walked the rest of the way to our next bed and breakfast, the Dunedin Guest House. It was quite close to the Turret Guest House, so we were on familiar ground. We checked in and relaxed in our room for the rest of the night, knowing we had a big day of walking ahead of us.
July 23, 2005
Lisa: UK trip, day 9
6/19
On Sunday morning we woke up, had breakfast at the hostel, and got back on the bus. Our first stop was the Sligachan River. Frazer told us a legend, the upshot of which was that if you stuck your face in the river and held it there for five seconds, you would have eternal youth and beauty. Blake did it!

After a bit more driving, we stopped for a walk in the Black Cuillin Mountains, up to some "fairy pools" above a waterfall.

(There's Blake in the poncho he insisted on bringing.)


Blake and Frazer were the only ones to strip to their swimsuits and jump in, and Blake said the water was freezing!
After our hike, we drove past Dunvegan Castle, which is still the seat of the Clan Macleod.

We stopped for lunch in the town of Portree, which is a fishing village with a beautiful natural port.

![]()
While Blake and Molly were in a caf� having lunch, I sat in the courtyard to eat the sandwiches I had packed at breakfast and then walked around and went into some shops. I found a store that sold some really cool clothing batik-printed with Celtic designs, and I bought a skirt there.
Our next stop after Portree was for another hike, this time up to the Old Man of Storr, a rock formation on the side of a mountain. It was a VERY steep hike, but not too long, and getting to the top was worth it. We had a beautiful view of the coast and of the ocean on two sides.

(I did not style my hair like that on purpose. I swear.)


(me and Blake again)
Our last stop on Sunday was at Quiraing, a lookout point at the top of a very windy and narrow road. There were tons of sheep around, which meant (as always) looking out for sheep-poop land mines.
I should mention also that all over the Isle of Skye we saw the long-haired orange Highland cattle, or "hairy coos," as Frazer called them. Legend has it that touching the horns has a Viagra-like effect. Blake loved the hairy coos (not for their libido-enhancing properties), and has been singing little songs about them ever since.
After that last hike, everyone was pretty tired and we headed back to Kyleakin for dinner and an early night.
July 22, 2005
Lisa: UK trip, day 8
6/18
On Saturday morning, we got up early so we could meet at the Haggis tour office by 8 am. The wonderful Jimmy made us a bag of ham sandwiches, fruit, and juice to take since we would be missing breakfast, and we took a taxi over to the Royal Mile, where the office was.
There were a whole bunch of tours leaving from there at once, but they got us all sorted out and assigned to the right buses. We met our guide, Frazer, who was the driver for the tour as well. He talked quite a lot while he drove, which was fun. He explained to us right away about Scottish weather. It was gorgeous and sunny on Saturday morning (and sunny and HOT when we were back in Edinburgh), which he said was "miracle weather." The other two days of the tour were what Frazer called "sexy weather": drizzly, with misty clouds covering the tops of the mountains.
Our first stop on Saturday was in a little village called Killin. Apparently, the little cascade of waterfalls there (the Falls of Dochart)

is very famous and has been painted a lot. We walked to the tiny grocery store to get some food for lunch, and talked about how fun it would be to retire to Scotland.
Our next stop was in Glen Coe,

where we heard the story of the massacre and got off the bus for a little hike.


It was raining a bit, so we ate our lunch on the bus before setting off for the Great Glen.
Frazer had us practice our guttural sounds by reciting the names of the four lochs in the Great Glen: Loch Linnhe, Loch Lochy, Loch Oich, and Loch Ness. We actually turned off the road before reaching Loch Ness, and instead headed over to Loch Garry. Loch Garry is vaguely Scotland-shaped, and so is on a lot of postcards and calendars of Scotland.


Then we drove through Glen Shiel, but it was too misty (in other words, the weather was too sexy) for us to see the Five Sisters mountains.
Our next stop was the Eilean Donan Castle,
which is famous to us because it was the castle in the Highlander movie. The owners still live in part of the castle, but we got to tour most of it.

It was all furnished, and was quite fun to see. I especially liked the bedrooms, which had all sorts of crazy nooks, stairways up to windows, and cute little fireplaces.

The castle itself is on an island with a bridge built over to it.

The tour guide told us that the causeway was actually the last thing to be built--they had to bring over the building materials for the rest in boats!
After seeing the castle, we piled back on the bus and headed to Plockton, a "tropical" fishing village with the Scottish version of palm trees.

From there, we headed over the Skye Bridge (supposedly shaped to suggest a pair of seagulls in flight) to the village of Kyleakin. The village is tiny, with two restaurant/pubs and three hostels making up the main part of the town. We checked into the hostel, named the Saucy Mary after a Viking princess who supposedly flashed her chest at passing fishing boats. Our room at the hostel was tiny--barely enough room for a bunkbed, a twin bed, and a sink--and we had to share a toilet and shower facilities. The horrors! I guess we were a little spoiled after the B&Bs.
Anyway, after we dumped our luggage we had some dinner at the restaurant that wasn't in the Saucy Mary, and set off to walk around the town.
First, we walked out onto a little tidal peninsula and hiked up to the ruins of a tiny castle that was supposedly the residence of Saucy Mary herself.


(That's part of the Skye bridge you can see through an opening in the ruins.)
Then we walked up another little hill on the other side of the port where there was a monument to the local soldiers who died in World War I. The monument was in the form of a Celtic Cross--so pretty!

July 21, 2005
Lisa: UK trip, day 7
I lost a little momentum, but here we go again...
6/17
We had an early day today--we caught our train to Edinburgh from the King's Cross station at 6:15 am! There was a little tension when our taxi was a bit late, but soon we were safely on the train, enjoying the beautiful English countryside.
When we got to Waverly Station, we caught a taxi to our bed and breakfast, the Turret Guest House. It was quite early (around 10:30 am) so we couldn't check in yet, but we left our bags and got some much-needed lunch at The Crags, a sort of pub aimed especially at the young backpacker/student crowd. Then we headed back to the B&B, checked in to our room (which was gorgeous!) and got our laundry together to go to the laundromat. I was already a bit upset because I thought Molly was writing mean things in her journal about me while we were on the train, and then to add insult to injury, when I unpacked my bag I realized I had left my toiletries carrier at the Garden Court Hotel! There wasn't much I could do about it at that point, so we got our clothes and asked Jimmy, the B&B owner, where to find the launderette. It was a pretty long trek away, especially with bags of dirty clothes, but it had to be done.
After we did laundry (It's amazing how much better you can feel with a suitcase full of clean clothes!) we ditched our bags back at the B&B and headed out on a quest for dinner. Molly and Blake decided on a Chinese takeaway, and I found a little grocery store that was still open. We ate in our room, chatted, and then turned in for the night.
July 12, 2005
Lisa: UK Trip, Day 6
6/16
The bus was scheduled to pick us up at noon, so we had some time to look around Bath. We decided to start with the Roman Baths, but there was a huge line of Japanese tourists waiting to go in, so we decided to look around in the nearby abbey for a few minutes first. It was beautiful.


I especially liked reading the epitaphs on the grave markers all over the walls.
After the abbey, the line at the Baths seemed to have calmed down, so we went in. It was pretty expensive, at over 9 pounds each, but they have done a nice job with the museum. Basically, we got to see inside almost all of the rooms--now most in ruins--and read about what each one was, how the baths worked, etc. The baths are still technically functional, with the hot mineral water bubbling up out of the spring, filling up the big main pool, and then heading out an ancient drain to meet up with the river Avon. The main pool is very picturesque, with a courtyard around it overlooked by Roman statues.

I decided not to try a drink of the water in the pump room!


After we visited the Baths, Molly and I went to the Jane Austen Centre. Jane Austen spent about five years living in Bath, and mentioned it to some extent in all of her books. A tour guide gave us some background on Jane's family, and then we walked through an exhibit with some replicas of clothing, furniture, etc. from her time period.

(Molly with Mr. Darcy)
After the Jane Austen Centre, it was time to get back on the bus!
Our first stop in the bus on Thursday was Lacock, an idyllic little village that almost seems untouched by time. The BBC's Pride and Prejudice was filmed there, and you can see why. There aren't even TV antennae to get in the way of the shot!

(Blake lusts after an anachronistic sports car)
After Lacock, we got back on the bus and drove to one of the white chalk horses--actually a relatively new one--called the Cherhill White Horse.

Next to it was an obelisk that was supposedly erected to commemorate a man who brought a woman back to life with a kiss after she was hanged.

Not far past the horse and the obelisk was Silbury Hill, which is completely manmade. It doesn't seem to be a burial mound, so (much like Stonehenge and the other standing stones), they JUST DON'T KNOW why it is there or how it was built.
Our last stop on Thursday was at the Avebury standing stones. The Avebury stone circles are much larger in diameter than those at Stonehenge, and a village is built right in the center. We had to pick our way through sheep fields to see the stones. It was definitely less touristy than Stonehenge, but I think it's a bit harder to appreciate without an aerial view outlining the shape of the circles, if that makes sense.
(I don't think Molly was ready for this one)

(OK, there she is)


(See, we were really there!)


(Can you see all the sheep poop?)
After Avebury, we headed straight back to London and checked in to the Garden Court Hotel. It felt like a palace after all those hostels! We rode the underground to the Waterloo station (after a delicious Italian meal), took a ride on the London Eye Ferris Wheel, and then headed back to the hotel and to bed.
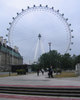


(We could have asked one of the nice people in the car with us to take our picture, but did we? No. Very attractive result, don't you think?)
Also, we met a really nice couple on our tour: PJ and Kate from Monterey, California. Maybe we'll run into them again someday!
July 08, 2005
Lisa: UK Trip, Day 5
6/15
On Wednesday morning, we went to Tintagel, which is said to be King Arthur's birthplace. We walked out on a very windy cliff, from which we could see the ruins of a medieval castle. Our tour guide, Postman Pat, led us through a dramatization of the King Arthur legend involving plastic swords. Blake played Uther Pendragon!


Then we walked into town to sample the Cornish pasties. Molly and I tried the cheese and onion, and Blake had one with steak. Yummy!
At the request of our driver (Kenny) and several people on the tour, we stopped for a look-and-taste at a cider farm. Kind of boring for us non-drinkers, but we sat outside at a picnic table and sampled a bunch of different biscuits (cookies) that Pat brought along. We tried Jammie Dodgers, Jaffa Cakes, Hobnobs, and some chocolate chip and hazelnut ones I can't remember the name of.
After the cider farm, we went to Glastonbury. Unfortunately, we only had time to go to the ruins of Glastonbury Abbey, but it was pretty cool. I guess we'll have to come back another time to see the Chalice Well and climb the Tor!


After Glastonbury we went to Cheddar Gorge, which is supposed to be England's Grand Canyon. After a stomach-churning twisty drive, we got out and took a few pictures. The sides of the canyon are limestone, with green plants growing everywhere. It was about the size of Millcreek canyon! I think whoever named it (and made it a tourist attraction) must have had a sense of humor. Anyway, it's called Cheddar Gorge because it's right next to the town of Cheddar, where the cheese was invented. Also, the oldest human skeleton found in Britain was found there, and is called the Cheddar Man. Mmm, cheddar...


After we got through Cheddar Gorge, we drove to Bath. We checked into the hostel (where Blake, Molly, and I got a private room, which was nice) and ate dinner at a delicious Indian restaurant with a bunch of people from our tour group. After dinner, we walked around Bath and found the places we wanted to see the next morning.


TO SUM UP
On Wednesday, we saw...
Tintagel
Somerset
Sheppy's Cider Farm
Glastonbury
Cheddar Gorge
Bath
July 07, 2005
Lisa: UK Trip, Day 4
6/14
I felt much better the next morning, and we headed off on the tour bus for Cornwall!
So far we have seen a few more Neolithic stone things (Lanyon Quoit


and Men-an-Tol)

and even participated in an "ancient" fertility ritual!
We're eating lunch on a beach near Land's End--it's so beautiful here.

It's a bit cold for swimming, but sitting the beach in a hoodie with my shoes off is just about perfect.
After lunch on the beach, we walked along the cliffs


to Land's End and took our pictures next to the flagpole.
![]()
Then we got back on the bus and headed to St. Ives, a quaint little fishing village with tons of gray stone townhouses.
It was packed with tourists, but we managed to cram into a little restaurant for an authentic Cornish Cream Tea (a pot of tea, two scones, clotted cream, and jam). After our tea, we headed back to the hostel in Newquay.
TO SUM UP
Here's what we saw on Tuesday:
St. Michael's Mount


Penzance
Lanyon Quoit
Men-an-Tol
Sennen Cove
Land's End
St. Ives
July 05, 2005
Lisa: UK trip, day 3
6/13
Monday we got ready quickly, snarfed some cereal and milk the hotel left out for us, and ran over to the travel office to meet up with our group for the Cornwall tour. The breakfast turned out to be a bad idea. Even though we had a great day of sightseeing planned (including Stonehenge) I got quite sick from the milk and spent most of the day throwing up next to the bus!
Here's where we went on Monday:
Stonehenge


(starring Molly)

(Heel Stone thingy)


(Hey, it's us!)
![]()
(Barrows across the road from Stonehenge)

(Real Dartmoor ponies?)

Cox Tor
(Molly took this photo from the top of the Tor. Unfortunately, I was down at the bottom in the parking lot, puking.)

(the beach right outside our hostel)
Anyway, we got to Newquay (pronounced Newkie), which is kind of a beachy surfer town, and I turned in for an early night at the hostel.
July 03, 2005
Lisa: UK trip, Days 1 and 2
I have decided I'm going to post here what I wrote in my travel journal for each day on my trip, along with the pictures I took that day. It's probably going to be pretty boring for most of you, but you can either look at the pretty pictures and ignore the words, or skip these entries altogether. There will only two weeks' worth, and I'll try to post one every day, so it probably doesn't matter much one way or the other. You will be out of your misery soon enough.
ANYWAY.
6/11
Blake and Molly and I got to the airport in plenty of time...but I hadn't updated my passport with my married name and had to get David to come back and pick me up so I could go get our marriage license. I made it back in time for our flight, though--phewf!
A six-hour time difference between Salt Lake City and London meant that we got on our second flight at 4 pm our time and landed in London at 8 am their time. I wish I had slept on the plane!
6/12
On Sunday, we found our Bed and Breakfast (the Georgian House Hotel), dropped off our luggage, and headed out to do some sight-seeing. We went to the British Library


and saw a whole bunch of really old and important documents and books, like the Magna Carta, a Gutenburg bible, the first manuscript of Alice in Wonderland (including Lewis Carroll's original illustrations), etc. Then we took the underground to the Tate Modern and saw a bunch of art from the last century.
Very cool--but we were getting pretty tired, so we headed back to the hotel for a shower and a nap. After our nap, Blake went foraging for food and came back with some authentically English chips, meat pies, chicken, and deep-fried sausage(!).
We set our alarm for early Monday morning and went to sleep.
July 02, 2005
Lisa: This is not a difficult concept
Eye-makeup remover should not sting the eyes. It is formulated for the EYE AREA. Seriously, people. Also, you should not have to rinse it off, either by wiping with a wet washcloth (creates wrinkles!) or splashing (washes the stingy stuff right into the eye proper).
June 27, 2005
Lisa: Bones
Thank you, Mallory, for bringing this to my attention. I'm not sure how I feel about the show's premise, but anything that gets D-Bo back on my TV is good.
Here's another photo.
And a video clip.
June 02, 2005
Lisa: Crunk
This t-shirt made me laugh, but I thought I'd better find out exactly what it means before endorsing it wholeheartedly.
Crunk:
1. To have a good time. Long as everybody get crunk in the drop -- Lil Bow Wow (Bounce with me [2000]). (Rap Dictionary)
2. To get crazy drunk. Originally, this term comes from the words crazy and funk. As opposed to popular opinion, crunk has had no relation to being coked up and drunk until recently. Because if its similarity of terminal sound with the word drunk many rappers have used it in reference with being crazy and under the influence. This and the intrinsical association with hard partying has brought about its association with alcohol. (Rap Dictionary)
3. A specific type of hip hop music, based out of the southern United States. The sound itself is a mix of repetitive chants and drum machine rhythms. Lil' Jon & the East Side Boyz often claim to be the "Kings of Crunk." Lil' Scrappy is referred to as the "Prince of Crunk" whereas Ciara has been referred to as the "Princess of Crunk" and Chyna White is sometimes known as the "Queen of Crunk." While these artists have embodied the term crunk in the hip-hop industry, the term was more widely exposed to the non hip-hop community during a broadcast of the hit Fox show "American Idol", when a particular contestant repeatedly used variations of the phrase "Get crunk!" during his audition. Also, beware the profane version which starts with a K. (Wikipedia)
4. To cry like a crane. [Obs.] "The crane crunketh.'' --Withals (1608). (Webster's Revised Unabridged Dictionary)
May 27, 2005
Lisa: Enlighten Me. (Get it?)
Quick question. Does anyone out there know stuff about lamp posts that automatically light up at night? We have a lamp post in our front yard that used to light up every night when it got dark. It stopped lighting up, so I replaced the light bulb, and now it doesn't light up at night any more. It never lights up. Any ideas? There is no switch for the post inside the house. There is a breaker just for the lamp post, but I have made sure it is in the correct position. I can't find any kind of sensor on the post itself that could be obstructed, but even if the sensor WAS obstructed, wouldn't that mean the lamp would think it was dark out and would just stay lit all the time?
Update:
Putting in a bulb with a smaller wattage made no difference. Here are some pictures of the lamp post to help with the detective work. There is a little thing on the front of the lamp post that I thought might be some kind of daylight sensor. It is a little round circle right below the lantern part. It looks almost like a mini bike reflector, with little horizontal lines inside the plastic--doesn't seem to be especially reflective, though.
Here's the lamp post:

Here's a closeup on the possible sensor thingie:
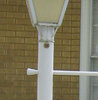
(Click on the thumbnails for bigger pictures.)
Lisa: Amazon Wish List
Amazon is practically perfect in every way, but there are a few things I would change. The most irritating of these has just come about with the new redesign. Apparently, there is no longer an "advanced search" feature! At least, I can't find one. There isn't even an ISBN search! Just "Search Amazon.com" and an empty box. This is unacceptable.
Secondly, I wish the international versions of the site were all a big happy family, allowing me to add items from all the sites to one big wish list. I want to put these two skirt pattern books from the Japan site on my list (thanks a lot, Mariko!), as well as this DVD of just the Buffy musical episode. I don't want to spend $50 to buy all of Season 6, which was largely crap, but I also don't necessarily want to illegally burn just that episode off of someone else's Season 6 set. I just want to pay my money for only the part I want. Is that so wrong? But I digress.
Thirdly, I wish there were easily accessible "log in" and "log out" links. I love all the cookie-enabled features Amazon offers (Big Brother overtones or not), but I don't necessarily want everyone else at work or wherever to be able to see my suggestions or (heaven forbid!) edit my wish list. "If you are not Lisa, click here" just doesn't cut it as a log-out option. And sometimes it can be tricky to log back in once you have figured out how to log out. Sometimes I have had to try to access a secure area of the site (logging on to check order status, change contact info, etc.) just to be able to delete something from my wishlist or see what they think I would like to listen to next. I think the problem is that they either don't want people to realize or notice how much of the site is personalized through cookies, or they think the average user is too dumb (or too concerned with preserving anonymity) to log in to access these features and allow Amazon to collect the information they use.
May 24, 2005
Lisa: Princess Peanutbuttercup
For our summer reading club kickoff party at the library, I am making a princess costume. Our theme is Dragons, Dreams, and Daring Deeds (cheesy, but hey, I didn't make it up). I decided to make the blue dress from the "I would not say such things if I were you!" scene in The Princess Bride. I haven't been able to find any pictures of the dress online, and I have been using a videotape for costume research, so I'm not sure how to make screencaps of my own. Anyway, I'll get some pictures up of the dress-making process soon.
The POINT is that I have a chin-length red bob with blond highlights. Not exactly your traditional princessy waist-length blond ringlets. I am trying to find a way to disguise at least the short length of my hair, while keeping the soft, feminine look Buttercup has in the movie. I don't think I want to wear a full wig. Here are some alternate options I've found online, but I'm not really loving any of them. Please send me your ideas! The good part is that this is a fairytale/fantasy princess, so I don't have to be authentic to any time period. Basically, it just has to look pretty.
 Gotta love Maid Marian.
 The idea is a stuffed fabric tube with ribbon twined around it and bits of fake hair sticking out the end. It would be fastened to my head somehow under a veil.
 Princess Isabelle from Braveheart. This would involve net caul things over the ears stuffed with fake hair (or lined with fabric) with fake hair braids around them. I'm not sure about the circlet, but I would definitely want to forego the veil around the neck.
 From Padme's Picnic Gown. I could handle the loose ringlets around the face, but I would need some kind of curly ponytail attachment for the back.
 Pop some fake braids on there (if I can find the right color), find a way to slick the rest down in back, and we're good to go.
 Drew wore sort of a be-pearled golden hairnet in Ever After.
 This looks a lot like the pearly hairnet thing too, but maybe a bit smaller and neater.
 Sort of a turban thing. Seems like it would be hard to get it to look right and then keep it up on your head.
 Sort of a fabric bag tied on to the head. This is basically a variant on the hairnet idea, but you can't see the hair through it. Also, I thought this girl looked like she kind of had a bob.
![]() A bunch of different crown/veil combinations. I don't think I would want anything around the front of my neck.
A bunch of different crown/veil combinations. I don't think I would want anything around the front of my neck.
Lisa: I...love you...Padme
It's sad when the best thing I can think of to say about a movie is "it was WAY better than the first two!" And it's even more sad when that isn't really saying much. That's what the Star Wars franchise has done to people. Sars summed up my feelings on Revenge of the Sith pretty well. Here's an excerpt:
Lucas can really make a movie look like a million bucks. A big set piece, no problem. Huge battle sequences, shit-kicking Muppets, aging an evil chancellor three hundred years with static electricity, ain't no thing. Two people just talking to each other and he's at a complete loss.
Update: Also, don't miss these hilarious Star Wars country song titles on Fametracker.
May 10, 2005
Lisa: Casing the Joint
After the whole needle breaking in half incident, I decided that my next sewing project should be making a knitting needle case. I found one in this rockin' book that looked pretty simple. I picked up some cool upholstery-weight fabrics at the Home Fabrics store in Midvale (which has a huge and reasonably priced selection) and went to town.
Word to the wise: invest in some heavy-weight sewing machine needles if you're using upholstery fabric for this project--I think the ones I got were made for sewing on denim. My top-stitching seam across the bottom of the case was going through four layers of velvet, two layers of chenille, and two layers of jacquard. I broke two regular needles before I gave up and went to JoAnn's.
Anyway, here's the finished product:
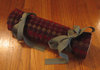
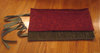
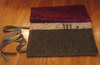
I'm happy with it. I think this is more of a keep-at-home storage solution for the entire needle collection, rather than something I would carry with me on the go. It's fairly huge. Maybe I should make a mini travel version...
May 09, 2005
Lisa: fit for a princess
I can't believe I haven't posted about decorating my pager yet! About a month ago, I bought 2-way pagers for myself and Blake. The idea was that they would be a cheap alternative to cell phones. We can send each other text messages, send and receive email messages, and exchange text messages with anyone who has a cell phone. It's quite handy, and about half the cost of cell phones per month. The pagers themselves were $9 each, and are plain back used models. I wanted to make mine cute, so, inspired by Sara's Handbling over at Going Jesus, I decided to paint it and then stick on some "jewels." I found some spraypaint especially for plastic and some acrylic crystals at JoAnn's. I decided not to ante up for the real Austrian crystals, since they cost three times as much. I didn't want to spend $20 on crystals for a $9 pager.
I taped off the screen, keyboard area, and the area on the back with the serial numbers and stuff, and sprayed on a few coats of paint according to the instructions on the can. When that was totally dry, I stuck on the crystals using tweezers and E6000 adhesive, as Sara recommended. Here's the result:
Sorry about the blurry pictures. It's surprisingly difficult to take in-focus pictures of something that sparkles. My camera kept freaking out and focusing on the table instead.
May 08, 2005
Lisa: The Best of Friends
One of the other librarians found these at the Holladay Pharmacy, and I had to get some. I love George and Martha, and even if I didn't these were just too cute to pass up.
May 06, 2005
Lisa: Fountain Cowl
While at the Needlepoint Joint, I also bought the materials for this sweater,
which is called Fountain Cowl or something, and is from this book:
In addition to being very cute, I am hoping that this sweater will replace the pink one that I so sadly shrunk. Here's the yarn I got:
It's Schoeller+Stahl Flanell, and it's much cheaper than the Adrienne Vittadini yarn the pattern calls for, but the color is almost an exact match, and it should be the same gauge and fiber content. I also had to get two pairs of straight needles and two pairs of circular needles for the cowl part. I have never used circular needles before, so that should be an adventure. This sweater will definitely be the hardest thing I have done so far, but that's how you learn, right? And I will do the Branching Out scarf first, so that I get the hang of doing lacy patterns.
May 05, 2005
Lisa: Do not do a Google search for "tight skirt."
On a dollar-pattern day at JoAnn's a while back, I picked up this skirt pattern and some black denim. I finally got around to finishing it.
I don't know if you can see it very well in that picture, but I did View D, which has pleats on the sides with some ribbon trim across the top of the pleats.
The skirt turned out cute, but it's a little on the snug side. I need to remember that sewing pattern sizes are smaller than retail clothing sizes! Oh, well. I've been meaning to lose a few more pounds anyway, right?
May 04, 2005
Lisa: Branching Out
At the Needlepoint Joint I picked up a few skeins of light green cotton yarn and some #8 needles in preparation for making Branching Out, a springy, lacy scarf pattern from the newest knitty.
The little thingy on the left is a yarn cutter pendant, which I got because (unlike scissors) it can be taken on an airplane. However, I am NOT going to wear it as a pendant, because of its humongous size and obvious old-laditude. Anyway, I am thinking about taking this project (since it doesn't involve 10 balls of yarn and four different sets of needles) to work on in the plane and on trains/buses when we go to England and Scotland. Is this a mistake?
May 03, 2005
Lisa: the Chipmunks are rollin' up in here
Like the hoodrat that I am, I was listening to the local R&B/hiphop station, U92, on my way to work this morning. During one song, I couldn't stop a huge smile from spreading across my face. Hey, I'm just glad Alvin is getting some work.
Lisa: Adventures in Beautifying
I have been having some skin issues lately, so I decided to try an oatmeal mask inspired by this book. There's not much to the recipe. You put some oats in a bowl, and then add water and stir until you have sort of a paste. You glop the stuff onto your face, let it dry, rub off the dried chunks, and then wash off the rest. I had pretty good results (at least, my skin doesn't look worse), but I think next time I'm going to try the cornmeal version from the same book. The oatmeal totally clogged my bathroom sink, and I get the idea that the cornmeal will make a smoother paste.
Also, since I don't like to use very much foundation, and since my foundation color is sort of orangey for my skin tone, and since I am always trying to simplify my morning routine to maximize sleeping-in time, I decided to combine my moisturizer and foundation into one bottle--essentially creating a tinted moisturizer. Here's what I started with:
I squeezed everything out into a bowl, mixed it together with a spatula, and used a ziplog bag with the corner cut off as sort of a funnel to get the mixture back into the moisturizer bottle again. The two substances mixed together quite well, and now I am applying a not-at-all-offensively-colored tinted moisturizer in just one step in the mornings! Admittedly, buying a moisturizer that is already tinted would be less messy, but this way I can use up what I already have. Please don't bother saying anything about the germs I introduced into my moisturizer, because LA LA LA I CAN'T HEAR YOU!
Oh, and I almost forgot--here's my newly-organized bathroom shelf, complete with plastic cubbies!

The Demeter spray is Honeysuckle, and it is so yummy. I highly recommend it!
May 02, 2005
Lisa: Needlepoint Joint
As I mentioned earlier, Sarah and I decided to drive up to the Needlepoint Joint in Ogden, which is about 45 minutes North of Salt Lake City. It was definitely worth the drive. The store was awesome. I snapped these two pictures on the sly, since I didn't think I would be allowed to photograph the store.

And here's Sarah, checking out pattern books!

Anyway, they had every kind of yarn I had heard of, plus tons of patterns, needles, accessories, and fancy buttons. Most importantly, they had Swallow casein needles like the one I broke--but I managed to find one or two other things to buy also. I'll post separate entries for the new projects.
I wish we could have spent more time up there. Historic 25th Street (where the Needlepoint Joint is located) is super cute, with tons of little brick shops that are antique stores, restaurants, galleries, etc. Maybe next time we will make it an evening!
April 28, 2005
Lisa: feeling productive
I have reached a very important milestone (only ten years after my peers!): wearing eyeliner without looking like an idiot. I purchased a black self-sharpening eyeliner pencil yesterday, and this morning I applied it fairly competently, I think. We'll have to see if anyone notices my smashing new look.
In other news, I finished sewing my black denim skirt with the pleated sides and my luxe knitting needle case, and I got some plastic cubbies and organized my bathroom shelf. Pictures to follow!
April 21, 2005
Lisa: Remodeling Project
I just made myself somewhat ill reading about plastic surgery online. Now you can too! I'm thinking it's lipo for me when the time comes. Pretty scary, though.
April 18, 2005
Lisa: My mind is always in the cord gutter.
Since I haven't had any luck finding a separating zipper in the right length and color for my Ribby Cardi at local stores, I have been searching around online. I am a little wary of trying to match colors that way, but I finally found a site that sold clear zippers along with various other knitting supplies. Unfortunately, the site was in German, so I had to use Babel Fish to get a rough translation. However, I found it via a recommendation from another knitter's blog, so I felt OK about giving it a try. When I went back today to actually purchase the zipper, I was greeted with this (translated) message:
Hello dear cord gutters,
we decided to adjust our on-line Shop.
It was a beautiful time with you. Thank you for your confidence.
They reach us weriterhin under info@seasonstore.com
The search continues.
Update: I just ordered a zipper from Zipperstop. $1.80 for the zipper, and $5.40 to ship--sheesh! You'd think they could just stick it in a regular envelope and mail it for 37 cents. Anyway, we'll see if it works.
Update #2: The zipper from Zipperstop arrived this morning, and it is a terrible match. Argh! If you have any suggestions, please let me know.
April 09, 2005
Lisa: That joint is tieeeght!
As I pulled my knitting out of my tote bag the other day, one of my needles snapped right in half. The needles, which I ordered from elann along with my Ribby Cardi yarn, are US size 7 (4.5 mm) Swallow casein 12-inch single points. I love them. They are just the right length, and they are smooth and warm but not staticky. Elann is sold out of that size, of course, and I haven't seen them at any of the yarn stores in Salt Lake. It looks like it might be time to make a pilgrimage to the Needlepoint Joint in Ogden, which is supposedly like a knitter's Mecca or something. Check this space for more.
For the next entry in the saga of the Ribby Cardi, click here.
Update: I guess I should be glad my needle didn't EXPLODE, like this poor lady.
March 25, 2005
Lisa: Sleep... Oh! how I loathe those little slices of death.
I had a series of disturbing and morbid dreams last night that may or may not warrant analysis.
1. Something involving a helicopter crash into a swamp. Of course, we had to pull out all the dead bodies, including Gwyneth Paltrow, Luke Perry, and Michael Vartan. We rolled them all up into one big bundle with a tarp. After the crash, I decided to hook up with a chubby but nice Agent Sean type. His roommates were very happy for him.
After that one, at about 3 am, I got up and brushed my teeth and washed my face and then went back to bed. I guess I felt dirty?
2. All I remember is visiting Kelso in a prison or detention facility or something. He was wearing a helmet.
3. I was on the set of a new Law and Order spinoff set in the 1950's and starring Christian Slater, Sarah Jessica Parker, and Winona Ryder (as one of a set of twins). I was very scornful of the whole thing, and kept pointing out anachronisms in the costumes.
4. After (finally) having sex with her boyfriend for the first time, a young blonde girl slid into a refrigerator on a little cart and closed the door after herself. This was totally not weird because it was her job and she was a professional. After a few minutes, her boyfriend heard sort of a coughing sound and opened the fridge, only to find her dead with her throat blown open. Believe me, the whole fridge thing sounds a lot weirder when trying to explain it to the 911 operator.
After that one, I woke up (one minute before my alarm rang) and got out of bed.
March 17, 2005
Lisa: Now I know why they drink on St. Patrick's Day
St. Patrick's Day is supposed to be a happy day. Everything is green, the pinching of near-strangers is officially sanctioned, cute little leprechauns and pots of gold abound, and Blake and I got engaged on St. Patrick's Day five years ago. Unfortunately, today is not living up to my expectations. I forgot to wear green (thank goodness I am not in elementary school anymore). Blake is deathly ill, and is at home under a pile of blankets, moaning, with the hood of his sweatshirt pulled up. I may have roiled the Orchestra at Temple Square waters by mentioning the seating situation, and I don't want to deal with that issue again. Most upsetting of all is that we were not able to get the deal on plane tickets that we were waiting for, and now there doesn't seem to be anything AT ALL available in our price range. Please help me salvage the crumbs of my wretched existence by leaving genius ideas about where to get cheap plane tickets in the comments. I am having a hard time now finding round-trip tickets between Salt Lake and London in June under $1000. I should have known $500 was too good to be true!
Tomorrow morning I plan to take a little blue pill and then reassess the situation. Hey, it's not my fault Mormons have to self-medicate via prescription.
March 14, 2005
Lisa: Los Angeles - Last Leg
Well, I'm finally going to finish telling about my trip to California with the Tabernacle Choir. I'm sure everyone cares even less than they did a month ago, but it's my online diary. SO THERE.
Okay, so after breakfast on Saturday morning we all walked from the hotel to Disney Hall, via an elaborate system of walkways and escalators in various office buildings that kept us from having to walk up too many hills. Since the women in the choir and orchestra are required to wear skirts and nice shoes when on tour, this was greatly appreciated.
Here's Disney Hall from the street corner:

After a bunch of waiting around and then a rehearsal, we were supposed to head back to the hotel for lunch. Unfortunately, Jeannine and I spent too much time in the L.A. Phil gift shop, and had to bypass the hotel and buy lunch at the cafe at our next venue instead. Before we left Disney Hall, we got someone to take our picture. Here we are:

Anyway, we headed over to the Cathedral of Our Lady of the Angels and ate in the courtyard.
Here's the outside of the cathedral:

After some more waiting around, we got to go inside and get set up.


After our rehearsal, I had to get a closer look at the tapestries hanging along the cathedral walls. From where we were sitting at the front, it looked like the subjects were painted on the fabric, but it turns out that these incredibly detailed portraits are actually woven. Anyway, they are all of different Catholic saints. Here's a closeup of one of the panels:

At the back of the cathedral there is a super tall panel depicting the baptism of Christ.
I thought this one was especially interesting from a theological standpoint, because it depicts Christ being baptised by sprinkling. In the LDS church, we interpret the bible as saying Christ was baptized by immersion.
ANYWAY, after the rehearsal at the Cathedral of Our Lady of the Angels, we walked back down to the hotel to eat dinner and change into our concert clothes. Then it was walking back up to Disney Hall for a concert, walking from there to the cathedral for another concert, and then back to Disney Hall again for a third concert. After we walked back to the hotel for the last time, my feet hurt pretty badly because I was dumb and wore the pretty shoes instead of the sensible walking shoes.
Which! Reminds me! Right before we went onstage for the last concert, the foot joint of my flute flew off and crashed on the cement floor backstage! One of the clarinet players grabbed his tools and fiddled with my flute until the low notes would come out again so that I could play the concert (thank you, Darin!), but I still have to get it fixed by a professional - and I should probably get the foot joint tightened a bit, too, so that doesn't happen again.
So, that's the end. On Sunday we split up onto about six different flights and headed back to Salt Lake and cold weather. I drank three big Diet Cokes right before getting on the plane, which was REALLY smart. Anyway, a good time was generally had by all. I hope they ask me to go on tour with them again.
Click here to go back to the beginning.
March 05, 2005
Lisa: Atomic Age Apron
A while back, on a 99-cent pattern day at Jo-Ann's, I picked up this retro apron pattern.
Since I believe not actually needing to use an item shouldn't stop you from making it, I took advantage of a Presidents' Day fabric sale to pick up this sweet fabric combo. The one with the bubble/dot things on it is seersucker, the pink is a linen-look fabric for the lining, and the trim is a lime-green velvet ribbon.
The pattern only took me a few sessions to sew, and it was pretty easy to figure out. I think this might be the best sewing I have ever done--my gathers lined up exactly right and my stitching stayed even right on the edge of the trim, and everything. I even learned how to sew on buttons and put in buttonholes on my sewing machine!
Anyway, here's the apron in all its neon-colored retro glory. Now I guess I'll have to find something to cook. In heels.
![]()
Lisa: secret admirer, show thyself!
So, it's a good thing I'm getting around to writing this while it's still really fresh, relevant news...
This past Valentine's Day, my brother David was the recipient of several gifts from a mysterious secret admirer. We still don't know who this person is, since the most obvious suspect (his GIRLFRIEND) was ruled out early on. Anyway, here are a few pictures of one of the gifts.

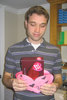
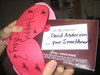
If you are the admirer, please speak up. Everyone else, don't even think about making fun of David's skinny arms, because he will cut you.
February 12, 2005
Lisa: Los Angeles, installment 2
Our second day on tour, Friday, we had a bit of time before we had to get on the bus to head down to San Diego. My roommate and I decided to walk over to the Los Angeles Public Library, which was only a few blocks from our hotel.

The gardens outside are full of symbolic statues, fountains, and other decorative elements, including stair risers with letters from different languages cut in brass, copper, and steel. When you enter the library, you can't see any books at all--just long hallways. It's the opposite of the new Main Library of the Salt Lake City Public Library System, which feels so open and modern. Of course, I had to check out the kids' section. Just outside the children's area is a huge, echoey rotunda with painted mosaics on the walls

and ceiling, and a giant chandelier.

The children's area itself feels old, full of dark wood paneling and shelves, with glass-fronted display cases.

The story area

and a reading nook next to it feel more modern,

and sort of form a hallway into the ENORMOUS picture book room

with a puppet theater at one end.

On our way out of the library, we stopped at the gift shop. They had tons of cute things, and I ended up buying these finger puppets that I thought would be perfect for storytime.
![]()
Anyway, the rest of the day involved driving to San Diego State University for a rehearsal, dinner, and a concert, and then driving back to L.A. I finished the only book I brought, Wind on the Moon, on the way down there, so I stopped at the University bookstore and picked up The Secret Life of Bees to read on the way back. I liked them both.
One more day's adventures to tell. Seriously, it will be LIKE YOU WERE THERE.
February 10, 2005
Lisa: Mmm. Brains.
Today's mimi quote that made me laugh out loud in the library:
harry: Organ meats are the new black.
smartypantsmimi: I like it when they're called VARIETY MEATS.
harry: Wow! Such variety!
smartypantsmimi: By the way: babies aren't supposed to eat brains. No brains until you are three years old.
smartypantsmimi: (This was in an actual infant-care book.)
harry: So sad for babies! They are crying and pointing at your delicious plate of brains.
smartypantsmimi: Sorry, kid. No brains for you.
I'm sure our future children (who will undoubtedly inherit my zombie tendencies) will be sorry to hear this.
Lisa: Los Angeles, installment 1
As Sarah mentioned, I was out of town last weekend with the Mormon Tabernacle Choir and Orchestra at Temple Square on a tour to the national convention of the American Choral Directors Association in Los Angeles.
We arrived at the L.A. airport on Thursday afternoon, and a small group of us rented a car and drove around L.A. instead of riding a bus to the hotel and sitting around in the lobby until our rooms were ready. We are such rebels. Anyway, we ate at California Pizza Kitchen (hey, it's a chain, but it has California in its name!),

walked around Venice Beach, and stopped for a bathroom break at the LDS temple.

One of the ladies with us wanted to go to a double reed store to buy a new oboe, and while she was in there I got a photo of the Hollywood sign.

Silly, I know, but I felt it lent a sense of closure to our unsuccessful quest last May. We finally made it to the Marriott for dinner, and then headed up to our rooms. This was the view outside our window!

Tune in soon for the next REALLY EXCITING installment...
January 30, 2005
Lisa: segue
From MSN Encarta Dictionary:
SEGUE
"3. smooth transition: the act of making a smooth transition from one state or situation to another"
If you don't click through and listen to the pronunciation guide, at least know this - it's pronounced seg-way, not seg-you. Seriously.
Lisa: Adorkable
I need a new TV boyfriend, since Adam Brody has become a giant, bloated floating head. Who better to fill that position than Topher Grace, who just gets cuter as he gets older?
I think I see a resemblance...


January 28, 2005
Lisa: Knitting Update
I finally got around to pulling my Ribby Cardi pieces out of the drawer, pinning them to the rug, and taking a picture. Still looking a bit rough, but I haven't blocked them yet.
Here's the first sleeve, which I just started working on again.
Knitting wisdom of the day:
When the heading of a pattern section says "NEXT ROW - DEC ROW (RS)," make sure that when you start knitting that row, you are on a right side row. Do not just assume that you will start on the row following the last row of the last section of the pattern. Ugh.
For the next step in the Ribby Cardi process, click here.
January 27, 2005
Lisa: I think we were in desperate need of some D-Bo
1. D-Bo is apparently filming (or has already filmed) a movie with Nick Lachey called The Hard Easy. No, as far as I can tell it is not gay porn. The concept seems to be two groups of people who plan to rob the same jewelry store at the same time. D-Bo plays a stockbroker (!) who agrees to the robbery to recoup some losses, and Nick plays an accountant (!!) with a tough working-class background(?). Whatever. Anything not involving a satanic biker gang representing the Four Horsemen of the Apocalypse is a step up as far as I'm concerned. I hope they play up the fact that Nick looks like a cartoon version of D-Bo. Anyway, D-Bo looks pretty hot in the photos. See you at the video store.
2. Speaking of D-Bo...as I think I have mentioned before, I play with the Orchestra at Temple Square, the group that performs with the Mormon Tabernacle Choir. Every Sunday, the Choir broadcasts a little concert thingy with a feel-good message, called Music and the Spoken Word. Locally, this is a TV broadcast, but I think it's carried on radio stations in other places. Anyway, even if we don't have a special musical celebrity guest like Donny, there is often another famous person in the audience. If their people contact the orchestra's people and we know they're there, the conductor will often call the famous person up on stage after the broadcast, introduce him or her to the audience, let the person say a few words and then present them with a gift. In recent memory we have had Sir Anthony Hopkins and Marni Nixon (the lady who did the singing voices for Natalie Wood in West Side Story, Audrey Hepburn in My Fair Lady, and the grandmother in Mulan). Anyway, I was thinking that (since he is likely to be in Utah visiting his in-laws sometime soon) D-Bo should totally come! That is the best chance I have of meeting him that I have thought of so far.
3. I had a vague memory of some scandal surrounding the dubbing of Marni Nixon's voice in for Natalie Wood's on West Side Story. A little digging turned up this helpful info. (Scroll down to The Songs.)
4. I heard part of an interview with Bowling for Soup on a local radio station this morning on my way to work. The DJ was talking to them about how a band's money situation works. I guess I didn't really realize that the studio gets paid back for making the videos and the record before the band gets anything, and then they have to pay for all their expenses out of the 75% of the profits that they get after that. BfS said that their bus costs $1000 per day, the drivers cost $200 per day, and staff salaries, etc. are all on top of that. Most of the merchandising revenue goes to making free stickers to pass out, etc. They said that the rule of thumb is that a band doesn't make any money until a record goes platinum. Go buy a CD from your favorite band!
January 24, 2005
Lisa: Concert Black, part deux
So, the reason I haven't posted for almost three weeks is that I have been working on programming a new version of our website for Concert Black, the business my mom and I are starting. We have new drawings, another level of navigation, and a few other less-obvious programming changes.
Check it out here, and please let me know what you think (or if there are any problems) in the comments. I would love to know what it looks like on as many different monitors and in as many different browsers as possible.
January 03, 2005
Lisa: I am a knitting machine
Yesterday I finished the right front piece of my Ribby Cardi! Both of the front pieces are curling up like crazy since they have large sections of stockinette stitch, so I will need to pin them to something flat before I can take pictures. I had problems with the pattern again, mostly because the pattern assumes I am smarter than I actually am. It says stuff like "for the shaping, follow the instructions for the left front but substitute such-and-such stitch," and then when you refer to the left front instructions it says "follow the instructions for the back," and that way leads to confusion. Plus, sometimes it turns out that I should be reversing parts of the instructions as well as replacing certain stitches.
Anyway, the knitting in the Ribby Cardi hasn't been nearly as hard for me (a near-beginner) as deciphering the pattern has been. I am finding that it is much more important to have a good overall understanding of how the pattern works (including how the sweater is actually constructed and what stitches create particular results) than it is to worry about following the pattern step-by-step.
So, I have started a sleeve (and a new yarn color!), and I should probably start thinking about where to get an appropriate matching zipper. It is very gratifying to be working on a piece of clothing with shaping and curves and everything. I think finishing an actual sweater will feel like a much bigger accomplishment than just doing another scarf. Yay for moving up to a more challenging level!
For the next update on the Ribby Cardi, click here.
December 30, 2004
Lisa: O, Tenenbaum!
I procrastinated putting up holiday decorations this year, but I'm glad I finally got around to it. There's nothing like a Christmas tree to make a house feel homey. Now we have a whole year to figure out how to string up Christmas lights outside with no handy electrical outlet.

Somehow in the holiday madness I found some time to work on my Ribby Cardi, and you can actually see some progress! Here's a picture of the finished back panel (click on the thumbnail for a larger image):
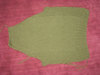
The instructions for the neck shaping on the left front piece kind of confused me, but with the help of a Christmas gift from Dave, I unpicked only what I had done wrong and redid it. I'm now about 10 inches into the right front piece. Woohoo!
For the next entry in the saga of the Ribby Cardi, click here.
December 20, 2004
Lisa: fancy pants
I am wearing new pants today (at least, they feel new because I finally got around to hemming them up to a wearable length), and although they are very cute, the number of closures they have seems a bit excessive. A zipper, two buttons, and three hook-and-eye sets might be a little much for someone who has to go to the bathroom as often as I do.
Today's question for the interweb: What do you know about Boston Terriers--and what do you think of them?
December 17, 2004

December 16, 2004
Lisa: Learning is hard.
I ruined my new sweater. Right before Thanksgiving, I got a gorgeous light pink lambswool sweater with a wide ribbed band at the bottom and a sort of open cowl neck with a pretty pointelle (?) pattern. The brand is I.N. San Francisco (so easy to search for on Google!) and I bought it at Dillards. I wore the sweater once and it was fabulous. Anyway, the tag said "hand wash cold, lay flat to dry," but for some reason I figured "machine wash warm, lay flat to dry" would be fine. I was wrong. The fibers have irreparably shrunk, and no amount of re-wetting and stretching will make a difference. Dillards won't exchange it because I don't have tags or a receipt (because I never anticipated returning such a perfect sweater), and besides, they are sold out of the pretty pink and only have a dirty-looking off-white left in stock. I can't find the sweater on the Dillards website, so I can't even order a new one and just chalk the cost up to experience. ARRGH! I just want my sweater back! I promise to follow the washing instructions next time!
Lisa: Trillian
I downloaded Trillian the other day, and I have to say it is pretty cool. You can use one central program for instant messaging through AIM, ICQ, IRC, MSN (Hotmail) and Yahoo!. Also, you can sign in with more than one account at a time on each service. To make it even cooler, you can install Trillian on a network drive and then run it from any computer on the network, or on a USB key and run it from any computer you plug the key into--while maintaining all of your preferences, buddy lists, etc. Unfortunately, Trillian isn't Mac compatible--if you know of a good Mac alternative, post it in the comments. I know Sarah, for one, would be interested. (Has anyone used Adium?)
In other Trillian news, I saw the trailer for the Hitchhiker's Guide to the Galaxy movie before watching National Treasure with my family the other day. My little brother and I were the only ones in the theater who clapped after the preview, and everyone in my family craned around to see who the big dorks were and give them a disapproving stare. Hey, what can I say? I think the movie has a lot of potential, and certainly has more credibility with me than a certain other book-turned-movie Jim Carrey-starring Harry Potter coattails-riding popular phenomenon. (If you know what I mean, and I think you do.)
December 10, 2004
Lisa: no turning back now
I finished programming the Concert Black website yesterday and have been submitting it to search engines all morning. Scary! Anyway, check it out and see what you think.
For the backstory on Concert Black, look here, here, here, and here.
December 06, 2004
Lisa: And now, the news we have all been waiting for
Here's the latest picture I took of my second try of the Ribby Cardi back piece. It's actually about a foot long now, and going much better! The shorter needles (and the pattern correction) helped a lot. Next up: not screwing up the decreases.
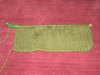
For the next entry in the saga of the Ribby Cardi, click here.
AND! The laundry room ordeal is over at last. The washer and dryer are hooked up--we even did a bunch of laundry yesterday. The drain is working fine, and the only problem we had after moving the washer and dryer in is that the sink doesn't fit in the laundry room any more. I can live with that!
(As always, click on the thumbnails for a bigger picture.)
December 04, 2004
Lisa: sewer gas may be affecting my brain
We have a drain in our laundry room floor! Yay! That is something I never thought I would be cheering about. Anyway, we rented an electric jackhammer thing from Diamond Rental and found that the potential drain was indeed a (totally corroded) drain with a (concrete-filled) U-bend right beneath it connected to a pipe that goes directly to the sewer. Short of a perfectly preserved and functional drain, this was the best possible scenario. Our friends at Action Plumbing came back and--for the low, low price of $400--cut off the old U-bend, installed a new U-bend, bowl, and drain cover, and ran a bunch of water down the pipe to make sure it drained the way it was supposed to. Then they filled up the hole around the pipes with cement and cleaned up the mess. I spent yesterday cutting and sticking down vinyl tile, caulking, filling the gaps under the wall with spray foam, and applying vinyl coving (I think that's what it's called).
When it came time to install the washer and dryer, the washer went in fine but we didn't have a power cable for the dryer--probably because we bought it at Costco instead of a real appliance store. I snuck into Home Depot at 9:15 pm when they came out to lock up the snowblowers for the night (suckas!) and made them sell me a cable, but it was all for naught. Our dryer hose isn't long enough to reach the hole on the back of the dryer, which is at the very bottom. So, it's back to Home Depot today to get a longer dryer hose.
BUT! A drain! We are almost there.
For the final entry in the saga of the laundry room, click here.
November 29, 2004
Lisa: Basted in Blood
Don't miss Basted in Blood (courtesy Defective Yeti) even though Thanksgiving is over. It might be Sarah Maclaughlan's finest moment.
November 23, 2004

November 22, 2004
Lisa: Problems in Ribby Cardi Land
I'm having a little trouble getting started on my sweater. I had the first three inches done of the back piece, but then there was an error in the pattern. If I had been using common sense, I would have caught the error right away--in fact, while I was knitting, I kept thinking something must be wrong. Three stitches are missing from the first row of the stockinette panel section of the back piece. Thanks to Amped for helping me figure out what I had done and why. Anyway, I had knitted a few rows after the mistake, so I just had to rip out the whole thing. I haven't yet figured out a way to back up in knitting--once it's off my needles, I can't salvage it. I was bummed, but actually a little glad because I had made a small mistake towards the beginning that now I could fix. The pattern calls for the piece to be started on smaller needles, and then you switch to the regular needle size after a few rows (which I think is a genius idea). The problem is that I didn't order the smaller needles from elann, so I just went to the JoAnn's near my house and grabbed the pair they had in stock that was the right size. They are 14 inches long, which is really too long for me. I keep bumping stitches off the end of the needle and screwing up. I started the first few rows three times before it was acceptable enough to go on the first time, and now I have started the first few rows another two times. Plus the yarn is all icky to work with now that it has been knit and then unknit. Argh. I am afraid to just cut that section off and start with fresh yarn, in case there isn't enough left to finish the sweater.
Update: I found a little yarn shop around the corner from my house called The Wool Cabin, and bought a new pair of 10-inch #6 needles. I have started the back piece again, and things seem to be going much better with the shorter needles.
For the next entry in the Ribby Cardi saga, click here.
November 18, 2004
Lisa: It's important to take a stand on this sort of thing.
Why is Tinkerbell in the Disney Princesses line-up? Why not fellow Peter Pan character Indian PRINCESS Tiger Lily? Is she not needed because the token Native American princess role is already filled by the more politically correct (but also historically inaccurate) Pocahontas?
Here's my take on the official princesses:
The Good:
The Bad:
Also, I always hated Peter Pan. What a womanizer--stringing along Tinkerbell, Tiger Lily, AND Wendy like that.
November 17, 2004
Lisa: Swatching
I got the gorgeous yarn from elann! Here's what it looked like when it came...
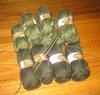
I even knitted a swatch according to what I could decipher from the pattern instructions. It says "19 sts/24 rows over 4" stockinette stitch using #7 needles." I took that to mean "cast on 19 stitches, stitch 24 rows alternating knit and purl, and make sure the result is 4" square." It worked out (I guess), because my result is basically 4" square.

Anyway, I hope that means I'm on the right track as far as size, because I couldn't wait to find out before getting started on the sweater. I have the first two inches of the back piece done--pictures to follow (becuase I know you are on the edge of your seats).
For the next entry in the Ribby Cardi saga, click here.
November 16, 2004
Lisa: matters to attend to posthaste (like, maybe as soon as Gilmore Girls is over)
Here's what I still need to get done in the laundry room. The sooner this all happens, the better, because I am getting pretty tired of the constant emptying of the pipe-drip-catching bucket and not being able to use our new washer and dryer. This small section of the overall house to-do list is probably the most urgent, but is somewhere on the fun continuum between "go through boxes of papers and address, pitch, or file each item" and "plan vegetable garden." Unfortunately, I have checked all the good "buy plastic bins"-type items off the list already.
For the next entry in the saga of the laundry room, click here.
November 12, 2004
Lisa: I'm sure God likes Red Vines, too
More members have been inducted into the awesome Girls Bike Club. I'm not linking the entry I quoted from below, because I think it's important to start reading at the beginning. Oh, and Sars rocks.
Wing Chun: But doesn't Jesus have better things to do?
Sarah: You'd think so. Then you'd look at the election results.
Wing Chun: That's kind of what I mean. He seems pretty busy hating gays these days.
Sarah: Oh, we can't blame Jesus for that. I bet he's under the bed totally mortified that people are using his name to pull this shit down here. "I died for this? Gah!"
Wing Chun: And God is tapping at his bedroom door all, "Jesus? Honey? Are you okay in there? I heated up some Bagel Bites, do you want some?"
Sarah: "They're pepperoni, your favorite. � Jesus?"
Wing Chun: Aw. Our God is a snacky God.
Sarah: That's what I choose to believe.
November 11, 2004
Lisa: But which turtle would play Hamlet?
I hope this is referring to the Teenage Mutant Ninja Turtles. Because that? Would be awesome.
Update: Alas, they are the tiny plastic ninjas of the grocery store vending machine variety.
November 09, 2004
Lisa: Stream of Consciousness
1. Yesterday I seriously considered purchasing a black velour tracksuit at Old Navy. A cry for help? I think so.
2. I don't know if this sweater is considered a shrug or not, and I don't care. I want one for my own. (Thanks to Lukes Diner for the screencap.)
Update: Unfortunately, I can't afford it. Shocker.
3. Thank you, Matthew Baldwin and Margaret Berry, for making me feel a little bit better about the election results and for explaining your thoughts coherently so that I don't have to.
4. As much as I love the library, it would not be a good place to be in case of zombie attack. It might be a good place to film a creepy zombie movie, though.
November 08, 2004
Lisa: Is making time for stress relief stressing you out?
My doctor (Well, I'm not sure if she is a doctor or not. All I really know is that her name is Aymi. The woman I usually see is a CNP.) asked me today what I do to deal with stress, and I didn't have an answer. Usually I just feel stressed until the stressor is removed. She recommended pilates or yoga, or listening to a CD with relaxing music and sounds when I get home every day. She suggested exercise as a stress reliever, but not if I get stressed about making time to exercise, or if the exercise itself is stressful on my body. I technically understand and agree with what she is saying on an intellectual level (and I have blissed out while watching the Wai Lana video recommended by Pamie here), but I think it might be hard for me to fit one more thing into my (non)routine. I can't manage everything I have to do as it is (as was so oddly pointed out to me yesterday when my mom said "it's a good thing [I'm] not married to Charles" after seeing the state of my basement). Hmm.
Oh, she also prescribed lemon-flavored cod liver oil.
Lisa: Careful, I think it might be contagious.
I let this Super Eggplant entry convince me to order yarn from elann in preparation for knitting this sweater, which is probably way too hard for me. Here are the colors I chose:
Hey, the yarn was less expensive than the cheapo stuff at Fred Meyer...and what kind of librarian would I be if I didn't knit my own sweaters?
For the next entry in the Ribby Cardi saga, click here.
November 06, 2004
Lisa: I wanna get witcha...and take your pitcha
Here are some more of the pictures I have been talking about for weeks. You would think it wouldn't be so hard to download them from my camera onto the mac, edit the images in Photoshop, put them on the USB key, upload them onto the website, and then ultimately save them on our PC...
Anyway, as always, click on the thumbnails to see larger images.
Here's the flower pin I made, pinned onto the apron my mom gave me because 1) I didn't have an apron and 2) my dressmaker's dummy looked kind of funny in my kitchen. It isn't in the kitchen anymore (because I now have a craft room!!!), but I still have a cute apron that matches my kitchen and dining area.
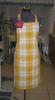
Here's the poncho/capelet thingie I crocheted to take my mind off of being super stressed out. I really like how it turned out, but I haven't worn it yet because I am afraid that I don't have the fashion chutzpah or whatever to pull it off. I am afraid it will look all contrived, poseurish, and over-trendy.
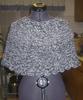
Here's a picture of a Scion just like mine. Sarah and I snuck onto the Toyota lot one night before my Scion came in and took pictures of the one they had there. I guess now I could just post pictures of my own Scion, but then we would have been so stealthy for nothing, right?

November 04, 2004
Lisa: Stop me before I do something stupid.
If you read this entry from a few weeks ago, you know that we have been having a few issues with a leaking water softener and the lack of a drain in the laundry room of our new house. Well, last week the awesome Jeff came and helped haul our new washer and dryer down the stairs and into the furnace room (alas, we "have bought the mansion of a love, but not yet possess'd it"), and then assisted Blake in dismantling and emptying the water softener and dragging it back up the stairs and out to the garage. Of course, the copper pipes that used to lead to the water softener still leak, so we currently have a bucket hanging from the pipe ends to catch the drips. Every few hours we have to go down and empty the bucket, or it overflows and mixes with the cement dust raised by the hammer Blake is using to break through the cement that was inexplicably used to fill in the old drain pipe we found under the linoleum.
The current plan is to buy a pipe cutter and some compression caps (to avoid the whole blowtorch/soldering process), cut off the pipes where they connect to the main water pipes, and cap off the ends. Is there some reason we should not do this? Please stop me before I do irreparable damage to my plumbing system.
Update: Thanks for nothing, Internet. This was indeed a stupid thing to do. The pipes can't just be cut off, they have to be connected together, bypassing the water softener. Also, we tried the soldering thing and I was right to be apprehensive--it was too hard for us. Anyway, a call to Action Plumbing and $225 later, our pipes look great and work perfectly.
For the next entry in the laundry room saga, click here.
Lisa: another question for the Mac gurus
Sending out another SOS signal to you geniuses...
OK, so I have a Powerbook with an Airport card and a PC that is connected to a printer via USB and to a modem (with wireless capabilities) via ethernet cable. I want to be able to print from the Powerbook to the printer that is attached to the PC. Also, just to complicate things, I also have Virtual PC installed on the Powerbook so that I can run the PC version of Quickbooks, and I need to be able to print reports from Quickbooks within Virtual PC. Also, being able to wirelessly share files between the Powerbook and the PC would be nice. I know all of this is possible, but I can't seem to make it work!
Update: I followed these awesome instructions and got everything set up the way it is supposed to go. Unfortunately, things still aren't working because I purchased a printer that may be incompatible with networked macs. It works fine with networked PCs or with macs that are directly plugged into the printer via USB. Argh! To make matters worse, I have the same printer at home and at my office at my parents' house, so if I really can't get it to work, I am screwed twice. Curse you, Unsupported Personality error!
Update #2: SUCCESS!!! I downloaded gimp-print and as per these instructions chose HP LaserJet 5 as my printer and gimp-print as my driver. Thank you, internet!
October 23, 2004
Lisa: Stare into the TV screen and count to 10
I unexpectedly found some political commentary in my Gilmore Girls recap:
How are there undecided voters? Why is this such a close race? How? I don't understand. How can anybody be happy with the way things are going now, how we're viewed in the world and what is happening to the majority of Americans, from their take-home pay to the troops at war, to the price of health care. How can anybody think that we need another four years of this to see where it's all going to pan out? How can that be a solution? It's like staying with a husband who beats you, because he tells you how much he loves you and it's for your own good, because if you just listened to him and did what he said, he wouldn't have to beat you so hard (notice how he didn't say he'd stop beating you?). Oh, and that husband hates your gay friends. Thinks they're evil to the core. And he kind of hates your black friends, too. He does like your Hispanic friends; they do great work around his house. He wants them to go back to Mexico when they're done cleaning up, though. Don't want them getting comfortable with our way of life.
Thank you, Pamie. If we do end up with W again, I am hoping that the announcement of the election results coincides with the release of Gilmore Girls Season 2 on DVD, so that I can lock myself in my house with lots of ice cream, ignore all outside news and current media, possibly hum some girly tunes to ward off rage blackouts, and immerse myself in the show.
October 21, 2004
Lisa: Home Sweet Home
Well, I don't know if the problem is fixed or not, but I got one of the pictures to work. Here's our beautiful house! (Click on the picture for a bigger view.)

Edited to add another picture:

Lisa: Help me, Obi-Wan Kenobe, you're my only hope!
Aaack! I seem to be having a problem that I am hoping someone out there in Internet-land can help me with. I used to have access to Photoshop at my old job, and I have been waiting to process and post a bunch of pictures from my digital camera until I got the Adobe Creative Suite installed on my Powerbook. I finally got the Creative Suite (which includes Photoshop) installed, and yesterday I edited the images that I wanted to post today. I put the images from my Mac onto a USB key (thumb drive, flash drive, whatever) and brought them to work with me today. When I tried to open, preview, and upload the files from my new work computer (a PC), I ran into some problems. The pictures are all pixelated across the bottom in the previews, and Movable Type won't upload them--it just gives me an error message complaining about "premature end of jpeg file." Not only that, but the USB key seems to contain duplicates of every file, with a period and space in front of the duplicate file names. I can't open the duplicate files at all. Is this a Mac/PC compatibility issue? Because one of the main reasons that I got the USB key in the first place was to simplify file sharing between the two computers. Help!!!
Edited to add...the problem was that I pulled the USB key out of the laptop without dragging it to the trash. Everything is fine now, and I panicked for nothing.
Also, what should I be for Halloween? I still like the Leia idea, but I fear it is too close to Halloween to get a decent Leia costume together.
October 19, 2004
Lisa: Lost
Blake and I finally watched the series premiere of Lost, which our Tivo recorded for us before we moved. During the credits sequence, I pointed out to Blake that the show was made by J. J. Abrams, who was/is responsible for Felicity and Alias. Abrams et al seem to share a lot of actors between shows, so we weren't surprised to spot Kendall (cryptically smiling with an orange peel in his mouth). Blake lamented the fact that Agent Sean seemed to be missing from the cast, and we both took a moment to mourn this omission. The concept of the show (plane crash survivors trapped on an island) seemed to eliminate the possibility of any guest stars, too. Fortunately for us (but unfortunately for his character), Agent Sean DID show up for his triple-threat after all, in a cameo as the doomed airplane pilot. Anyway, the show was pretty dang good, the guy from Party of Five looked hot, and the Greg Grunberg cameo took it over the top. Lost, welcome to the Season Pass Manager.
October 14, 2004
Lisa: Leaks and Links
Leaks:
Before we closed on our house, the inspector warned us that there didn't seem to be a drain in the basement suitable for allowing leaking water to escape without icky flooding. While probably not urgent, this was a problem that needed to be fixed, so the previous owners agreed to throw in some cash so that we could get a drain installed after we moved in.
A few days before we moved in, our realtor noticed a little drip coming from the water softener, located in the basement laundry room. It seemed like no big deal, but the previous owners again agreed to add a bit to their check to us to facilitate repairs.
I know you see where I'm going with this--the water softener has been leaking like crazy and forming big puddles all over the drainless laundry room floor. Unfortunately, our home warranty doesn't cover water softeners, but I think we can fix it ourselves if we get the right part. However, the plumbing supply company referred to me by the water softener people as their distributor has never heard of the brand, MacCLEAN. After running all over town, I finally just tried ordering the part directly from the manufacturer, so we'll see if it shows up.
When I finally got a plumber to come out and give me a bid on putting in a drain down there, he pulled up a few linoleum tiles and found what looks like a drain already in place, that was for some reason PLASTERED OVER in a previous remodeling effort. He recommends that we bang on the plaster with a hammer, pull it out, and see what is underneath. If it's a pipe, we are in business. If not, we have just destroyed our floor AND have to pay to bore a hole for a drain into the giant cast-iron pipe in the corner of the laundry room.
The saddest part of all of this is that we can't buy a fabulous new front-loader washer and dryer until the drain situation is resolved. I was hoping the days of doing laundry at Mom and Dad's house were past.
Links:
I want to make these super cute (and easy looking) Halloween lanterns. Maybe on a string of white Christmas lights?
Thank goodness someone saved Bush's notes from the debate, so that we could all laugh before we think about it too hard and start to cry.
For the next entry in the laundry room saga, click here.
October 05, 2004
Lisa: a tucked-in shirt and a good haircut makes the man
The sound of thousands of Gilmore Girls viewers around the world screaming in unison "GET A HAIRCUT, DEAN!" every time poor Mr. Padalecki came on screen was finally heard--and that boy is lookin' fine! Too bad the wardrobe people at Angel missed my repeated admonitions to "TUCK IN YOUR SHIRT, ANGEL!"--I know my downstairs neighbors didn't. Unfortunately, the formerly dapper D-Bo sported the untucked button-down shirt under the suit coat look (often paired with too-long pants and hands stuffed in his pants pockets) until the very last episode, and probably died looking like that. It's a shame, really, when he used to be so hot.
Thanks to Luke's Diner and Phoenix's D-Bo site for the photos.
October 04, 2004
Lisa: Home is where my head is
Today is moving day. Yesterday we cleaned the new house and made a bunch of trips in our cars, carrying the stuff we didn't want to put in boxes like clothes and framed pictures. Right now Blake and some friends are loading up a moving truck with boxes and furniture and driving it over to the new place. At least, I assume that's what they are doing--I had to go to work. Blake says it's better this way anyway, as I'll just get all stressed out, which will make him more stressed out. Whatever. Now I'm just stressed out at work, imagining the worst.
Also, our phone and internet at the new house isn't getting installed until Thursday, which means FOUR DAYS without them. Plus, for some reason the guy at CompUSA couldn't install an AirPort card in my PowerBook, and the Adobe Creative Suite wouldn't install either, which means everything is screwed up and I can't even check email at my parents' house. I think David is going to come to my rescue, and in the meantime I am going to concentrate on organizing and cleaning my home in a very Zen-like state without interruptions from the outside world. As soon as I get home from work.
October 01, 2004
Lisa: Finally
Lori Hacking's remains were found today. I haven't mentioned her here before, even though she and Mark lived half a block from our apartment. It was too close, too real, too scary. Rest in peace, Lori.
Lisa: Hey, I can be silly AND serious
Molly, I know we talked about going to your cabin on Halloween weekend, but are you sure you don't want to have a Lots-a-Leias party instead? I could totally get into making a Leia costume, and I would pay good money (if I had some) to see Blake in a Leia costume too. Or maybe he could be a wookie.
Also, I would like to ask a special favor of any Utahns of voting age who may be reading this. Please read this site and make an educated decision on whether to vote yes or no for Amendment 3 next month. Knee-jerkers, I would like to ask you to pay special attention to the section titled "LDS Church has NOT Endorsed Amendment 3." Thank you.
September 20, 2004
Lisa: Let's just crank that stress level up a notch
It looks like we may have to pay 3% down on our house, which would totally screw up our plans regarding the car, not to mention my precious front-loading washer and dryer. Cross your fingers for us (or touch the roof of your car when you go over railroad tracks, or whatever) that two years of school can stand in for two years of work in my current profession on the mortgage application.
Also, I took a few pictures of the house on yet another stealth-filled drive-by. To be posted here soon...
September 16, 2004
Lisa: More of the Same
I don't really have anything new to report, just mostly updates on the same old things I have been talking about for the last little while.
Car: Instead of taking 5 more weeks, it looks like my Scion will be ready to pick up next week sometime. This is great for Blake, since he won't have to take the bus and/or beg rides from coworkers anymore, and only slightly bad for our home mortgage situation. Actually, I think we have it worked out so that everything will be fine--we're just using some of the cash we originally had earmarked for the car to pay closing costs on the house.
House: After several recent drive-bys, I have to say that I don't think the sellers are getting ready to move fast enough. They technically have until the end of October, but I keep hoping they will find a house to move into sooner, so that we can then move into their house sooner, and vacate our smoke-smelling, broken-window, plywood-patched-cement-stairs, water-always-running, tiny apartment (go into Cartman singing voice here) in the ghetto.
Job: Everything at the library is awesome. There is a huge banner still up in the children's section that says "Welcome Lisa." Everyone seems really nice. The library is only ten minutes from our new house (but unfortunately 25 minutes from our apartment). I am still getting used to things and learning everyone's names and where things are. Luckily, I don't have to start doing storytimes until October. They will be kind of intimidating and intense at first, but at least I have a little while to adjust to the new job before I have to start doing them.
Business: My mom and I went and bought a fax machine, printer, phones, Quickbooks software, and a bunch of other office supplies on my day off. Then we went to a meeting with our manufacturer and designer. The manufacturer has all of our fabric and the "markers," which I think are these sort of giant pattern layout things. We should have samples of two tops and two skirts (all in two fabrics) by next Tuesday, which means we can start taking pictures of the clothes, which means I can put the website online sometime next week. I'll be posting the address here as soon as it's ready for public consumption.
Update: the website is live! Check it out here.
Anyway, all of this is clogging up my thoughts and I haven't had a chance to do anything crafty or think of anything funny. Actually, though, now that I think of it, I finished crocheting my poncho and David and I pulled an awesome fake wedding invitation prank on his former girlfriend. I will have to post pictures and more info on those exciting events, to remind myself that I am not completely boring.
September 01, 2004
Lisa: Everything is insane
1. I got the job at the library (WOOOHOOOO!!!) and I start September 13th.
2. Blake and I have met with our realtor twice and have been prequalified for a home mortgage.
3. My mom just took out a line of credit for our business, and we are rushing to finalize things with the manufacturer in time to fill our first order.
4. I ordered a Scion xA.
5. I started crocheting a poncho last night around midnight. Because...?
It is obviously a time for new beginnings. And a time for increased chance of stress-related illness or accident. I am planning to take deep breaths, drink lots of Diet Coke, and attempt to form coherent thoughts.
August 30, 2004
Lisa: Family and Coke--no better combination.
Last Friday, David, Jeff and I drove up to Logan to help Sarah get installed in her new apartment for the upcoming school year. I just have to say that all of my siblings are awesome. We had tons of fun on the drive up there, with a more than a little bit of Coca-cola-induced hysterical giggling (thank goodness for the McDonalds in Centerville and its 59-cent 44-oz. drinks!). We managed to build Sarah's IKEA desk and chair while we were up there, but not much else.
Here are some photos from the drive, when I started rooting around in my purse for things to play with and found my camera:


Sarah, I will miss you tons. I hope you will still come down and hang out with me sometimes! And on the plus side, maybe you will remember our lowly blog and post a few entries once in a while...
August 25, 2004
Lisa: Suddenly Seeking...Shrug?
The other day I was feeling bummed out while grocery shopping at Smith's Marketplace, and some yarn ended up in my cart. I didn't have a project in mind for it or anything, but the idea of future craftiness did make me feel a bit better--and it was on sale! The yarn is a sort of variegated black and white natural fiber/acrylic blend. I thought it was Lion Brand, but I can't find the color on their excellent website. Or maybe it's a discontinued color, and I should hurry back to the store and buy some more just in case. If I had it here, I would just check the label and all of this confusion would be cleared up. Anyway, it sounds dumb, and I'm sure if it was regular cheapo 100% acrylic, it would be ugly, but actually it is nice-looking.
The point is that I am trying to decide what kind of project to do with said yarn. I am bored of scarves and gloves, and anyway I still have a mitten to finish crocheting in the blue-green Homespun. I haven't been knitting or crocheting long enough to feel confident about complicated patterns, or figuring out gauge, and I certainly am not going to spend money on super-fancy real yarns yet. I think I want to do a fitted shrug to wear with all the black clothes I own. That would be cute, right? I love this pattern, but it looks too hard for me, and I think the cool lacy back wouldn't be right for the more rustic-looking variegated yarn. I just want a simple pattern for a fitted shrug--I even promise to check the gauge this time so that it ends up the correct size! (Maybe something like this, but not so bulky?) So, let me know if you see something promising.
Also, I want to make this poncho, which would follow the huge (and somehow disturbing...yet appealing) poncho trend, but also kind of reminds me of the Jessica Simpson Newlyweds shawl. However, again I'm worried that the pattern is too difficult, and it looks like it requires a TON of yarn, which could get expensive.
Also, I have an update on the car situation. I went to the Toyota lot, and to be honest, the Scion xA is cuter and nicer than the Echo. I think I am going to order one configured just the way I want it. The Scion's no-haggle pricing means there's really no cost advantage to buying one from the lot that isn't exactly what I have in mind. It will take 6-8 weeks to get here, but I can wait. That just gives us 6-8 more weeks to save another $1000 or so, so that we don't have to take out any loans for the car at all. The only problem will be if I happen to get the library job, and have to start driving to work every day. Blake has assured me he doesn't mind taking the bus to work if that happens, but I have my doubts.
Update:
The yarn is actually Red Heart. I think it's this one, in Zebra. And I will not be making a shrug, as everyone I suggest the idea to quickly condemns shrugs as useless and ugly. So, I guess I'm back at square one...
To see the finished capelet/poncho thing I made using this yarn, click here.
August 20, 2004
Lisa: Brain Cloud
It looks like I am too late to buy the car I had my heart set on. The Echo, which I blathered about here, is apparently being discontinued, although I find no evidence of that on the Toyota website. None of the dealers in the entire region have a new Echo. I am so bummed! I loved its cuteness and incredible gas mileage, but most of all I was excited about the oh-so-affordable price. I want to buy a car with cash, and I think we will have to earn two or three thousand more dollars before we could consider buying a different but comparable new vehicle. Getting a loan for $2200 or whatever would be lame. All of the Toyota dealers want to sell me a Scion XA when they hear I am looking for an Echo, but I am not convinced. The Scion is not as cute. It is a hatchback with four individual seats. Its base price is $2000 more than the Echo. True, it has more standard features...
I guess I will have to decide what to do. The problem is that if we buy a house soon (which we want to do) and/or if I get a library job (and I'm interviewing for one on Monday!), I will almost assuredly not be able to ride the light rail to work. We will need another car, period. I was just hoping I could go to the dealership, tell them exactly what I wanted, come home with something shiny and NEW that I loved, and feel happy and carefree. Now I am all stressed out about it and worried I will make the wrong choice.
Furthermore!
I just moved into a new office at work. It is much bigger than my old office, with tons of storage space and real wood furniture instead of the gray modular stuff. I love it. And they are sending me to a conference in New Orleans in September, which should be awesome. I had just decided I was feeling good about staying at this job for a while when I got called for the aforementioned interview for a library job that I applied for months ago. Now I am almost hoping I DON'T get the library job, which is crazy.
In other, not-related news, Sarah gave me this super cute librarian pin from Fred Flare for graduation! I love it, but I'm not sure whether or not I'm actually making fun of myself by wearing it. I mean, is it an ironic librarian pin? Whatever, it's cute.
Also, the guy I mentioned a couple of months ago is starting medical school on Monday at the medical school WHERE I WORK, so I guess I will only be seeing more of him. Whoopee.
August 13, 2004
Lisa: Educate yo' ass
If you have the right sort of sense of humor (you know who you are), read this article from the New Yorker, which I found today via mimi smartypants. I have made a mental note to use the phrase "bust a potentially injurious move" in the near future, and I hope you will too.
Further Reading:
The latin translation of Baby's Got Back by Sir Mixalot may appeal to the same audience.
August 11, 2004
Lisa: the sheer cuteness of it all is overwhelming
For our anniversary, Blake took me to Build-A-Bear, because he is cute like that. Olivia (below, on her way home in a box) is the very endearing result.
This post and then this website made me all nostalgic for My Little Ponies, so I picked up one of the new ones while I was at Fred Meyer (or as I guess it's now called, "Smiths Marketplace") a few weeks ago. Isn't her sparkly pink skin glamorous? I reset her hair with water and curlers because it was all wonky when it came out of the box, but now I'm not really sure what to do with her. I did succeed in almost giving Blake a heart attack by trotting it up his arm while he was sleeping.
I found this cool drawer thingie at Target, by the recipe boxes. We all know I won't be using it for that purpose, but I haven't decided what I WILL be storing in those two little drawers. It appealed to me because I like little drawers and boxes with compartments, I like the places for labels, and it reminded me of library card catalog drawers. Plus, it was on sale for four bucks! Maybe I could line the drawers with velvet and store jewelry in them. But I already have a jewelry box. Maybe the drawers could hold office supplies. I will have to think on this.
August 02, 2004
Lisa: Four Years
Happy anniversary, Blake. Thank you for carrying me to bed most nights and for not being upset that I rarely cook. Thank you for being supportive of me in going back to school and for coming to all my concerts. Thank you for listening to me complain about whatever is bugging me on a given day. Thank you for being open to my point of view when we argue, and for treating me as your equal. Thank you for being so friendly and kind to everyone you meet. Thank you for always making me laugh, and for holding me and letting me wipe my tears on your shirt when I cry. Four years ago, I had no idea how lucky I was to be marrying you. I love you more than I ever have, and I can't wait to see what happens in the next four years.
July 26, 2004
Lisa: Mmm. Piepants.
I made a little knitted case for my digital camera inspired by Sara's iPod cozy over at Going Jesus. It's knitted in stockinette stitch (purl side out) with a seafoam-green chenille yarn I got at Fred Meyer. The coral-colored button is vintage, I think probably owned by my grandmother back in the day. It's quilted, and looks like it was made to match a specific article of clothing.
This photo was taken with my palm pilot inside the case instead of the camera, since I was sort of using the camera to take the picture. It's roughly the same size--the camera is a little narrower and fatter, if that makes sense.

I have been making these marble magnets (following Megan's instructions on Not Martha, here) for a while now. They're totally habit forming, since they are so easy to make and turn out so cute. If you're going to make your own, I would like to reiterate a few of Megan's suggestions, based on my experience. First of all, buy a circular punch the same diameter as the magnets you will be using. Cutting out the little pictures with scissors takes the fun right out of the project. Secondly, if you're using magazine pictures, back each one with a circle punched out of white cardstock (I use magazine subscription postcards). The silicone sealer sometimes makes the flimsy magazine paper a bit transparent, allowing the black of the magnet to show through. For cute tins to put the magnets in for gifts, I usually go here.
These particular magnets are the ones we currently have on our refrigerator at home. They're a little heavy on the Nintendo references, to keep Blake happy.
As usual, click on the thumbnails for bigger versions.
July 22, 2004
Lisa: Pretty drawings do not a website make
My mom and I had another meeting with the designer for our Concert Black business last night. It was all kinds of serious, with fabric samples and a design board with pretty drawrings and everything. Evidence below (click the thumbnail for the bigger picture).
So, the next step with the clothes is a few design changes (like making the skirts all long enough) and getting quotes from manufacturers.
Unfortunately, the clothes part isn't my responsibility. Instead, I am supposed to be working on the website. Argh! E-commerce websites have so much STUFF involved that I don't know how to integrate. I need a tax calculator, shipping calculator, credit card verification/processing service, SSL on my web server, a web server, a digital ID/authentication certificate, and a really good looking and functional website. What do I have? None of the above. Help!
Update: the website is live! Check it out here.
July 21, 2004
Lisa: Numbered to create a false sense of order
1. A few weeks ago I traded in my super-heavy "compact" day planner for a palmOne Zire 31 handheld. I really like it so far. Not only is it much smaller and lighter than my planner (giving me an excuse to buy a smaller purse), but it seems like a really functional, basic handheld. I mean, it doesn't have a camera or phone in it, or wireless connectivity and internet/email checking (which I don't need), but it has plenty of memory and a backlit screen, and it's easy to use. Best of all, it wasn't too expensive AND it fulfilled my (recurrent) need to buy something shiny. The one unfortunate side effect is that I have become addicted to solitaire. The moment I get on the train, out comes the handheld--and it doesn't let you cheat, either, so I feel like I have to keep playing until I win one. Hey, it's hard to fit books into my cute smaller purse, okay?
2. A cheesy but cute song about being a librarian can be listened to here. For some reason I think it would be more appealing with a youngish woman singing instead.
3. This is the car I want to buy. I want four doors, standard transmission, color-keyed sport fender and rocker panel extensions, rear window defogger, power steering, air conditioning, power door locks and windows, radio/cassette/in-dash CD player, and maybe a color-keyed rear spoiler (just because I drive fast like that). The Echo (or ECHO, since Toyota insists on spelling it with all caps) gets the best gas mileage of all the Toyotas except the hybrid Prius, at 42 miles per gallon on the highway. It's also Toyota's cheapest vehicle. Also, it is very cute and cartoony-squished looking (hard to tell from the website). I want to buy a new 2004 model right after the 2005s come out and they have to reduce prices to get rid of the 2004s. When is that, anyway? I can't decide on the color. Maybe Aqua Ice Opalescent (too trendy?), Impulse Red Pearl (hard to keep clean?), or Silver Streak Mica. I figure there's no problem with buying a brand new car with all the options I want as long as it's an inexpensive car to start out with and we're buying it with cash, right? Right?
4. The paper store closes at six on weekdays. This is unacceptable. What about people who have jobs? Do they not have paper needs?
5. Is it illegal to place tracking devices on people and/or their vehicles? Is it ethically wrong? Is it even possible? How would one go about doing so? Can said people then be tracked on my Zire 31? We all know that I am a stalker at heart. Tracking devices would save me so much trouble.
July 12, 2004
Lisa: Road Trip
Blake and I went with some friends to a cabin in southern Utah this past weekend. Can I just say that Utah is gorgeous? Here are a few pictures I took at the cabin and at Cedar Breaks National Monument (click on the thumbnails to see enlarged versions).
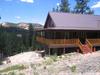


Someday I will write entries instead of just posting pictures. On the docket:
Also, HAPPY BIRTHDAY, SARAH!!!! Many happy returns of the day, etc.
July 06, 2004
Lisa: tonight is our independence night
A few highlights from the Anderson Fireworks Extravaganza (click on the thumbnails to see the full-size images):


June 29, 2004
Lisa: the freakish domesticity continues
Can I just say that I love having a sewing machine? I asked for one last Christmas, and it was totally an inspired request. The best part is that I can take clothes I already own and alter them to fit the way I want them to. I can bend them to my will! I had access to my mom's sewing machine growing up, but something about having my own just makes me want to use it more. Unfortunately (suprise, suprise), my apartment doesn't have room for a dedicated sewing space--you can tell from the pictures below that the machine is currently set up on the kitchen table. I figure that since I rarely cook, this is actually a much more effective use of the space.
Here are two projects I did recently (as usual, click the thumbnails to see bigger pictures):
I don't know WHAT I was thinking when I tried this skirt on at the store. Everything seemed fine in the dressing room, but then when I put the skirt on to go to a baby shower last Saturday morning, it was humongous. Seriously, it fell down around my hips and looked totally weird. I wore it to the shower anyway and just hoped my shirt covered the weirdness adequately, but as soon as I got home I ripped the skirt off and went to town with my sewing machine. I put two little darts in the front and two bigger darts in the back, and topstiched over all four to make them lie down right. The entire project was complete in like fifteen minutes, and I wore the skirt (now minus the wonkiness) for the rest of the day.
This dress was one of those online purchases I should have just let go, but I loved it so much that I couldn't. I ordered my usual size, and the dress that came in the mail fit perfectly on top but (since I am not a Victoria's Secret model) was too small on the bottom. I sent the dress back for the next size up, which fit totally fine on the bottom. Unfortunately, this meant the top was a little baggy, and the whole thing was made for a taller person. The belt, which is supposed to be low-slung, was really too low on my hips--I don't need to make my legs look any shorter. However, I just had my mom take in the darts on the back a bit and redo the topstiching, and I wore the dress a bunch of times. The problem is that now I have lost more weight, and the top of the dress was even baggier and just looked silly. So a few weeks ago, I decided to take in the side seams myself, since they are relatively hidden and hard to screw up. While I was at it, I got ambitious--not only did I take in the side seams, I also took in the front darts, redid the topstitching over the darts, took off all the belt loops, and reset them about an inch higher. I'm actually really happy with how it looks--who would have thought?
I highly recommend an adjustable dressmaker's dummy if you are sewing things for yourself. Pinning and measuring things on your own body is almost impossible. Mine is a Twin Fit, and it rocks. My sewing machine is a Viking Huskystar 219, and I've been VERY happy with it so far.
June 28, 2004
Lisa: a dream is a wish your heart makes
Sometimes the least exciting dreams are the ones you want to come true. For example, the other night I dreamed that Blake and I accidentally found a GREAT apartment. It was way bigger than ours, really old and cool looking, with sort of a private courtyard area. The best part was that it was filled with a ton of old, ornate, dark wood furniture that the landlord wanted to get rid of. He said we could keep whatever we wanted as long as we sold the rest and sent him the proceeds. Unfortunately, I don't think we're going to find anything like that in Utah. Maybe if we were looking for a place in Italy...
A few nights before that I dreamed that I delivered an intelligent, logical, and not at all psycho-hose-beasty speech to a certain ex-boyfriend all about how we are both adults and don't need to pretend not to recognize each other when we run into each other, which happens to be a lot since we work at the same hospital and ride the same public transportation. I tried to remember what I said when I woke up, but it was gone--which is too bad, because I could use a little help in that department.
June 25, 2004
Lisa: A few items of varying importance
1. I am wearing my "World's Best Grandma" shirt today, which nobody seems to think is funny but me. Maybe it's because I live in Utah--do people think it's possible I really could be a grandma? Whatever. I think the shirt is funny, and besides, I look hot in it.
2. Molly, Blake, and I are getting more and more serious about our trip to the British Isles (is that capitalization correct?) next summer, which I think I have mentioned before. I am totally excited. Molly and I went to Europe together in college, and we did the whole giant backpack, youth hostel, Eurail Pass, five countries (and ten cities) in three weeks thing. This would be different. This would be hotels and quite possibly a rental car. This would be seeing things we want to see, not just things we feel we are obligated to see because they're famous or important (although seeing the famous/important things has its merits). Anyway, the planning is half the fun, so we're starting to research costs and things we might want to see. If you have any suggestions, please comment! My assignment is to look for books and movies with a historical (fiction or non) slant set (and/or filmed) in the British Isles--you know, to get us in the mood.
3. Talking about going on a trip next summer has led to a lot of talks on future plans in general. Blake graduated in May and has been looking for jobs, and I graduate in August. There's just a lot of change coming up for us, I think. Within the next year, we (Blake and I) would like to:
All those things are kind of a big deal, but I am suprisingly not freaked out. Maybe it's not real enough yet.
4. I am thinking about quitting my job and applying to be a substitute librarian at both the city and county library systems. My theory is that between the two systems I would be able to get plenty of hours, and the people at the libraries would get to know me, making me more likely to be considered if any librarian jobs ever open up. I wouldn't get benefits, but hopefully Blake can get benefits through his new job (which is still nonexistent at this point). I need to research how many hours I could realistically expect to get before making a real decision. Any thoughts?
June 18, 2004
Lisa: Well, we didn't have cable!
OK, I know these quizzes are usually lame, but this one (based on 80s song lyrics) was actually really fun. I thought I was doing well until I saw my crap score.

See if you can do better! (Via Going Jesus.)
June 17, 2004
Lisa: Fine. Pick your OWN freaking colors!
I put up a new stylesheet today (obviously). Sarah thinks the yellow is "vomitous," but I kind of like it. All three of our readers are expected to vote in the comments. That means YOU!
June 14, 2004
Lisa: Schooled
I finished my comprehensive essay exams last night (WOOHOOOOO!!!), which means I am almost done with the Capstone Experience of my master's program. The other main component is a leadership project, which I'm basically done with. I just have to have one more meeting and then write about what I did.
In case anyone's interested in my project (or indirectly my lack of postings lately), here's what it entailed:
I made 15 story sacks for the library of the Young Parents Center, which is an alternative high school for students who become parents and want to bring their children with them to school. The sacks each contain a few related books, some activity items, a sheet with more activity ideas and tips on reading to babies, and a bunch of reading lists and brochures from the county library system. I took pictures of a few of the sacks this morning to include with my write-up, so you get to see them too. (Click on the dealy-hops to see the bigger thingummies.)
Outside

Inside
By the end of the week, my write-up will be done and turned in, and that means no more Capstone! I just have to finish out summer semester (three classes) and then I graduate in August. In Vegas. Yeah, it will be the hottest--but also the funnest, right? If you know of any fabulous yet affordable hotels, please let me know.
June 09, 2004
Lisa: Mackerelly
If you could use an hour's worth of suppressed giggles, check out these Weight Watchers recipe cards from 1974. (Via Cockeyed.) The funniest part is the comment next to each card in the tour. Seriously, I had to flee from my office to the bathroom to hide my suppressed giggling shame.
June 03, 2004
Lisa: dorkbot (not just for dorks anymore?)
Nerds and normal people alike should check out this article (via David) on dorkbot, a group that meets near Colombia to talk about "doing strange things with electricity." Any group that has presentations titled "Fire-Spewing Vacuum Cleaners" and "Things That Might Fly if You Put Enough Rockets on Them" is OK by me.
June 02, 2004
Lisa: Next up, carrot jello!
Last Sunday, I played at a Music and the Spoken Word broadcast with guest artist Donny Osmond. Donny. OSMOND. And for the first time, I actually thought he was...cute (for a 46-year-old). I have never been more a part of stereotypical Mormon culture than at that moment. Click the thumbnail below for a bigger picture.

Anyway, I offered the piccolo player twenty bucks if she would ask Donny to sign her boobs. No go, though--she said it would take a lot more than that to be worth getting kicked out of the orchestra (which she undoubtedly would have been). But, come on! Donny would have signed her boobs--that's got to be worth WAY more than $20.
May 28, 2004
Lisa: Goodnight, Sweet Prince
I finally got around to watching the series finale of Angel on my TiVo last night. Putting it off was allowing me to pretend that the show wasn't over, but that only works for so long. Anyway, the ending of the episode was excellent and sad--and I thought it was very appropriate for a show that was always much darker and more adult than Buffy (which ended with an apocalypse being averted and Buffy traipsing off to Rome). The last scene closes on Angel, Spike, Illyria, and a mortally wounded Gunn facing off hopelessly but heroically against thousands of demons. (Molly, it might be difficult for us to keep up that "Angel becomes human and marries Buffy" fantasy.) I guess the ending is still technically open--but I have to say the odds are pretty highly stacked against the Ministers of Grace (even by Kill Bill standards).
Blake (bless his big, tender heart) came up with an alternate ending:
After they start fighting the demon hordes and we fade to black (the episode's actual ending), we reopen outside a house in a sunny neighborhood in a world that is obviously a better place. Inside the house, a bunch of kids are clustered around a seated old man. "Grandpa Spike, Grandpa Spike! Tell us the story about the heroes!" And that's the end. See? Just as open-ended, just as heroic a battle, but with a tiny smidgen more hope. Okay, a big smidgen. Thank you, Blake.
And thank you, Mutant Enemy, for eight years of great dialogue, lovable characters, kick-ass fight scenes, and yummy Angel goodness. I will never forget that leather pants and smoking = evil.
May 25, 2004

Lisa: Dream a Little Dream of Teeth
Yesterday, Matthew Baldwin of defective yeti talked about the "teeth falling out" dream, which I have mentioned before here. He brings up the logical point that grinding your teeth at night probably leads to dreams about loose teeth. I'll have to pay attention in the future--I'm not sure if I've had one of those dreams while wearing my mouth guard.
Another tooth-related dream I've often had involves retainers (you know, dental appliances). There's someone walking up to me in the dream who (whom?) I want to impress with my intelligence, maturity, and sophistication. I try to take out my retainer (which I haven't worn in my waking life for 10 years), but a new, bigger and more cumbersome one takes its place each time I do, a la Bartholomew Cubbins. I end up talking to the person with a huge lisp and feeling like a child. Waaah!
May 19, 2004
Lisa: But we're agreed that asking your date to carry tampons in his pocket is bad, right?
Wise words from one of Pamie's recaps on TWoP:
If your boyfriend hates buying you tampons, he's an idiot. A child. A man buying tampons is a man who gets laid because there's not a man on this planet who needs tampons for himself. Get over it, guys. When a girl buys condoms it means she's totally getting laid. You should hold those tampons over your head and go, "My ladyfriend is bleeding! I am a good boyfriend! I am taking care of her! We have sex on a regular basis and we're responsible about it so now she's on her period! Yes, that's right, we had another successful month of having sex without getting pregnant! Three cheers for me and my penis!"
Skating by on other people's funny is not meant to be a trend--my last two entries notwithstanding.
May 18, 2004
Lisa: Shut up, Jess.
After last week's Gilmore Girls marathon, it's not suprising I have the show on my mind. Specifically, I remembered this article on the always-funny Fametracker. Here's my favorite bit:
In the second season of Gilmore Girls, the WB decided to throw a monkey wrench into the works of Rory's happy relationship with Dean by bringing a newer, badder boy to town. Since this boy would be a retread of every bad boy in TV history -- from Fonzie to Chachi to Poochie -- his looks and manner mattered a great deal less to the WB. Unlike the anxious call they'd placed to the Hollywood Geneticists in order to find their Dean, this time they called the lab to see whether there were any rejects lying around the stockroom that they could haul out and throw on a bus bound for the studio. The Geneticists -- having just sent a shipment of Steve Buscemi clones to UPN for Special Unit 2, regretfully reported that all they had left was a Ben Affleck experiment gone horribly awry. Its hair was too thick and gel-y, it was too swarthy, it sported a monobrow, and its Affleckian attitude was super-concentrated. Besides which, they'd siphoned off some of the raw material to make a pet chocolate lab for the...uh, lab, the Affleck clone was a great deal shorter than the original -- barely taller than Rory, in fact. "Eh, whatever," came the answer from the WB. "That'll do." The geneticists crafted the moniker "Milo Ventimiglia" out of the leftover letters from their alphabet soup, and wished him good riddance.
It's hard when you're a Dean-lover not to be a Jess-hater. At least, I assume so. I haven't really tried.
Lisa: Good News and Bad News
There is a New Urbanist development being built in the Salt Lake Valley! Well, they don't use the phrase 'New Urbanism' on their website, but as far as I can tell, that's what they are. Huzzah! And maybe they will have a library for me to work in!
Unrelated note to crabby credit union manager:
I am not unstable, irresponsible, or shifty. Of COURSE you aren't supposed to write checks if you don't already have money in your account to cover them. It's called unexpected vacation expenses (such as IKEA purchases, to be explained later)--it could happen to anyone! Anyway, that's why I'm giving you this big check right now. Yes, I wrote it to myself from another account. No, I can't drive to my other bank to get actual cash during the middle of the workday. My other account has PLENTY of money in it, if you would only CALL THEM TO FIND OUT. Sure, no, go ahead, put a hold on my check instead. I don't mind AT ALL!!
May 06, 2004
Lisa: CuteDean. Accept no substitutes!
Lisa: I JUST GOT MY GILMORE GIRLS DVDS!!!!!! I am so bringing them to California.
Sarah: WOOOHOOOO!!! Dude, do it.
Lisa: We can totally watch the whole season in a week.
Sarah: And if Blake and Dave are being boring in the car...
Sarah: Are you SOOO excited?
Lisa: I AM SO SO SO SO SO EXCITED!!!!! Best show EVER! At least, Season 1 was.
Sarah: Yeah, they talk so fast! And are so funny! And cute! And i've never seen Season 1, so i'm psyched.
Lisa: And they were so much funnier and cuter in Season 1.
Lisa: And there is CuteDean!!!
Sarah: hee
Lisa: WOOOHOOOOOOOOO
Sarah: Yeah, I never saw Dean when he was cute. Only when he was a punkass with a new girlfriend who was TOTALLY not as cool as Rory.
Lisa: Yeah. You will love him. Every girl should have a Dean as a first boyfriend. He makes guys want to be better men.
Sarah: hee hee
Lisa: How was your date?
Sarah: It was fun.
Lisa: Did you talk to David when you got home?
Sarah: No. Why?
Lisa: We were instant messaging around midnight. David thinks Armando wanted some booty. In fact, i think his exact words were "methinks he wants some booty."
Sarah: hee
Lisa: So...was he right?
Sarah: Hee. Um...damn straight!!!
Lisa: With the wanting of the booty?
Sarah: I dunno. He likes me, i think.
Lisa: Of course he does!
Sarah: So, why did Dave think that?
Lisa: Maybe because his name is Armaaaando. And he picked you up on the side of the road and got your number.
Sarah: Hee. Well, it wasn't QUITE like that...
Lisa: ROOOOOOxanne
Lisa: you don't have to put on the red light
Lisa: walk the streets for MOOONey
Lisa: you don't care if it's wrong
Lisa: or if it is right
Lisa: Hee. Just indulging in a little mid-morning Sting (Moulin Rouge remix)
Sarah: Hee. You have problems.
Lisa: yars
Sarah: So, maybe he likes me for my brilliant mind!
Lisa: Maybe he feels it's his duty to please that booty. (tm Shaft)
Sarah: Wha...? You lost me.
Lisa: Sarah: so, maybe he likes me for my brilliant mind!
Lisa: maybe he feels it's his duty to please that booty
Sarah: Why did you just copy the conversation that we had TWO SECONDS AGO??
Lisa: Because you said you were lost.
Sarah: Lisa: (tm Shaft)
Sarah: I do not know what that was supposed to mean.
Lisa: He's the black private dick who's the sex machine to all the chicks. Can you dig it?
Sarah: Hee. Well, i know who Shaft is...
Lisa: Shaft said "it's my duty to please that booty." I was just giving him proper credit.
Sarah: I see. Hee.
Lisa: Armaaaando doesn't read our site, does he? So i can post something about him?
Sarah: Dude, he's commented on our site before. So yeah, he does. But he keeps wanting to be written about, so go ahead.
Sarah: Also, are you going to continue to say his name "Armaaaando"?
Lisa: It is decidedly so.
April 30, 2004
Lisa: Fruity Labors
As part of my abrupt swing into craftiness, I decided to teach myself how to crochet. Several months ago, I started a baby blanket that (with some tweaking) actually turned out well enough that I gave it to a friend at her baby shower. Of course, halfway through that project I saw some prettier yarn at the store and wanted to make something for myself. A scarf seemed like just the thing. Since the yarn I used makes crappy-looking fringe, I decided to add a few rows on each end with a fancy eyelash yarn (just because I'm crazy like that). Here's the finished product:
I was pretty happy with my scarf, so I decided that I needed matching mittens. I found some free patterns online, and tried the one that looked most promising. Unfortunately, I had no clue about the importance of measuring your gauge, plus I was using fatter yarn than the pattern called for, and I'm naturally a pretty loose crochet-er. Of course, the first mitten turned out humongous (see below). I tried a new pattern without checking the gauge AGAIN, and it turned out huge too, so I sort of improvised (using my own creative ideas [hee]) to come out with a mitten that was basically the right size. If I ever finish the other mitten, maybe I'll post a picture.
The yarn is Lion brand Homespun (acrylic) in Windsor 341 and Fun Fur (polyester) in Sapphire 109. Both yarns are pretty to look at, cheap, and easy to find, but hard to work with--and would undoubtedly be frowned upon by yarn snobs.
Next up, I'm going to try knitting again. The last time I knitted was in Girl Scouts, and it was an abject failure. Not knowing how to cast on or off was probably detrimental to the whole process. I checked out a copy of Stitch 'N Bitch from the library, and I think I'm going to try the "Ribbed for Her Pleasure" scarf in a charcoal gray wool for my dad. I just won't tell him that's what it's called. Anyway, wish me luck!
April 28, 2004
Lisa: I didn't make it all the way through third grade for nothin'!
Today my mom sent me a link to a quiz on the placement of the US States that was actually pretty fun. I passed! It did take me four tries, but hey, who doesn't need a bit of a refresher on those ones in the middle? I'm just glad no one's testing me on Utah's counties and their county seats, which I had to memorize in fourth grade.
I would normally go into a rant here about how it would have been helpful to actually learn world geography in my ninth grade World Geography class, instead of making videos about saving the environment, but I think it's getting a bit tired. Mr. Burnham, you're off the hook.
April 27, 2004
Lisa: But officer, we were following the scientific method!
A few months ago David, Blake, and I served as judges for a local school district's science fair. The simple truth is that we got jealous. WE wanted to do a science fair project, too! Besides, we were confident that three adults with a combined 12+ years of post-secondary education would be able to show those seventh graders how it's done. Anyway, it's taken us a while to come up with a decent topic. Around Easter time, we seriously considered trying to determine how to make the strongest-shelled boiled eggs, in order to always win in egg fights. (The sacred egg fight tradition is an entry unto itself, and will be discussed no more at this time.) Unfortunately, the cost of the thousands of eggs necessary to make our experiment scientifically sound became prohibitive.
Today David sent me this link to a series of pictures drawn by an artist at various stages of an LSD trip. Not only are these drawings and the associated commentary fascinating in their own right, but they are also serving as preliminary research for our new experiment. Don't worry, we're not planning to document the effects of LSD (Hi, Mom and Dad!); we're thinking of something less illegal. Something more along the lines of "The Mind-Altering Effects of Sleep Deprivation."
Look out, science-loving thirteen-year-olds! You won't know what hit you.
April 26, 2004
Lisa: Cabin Fever
As promised, I have produced another cute yet useless picture that is supposed to look somewhat like myself. Here she is (the ribbon belt is an homage to Sarah):

I think there has been some confusion on how these are made. I started with a base (from the website I linked in my earlier entry) which is essentially a picture of a bald, naked body, and then I drew the clothes and hair on all by myself using MS Paint. Why would one do this, you ask? That is a very good question. One that I cannot answer right now. Shhh.
Caution! Non-sequitur ahead.
My friend Molly has asked me (and Blake, if he doesn't have school) to go to Europe with her this summer. I want to go SO MUCH! I don't think we can afford it, though. What's the best place to look for good prices on plane tickets?
April 19, 2004
Lisa: Great, now I'm hungry.
Blake said he would like these Snacks panties even more if they came with a matching bra labeled "dinners." I think you have to have read Raney (or be married to someone who has read Raney) to get that reference.
On a related note:
Until today, I thought that "dinners" was a fairly commonly used euphemism for "breasts" in the South, but searching online has proved otherwise. And let me tell you, a Google search involving the word "breasts" is not to be undertaken lightly.
April 13, 2004
Lisa: because I like to join every craze two years too late
I made a little picture of myself in my concert clothes after accidentally finding this website. (Thanks, Xandorra!) I don't know what to do with her yet, but I'm going to make another one immediately.

Any thoughts on what the purpose of this mini-Lisa should be?
April 05, 2004
Lisa: Happy Anniversaries all around
I meant to write an entry commemorating the one-year anniversary of our first entry yesterday, but I was too busy watching the Manor House tapes I checked out from the library. Oh, and playing in front of millions of people. (If you actually try to download the huge video file at that link, I'm playing in the musical number that's right after the opening prayer [my first appearance is at 10 minutes and 30 seconds]. Look for the flutist on the far left.) So, playing at the LDS General Conference was a little crazy. Not only does the auditorium (which was packed) seat 21,000 people, but the program is broadcast all over the world and translated into 66 languages (including Hmoob). That's approximately seven seconds of (nameless) international fame for me! Anyway, it's been one year of blogging. Yay! Thanks to the two people who have commented--that'll keep us going for a while.
Also, congrats on your anniversary today too, Mom and Dad! It's been 25 years since I brought you home from the hospital, and I think you may have even known each other for a while before that. Well, at least nine months.
March 26, 2004
Lisa: It's rude to type with your mouth full.
Sarah signed on to instant messenger this afternoon before heading down to Salt Lake from Logan, to let me know she would be a little earlier than expected to pick me up. Unfortunately, I was in the middle of cleaning my keyboard when she signed on. Since I eat lunch at my desk almost every day, my keyboard was completely disgusting. I had a bunch of keys popped off in order to clean underneath, making it almost impossible for me to type. Translations and explanations are below in bold. Sorry, Sarah! I love you!
Sarah: so i might be there closer to 2, depending on the roads.
Lisa: (hasn't noticed yet that Sarah is trying to talk) 1223134
Sarah: i TOTALLY agree.
Lisa: krd rk (keyboard broken)
Lisa: (still cleaning) 5
Sarah: okay, i'm going to be okay on money.
Sarah: i don't have a lot to spend, but we can buy ribbon or whatever.
Lisa: (now cleaning the keyboard tray, causing the number keys to smash against the desk above) 7+7+++777;
Sarah: have you been gagged?
Lisa: 77777777777777
Lisa: (puts the keyboard back down) (smiley face emoticon)
Sarah: ugh.
Sarah: what's your deal?
Lisa: (sobbing emoticon)
Sarah: WHAT??
Lisa: (reassesses available keys and tries again) typg rkm (typing broken)
Sarah: typing rkm?
Lisa: typg (Yes! Typing! You figured it out!)
Lisa: (smiling emoticon)
Sarah: typing.
Lisa: (smiling emoticon)
Sarah: dude. add vowels. it will take less time.
Sarah: is your mouth full or something??
Lisa: rkm (Okay, second word. BROKEN.)
Sarah: slkdgh;asdioghjwamcsewionsdfvads
Sarah: okay, miss no-speaky.
Sarah: i'll see you soon, i suppose.
Lisa: (Seeing Sarah's stream of letters, gets the idea to cut and paste. Unfortunately, there is no 'b'. Long pause.) sorry
Sarah: what's up with the crazy talkey?
Lisa: (Now brilliantly deduces that she can use the missing letters by poking down the little holes in the keyboard with the screwdriver she was using to pry the keys off. Long pause.) broken
Lisa: (pause) keys
Sarah: really?
Lisa: cleaning
Sarah: oh. dweeb...
Lisa: (longest pause ever) now using screwdriver
Sarah: hee
Sarah: okay, i'm gonna go.
Sarah: i'll call you when i'm close.
Sarah: LOVE YOU!
Lisa: k
Lisa: (heart shaped emoticon)
Lisa: (resumes cleaning) 05455545555555555555
So, all's well that ends well, I guess. My keyboard is now cleaner than when I got it. Unfortunately, I kind of broke the space bar when i was putting it back on. I just have to remember to space with my right hand.
March 25, 2004
Lisa: The sad, sad tale of Mr. Eggman
I took advantage of my new deluxe picto box (YAY!) to record Blake's breakfast shenanigans. He did not know his work would be photographed--he just does this kind of thing for fun.
The birth:
The death:

I guess that's all there is to the "tale"--maybe that was a bit of an overstatement.
March 23, 2004
Lisa: At least I'm in time for the DVD release...
Okay, I'm finally posting more pictures of my costume for the Lord of the Rings Trilogy Tuesday. To see the full photos, click on the thumbnails (duh).
 Back. (with Blake!)
 Front. (with Blake!)
 Back. (Outside. Yes, it is cold. Hence the silly velvet cape)
For the first entry in the saga of the Eowyn costume, click here.
March 22, 2004
Lisa: Meet me in Montauk
Do yourself a favor and go see Eternal Sunshine of the Spotless Mind. I don't think I've seen a better movie--ever. If I had the money (and no real-life obligations) I would be watching it again right now.
Edited to add:
According to the front page of the official movie site, Peter Travers of Rolling Stone thinks E.S.o.t.S.M. is "A smart, sexy, and seriously funny comedy." Um, did he even see this movie? I guess it had funny parts, and it was definitely smart, but that quote makes the movie sound like an above-average RomCom. Which it IS NOT.
March 17, 2004
Lisa: wack
Question: is it "wack" or "whack" that Angel was seen getting a spray-on tan at a strip mall on L.A.'s Sunset Boulevard?
wack
NOUN: Slang A person regarded as eccentric.
ADJECTIVE: Inflected forms: wack�er, wack�est
Very bad: walked out of a really wack movie.
ETYMOLOGY: Back-formation from wacky.
(Courtesy The American Heritage Dictionary of the English Language. Check out the pronunciation guide recording of the extreme white girl.)
Answer: "Wack" seems to be the generally accepted spelling. However, "wacky" is probably derived from the phrase "out of whack", so there's a case for "whack" being an alternate spelling of "wack." Since it's a slang term, I think the spelling is probably pretty flexible, but when writing a note to my peeps in the hizzouse, I for one will eschew the 'H'.
March 15, 2004
Lisa: The world is round? Nonsense!
There has been a lot of anti-Atkins sentiment going around lately. I mentioned here about six months ago that I was going on the Atkins diet (or rather, changing my eating patterns to fit the Atkins nutritional approach), and I have been faithfully following it ever since. So far I have lost about 35 pounds, with another five to go. I have never stuck to a diet before in my life. On Atkins, I not only look a lot better, but I feel a lot better. I have more energy and fewer mood swings (and hardly any unexplainable crying). Here's the thing--I am sick of people telling me that my lifestyle of choice is unhealthy. Atkins isn't about eating pound after pound of bacon, topped with cheese and a stick of butter. It's about avoiding processed flour, processed sugar, and caffeine. I'm pretty sure that all doctors (and garage mechanics) would agree that cutting those things out of your diet will not only help you lose weight, but also be generally healthier! And of COURSE people who go off the diet gain the weight back! Their regular diet is what made them fat in the first place!!!
OK. I'm backing away from the computer now...to eat my delicious, low carb lunch of grilled chicken with pesto and sauteed vegetables.
March 12, 2004
Lisa: Please don't take my Angel away!
Whether you read this blog or know me in real life, you are probably aware of my love for Angel, the Buffyverse, and yes, Mr. Boreanaz himself. A few people have gingerly mentioned to me Angel's probable cancellation after this season. Considering that Angel and Gilmore Girls are the only watchable dramas on the WB, I find the idea of canceling one of them absurd. I'm not the only one who feels that way, and I hope the fan and industry outcries are being heard and considered by The Powers That Be. (Is it wrong that I think a "Keep Angel Alive" blood drive is a brilliant idea?) I am staying abreast of any updates via Karen at this site, but I refuse to comment more about this until Angel's fate has been decided. (Except about the blood drive. Phlebotomists, call me!)
Come on, people! It's not like things in the Buffyverse can't come back from the dead...
March 02, 2004
February 24, 2004
Lisa: Rockin' the vote
Today the library is a polling location for the party-run Utah Democratic Presidential Preference Primary, and it has been insane. There has been a steady stream of people coming in to vote, so many that the library manager is threatening to bar the doors in one minute when voting is officially over. Democrats of Utah, I am proud of you! Thank you for still caring, even though your votes are often overruled by the vast number of people who mistakenly think that voting Republican is their church responsibility. Up with the democratic process! (And down with politicians whose faces are too small for their heads. I am not naming names.)
Also, apparently they now allow junior high kids to vote--either that or I am officially Very Old. Look for me to start using an earhorn sometime soon.
Lisa: A very pressing question
What software/hardware setup do I need in order to copy movies and tv shows from DVDs onto my PowerBook, manipulate clips from them, and burn the result onto new DVDs? My laptop has a superdrive, so I have the DVD burning capability covered. iMovies or whatever program comes with OS X won't do it. How will I ever make my librarian video clip quiz game?
February 21, 2004
Lisa: I guess I'll let them live.
Today at the library, a woman using one of the computers was frustrated because the website that she was trying to print information from was formatted such that a bunch of the text was outside the printable area of the page. I showed her how to select just the text, right click on it, and print the selected area--which of course solved her problem. (Don't worry, copyright freaks. The URL still prints on the bottom of the page when you do this from IE.) She was so happy! I quote: "I can't thank you enough for teaching me something today. You really helped me, and I appreciate it very much." She even thanked me again (By name--curse you, nametag-driven overfamiliarity!) when she left.
Here's what I learned:
Thank you, computer-using woman! You have restored my faith in humanity and in myself.
February 20, 2004
Lisa: You Decide
 Matt at X-Entertainment: "The movie that's so bad, you'll start to wonder while watching if you're typing on the devil's computer in Hell itself! It's back: The Corey Haim Video Diary."
Fans at the Hollywood Memorabilia Convention: "We can't stop talking about Corey and his reactions to us. When we get back to the hotel room, Jennifer grabs Kris's video and begins to kiss it over and over again. Kris, for fear of Jennifer messing up the signature, let alone the wearing box itself, takes the video away from her. She only returns it to Jennifer's grasp after making her promise not to kiss it anymore."
Corey himself, on the video: "You are what you wear. I wear something different everyday."
February 18, 2004
Lisa: Reason #46573 why I love the Internet
Today is all about exchanging my crap for other people's crap. I bought this commemorative Hollywood Reporter issue (Featuring Angel! For one dollar!!), and I'm selling a Gandalf action figure, some home design software, and a Nintendo 64 game storage box. You can redeem yourself for not buying my parents' coffee table by bidding on these fabulous items. Up with capitalism!
Edited to add: I also put a bunch of Blake's old Super Nintendo games up for auction (with his permission). Check it.
February 12, 2004
Lisa: Let's just get this over with.
I think there comes a time when every blogger or online journalist (journaler?) questions why he or she blogs/posts journal entries/whatever. This soul-searching process then becomes fodder for a new entry, which is inevitably very dull.
The thing is, the whole concept of having a blog at all is a bit tired. However, if you are spending time reading someone else's blog, then you are agreeing to submit yourself to whatever she wants to tell you. Essentially, I'm saying that you can read or not read this entry, whichever you choose. If you find it dull, you have only yourself to blame for the waste of time.
Disclaimer in place, here are a few of my reasons for creating and posting on Two Loose Teeth:
Lisa: bored at work how to tell
More treasures from the referral-log trove:
February 07, 2004
Lisa: My Petition for More Space
What do you do if the cars available to you are either too small or too decrepit to use for a road trip? Do you take two tiny cars, and separate the roadtrip participants into two groups? Do you try to buy and install a roof rack cargo carrier apparatus on one of the tiny cars, in an effort to free up space inside? Do you rent a larger vehicle (to the tune of $500-$700, effectively negating the practically-free nature of the road trip)?
And what if you want to stop at IKEA at some point on the trip, to purchase many flat-packed but still awkwardly-sized items?
January 27, 2004
Lisa: How can it be crass if it's written on premium 60 lb. ecru paper with a fountain pen?
I really want this set of old-school library lending cards and pockets that say "From the Personal Library of..." on them, from Levenger. They even come with a date stamp, a "Reference Only: Does Not Circulate" stamp, and a pencil, all in a little cherrywood box. (Hey, isn't Valentine's Day coming up? And isn't Valentine's day all about consumerist pressures on people in relationships...?)
Anyway, I'm wondering if book-borrowers might find the whole check-out thing a little rude. I mean, if someone offered to lend you a book, but then went through the whole process of checking it out and stamping it with the date they wanted it returned, the whole gesture would seem a little less generous. On the other hand, maybe the borrowers would find the card-and-pocket system quaint and endearing. At least I can be sure it isn't as rude as asking for a Valentine's Day present.
Edited to add:
Fred Flare is offering a similar set. Don't worry, everyone, I didn't get either set for Valentine's Day, so you can still get one for me. (Phewf!)
January 24, 2004
Lisa: I can tell this is going to rock.
While I was working on the information desk today, I looked up a few things for myself, too:
Checked out:
Run Lola, Run
Put on hold:
All About Eve
The Garden of the Finzi-Continis
Living in Oblivion
Lord Peter: a collection of all the Lord Peter Wimsey stories
Buffy the Vampire Slayer: the album
The Pixies: Bossanova
The Best of Morissey
Party Girl
My list doesn't stand a chance--I think this is the best job ever.
January 20, 2004
Lisa: Perhaps more sleep is in order.
Today is a blech day. I don't know what is behind this blechiness, and therefore I don't know how to fix it. Should I self-medicate with delicious, comforting food (or Diet Coke)? Should I buy the Alias Season 2 DVDs and enjoy the associated temporary capitalistic euphoria? Put my nose to the grindstone and appreciate the sense of accomplishment that comes with increased productivity? (HA!)
I feel like complaining. I want to rant about people who have irritated me. Unfortunately, a few people from my real life know about (and therefore could potentially read) this website. I certainly wouldn't want anyone I know to find something about themselves and then have to hate me, Harriet-the-Spy-style.
It doesn't help that today after work I have to go to the library for my internship. I mean, it should be fun (as fun as unpaid labor can be), but I just want to go home, put on pajamas, and watch Buffy with Blake. And I haven't even gotten to try out the new sewing machine I got for Christmas! At least tomorrow I get to go to art class. (singing) Art class! (/singing)
I think I'm going to use the small burst of positive energy I got from remembering about art class tomorrow to head down to the cafeteria. Luckily, they sell sweet life-giving nectar in giant 32 oz. cups.
January 16, 2004
Lisa: No Experience Necessary
I've been messing around (but looking very important and productive) on Zazzle, designing dorky t-shirts. I highly recommend creating some of your own, especially if you are more creative and talented/less dorky than me. If you want to see the Lisa originals, keep your expectations low and click on the picture below:

Once your design is done, you can order any shirt style and color that you want. Now go! Create!
January 13, 2004
Lisa: Excuses
I didn't get up and exercise this morning before work, because I was still shaken up by the airplane-crash dream I had had earlier. Seriously, this was a very detailed and disturbing dream! Not to be put away lightly before going about my usual routine!
Here's what happened. I was on a plane, arguing with Will Smith because he owed me some money. The Fresh Prince was trying to pay me in some kind of international airplane money, which was like a long tape on a spool, perforated into inch-long chunks that each represented a different amount of currency from various countries. Will was showing me the spool, and trying to convince me that if I tore off the amount he owed me, I would be reimbursed in my own currency by the airline upon deplaning. At some point during this conversation, I felt a tug on the spool, looked across the aisle, and realized that the tape had come unwound, gotten tangled around a female passenger's neck, and then snaked its way out of the plane through a crack in the wall, where it had presumably come in contact with a burning airplane part of some kind (an engine?). The tape was on fire AND was strangling this poor woman in a grotesque and overly prolonged manner while the surrounding passengers sort of tugged on the tape ineffectually.
Anyway, there was more violence, and then some crashing, and scooting along the runway on a broken piece of airplane wing, and a taxi ride to an apartment in India that I had no memory of living in. How could anyone exercise after that?
January 08, 2004
Lisa: Far beneath the ship, the world is mourning
I believed (and was responsible for perpetuating the misconception) that Major Tom was a real astronaut, and that the David Bowie and Peter Schilling songs described a real event until about two months ago. I was sure that the existence of two songs by different artists about the same story was inexplicable if the story wasn't true. I was wrong. Unfortunately, now that I have so rudely been "brought to earth" (Ha. Ha?), I find that I wish Major Tom had been real. Hey, it was a poignant and touching story, a la The Abyss! It was a trajedy that so gripped the world that songs were written about it!
Sob. Moving on now.
Lisa: I think he has a point
How could I not love D-Bo, when he says wacky stuff like this:
Waterfalls...they're so mesmerising - they're very weird, man. They have this water voice talking to you, "Come and jump in!" And I'm like, "No, I don't want to jump in". But it's saying, "It's so clean and nice, you'll be fine!" But I'm like, "No I won't be fine! There's rocks underneath you!"
-- David Boreanaz, quoted here.
December 31, 2003
Lisa: Yes, I am a huge nerd. Why do you ask?
If you want a sneak preview of my Eowyn costume before I post my own pictures, you can check me out here on The One Ring. If I look a little disturbed to have a complete stranger taking my picture, well, that's because I am.
For the next entry in the saga of the Eowyn costume, click here.
December 30, 2003
Lisa: This means something
I had a very strange dream last night that combined all of the following elements except one. Ten points if you guess which freaky thing I didn't dream about.
December 23, 2003
Lisa: The best use I can think of for a Foreman.
I knew there was a reason I was reading mimi smartypants's archives instead of facing up to my adult responsibilities.
Does the George Foreman grill come with a money-back guarantee? If so, it would be good to grill a Stretch Armstrong doll on it and then send the whole mess back to the manufacturer, and write a cover letter saying it just started to smell funny and didn't work. And then they could open up the grill cover to find Stretch's smashed melted blond-weightlifter body inside. ("Well, I think I've found the problem.")
Lisa: It's the thought that counts
One of the other flutists in the Orchestra at Temple Square and I were interviewed (and photographed) for the Music and the Spoken Word website. I'm not sure how long our interview will be up; it looks like it's one installment of a "behind the scenes" series.
I thought spotlighting us was a nice gesture, but unfortunately, they called me Julie Smith instead of Lisa Smith 3 of the 4 times my name was mentioned--talent agents (HA!) should avoid the confusion and just contact me here. Edited to add: They fixed my name! Now there is no real reason for this blog. Fate is a fickle friend.
If you look at the picture, I'm the one on the right. Feel free to ignore the gaping rictus that has appeared on my usually demure face. Apparently, music MAKES ME SO HAPPY!!!!!
December 10, 2003
Lisa: none of your business!
I hate it when the ladies at the fabric store ask me what I'm going to be making with the materials I'm buying. You always get asked twice, too--once by the person who cuts the fabric, and once by whoever rings you up. Here's the conversation from my last trip to JoAnn's:
Nosy Cashier Lady: What are you making?
Me: (mumbling) Oh, just a cape.
NCL: Oh. Is it for a wedding?
Me: Nope.
NCL: Well, is it for some other special occasion?
Me: Uh, no...(turns head to the side and talks out of corner of mouth) it's just a for a costume.
I'm sure they're just trying to be friendly, but it seems a little invasive to me. When I worked at the bookstore, we weren't allowed to comment on the books customers were buying. Plus, I've been buying fabric for a costume that I'm a little insecure about anyway. I don't want to feel embarassed or like I need to justify myself!
I also anticipate with dread the reaction of video store clerks to what I'm renting. The clerks at Blockbuster seem especially prone to praising or scoffing at video choices. Unfortunately, impressing Mr. Blockbuster Employee with a sophisticatedly artsy or cult classic tape doesn't guarantee that I'll enjoy the film. The last movie I rented that got the "great movie!" seal of approval was a terrible disappointment. Valley of the Dolls, why hast thou forsaken me? To add insult to injury, when I complained about the movie to my mom later, she insisted (in a disgusted and disappointed tone) that it was X-rated. Apparently, "all [she knows] is that when it came out, people considered it PRET-TY ROUGH." Please, Mom. Have another "doll."
For the next entry in the saga of the Eowyn costume, click here.
December 02, 2003
Lisa: Not just pretending
Things I am thinking about right this minute:
November 20, 2003
Lisa: Nobody sings in the library
If you have a second to watch a short video, and you really like books and/or musicals, you need to watch this.
On the other hand, if you want to watch a music video, but hate musicals and books, and just have a general feeling of apathy toward everything, then this is for you.
November 18, 2003
Lisa: adumbrate
Today I encountered a word that was completely new to me. To commemorate this momentous occasion, I started a new category, "Word of the Day." I'm not sure why I called it that--a lack of creativity, maybe? I don't anticipate posting a new word every day, but I promise that when I DO post a word, it will be on a day.
Anyway, here's the word:
adumbrate
1. to foreshadow vaguely
2. a. to give a sketchy representation or outline of
b. to suggest or disclose partially
3. overshadow, obscure
(courtesy Merriam-Webster OnLine)
For the five-year-old inside all of us (everyone else has one too, right?), I would like to point out that "adumbrate" contains the word "dumb."
Lisa: a heart too soon made glad
When I posted my new "Listening To" CD yesterday, I remembered jamming to Weezer back in high school. Yeah, I fancied myself pretty hardcore. (HA!)
On another not-very-hardcore note, I have often thought that Weezer's "No One Else" was a tribute to the Robert Browning poem "My Last Duchess." I know that seems farfetched, but they're smart guys. Rivers Cuomo did attend Harvard, right? It could happen.
I say, read both and decide for yourself. At the very least, the two works share a similar (albeit jealous and misogynistic) sentiment.
November 17, 2003
Lisa: Don't choose me to be your Secret-Keeper
Because it is KILLING me not to talk about this brilliant idea Blake and I have been cooking up, I am posting a few pictorial clues for Sarah to puzzle over.

I guess while I'm here, I should apologize (in case there's one person out there who cares) for being a horrible blogger. I have been trying to pass my classes, working, helping Blake apply to law school, starting a small business with my mom, and sewing my costume for Trilogy Tuesday(!). All caught up now? Good.
November 04, 2003
Lisa: Suburban Legend
From a comment on this post at Defective Yeti:
Operator: "Hello, this is on-Star. How can I help you?"
Caller: "Umm...yes...this is weird, but...Someone is calling me, saying they're going to harm my children, but I'm in the Escalade, and I need to know where they really are so I can press charges."
Operator: "Ma'am! MA'AM! Get out of the vehicle! They are calling you from the FIFTH ROW FOLD DOWN SEAT!"
Thank you, Lost Poke, whoever you are. Thank you.
October 14, 2003
Lisa: Something about that plastic jug looks familiar...
Today at lunch my coworkers and I sat about five feet away from the kid from Everwood (who is apparently named Gregory Smith). He was waiting for take-out, and--somewhat inexplicably--drinking from a gallon-size plastic milk jug. Now, Everwood is filmed in Utah somewhere, so I guess it's not that weird that we saw him. Even so, I must admit that we immediately started giggling and whispering about the show, and briefly considered asking him for his autograph. Let me clarify--this is three adult women, all married, two with children (and one of those two visibly pregnant), and only one who actually watches the show. I kept wondering "for heaven's sake, why didn't D-Bo go to any restaurants while he was here?", but looking back on today's sad events, I'm glad I missed him. If we acted star-struck in front of Gregory Smith, I can only imagine how I would have behaved in the shadow of David Boreanaz's looming brow.
October 07, 2003
Lisa: A Friend of a Friend
So, I have this friend, TOTALLY not me, who has a hypothetical scenario that she would like a little feedback on. The friend's husband really likes the Lord of the Rings movies. Hey, who doesn't? Anyway, mostly for the benefit of the husband, this friend of mine may hypothetically have purchased some exorbitantly priced tickets to see the midnight showing of the new movie AND the extended versions of the first two movies, in a wacky trilogy extravaganza. There might happen to be gift bags, prizes, and a costume contest. So here's the question. My friend, who has long been a proponent of costumes and "dressing up" in general, is considering making a Lord of the Rings costume and wearing it to this event. Would that make her the biggest nerd ever, to be mocked by friends and family at every opportunity? And if that is the case, should she care?
For the next entry in the saga of the Eowyn costume, click here.
September 25, 2003
Lisa: the glasses make the man?
A strangely hot photo of a bloody and bespectacled David Boreanaz (found here):

Click on the thumbnail for the whole picture. It was taken during the filming of The Crow: Wicked Prayer, a movie that I (somewhat inexplicably) hope makes it to the theaters. Just thought I'd share.
You know, maybe my brother was right about his glasses/hotness theory. I'll have to think about that.
September 22, 2003
Lisa: Calling all Dons
Help Sars find Don. Why? Because I would never dare to do what she is doing. Because sometimes after you meet someone, you wonder if he was the person you were meant to be with, and that now, because you feared rejection, you will always wonder. Because she is intelligent, funny, and not a stalker (as far as I know).
September 19, 2003
Lisa: Shelve the Issue
I am not very good at spacial thinking or story problems, and I have a deceptively simple question that I have not been able to find the answer to:
How many bookcases do I need?
I can count the number of books I have, but how many books fit in each bookcase? I know that books are different sizes, but even an estimate would be helpful. I can't just start buying bookcases, one at a time, until all the books are shelved. How would I know how big of a room I need to hold the bookcases that are holding my books? And what if you have a whole basement full of books, and you don't want to count them all? Say that you know you have 10 bookcases full--how many books is that?
I have found online calculators of the square footage of storage space in a bookcase, but I don't know the square footage of my books! Libraries and bookstores must have some kind of formula for this type of calculation. Why don't they publish this valuable information online?
September 16, 2003
Lisa: Demon Spawn
Is it wrong to feel vaguely jealous when you find out that your ex-boyfriend's wife is pregnant? Even if you are happily married yourself and have rationally decided not to reproduce until doing so won't reduce you to eating mayonnaise sandwiches? I am thinking yes--it is wrong. But does it happen? I think I can safely respond in the affirmative.
Update: This bizarre cloning experiment gone wrong has come to an end. The devastated parents are now sobbing over their misshapen and tiny female offspring. And no, writing it this way didn't really make me feel better.
September 15, 2003
Lisa: Concert Black
My mom and I have been talking about starting a small business. It's getting pretty serious--more so than my usual genius ideas--because we're talking about getting a small business loan and I've registered a domain name and everything.
Here's the concept. Almost all orchestras and symphonies require their female musicians to wear formal, all-black ensembles, usually skirts, that are long-sleeved and ankle-length. If you have shopped for this type of outfit before (as I have on countless occasions), you would know that it does not exist. If it's formal enough and long enough, the sleeves are guaranteed to be too short, etc. "But I'm sure there's an online clothing retailer that caters to musicians," you might say. You would be wrong. The only similar-concept site that I have found after countless hours of searching has only ugly clothes with short sleeves.
We've decided to sell separates, a la David's Bridal bridesmaid outfits. Separates are the easiest way to fit varying body types and allow for customized looks that give an overall uniform effect. There are a few caveats for formalwear that is used as an everyday uniform, though:
Anyway, I've been working on the website, and my mom's been working on how to produce these customized skirts and tops. I'll post more info as we get closer.
I have no doubts that a business of this kind could be successful. There is a huge market that is not being satisfied. But...this is kind of scary!
Update: the website is live! Check it out here.
September 08, 2003
Lisa: Vocabulary Lesson
Lately I have heard several people use the words genre and oeuvre almost interchangeably. We must put a stop to this outrage!
Here's what Merriam-Webster's online dictionary has to say:
genre: a category of artistic, musical, or literary composition characterized by a particular style, form, or content
oeuvre: a substantial body of work constituting the lifework of a writer, an artist, or a composer
Ringwald movie watchers and sci-fi readers take note!
Lisa: You mean I might have to get a real job?
I have this fantasy. No, it's not about D-Bo, you sickos! Anyway, here it is (not that you asked):
A wealthy older woman in my neighborhood has spent the last ten years aquiring an extensive collection of high quality children�s picture books. I don�t know if the books were taking up too much room in her home or if the woman developed a social conscience, but she now wants to share the picture books with the community. She doesn�t want to donate them to the public library, because she wants the collection to stay together with her name on it. Also, the nearest city library is a ten-minute drive and she would like the children in her neighborhood to be within walking distance.
Since this woman knows that I am working on a degree in library science, she wants me to investigate what it would take to start a privately owned �public� library. Of course, I would be the librarian...
After that it just gets too personal.
September 05, 2003
Lisa: Percussion...Strings...Winds....Words
Sarah: I've had the song "Poor Unfortunate Souls" from The Little Mermaid stuck in my head all morning.
Lisa: Hee. Now I'm going to have it in MY head. Thanks a lot.
Sarah: �This one longing to be thinner, this one wants to get the girl, and do I help them??�
Sarah: �Yes indeed!�
Lisa: hee
Lisa: �If you want to cross the bridge, my friend, you have to pay the toll!�
Sarah: hee
Lisa: �(Flotsam, Jetsam, now i've got her, boys! THE BOSS IS ON A ROOOOOLLLLL!)�
Lisa: �those
Lisa: POOR
Lisa: UN
Lisa: FOR
Lisa: TUNATE
Lisa: SOOOOUUUUULLLLS!�
Sarah: No one can shimmy like Ursula.
Lisa: truh
September 02, 2003
Lisa: Segue
I think this is the best conversational transition I have ever heard (courtesy Gabrielle):
"Speaking of unnattractive bulges..."
August 21, 2003
Lisa: Phantom Burritos
As you can probably tell from the book that's been in my sidebar, I've started the Atkins diet--or, as cult members call it, the Atkins "way of life." I've found that changing my lifestyle to such a radical degree has made me something of a broken record. It seems that all I think or talk about is the diet. My long-suffering friends, family, and coworkers have been subjected to ongoing prattle on what I can and cannot eat. I haven't been blogging much lately, because I've been updating my online food diary instead. Could this be the effects of brainwashing?
I've even started dreaming about the diet. I am devouring a delicious but carbohydrate-laden food (bean burritos, chips, M&Ms, etc.), when I suddenly realize it is not allowed. I become very distraught, spitting out the bite I have in my mouth and throwing the rest on the ground. Sometimes I even throw myself on the ground, cry, and pound my fists in despair at my stupidity and failure. While the foods change from dream to dream, the scenario always remains the same. Incidentally, Blake says that I chew a lot during the night.
Now, I'm not really complaining--I'd prefer to have stress dreams about food than about gory massacres. But I'd much rather dream about how thin I'm going to be. Or, even better, about Angel.
August 13, 2003
Lisa: Editor at Large
Blake and I have often thought that cities should hire an "editor at large," to remove errant apostrophes and spelling mistakes from billboards and signs--in other words, to beautify the landscape and make commuting more pleasant. Of course, I would be this editor for our city.
One error in particular has been attacking my brain with an ice pick lately. Have you seen the McDonald's commercial starring Dominic from Kindergarten Cop? In the commercial, Dominic picks up his mother and several of her mom-type friends, who all pile in the back of the minivan and start yelling their McDonald's menu selections at the top of their lungs. This is not the worst part.
The camera then cuts to a shot of an artfully tossed Crispy Chicken Caesar Salad (tm) or similar, overlaid with a woman's voice saying "If your kids could, they'd take you!" Now, I guarantee that the advertising whizzes who came up with the concept for this commercial meant for that slogan to be read "If your kids could, they'd take you!" Do we all understand the difference here?
Now, if McDonalds had hired a grammar specialist to oversee the production of all advertising, signage, etc., this disaster could have been averted! Here's the moral of the story: if you are an executive at a powerful company that wants to portray an intelligent image, contact me immediately. I'd be glad to fax over a resume.
August 11, 2003
Lisa: pie with cake stuffed inside
This excerpt is from an article on The Morning News, a site that has now been added to my favorites list. The article is the responses of a panel of "non-experts" to the question "Does Santa Claus exist?".
Here's what Joshua Allen had to say:
One time I was in a Denny�s trying to slit my wrists with my final paycheck from a different Denny�s. The female waitperson came over, lay her meaty hands upon mine. �What can I get for you?� she asked, her voice husky and intimate. �Anything,� she said. I looked up and saw the tinsel-fringed Santa hat upon her head. Tears rolled down my smoke-stained cheeks as I said: �Pie, with cake stuffed inside.� She nodded and went to get it while I dunked the paycheck into my tiny glass of ice water. Thank you, Santa Claus, thank you thank you.
August 05, 2003
Lisa: Who says romance is dead?
Pillow Talk:
Lisa: "Harrumph hum hechhuh. I think I damaged my phlegminator."
Blake: "[Beavis and Butthead-style laughter]. I ruptured my phlegmkebobble."
August 01, 2003
Lisa: homer simpson pictures the matrix
Some people say that librarians will become obsolete. Apparently, everyone in the future will search for their information on Google instead of coming in to the library. Well, people may search on Google, but I doubt they'll find what they're looking for. Believe me, there will be a need for intelligent individuals who know how and where to look in order to find the relevant answers.
How do I know this, you may ask? Why, I simply look at the search phrases that bring people to this site. Most of our readers seem to be looking for porn or information on teeth, but some of the queries are sad or just plain bizarre. Here are a few of my favorites:
July 31, 2003
Lisa: good old Ben Franklin saves the day again
I'm afraid I do not take full advantage of my Franklin Day Planner. I don't think all those structured little pages were made for goals like "become a universally revered gatekeeper of knowledge," or "don't be a fat bitch." And I just feel silly writing "7:00 - 8:00 pm: Gilmore Girls" in the appointments column. Most importantly, I think that anything of enough personal importance to be worth subjecting to that much detailed analysis is too private to be written down for other people to find and laugh at. However, I did notice several months ago that behind a tab labeled "Discover," there were pages for recommended books, movies and websites.
On a separate (but not unrelated) note, I always arrive at the video store and then promptly forget the names of all the films I've been meaning to check out. I wander listlessly around the store, watching Michael Jackson videos on the overhead monitors and making faces while reading the back of the A Woman, Her Men, and Her Futon video box.
In a brilliant and unexpected move, I decided to start writing down recommended movies in the prefabricated "Recommended Movies" list in my planner. Here are the movies on the list that I still haven't seen:
[Eternally lengthy list deleted at Sarah's request.]
Hmm. Maybe I should have alphabetized those. Anyway, if you have any suggestions for more, or disagree with the suggestions above, feel free to let me know. I'll try to remember to cross movies off when I see them.
July 29, 2003
Lisa: Single White Female
Finally, I can put my psycho-stalker tendencies to good use by implementing my own branch of "The Date My Sister Project". (This site is hilarious, but beware of Gator popups.) Don't worry, Sarah--you'll be married in no time! I'm mostly kidding, but she really could use some help finding a decent guy.
More humor from search-phrase list:
"edward furlong 2003 [is he going out with anyone]"
I have to say, Edward Furlong is not the Crow: Wicked Prayer cast member that I would choose to lust after. But, to each his own. And I like the unusual use of the brackets around that desperate, searching question...
July 25, 2003
Lisa: If you sprinkle when you tinkle...
I will never tire of reading the phrases people search for that lead to our site. Today the one that made me laugh was "do not pee on the toilet seat clip art." I looked for a picture online that I could post for our gentle readers, but even I was stumped. Good luck, lady!
Bonus image:
A good way to keep unwelcome guests from using your toilet: The clear plastic bug and barbed wire seat! Only $132!
July 21, 2003
Lisa: Vah Beach
So, I had a dream that Sarah and I were walking down a sidewalk with my mom, just talking, and she said "But don't you want to lose weight?" and we (Sarah and I) linked arms and started skipping and singing at the top of our lungs. The chorus of our song started with something like this: "It's easier to get FAAAT....than THIIIIIINNNNN!!!!!!" All in all, though, it was better than the dream with the girl whose face had no skin on it. [Shiver.] As has been previously stated, I have serious problems.
In other news, my conference in Virginia Beach (or as the locals call it, "Vah Beach") is going much better than the one in Springfield last April. We're staying in this quaint old hotel that is really charming and fun. No narsty condom wrappers on the floor, and this time Blake got to come with me! Oh yeah, and the conference itself has been good, too.
I should also add that I am writing this blog from our new and fabulous PowerBook G4! Hurrah for Financial Aid!! And for exclamation points!!!
July 10, 2003
Lisa: This Week's Sign That the Apocalypse is Upon Us
Despite being amused by The Shizzolator, I vowed never to watch Doggy Fizzle Televizzle. However, last night I found myself watching it and laughing out loud. What's next--listening to Kid Rock?
"Hatorade! Because all that hatin' leaves you parched! Now in extra strength for catty bitches!"
Lisa: Stressed much?
Here are a few more recurring themes from my dream journal:
Wow. I am not a happy person. At least there hasn't been gory violence lately.
June 27, 2003
Lisa: Because some people don't know how to use email.
If your name is Blake, click on this picture.

Thanks for letting me take the car this morning!
June 26, 2003
Lisa: Dream Journal
I've decided to start keeping a dream journal, in an attempt to figure out what's going on in my subconscious. Which reminds me of The Cell, a movie that not only features Vince Vaughn AND Jennifer Lopez, but also lets you see the subconscious worlds of three very different people. The concept was intriguing, the sets were visually stunning, and boy, did it ever freak me out.
Anyway, I definitely have a few recurring themes in my that I could analyze, and also some very violent and morbid nightmares that I would like to gain more control over. Here are a few of the themes I can think of right now: (And thanks to Dream Doctor for the interpretations.)
Loose teeth: could reflect concern about my appearance
Filthy bathrooms: suggests an emotional blockage
Huge locker rooms: possibly indicates doubts about my identity or role
So, there you have it. If I come up with anything astounding, or have any really crazy dreams, I'm sure I'll let you know.
June 20, 2003
Lisa: Hoping for a brush with...mediocrity?
Some of the more alert readers of this site may be aware that David Boreanaz is currently filming a movie in Utah. No? Just me then? Alrighty. Well, anyway, the movie is The Crow: Wicked Prayer, which I believe is the fourth in the Crow series. From what I can figure out, this movie is going to be completely and utterly terrible.
Evidence:
Nevertheless, having "Angel" in the near vicinity is moderately exciting. Here is your mission: find more information, and report back to me at 0800 hours!
Update: Alas, production on The Crow 4 has wrapped. And there was no D-Bo.
Another update: See the movie poster (which, admittedly, looks kind of cool) here.
Lisa: Stream of Bookishness
So, I was looking over the search phrases that brought people to our site, and I noticed "tooth books." As it happens, I have an excellent book about teeth to recommend: Open Wide: Tooth School Inside, by Laurie Keller. Ostensibly a picture book aimed at encouraging youngsters to brush, Open Wide is chock-full of very detailed and often hilarious illustrations that can keep even an adult (or at least me) entertained for a while.

And that reminded me of another book with a similar (but much more sophisticated) illustration style, called The Very Persistent Gappers of Frip, by George Saunders. This book is for slightly older kids with an attention span that's a little bit longer, but it's full of imagination and humor. And the moral of the story is much more important (and subtle) than "brush your teeth!"
June 12, 2003
Lisa: I figured it out all by myself.
I know nobody was eagerly awaiting this quiz except me, but here you go:

You are Rupert Giles, from "Buffy the Vampire
Slayer."
What Type of Librarian Are You?
brought to you by Quizilla
June 11, 2003
Lisa: This Week's Sign That the Apocalypse is Upon Us
This morning on the radio, I heard about this thing called Celebrity Wake Up. You pay eight dollars a month, and every morning you get a phone call with a pre-recorded "wake-up message" from your favorite celebrity. The scary part is that I would consider paying for this service.
Comment fodder: which celebrity's dulcet tones would be rousing YOU from a fitful slumber?
June 03, 2003
Lisa: Needed: One Brain
How does one go about creating one of those quizzes I have such a penchant for filling out? I want to do one called "What type of Librarian Are You?". Trust me, this is a genius idea. Anyone? Bueller?
June 01, 2003
Lisa: Angel Wanna Cracker?
Well, I had another dream about Angel last night. For someone I don't even think is very attractive, he sure shows up in my subconscious a lot. I refuse to acknowledge that I am dreaming about David Boreanaz. It is the CHARACTER! Anyway, this time I was sitting on his lap feeding him crackers. (Crackers?)
Previous dreams I have had about Angel:
That's all I can remember right now. But I don't get it. That beetly brow, spiked hair, and not-so-bright look? Not usually my thing. And hello, I am happily married! Good thing Blake isn't as disturbed as I am about all this.
[Sarah says: Lisa has a crush on David Boreanaz. Really.]
May 27, 2003
Lisa: Bullets are your best friend

You are Trinity, from "The Matrix."
Strong, beautiful- you epitomize the ultimate
heroine.
What Matrix Persona Are You?
brought to you by Quizilla
Hmm. As I was filling out this quiz, Sarah said "so, are you answering these questions truthfully, or do you want to be Trinity?" YOU decide.
May 22, 2003
Lisa: If wanting a TiVo is wrong, I don't want to be right
There are three rather expensive items that I desperately want to buy. Here they are in no particular order:
PowerBook G4 12-inch, with SuperDrive: $2000
TiVo (with lifetime subscription, of course): $650
Vespa ET4: $6000
Is it wrong to want these things so badly? Is it wrong to spend financial aid money to buy them?
Donations (HA!) are accepted through PayPal (lisa@twolooseteeth.com).
Edited to add that I also want this button maker. I don't know why.
May 16, 2003
Lisa: Sitting Pretty Enough
I think I�m about a year behind the times, but here are my results for a Google search for �lisa is� (porn results have been deleted to protect the innocent):
Lisa is a modgirl -- in pictures!
Lisa is a 76 year old lady who lives alone in sheltered accommodation.
Lisa is a Race Car Driver in the pits.
LISA is the premier organization for the globalization, internationalization, and localization industries.
LISA IS A LOSER!
Lisa is my real name.
Lisa is going to Heaven.
Lisa is no longer in a class of her own.
Lisa is forever smiling.
Lisa is the best!
Lisa is sitting pretty enough.
May 14, 2003
Lisa: New Urbanism
How did I not know about New Urbanism before? Also known as Traditional Neighborhood Design, this is about the rockin'est idea ever. "Small town" neighborhoods, with schools, shops, and churches within walking distance. Narrower streets, slower traffic, pedestrian-friendly design, and garages out of sight behind houses. What's not to love? If you want to spend all day looking at New Urbanism websites (just like me!), here's a few links to get you started:
The Thirteen Points
Congress for the New Urbanism
Meeting Street Homes - a commercial site, but with lots of pictures and info.
Update: Utterly failed to convince husband and father-in-law of the awesomeness of New Urbanism. Apparently not everyone wants to be part of a community.
May 13, 2003
Lisa: Tiny Happy Song
I am currently writing new lyrics to "Yes, We Have No Bananas!". Here's what I have so far:
YES, we have a domain name!!! We got our domain name toDAY!!!
Quietly going back to work now.
May 12, 2003
May 08, 2003
Lisa: mimi smartypants explains it all
Shamelessly stolen from mimi smartypants:
"Then I met up with S. for beer and we decided that having the body-image blues is dramatically worse for girls like me and her and, presumably, you, because we are all Bitch and Sassy and Janeane Garofolo and Beauty Myth and Kathleen Hanna, and it is so very Not Punk Rock to have the body-image blues, so then besides feeling like we are hideously deformed we also have to have this extra layer of guilt and shame and not-punk-rockness on top of everything."
Word, mimi. Word.
Lisa: THROTC, Final Report
I know people everywhere are hanging on the edge of their collective seats to find out how my hotel room saga ended. I talked to the manager of the hotel today, and I am happy to report that I was professional and firm but not nasty. The manager is simply SHOCKED that such a thing could happen! She can't understand why I didn't personally seek her out between the hours of 7 am and 4 pm and tell her what was going on! She had no idea! She has NEVER had a problem like this before! Anyway, she will supposedly be arranging a refund to my work from the corporate headquarters of the hotel chain. She tried to convince me that gift certificates would be just as good, but I didn't bite. Anyway, all's well that ends well. At least I got to watch Driven: Jennifer Lopez on VH1.
Update (7/31/03): I have never received any kind of refund. I HATE THEM.
For the first entry in this series, click here.
April 30, 2003
Lisa: Update on THROTC
Well, it did get worse from there. I called the night manager, and he came and took the grody food away. He promised to leave a note for the housekeeping staff, but he did NOT offer me another room. Later that night, I discovered that my sheet had some sort of red goo stuck on it and that my toilet seat was covered with nasty pee and pubic hair. I laid in bed on the side farthest from the goo and tried not to cry. Okay, I cried.
Anyway, I told the next manager on duty about the new problems, and he promised to add them to the note for Housekeeping. HOWEVER, when I returned from the conference yesterday evening, my sheets had not been changed and the toilet had not been cleaned! I told the night manager (the same one who was on duty Sunday night) about this oversight, and he promised to take care of it PERSONALLY, as soon as possible. Meanwhile, I went to ShopKo to buy various important items I had forgotten to pack (and the 24 DVDs!). I returned to find that nothing at all had changed in my room. I called the night manager (Jonathan) again, and he apologized profusely, calling me HONEY several times. I cannot stand people calling me honey, especially people MY OWN AGE!!!! Whew. Anyway, I asked him if he would just bring me a clean set of sheets that I could put on by myself. He did, but did not offer to put them on or clean my toilet or move me to another room. Also, he brought two top sheets and no pillowcases.
I may find myself taking advantage of the 100% satisfaction money-back guarantee. But then would my work get the money back, since they are paying for the hotel? THEY didn't have to sleep with goo!
On the upside: The conference is good and the other participants are very nice. I spent $100 at ShopKo and loved every minute of it.
For the next entry in this series, click here.
April 27, 2003
Lisa: The Hotel Room of TOTAL CRAP
This week I'm at a training conference for my job. I got to my hotel room tonight and there was old leftover takeout in the mini fridge and an EMPTY CONDOM WRAPPER on the carpet by the bed. Ew. Just ew. I hope the week goes up from here.
For the next entry in this series, click here.
April 18, 2003
Lisa: Librarian Video Collage
I want to make a video of clips from various movies and TV shows involving librarians. I'm not sure what the purpose of this video would be, but I suspect that the possibilities are endless (ha). A game played at a librarian-themed event, where you guess what movies the clips are from! Part of a presentation on the stereotypical portrayal of librarians in the media! And so forth! [Legal Disclaimer: this video would be for personal use only, not sold or distributed in any way.]
Anyway, here is a list of possible candidates for inclusion. If you think of a show I have forgotten, please let me know!
Buffy the Vampire Slayer (Giles)
Angel (Wolfram & Hart corporate librarian)
UHF (Conan the Librarian)
Party Girl
Star Wars: Attack of the Clones
It's a Wonderful Life
Foul Play (Goldie Hawn)
The Music Man
The following shows have been suggested by others. If you want to say yay or nay, or would care to enlighten me as to what these have to do with librarians, please comment!
Wishbone?
Bliss
It
The Gun in Betty Lou's Handbag
The Shawshank Redemption
Indiana Jones & the Last Crusade
Joe vs. the Volcano (I think Joe was some kind of corporate librarian at the beginning of the movie)
Philadelphia
Caveman's Valentine?
Where the Heart Is
Breakfast at Tiffany's (they may or may not have meant The Breakfast Club)
Also, I'm not sure how to go about making this fabulous clip montage once I have assembled a satisfactory list. What technology do I need? And do I have to rent all of these movies at once? I might need to find some sponsors if I have to do that. And....GO!
April 17, 2003
Lisa: my fun score is WAY down
Ok, you know how when you're playing The Sims, sometimes your sims refuse to do the things you tell them to do? For example, if their fun score is too low, they won't look for a job or read about cooking or repair the hot tub? I kind of feel like that sometimes.
Lisa: your family crest is...blue and spiny!
Blake and I were sitting in church last Sunday, and (instead of listening like a good girl) I whispered to him all about the dream I had the night before. You see, in my dream, in �Jewish church,� everyone has to sit according to matriarchal clan, and each person has a crawly sea-anemone thing representing his or her family name attached to the back of his or her chair. There was more along those lines. Anyway, when I was done, he just said �that sounds very�detailed.� Thanks a lot, Blake!
April 15, 2003
Lisa: Monotonous Doesn't Mean Boring!
I wish I had more routine in my life. Really! I long for the comfort that I imagine routine will bring. For example, Monday should be library day. Pack up the (future) little kiddies in the car with their canvas tote bags of last week�s books, and come home with a promising new batch. Maybe even check out a musical or something vaguely educational on video to watch before bed on Monday night.
On a related note, my dad always goes to the dry cleaners on Saturdays. I have accompanied him on this errand many times, basking in his company even when we couldn�t relate to each other well enough to come up with any conversation. I wish I could convince Blake to go to the dry cleaners every Saturday. Imagine�all the clothes I own, available to wear on a whim! No more late-night or pre-concert dry cleaner-related panic! On the other hand, going to the dry cleaner on a very infrequent basis has its benefits. Just the other day, the dry cleaners handed me a fetching black silk sweater that I had completely forgotten I owned! It was like Christmas.
Maybe I�ll wait until Blake and I have kids to settle into a fulfilling, satisfying routine. After all, Sarah already thinks my married life �sounds monotonous.� Plus, I�m not quite ready to give up those unpredictable, devil-may-care trips to the dry cleaner.
April 14, 2003
Lisa: Issues
Actual conversation conducted via instant messaging.
Sarah: Hee hee hee. Snoop. Funny, yo.
Lisa: I thought so too.
Sarah: By the way, did you like my latest evidence that mom is a complete crazy crazy?
Lisa: She's insane. Also, her message irritated me very much and kept me from falling asleep.
Sarah: Dude, it kept you up last night??
Lisa: It made me really mad for some reason, even though it didn't apply to me in any way.
Sarah: Yeah, it had a maddening effect on me too, but it didn't keep me up at night.
Lisa: �So, you'll be singing in choir with us, so you'll have to be in bed by 11. OK? Ok, great! See you then! Bye!�
Sarah: Yeah. Word.
Lisa: �Oh, and David can cram his CD player! He is getting a chocolate bunny or nothing!�
Sarah: Bwee.
Sarah: I don't think she meant that part like that.
Lisa: �And you will be getting treats that are sugar- and fat-free! Also, a toothbrush!�
Sarah: Hee hee hee.
Lisa: �We don't invite Lisa and Blake for Easter, because we don't want to intrude on their private egg hunt!�
Lisa: �Maybe we will invite them over if we have to, but they have to bring their own, pre-filled Easter baskets!�
Lisa: �Then we will look disapprovingly on any fattening items they include!�
Lisa: �Ok, great! See you there!�
Sarah: Hee hee. Dude, I thought I was the one with issues...
Lisa: Apparently not.
Sarah: hee

April 11, 2003
Lisa: Accessibility
So, after I voted for Cockeyed in the Webby People's Voice Awards, I got curious about the Bloggy Awards I had heard a few people mention in their weblogs. I wanted to nominate or vote for Defective Yeti, another of my favorite sites. When I searched on google, I found this page, which explained that the 2003 Bloggies had been awarded already. The winners were listed on the site, and gave me hours of browsing pleasure.
The winner for Best Article or Essay About Weblogs went to 30 Days to a More Accessible Weblog, by Mark Pilgrim. This essay (or really, collection of 30 short essays) guides even an inexperienced weblog owner effortlessly through the process of making his or her site more accessible to users with physical, mental, and technological disabilities.
Needless to say, I followed Mark's simple instructions. The Accessibility Statement for www.twolooseteeth.com can be viewed here. Hurrah for nice people!
April 09, 2003
Lisa: The Amazing Beeping Day Planner Thingie!
Ok, here�s a genius idea for an invention that I thought of a while ago but still can�t get anyone to follow through on. This idea is copyright-free, so go ahead and make a million dollars! Please just send me a prototype as a thank you--I could really use one of these.
This item consists of two sensors. One sensor is embedded in a simple silver bracelet (or another item that you would be willing to wear every day). The other sensor would be secured inside a day planner, wallet or purse. Whenever the two sensors are more than 10 feet apart, they both start beeping.
The benefits of this system are twofold. The most obvious purpose (and the most helpful to me, personally) is to keep you from leaving your day planner somewhere. If you started to leave without it, the beeping bracelet would remind you to go back, and the beeping day planner would have your friend or waitress chasing after you with it. This system also serves as a theft deterrent. A purse snatcher is likely to drop his booty if it suddenly starts beeping loudly and calling attention to itself.
If you wanted to get really crazy, the beeping on the day planner could also be remotely activated by a button on the bracelet. It would work like the �handset locator� button on a cordless telephone, allowing you to page the day planner and then follow the beeping until you find it.
I know this is technologically possible; I just don�t have the know-how. Let�s get this baby into production!
April 08, 2003
Lisa: And Hilarity Ensued
So, I walked across the hall into my old office and into this conversation: "and then he started smashing it with a rock, and he was all 'die, snake! Die! DIE!!'"
How could I talk about copy center account numbers after that?
April 06, 2003
Lisa: So Long, and Thanks for All the Fish
Once in a while it pays to pick up your little brother's book and start reading it. Here's what I read today:
"And as he drove on, the rain clouds dragged down the sky after him for, though he did not know it, Rob McKenna was a Rain God. All he knew was that his working days were miserable and he had a succession of lousy holidays. All the clouds knew was that they loved him and wanted to be near him, to cherish him and to water him."
--So Long, and Thanks for All the Fish by Douglas Adams