
April 23, 2011
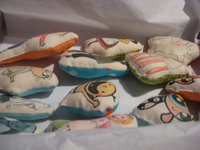
Lisa: 2010 ornament: Dita's Sleep Mask
As you probably know, Sarah hosts a Christmas ornament exchange every year. I know she still has some to show from this latest exchange, but take my word for it--the ornaments are just getting more and more awesome and we have so much fun coming up with something and then seeing what everybody else has made. Before I let it get too much later in the year, I wanted to show those of you who weren't in my swap group what I ended up making this time.
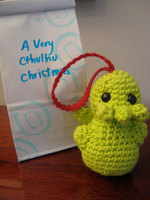
Preface: it probably doesn't mean anything to anyone but me, but for each swap I try to make an ornament that represents something that has been influencing me in the last year--either in subject matter or in technique. The first year we did the exchange, I had recently discovered knitting and was getting excited about the crafting potential there, so instead of glass balls I made little balls of yarn, each topped with a tiny pair of knitting needles and the beginnings of a miniature scarf. Our second year, there had been a LOT of discussion about zombie apocalypse preparedness plans, and I planned to buy Blake largely zombie-themed presents. A zombie ornament seemed like the next logical step. For 2009, I got obsessed with amigurumi and nerd culture, and crocheted tiny Cthulhus for everyone.
In 2010, I started getting more into vintage beauty, burlesque, and specifically the incredible Dita Von Teese. I drove away the few male readers we had left babbling on about it, and the rest of my free time sewing dresses from vintage patterns. Sarah and I and some of our girlfriends also had fun checking out a local burlesque troupe, the Voodoo Darlings. And don't tell her parents, but a certain like-minded friend and I actually went to see Dita perform at the Crazy Horse in Las Vegas. So fun.
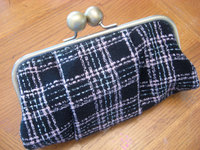
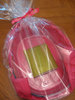
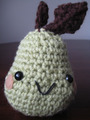
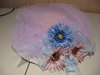
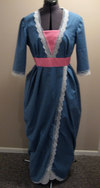
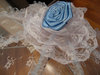
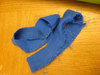
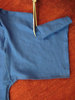
But I digress. When it came time to decide what to make for the 2010 exchange, I couldn't stop thinking about an image Dita had posted on her twitter feed, featuring her beautiful self holding up a glamorous Moschino sleep mask over her eyes. I decided (because I am possibly cracked) that miniature versions of the sleep mask would make awesome Christmas ornaments. The fact that I had a lot of the fabrics I needed already on hand made it an even more attractive option, since we were pretty broke at the end of the year.
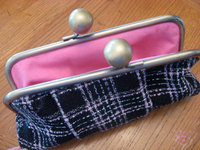
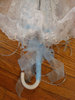
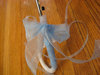
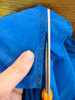
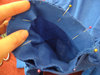
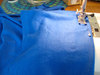
I copied the shape of the mask and the style of the lashes and writing as best I could, swapping out "Dita for Moschino" with the more fitting phrase "All I Want for Christmas." I'm sure these details were hand-embroidered on the original, but in my slacker way I substituted carefully-trimmed printable iron-ons. I decided to line the back of the mask (which you can't see in either Dita's photo or the photo of my finished product) with a dark red satin, and I stitched in little loops of black satin ribbon on each side to accommodate either ornament hooks or a longer ribbon (for practical use by the very small-headed).
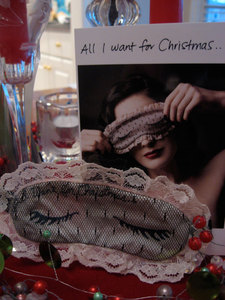
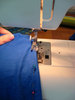
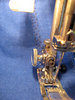
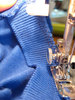
Once I had the system down and the materials in hand, I decided to make a few full-size sleep masks as well, as Christmas gifts for some of my friends. The larger version has sewn-in long ribbon tails instead of the little loops. I hope Dita would approve!
January 30, 2011
Sarah: And it's not even November
I signed up for Kendi's 30-30-30, so while I'm sifting through my closet and doing laundry to get my 30 clothing items pinned down, I thought it was about time to recap the lovely ornaments from this year's Ornament Swap.
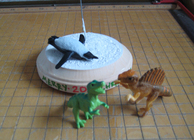
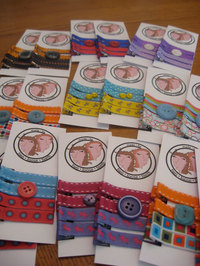
First up is Rachael, whose ornaments completely cracked me up.
Nothing says Christmas like penguins and dinosaurs. Awesome.
But tragically, Rachael's ornaments didn't make it through the mail unscathed.
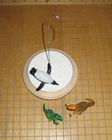
In case any of you in Group 2 were wondering why there were a few loose plastic animals in your package of ornaments, I took the liberty of keeping one of Rachael's extra ornaments (Rachael, let me know if you'd like me to send it back to you!) so that I could show you how I fixed it. It's super easy, I promise.
First I scraped off the snow from the bottoms of the little dinosaur feet. I thought it'd be best to start with a clean surface.
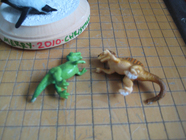
Then I glued them back in place. I used Tacky Glue, but I bet that hot glue or superglue would work well too.
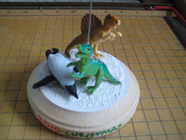
And then done! Easy fix. Thanks, Rachael! You are a sassy broad and I like you as much as you like cats (a lot).
December 28, 2010
Sarah: Bacon Pillow
Among my brother's extremely varied list of Christmas wants (everything from chain mail to socks from Wal-Mart) was ThinkGeek's My First Bacon Talking Plush. I found the idea of a bacon pillow amusing, but couldn't get behind paying $20 plus shipping for something with a face that says "I'm bacon" whenever you lean against it while watching a movie.
So I made my own version of the bacon pillow:
Which turned out to not look much like bacon at all. So I added a little embroidery to clarify things.
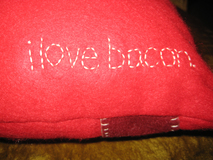
He really does. Done and done.
December 22, 2010
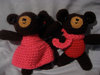
Lisa: 2009 ornament: Cthulhu
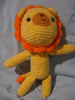
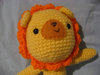
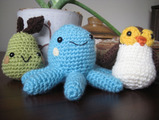
Since I'd been so obsessed with making amigurumi earlier in the year, I decided I had to crochet some for the 2009 ornament exchange.
I'd been wanting to try a pattern from my new Creepy Cute Crochet book, and some nerdy reading on the internet helped me decide that tiny Cthulhus would be just the thing.
I got started in early December, making all the pieces assembly-line style.
I find terrible/awesome movies from the past are the best to watch while crafting. Start with The Cutting Edge. Use the time when you're actually looking at the screen to contemplate the inexplicable hotness of D.B. Sweeney.
I thought when I got to assembling the heads, little tentacles and eyes and hanging ribbons and all, that I was almost done. I was wrong. Because you know what takes an excruciatingly long time? Crocheting TEN of the same amigurumi all at once. Heaps of thirty tiny tentacles, twenty tiny arms, and twenty confusingly-shaped wings can get overwhelming.
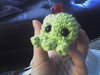
Anyway. Once the pain of construction was past, and I just had ten cute little baby Cthulhus staring up at me, I picked up some white fold-down bags and blue ink from Xpedx. The uppercase O stamp from my alphabet set was perfect for simulating sucker marks across the top, and I just wrote the theme title across that in coordinating blue Sharpie. Success!
December 15, 2010
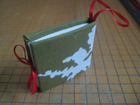
Sarah: Accordion Books
In 2008*, I made accordion books for our Ornament Swap.
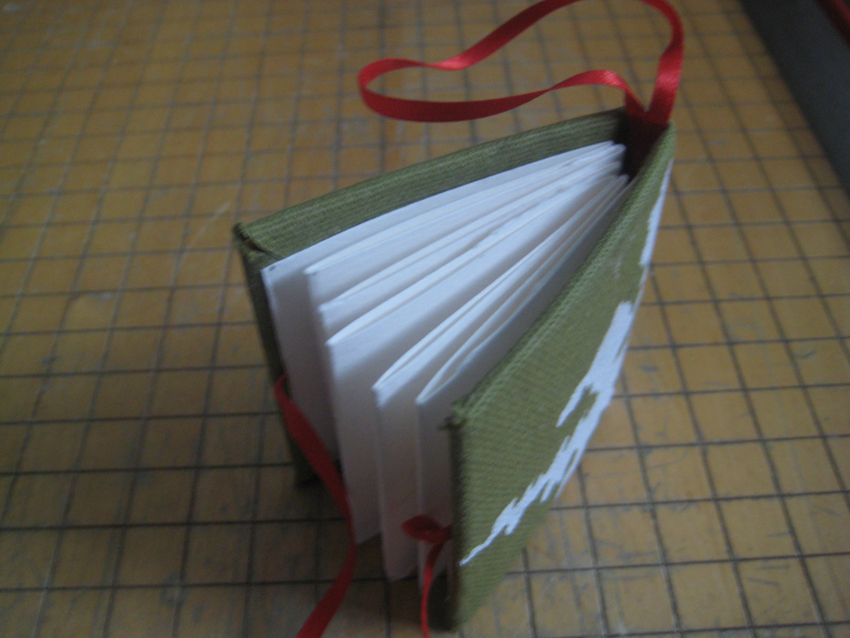
I was interested in trying my hand at (extremely rudimentary) bookmaking and thought an accordion book could have an extra layer of specialness. Let me explain:
When I was growing up, our family was once given a sort of hideous book ornament. The pages had drawings depicting the nativity story and for some reason, I was fascinated by it. The cool part of the book was that you could tie it back so that the pages were on the outside and the cover was on the inside and, when you did, the pages formed a star shape.
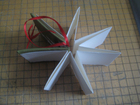
That's sort of what I was going for.
The covers of the books were made with red or green duck cloth with white screenprinted bonsai trees that I had left over from another project. Successful recycling and I thought that they worked perfectly for the books.
Ta-Da! Next up: Stay tuned for Jillian's ornaments from last year's swap.
*Yeesh, I am just a teeny bit behind here.
November 01, 2010
Sarah: Ornament Swap 2010

For the last three months, I've been living in denial that the year is passing so quickly. But, alas, I can no longer pretend that it's August, and so I am now facing the oncoming holiday season. So that must mean that it's time for the fourth annual ornament swap! I'm a bit more on top of this than last year, which will hopefully mean that we'll all have a little more breathing room for crafting this year. I know there were some late nights for some of you, and I was more rushed to make an ornament than I would like. But 2010 is the year for awesome. Trust me.
I haven't quite decided what I'm making this year. Possibly some tiny version of something in my shop, or perhaps a craft I've been dying to try. Lisa has been showing me up every year (a ball of yarn with miniature knitting needles, a zombie rising from the grave, and TINY. CROCHETED. CTHULU.), so I definitely will be stepping up my game.
Do you too want to put just one more project on your plate this year? Oh, I hope so. Here's what you do: Leave a comment below with your email address or send an email to sarah at twolooseteeth dot com and I'll send all of the details. Sign-ups will be open until November 25 (Thanksgiving) and you'll have until December 15 to make your ornaments and ship them to me (I need to receive them on the 15th, so plan your shipping time accordingly). I'll ship out packages on December 16, just in time to finish trimming your tree.
Details are after the jump. See you in a few weeks! Well, hopefully I will see you sooner. And also hopefully you will see a blog entry from me sooner. But I will bug you guys about the swap in a few weeks. Sarah: stop talking.
The guidelines:
1. Sign up for the swap by sending an email with the following information to sarah at twolooseteeth dot com by November 25th. If you leave a comment on this entry, I'll try to get in touch with you, but an email will make sure you get all of the information ASAP.
- name
- address
- email address
- you website or blog (if you have one)
(Note that when you submit your information, please submit it in this order with traditional capitalization - it makes things a little easier on my end!)
2. On November 26th you'll receive an email from me confirming that you're in the swap and containing the number of swap participants and the address to send your ornaments to.
3. Design a handmade ornament that you can create multiples of and make your ornaments. You will not have to make more than 10 ornaments, but last year's participants only had to make about 6 or 7.
4. Package your ornaments well...especially if you create anything fragile.
5. Send your ornaments to me by December 15th at the latest. Send a picture of your ornament in an email to me (sarah at twolooseteeth dot com) notifying me that you've mailed your contribution.
6. Sit back, relax and wait to receive fabulous handcrafted ornaments in the mail!
7. Once people have received their ornaments, I'll try harder than ever to post the pictures here, along with a link to your website, unless you request otherwise.
8. One last note: I'd encourage you to research the cost of shipping and take that into account when you design your ornament--lighter and more compact ornaments are cheaper to ship. I want this swap to be fun, so it shouldn't be a financial burden.
Most Common Questions
What sort of materials can be used?
Anything! Knit, sew, letterpress, gocco, paint, draw, sculpt, glaze, cut-out, glue, weave, blow glass, weld... whatever you do or want to learn how to do.
Who are the other people I'll be swapping with?
The other people on the swap list you receive on November 26th.
Will my address be on the internet anywhere?
No. I'll be the only person who will receive your snail mail address and email.
What about shipping costs?
You are responsible for the shipping cost to get your ornaments to me. I will pay for the ornaments to be shipped to their final destination. Please check your local shipping rates ahead of time if you are wary of the cost of shipping.
What if I don't receive my ornaments or I can't send my ornaments out on time?
Please email me if you're having problems meeting the deadline. Depending on the situation, I may hold back the packages for a day or two or ship your ornaments separately. But please try to have them done in time! If you don't receive a package from me with all of your ornaments, let me know and I'll track it down. Anyone who participated in the past who did not follow through and ship an ornament, however, is not invited to participate again. That sounds scarier than it is: last year everyone was angelic and on time.
Do I need to have a blog to participate?
No. If you have a blog, that is lovely, but absolutely not a requirement to join the swap.
Other questions? Email sarah at twolooseteeth dot com and I'll respond as quickly as possible.
October 26, 2010
Lisa: last minute costume, awesome edition
Maybe you weren't planning on dressing up for Halloween this year--a valid if unexciting choice--but then you got invited to a costume party. Don't hide at home because it's too late to put together a cool costume! If you can work a space, future, Tron, or robot costume into the party's theme, you're in luck. This might be the easiest and cheapest costume I've ever put together, and it's well within your capabilities.
1) Find a basic black dress and some black boots you already own.
2) Buy a couple of different colors of masking tape at the hardware store (usually in the paint section) and a roll of SILVER METAL-LOOKING TAPE from the area with the heating/duct repair stuff. This metallic tape is a dress-up miracle.
3) Lay your dress flat or put it on a dress form if you're a sewing dork like me, and start laying out the tape in a cool pattern. You might want to sketch out your design idea on paper first, to avoid repositioning tape too much. In my experience, the masking tape isn't sticky enough to move around, and the silver tape is just sticky enough that you start worrying about the dress underneath if you're taking it on and off.
4) Tape up your boots, too, IF YOU DARE.
5) Check the dollar store for some glow-stick necklaces or bracelets. I taped some sticks to the side of a headband so they'd stick up out of my hair, too.
6) The dollar store is also a good place to find chunky, brightly colored plastic earrings and bangle bracelets. Intermix them with glow-bracelets.
7) Dig out a pair of black tights with no holes and put on the whole shebang. DONE.
I didn't even look lamer than everyone else at Val's Future party! Proof here and here. I now pass this costume secret on to you. See you at the Tron Legacy premiere?
August 08, 2010
Lisa: One on One
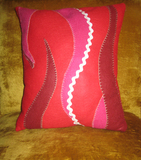
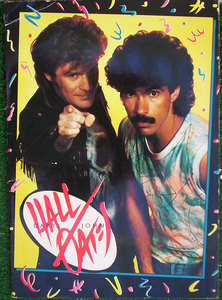
Since I was trying out No-Spend Month back in June, I wanted to come up with a birthday gift for Angie that I could make myself, using mostly materials I already had on hand. One passing reference to Hall & Oates later, an idea was born.
Here's the finished product: A throw pillow proudly featuring the head of Daryl Hall on one side and John Oates on the other.
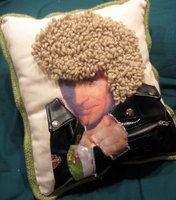
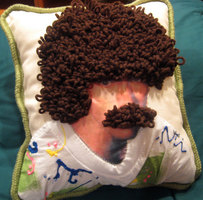
Here's the inspiration image I started with, showing our boys in all their '80s glory.
I tried to convince Sarah she needs a pillow with Horatio on one side and Grissom on the other, but she just said she hated me. Confusing. Anyway, more info on the process after the jump!
What I bought for this project:
needle punch tool (really too small for regular yarn)
Build-a-Bear faux leather Harley Davidson jacket
green lipcord trim (from JoAnn's but not online)
tiny iron (which I am taking back because it was crap and wouldn't get hot enough to transfer anything)
What I had on hand:
off-white cotton duck
printable iron-on transfer paper
poly batting
plain white toddler-size t-shirt
puffy paint
two colors of brown yarn
needle & thread
pencil
fabric glue
embroidery hoop (borrowed from Sarah)
Order of operations:
1. I traced the shape of the hair/mustache areas on the back of the fabric, and started needle punching according to the instructions included in the needle package. I adjusted my technique a bit to compensate for working with yarn that was clearly much too large for the type of needle I had. (There was more yanking the yarn through the needle and holding it in place in the fabric than there should have been.) After all the yarn loops were in, I drizzled fabric glue over the back side of those areas to anchor everything in place.
2. I splatter-painted Oates' t-shirt, and tracked down a mini leather jacket to cannibalize for Hall. I cut them apart, strategically placed things as best I could, and sewed them in place. The idea was to use three-dimensional materials to emulate a two-dimensional representation of a three-dimensional object, and it was as confusing as it sounds. I wanted to use the real neck trim, zippers, placket, etc., whenever possible.
3. After throwing out the idea of sewing with actual human skin I tried to iron the skin-area transfers directly to the spaces between the hair and clothing, and failed miserably. I had saved the iron-ons for last because I knew from washing Nora's pillowcase that the surface of the transfers can crack and scuff if they're messed with too much. This left me with some very tiny areas to try to press bits of transfer into (Sorry about your ear, Hall. It's not happening.). I thought a miniature iron was the answer, but it didn't get hot enough. My final solution was to iron the face and hand transfers onto another piece of smooth cotton fabric, and then to sew that fabric into place on the pillow sides. The look isn't as seamless as I wanted, but I think it works.
4. Once the pillow sides were done, I pinned the lipcord trim to one of the sides and sewed it in place with a zipper foot. (You might want to check out a tutorial like this one for more step-by-step help.) Then I pinned the two halves of the pillow together, right sides together, and sewed around the edges again, catching the lip part of the lip cord between them. I left a bit open for turning, flipped the whole apparatus right side out, and stuffed it with batting. Use small chunks of batting for a smoother pillow. Then I hand-stitched the opening. Voila!
May 05, 2010
Lisa: Plain Jane or Wacky Sailor?
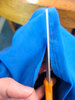
I just finished making a skirt with this gathered skirt tutorial from Gertie's NBfBS (which I just wrote about a few days ago). I'll put more details about my skirt-making process after the jump, in case anyone is interested, but meanwhile I have a pressing question for you. A question involving yellow-gold rickrack. And a hot pink petticoat.
Exhibit A (sorry about my ironing issues):
Exhibit B:
I love the skirt's shape with the petticoat, but is it too much? Is it the pink that makes it too much? Or is the pink only too much when combined with the yellow rickrack? I like the rickrack because it is oversized and fun and gives some interest (and a little more fullness) to the plain skirt, but does it make the previously perfectly serviceable skirt tacky and ridiculous? I was thinking about a possible nautical vibe to go with the navy skirt fabric, but then I sort of lost control in the aisle with the gold trims. Maybe the idea of trim is good, but the yellow rickrack is the wrong choice. Or maybe I should whole-hog it and throw some gold anchor buttons on the waistband. I fear I have completely lost perspective.
Here comes the important bit: please help me end this madness and vote on your favorite version!
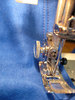
One of the things I liked about Gertie's tutorial is that there is no pattern to buy! You just take your measurements and plot out some rectangles. Finding some 100% cotton fabric that was around $1/yard (in the form of a clearance duvet cover at Bed Bath & Beyond) meant an almost free sewing project--the exact opposite of my usual undertakings.
Since I didn't have much to lose, I also tried out a few new techniques and used THREE specialty presser feet for my machine! Of course, I jumped on the opportunity to use my new ruffler foot. I had to fiddle around with it quite a bit and do some test ruffles to figure out what settings I needed to make the 80 inches of skirt fabric gather down to the length of my waistband, so it probably didn't save me a lot of time in this case. I wrote down the settings on my homemade pattern, though, so next time should be faster.
I also used the blind hem foot that came with my machine for the first time (following this great tutorial). My hem isn't as invisible as I'd hoped, but I think that was the fault of user error and some possibly sloppy folding. When I get the technique down better, I think it will make a very professional-looking blind hem --great for big skirts that would take yards and yards of hand-hemming.
Lastly, I pieced together my crappy-but-functional plastic invisible zipper foot and set in a zipper with this tutorial. I don't know what crafters did before the internet.
Verdict: I will DEFINITELY be making this skirt again. It's a relatively easy, flexible project, with a cute, wearable result. Maybe next time I'll use a border print or a stiff taffeta.
April 23, 2010
Lisa: dress-up closet
We finally rented Fantastic Mr. Fox to watch with Nora last week, and I fell in love with (among other things) Mrs. Fox's yellow housedress. I love a vintage dress anyway, but this sunny a-line one with a tiny apple print, an adorable stand-up collar, and an empire waist is so tailored and cute. Add a brooch and a few pockets on the front for holding art supplies, and it's pretty much perfect. You can see more of it here at Design*Sponge and The Handmade Experiment.
Thinking about retro dresses naturally sent me back to the Bettie Page Clothing site again, where I've spent a lot of time lately hanging around looking at the same dress over and over. I bought this Bettie Page dress a while ago, and the quality is great. I've gotten a ton of compliments on it, too. Does it strike anyone else as odd that one of the only places I've found consistently modest but stylish and sexy dresses is a costume/fetish shop? But I digress. The only thing keeping me from just buying the rust-colored one has been the price--but when I got an email about a birthday sale (enter code BETTIE BDAY at checkout for 25% off until April 26!), I couldn't resist. Plus, Blake bought it for me as an early Mother's Day gift because he's a model husband.
Searching around for housedresses online inevitably led me to A Dress A Day, a blog about sewing and wearing vintage dresses and skirts that's been around for years, and has the clunky old blog template to prove it. For some reason I decided I absolutely had to read all the archives at once, which is taking a bit of time. I'm enjoying them a lot, and getting more excited about sewing along the way. I even posted a page on the Vintage Sewing Patterns Wiki about the pattern I used to make my dress for Jillian's funeral party, which I still intend to blog about someday...AHEM. I do wish the A Dress A Day archives were heavier on dresses Erin has sewn herself, and lighter on adorable vintage patterns that have already been snapped up by someone else. Mostly because I keep falling in love with things I can't have.
I can (AND WILL) have this reproduction Vogue pattern Erin mentioned, though! Isn't it cute, with the little pintucks on the front and the big, full skirt? I started thinking about possibly making it in a cotton batiste, and some idle online searching led me to Belraf Fabrics. I clicked around on some prints I liked, and almost before I knew it, free batiste samples were winging their way to me through the postal service. For free. DID I MENTION THE SAMPLES WERE FREE? Very exciting.
Another site I dug up in the Dress A Day archives is StyleShake, which I want to try out next time I'm feeling flush. They let you design your own creation (using quite a few possible building blocks) and have it made-to-measure for around $100. StyleShake would be great also for outfitting your bridal party in coordinating dresses that they can customize to work for their tastes and body types (sort of the next logical step from the David's Bridal-type mix-and-match styles). I really like how the photo galleries range from classic to trendy to avant garde.
Somewhere along the way, I came across Vintage Vivant. I don't know why it surprises me when I find something new (to me) on the internet. Don't worry, I got caught up on all her archives, too, so it's just like I've been reading all along. Amelia wears vintage every day, and has a tattoo by Sunny Buick, the artist behind the most beautiful tattoo of all time. Looking at the hilarious embroidered slips Amelia sells in her Doublespeak Etsy shop also got me thinking about vintage slips as a possibly awesome lengthening tool/modesty enhancement for some of my summer dresses that are a tiny bit on the short and skimpy side. Or maybe I could make or embellish something with my new ruffler foot. You non-sewing, non-wearing-used-underwear types might be interested in the (possibly-Utah-based?) Vintage Hem.
Thinking about vintage slips reminded me of What I Wore Today (which I used to read religiously a few years ago, and just now figured out is still going strong!). Whether or not you like Kasmira's style, I think she'll make you braver about wearing dresses and skirts, pairing unexpected pieces, layers, and colors together, and remembering to accessorize.
Speaking of accessories, it's really hard for me to look at dresses without thinking about the shoes that will go with them. You know how everything on Modcloth goes out of stock in about two seconds? Well, I did manage to grab these green retro mary janes with cone heels a few weeks ago that would be perfect with a vintage silhouette. Unfortunately, now I've also seen these even more retro metallic Veronica t-straps with even cone-ier heels. Of course, Modcloth is sold out, but maybe I will save my pennies and order them right from the Seychelles website.
Unless I'm too busy donating all my time to orphans and developing new mathematical theorems, of course. Or cleaning the baseboards (in a dress). You never know.
February 14, 2010
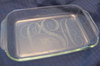
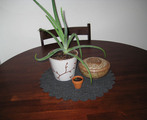
Lisa: platters
This is the present that ate Christmas. I don't know why I thought it would be really easy and inexpensive to just throw together a homemade pottery platter for my mom, but I did. Ignorance is bliss, I suppose. On the bright side, 1) she ended up with two awesome and humongous new platters to replace some that went missing from storage, 2) I got to force Sarah to spend a lot of quality time with me, and 3) I think I also get to check "sign up for a pottery class" off my list.
We didn't get any photos of our first session at Rob's studio, but we spent a lot of time squeezing blocks of clay into flat slabs, cutting those into circles (for the platter bases), turning those on the wheel and scraping them with spirals, extruding more clay for the platter sides through a homemade template on a Play-Doh contraption on steroids, and painstakingly attaching and shaping the sides on the wheel.
Rob let the platters dry in his studio for a while, and then put them through their first firing. He's the one who suggested we make two platters--so that if one broke in the kiln, we'd still have a presentable gift for my mom. Rob's watchful eye and expertise kept them both intact, and I brought the fired platters home and sanded off the really rough bits.
Back at the studio for our second session, Sarah (who was really sick and a SUPER good sport) and I chose glaze colors and mixed them up by hand while Rob built a form to hold the glaze. It had to be wide and deep enough to dip the platters into, but also maximize the amount of glaze we had. There is a surprising amount of math that goes into pottery-making. We wiped down the sanded platters and carefully dipped them into the glaze. While they dried a bit, we bailed gallons and gallons of glaze back into the garbage-can storage bins. Then we had to scrape the glaze off the bottoms of the platters so the final firing wouldn't melt them onto the kiln shelves.
Rob put in one more marathon kiln session, and the platters were done! Dishwasher, microwave, and even oven safe (if they would fit in any of those handy devices), and large enough to serve four children...to a table of hungry child-eating monsters.
Thank you again to Rob Marquardt, scientist-artist, and most of all to Sarah, for helping me to bring even my most ridiculous ideas to fruition.
February 13, 2010
Lisa: A New Hope
These gifts for the Bossyths (that is, the beautiful and talented Valori, Jillian, and Kaeleigh) were some of the first I decided to make, and some of the last to be completed.
Perhaps I should explain. 1) The Bossyths love costumes more than anyone else I know. It only seems fitting that they should own one of the most iconic costumes in cinematic history. 2) I happened to already own a very large quantity of stretchy white fabric. 3) Everything is more awesome in multiples. 4) Wouldn't you enjoy arriving at Yuma Haus for a night of relaxed TV viewing, only to find one of the ladies of the Haus lounging in a Leia costume? I thought so.
I improvised a pattern using this helpful advice. I ran into trouble twice: once when I cut the neck openings too large (right after being specifically instructed not to) and again when I left the main body of the dresses twice as wide as they needed to be. Thank goodness, both errors were ultimately fixable.
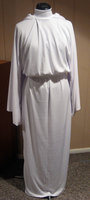
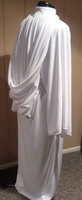
You can see photos of the ladies good-naturedly wearing their costumes here (on Facebook) or here. E made the awesome matching belts as her gift.
February 12, 2010
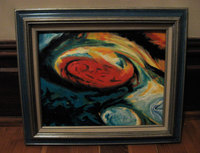
Lisa: The Eye of Jupiter
For my dad the painting lover, I finished an oil painting I'd started years ago. I realize that space photos are an odd subject for such a traditional medium, but something about the layers of gases around the Great Red Spot reminded me of brush strokes in thick paint. Plus, I think images that seem abstract but are actually realistic are kind of fascinating--maybe I can attribute this to reading Powers of Ten a million times as a kid. Whatever. Clearly I cannot articulate this in an intelligent fashion. Also, sorry about the lackluster photography.
February 11, 2010
Lisa: purse-frame clutch
I meant to post a few blog entries while we were in Spring City for the holiday weekend, but my cute family (and The Invention of Lying) seemed more important at the time. What do you say we just back-date a few entries, get caught up, and pretend this little lapse never happened? It's not like these Christmas present entries aren't already a month or so overdue.
I decided to make Marci a purse-frame clutch, which is another project I've been wanting to try. I started with this purse frame, which I found on Etsy. It was very important to me to find a kiss lock frame with really big balls. I tried looking around for patterns, but I guess there's just too much variation between purse frames for a traditional pattern to work. I ended up following this tutorial from U-handbag instead.
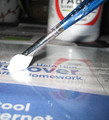
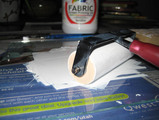
The black-and-pink tweed fabric and the pink lining were from my stash, and I bought some Platinum Bond Super Fabric textile adhesive to glue the fabric into the frame. The gluing was by far the trickiest part of making the clutch. Tucking the fabric edges into the frame opening and getting them all to stay in at once without getting gobs of glue on the rest of the purse fabric was almost impossible. I ended up using the end of a metal knitting needle to poke things into place, and luckily the dry adhesive can be picked off the metal frame.
A little more thoughtful measuring would have served me well here, and I think I also made things more difficult for myself by using thicker fabrics and by deciding to add pleats at the last minute--which made things thicker and even less exact. The sewing involved is really easy, though, and a clutch is really small and can be finished quickly. Quick projects are so satisfying.
February 10, 2010
Lisa: a cunning piece of knittery
I made this Jayne hat for my "shiny"-saying baby brother, Jeff. He didn't recognize it immediately, which I admit did make me doubt his Firefly credibility a tiny bit. I didn't doubt the accuracy of my hat replica, because it is clearly spot-on.
I used this pattern from Heather on Craftster, which was great. The yarn is Lion Brand Homespun, which is the only thing the regular craft store had that was rustic enough and came in remotely close colors. I've had a lot more knitting experience since last time I used Homespun, and besides, I'd say the yarn is easier to knit with than to crochet with. When you're crocheting, you have to figure out what loop to pick up from the mass of your project; with knitting, the loops are already on the other needle. Anyway, since I had to buy three huge skeins, I probably could have spent less on something more appropriate at the real yarn store, but whatever. Jayne hats for everyone!
I am notoriously bad at checking my gauge, and I was worried the hat would turn out way too big for Jeff's smallish head, but it was perfect! Jeff even humored me by wearing his hat everywhere he went for an entire week.
February 09, 2010
Lisa: feather earrings
Mallory's present was another one that could have used a bit more advance planning.
I decided to make her some crazy feather earrings, which I've seen around a lot (most notably on the lovely Jillian), and I just grabbed some feathers and jewelry findings at the craft store and figured I'd wing it.
Luckily, I tried on my first attempt before wrapping the box. They went down past my boobs. Now, maybe if you are Jillian you can pull this off, but I think it takes a certain level of commitment to accessorizing that I wasn't sure Mallory shares.
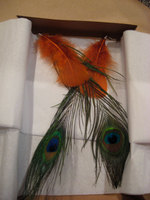
I ripped them apart carefully, cut the feathers down several inches, and tried again.
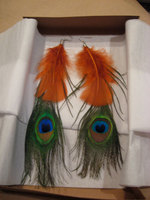
I didn't take a photo of my third version, which came about because I remembered after wrapping the box that Mallory doesn't have pierced ears. Luckily it's not hard to swap out hooks for clips. If you think about these sorts of things before you start, though, this project is easy and fun! I want to make a pair for myself now.
February 08, 2010
Lisa: Laptop Sleeve
You guessed it, another homemade Christmas gift! This one was for Angie.
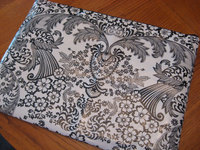
I had been thinking about making a minimalist laptop sleeve, possibly out of pretty oilcloth, when I saw this one at geeksugar. It was exactly what I had in mind: no fussy extra handles or pockets, just a pretty, slim sleeve that would protect her computer inside another bag.
I struck a deal with Sarah for a piece of her Corner Station oilcloth (which is exactly the same print as the one in the article photo), and purchased a pattern I thought would work from Etsy.
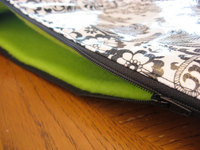
The pattern--from Sew Spoiled--is great and easy to sew. Overall it was clear to follow and I was happy with the result. I had hoped the sleeve would fit a bit more closely, like the one in the geeksugar photo, but it has a little extra room. At least this way the zipper won't scratch Angie's laptop, and maybe she can throw in a little makeup bag for cords and a USB key or something.
My major regret is that I didn't choose more carefully the way the pattern would lie on the outside of the sleeve. I was so concerned with using as little of Sarah's oilcloth as possible that I didn't even check what the squares I was cutting would look like. On the pieces I ended up with, the arched feather motif seems VERY prominent (and Angie is not what I'd call a bird lover), and it's a little off-center as well. She was really sweet about it, though.
I do like the bright green fleece I found for the lining, and using fleece kept things cushy and protective--minimizing the repercussions from my not interpreting "heavyweight fusible interfacing" in the instructions as "fusible fleece."
Like a lot of my handmade gifts, I'd say this project was generally a success, but there are a few things I would change if I were to make it again. If only I could have made rough drafts for each present! Angie (or anyone else) if you want a revised version in time for the next appropriate holiday, let me know.
February 06, 2010
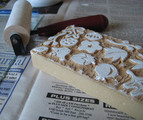
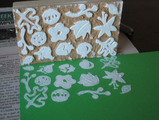
Lisa: book character softies
When I saw this adorable dollhouse created for homemade versions of Lauren Child's Charlie and Lola on sweet sweet life (found, I think, via loobylu), I knew Nora had to have her own Charlie and Lola dolls.
From there, things sort of spiraled out of control, and she had to have dolls of ALL of her favorite book characters. Luckily, it was harder than I thought to find suitable illustrations of the characters standing alone in a way that made sense for being cut out of context and played with, so the pool was limited a bit. As you can see, we also ended up with George and Martha, the Powerpuff Girls, Cynthia Rylant's Hansel and Gretel, the No No Yes Yes baby, Alice, Eloise, and Edith.
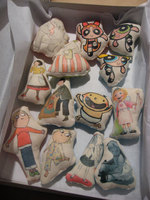
I scanned the images from Nora's books and printed them onto iron-on sheets with my hand-me-down inkjet printer. I love printable iron-ons, and I always keep a few packs on hand for spontaneous crafting. Anyway, I ironed the images onto some off-white cotton duck I already had--actually some old curtains from our first apartment--and cut matching backs out of a set of coordinating fat quarters from JoAnn's. You can kind of see the backing fabrics in this photo:
Nora's still a bit young for her dollhouse, but I think the more she gets into it, the more these little softies will get used. And they're so easy and inexpensive to make, I could always add in a few new ones (maybe even mini family members?) to keep things interesting. Plus, I like the idea of incorporating her favorite characters but retaining the feel of a homemade, non-commercial toy.
February 05, 2010
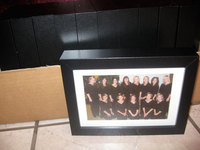
Lisa: Voices Photos
I got to use my trusty photo printer for another Christmas gift--framed photos for the girls in Voices, the a cappella singing group I joined in the fall.
First, I made Sarah come to one of my concerts, with the express purpose of taking a workable photo. She performed admirably. Next, I got rid of red-eye and flash-related clothing transparency in Photoshop (very advanced for me).
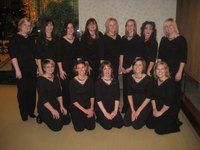
I printed the photos and put them in a bunch of RIBBA frames I found at IKEA, and finished them off with a raffia bow. Easy peasy--and I think it definitely counts as homemade.
February 04, 2010
Lisa: Model Train Photos
My father-in-law has the most incredibly intricate display of model trains that I have ever seen. He has been asking me for years to take photos of all his trains and the little vignettes he has set up, so that he can a) have a record of them in case he ever dismantles things or starts over, or b) write an article about them for one of his beloved train magazines. This Christmas, I finally got around to taking the photos, and I think it was the most well-received gift I have ever given.
I took about 70 photos and burned them onto a CD, printed around forty of the good ones on my little 4x6 photo printer (my second-best Ebay purchase ever), and got three 8x10s of my favorites printed at Walgreens. Bam. Favorite daughter-in-law of all time.
Not bad for a point-and-shoot, right? Plus, it was fun to take the real version of these photos.
February 03, 2010
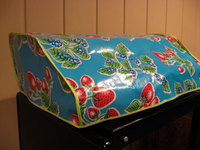
Lisa: Typewriter Cover
Another homemade Christmas gift for you today!
For Sarah, my favorite typewriter collector, I made an oilcloth cover for one of her typewriters. She and I bought matching IBM Selectrics at a county surplus sale, so I had a handy-dandy model at home to try the cover on.
My Selectric came with the standard-issue black plastic cover, which was getting brittle and had a few holes in it. I carefully cut the original cover apart along the seams and used it as a pattern for the new one.
The oilcloth is from the adorable Corner Station, and I'd been hoarding it until I found the perfect use. One precut piece was exactly enough for two typewriter covers--so I made one for Sarah and one for myself to replace the one I cut up.
The super-skinny bright green binding tape is from JoAnn's. I forgot to bring a scrap of the oilcloth with me to match when I picked it out, but I think I actually like it better less matchy-matchy.

February 02, 2010
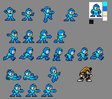
Lisa: Nintendo Cross-Stitch
My decision to make all homemade Christmas gifts this year gave me a great excuse to try some crafts I've been wanting to do and to finish some projects I'd started and then abandoned. These cross-stitched dish towels featuring classic Nintendo characters are one of the latter.
With their matching gun-arms, I always thought Samus and Megaman would make a cute couple. Almost as cute as Angie and Dave, who I hope are using these towels in their tiny kitchen right now.
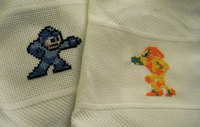
The cross-stitchable towels are available at most craft stores--I think I got mine at JoAnn's. For the patterns, I found pictures of the 8-bit characters online (try looking for game packaging and sprites), and then mapped the pixels out on graph paper as best I could.

December 06, 2009
Sarah: Next up, a tiny Hansel and Gretel
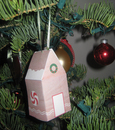
All this talk of ornaments got me thinking about folding up a paper ornament. So I designed a simple little gingerbread house to put together over a cup of cocoa. The print out and instructions are over at Anderson Ink.
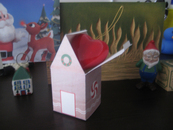
I also posted a blank version of the house, in case you want to color in or design your own.
November 19, 2009
Ornament Swap 2009

Edited to add: Hey guys, I heard I was having email problems. A new email address is below. Thanks for your patience.
Oh hi. Good to see you again. It's been a long time. Are you feeling the holiday spirit? I have the constant urge to eat stuffing, so it must be time for Thanksgiving. And then, all too soon, it will be Christmas, which means: Ornament Swap! Are you in? Do you have the urge to cut and paste, stitch and glue? Glitter with wild abandon? I hope so.
I'll be ringing in this year's third annual ornament swap by finally posting photos of last year's contributions. They were cute, and everyone played nice, and then I slacked off. That's what happened.
But! I hope you'll still be game for crafting something this year! We'll be doing things a little differently: to prevent the occasional swap no-shows that we've had the last two years, I'm asking everyone to send their ornaments to me. Then you'll get one big package from me with all of the ornaments. It'll be fun! And if any of your ornaments aren't reciprocated by other swappers (which would be sad), you'll get them back for your own tree or to use as extra gifts (which would be happy!). I feel so much more at ease with this. I hope you do too.
So here's what you do: Leave a comment below with your email address or send an email to miss dot sarah dot anderson at gmail dot com and I'll send all of the details. Sign-ups will be open until November 28 and you'll have until December 19 to make your ornaments and ship them to me (I need to receive them on the 19th, so plan your shipping time accordingly). I'll ship out packages on December 20, just in time to finish trimming your tree.
Details are after the jump. Let me know if you have any questions. You are looking really pretty this year. Have you lost weight? Started using a new conditioner? Tell me your secret. In the comments.
The guidelines:
1. Sign up for the swap by sending an email with the following information to miss dot sarah dot anderson at gmail dot com by November 28th. If you leave a comment on this entry, I'll try to get in touch with you, but an email will make sure you get all of the information ASAP.
- name
- address
- email address
- you website or blog (if you have one)
(Note that when you submit your information, please submit it in this order with traditional capitalization - it makes things a little easier on my end!)
2. On November 29th you'll receive an email from me confirming that you're in the swap and containing the number of swap participants and the address to send your ornaments to.
3. Design a handmade ornament that you can create multiples of and make your ornaments. You will not have to make more than 10 ornaments, but last year's participants only had to make 5 or 6.
4. Package your ornaments well...especially if you create anything fragile.
5. Send your ornaments to me by December 19th at the latest. Send a picture of your ornament in an email to me (sarah at twolooseteeth dot com) notifying me that you've mailed your contribution.
6. Sit back, relax and wait to receive fabulous handcrafted ornaments in the mail!
7. Once people have received their ornaments, I'll post the pictures here, along with a link to your website, unless you request otherwise (for real this time. I promise).
8. One last note: I'd encourage you to research the cost of shipping and take that into account when you design your ornament--lighter and more compact ornaments are cheaper to ship. I want this swap to be fun for all of us. This shouldn't be a financial burden, it should be a chance to craft and get to know each other a little bit.
Most Common Questions
What sort of materials can be used?
Anything! Knit, sew, letterpress, gocco, paint, draw, sculpt, glaze, cut-out, glue, weave, blow glass, weld...go nuts.
Who are the other people I'll be swapping with?
The other people on the swap list you receive on November 29th.
Will my address be on the internet anywhere?
No. I'll be the only person who will receive your snail mail address and email.
What about shipping costs?
You are responsible for the shipping cost to get your ornaments to me. I will pay for the ornaments to be shipped to their final destination. Please check your local shipping rates ahead of time if you are wary of the cost of shipping.
What if I don't receive my ornaments or I can't send my ornaments out on time?
Please email me if you're having problems meeting the deadline. Depending on the situation, I may hold back the packages for a day or two or ship your ornaments separately. But please try to have them done in time! Anyone who participated in the past who did not follow through and ship an ornament, however, is not invited to participate again. If you don't receive a package from me with all of your ornaments, let me know and I'll track it down.
Do I need to have a blog to participate?
No. If you have a blog, that is lovely, but absolutely not a requirement to join the swap.
Other questions? Email sarah at twolooseteeth dot com and I'll respond as quickly as possible.
September 14, 2009
Lisa: Chocolate Blues
While I was on tour with the Tab Choir, I visited a tiny yarn shop in Independence, Missouri. I bought a skein of pretty yarn as a souvenir, with the idea of knitting something for Nora when I got back home.
One skein isn't really a whole lot of yarn to work with, but it was just the right amount for one of the adorable hats from this book. I finished it off with pompoms made out of some of my leftover Ribby Cardi yarn for a little contrast.
I know, making a winter hat in July seems incongruous, and the photos of it on my sundress-clad daughter look ridiculous, but this was a quick and fun little project that got me kind of excited about knitting again. Maybe someday I'll even sew the zipper into my otherwise-totally-finished Ribby Cardi!
August 27, 2009
Lisa: buy my love
If get your Two Loose Teeth fix via a blog reader, you might not have noticed the new Etsy widgets in our sidebars. Instead of featuring books and movies that we never got around to updating, you can now see items from Sarah's Anderson Ink shop on the left, and the Two Loose Teeth shop (currently selling some toddler hair barrettes I made) on the right.
Mostly, I started making some clips for Nora, and then they were so fun and easy to make that I got carried away and made more than one two-year-old could ever wear. So. Do you know any little girls who need a set?
June 06, 2009
Lisa: The package goes in the box. If you know what I mean.
Some of you know that I work from home, sending out orders for my online business. Thanks to the wonders of Click-N-Ship, my mailman can pick these packages up right from my front porch (for free!) and get them on their way. When I first started doing this, I bought a clear plastic tub with a flip-up lid to corral the slippery Tyvek envelopes and protect them a bit from the weather. It worked fine, but wasn't doing much for the aesthetics of my front porch.
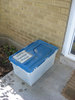
I clearly needed a prettier, more permanent solution. Here's what I came up with:
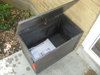
As a side bonus, the mailman and the UPS/FedEx guys deliver my incoming packages into the box now, so they're out of sight and protected from the elements as well. Materials and more details after the jump!
Base:
After a little research, I chose this unfinished toy box from JoAnn's. The size was about right, and I wanted a box with a hinged lid that could be raised from the top with one hand. On Sarah's excellent recommendation, I painted the pieces before assembly.
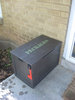
Paint:
Our new porch light, house numbers, and mailbox are all either oil-rubbed bronze or black, so I chose Hammered Dark Bronze Rustoleum spray paint. Supposedly, it's good for outdoor applications. I primed it first and put on a coat of clear polyurethane after I stenciled the letters on. I always forget how much spray paint it takes to cover something--this project used three full cans each of primer and paint.
Lettering:
I had some leftover Fern Green Patio Paint, which I already knew was weather resistant. I used that with some 2-inch block letter stencils I picked up at JoAnn's. I'm kind of a slapdash stenciler, but I figured that gives the box a pleasing rustic quality.
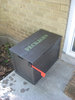
Flag:
I bought a mailbox flag replacement kit with an official-looking jaunty red flag at our local Ace Hardware, and adapted the instructions a bit for screwing it into wood rather than a thin metal box. As you can see in the photos, the flag is attached on one side, so when it is 'raised' it sticks out past the front of the box. So far, it seems to be an adequate system for signaling the mailman that there are items to pick up.
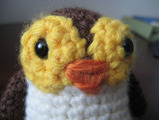
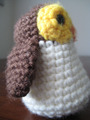
June 04, 2009
Lisa: Seriously Cute Crochet
My animals aren't as cute as Sarah's, and my photos certainly aren't as well taken, but I had to share the little amigurumi I've been making from the same book.
Next up: zombies, ninjas, and robots...unless I go with E's suggestion of crocheting Nora an amigurumi Halloween costume, in which case I'd better get started now.
May 15, 2009
Lisa: Etch a Sketch
Inspired by this glass-etching tutorial on isly (found via this post on How About Orange), I decided to try etching a giant monogram (I love monograms) into my 9x13" pyrex baking dish, in an effort to make it prettier and more identifiable at potlucks.
All the background info and steps are after a jump, but here's the finished product:
I liked my finished baking dish so much (and making it was so fun and easy) that I made another one for my cousin as a wedding gift, this time with just the first initial of her new last name.
I admit, I felt a little less cool when I went to church the next Sunday and found out that etching glass baking dishes is our upcoming Enrichment Night craft. But at least mine isn't made with one of those precut vinyl dealies, right? It's still a LITTLE bit original. So. Want me to make one for you?
Materials:
Computer
Printer
Monogram font
Adobe Illustrator (or whatever program you like)
Scotch tape
Transfer paper
Contact paper (any pattern)
Pen/pencil/stylus
X-Acto knife (sharp)
Spatula
Armour Etch
Pyrex baking dish
Kitchen sink
Silicone baking spatula
Note:
The bottle of Armour Etch says it won't etch Pyrex, so I did a little checking around on the internet. I'm glad I did, because I learned two important things that were backed up by several sources. First of all, you CAN etch Pyrex (at least some Pyrex) with Armour; you just have to leave it on for 25 minutes instead of five minutes. Also, you don't have to just wash the etching cream down the sink when your time is up, like it says on the packaging--you can scrape it right back into the bottle and use it again! A little bit is still lost, but you'll get a lot more use out of that expensive bottle.
Steps:
1) I downloaded monogram kk from Abstract Fonts, and tooled around with my initials for a few minutes in Illustrator. I was hoping the large size of the monogram would make it feel more modern, and that at first glance it would just appear be a pretty, scrolly design. Once you've decided on your design, reverse it before printing. You'll be etching on the bottom side of the dish (so little bits of food don't get stuck in there), and you want to be able to read the letters through the bottom of the dish when it's right side up.
2) Cover the bottom of your baking dish with whatever leftover contact paper you have on hand (keep the color of your contact paper in mind when you're buying transfer paper). Use your fingers or the back of a spoon to smooth out any bubbles. Be especially careful around the logo/raised lettering on the bottom of the pan. It's REALLY important to make a good, smooth seal.
3) Tape your reversed, printed out design on top of the transfer paper, which is on top of the contact paper. Trace over all the edges of your design with a pen. Remove the transfer paper and printout from the contact paper carefully, making sure your entire design got transferred.
4) Use the X-Acto knife to cut out all the pieces of your design that you want to be etched. Don't stress out about this part. I hate cutting with an X-Acto knife on paper and cardboard, because the knife always goes zinging out of control at the worst possible moment and ruins my design, but it's really super easy to cut contact paper on top of glass.
5) Brush on the Armour Etch in a very thick layer (enough so it's opaque and white), making sure you cover all the parts of your design. Don't let any sneak off the edges of your contact paper outside the design area. Also, be REALLY careful not to get any etching cream on your hands, because that stuff burns like a mother. Set your pan (carefully!) aside and time it for 25 minutes.
6) Once time is up, take your pan into the kitchen and very carefully scrape off the etching cream with a silicone spatula. Scrape it into a funnel and then back into the jar, or just right into the jar if you're coordinated enough. Then peel off the contact paper and throw it away without gooing yourself with the creamy side. You might need your X-Aacto knife to catch the tiny bits of contact paper--you don't want to be scraping them up with your fingernail and get Armour Etch under there. Then rinse off the rest of the etching cream on the pan with water. Wash your hands and arms really, really well with soap and water, and wash the pan again really thoroughly before cooking in it.
April 23, 2009
Lisa: little bunny foo-foo
It's hard for me to believe that Nora is old enough to notice what holiday it is and if she gets a present or not--but this Easter I had to face the facts. Since Blake is pretty adamant that Nora not eat candy (and I'm not actively encouraging candy either), I wanted to make her something special that would take her mind off the lack of chocolate eggs.
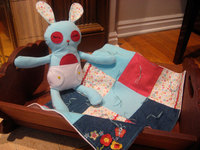
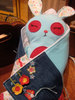
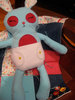
This little bunny and her blanket are made from this mmmcrafts pattern, and are sewn from some of Nora's outgrown baby clothes. I used felt, embroidery floss, thread, and batting that I already had, so the only thing I had to buy was the pattern itself. My dad made the cradle for me when I was a baby, and my mom brought it up from Spring City so that I could pass it on to Nora. Tender, right? I mean, I'm pretty much the best mom ever, wouldn't you say?
Unfortunately, my gift was completely overshadowed by the gigantic pink plush Care Bear Nora's great-aunt bought her at a secondhand store. Nora tackled that thing and rolled around with it, giggling and giggling. Ah, well. Maybe this sleepy little homemade bunny will grow on her.
(Oh, and if you think that I copied Angie's wedding colors, then all I can say is thank goodness I have people with really good taste to mooch off of.)
March 31, 2009
Sarah: Prezzies!
I signed up with a friend via Facebook for a gift exchange-type concept. I've posted my gift offer here, and I hope I can make something for you. Just leave a comment below with a valid email address so that I can get your mailing address, if necessary. I hope I can make something you'll enjoy!
The first five people to respond to this post will get something made by me. This offer does have some restrictions and limitations so please read carefully:
1. I make no guarantees that you will like what I make, but I promise to make something that I would like!
2. What I create will be just for you, hand crafted with love.
3. It'll be done this year (2009). Beyond that, you won't know in advance when it's coming.
4. I will not give you any clue what it's going to be, unless I can't resist teaser photos or hints on the blog. It will be something that you can hold, not an online gift. It may be weird or beautiful. Or both. Or neither. It might be baked goods. It might be a mix CD or an art project or something made with yarn. I reserve the right to do something extremely strange, if inspired to do so.
6. In return, all you need to do is offer up a note of your own and make something for the first 5 to respond to your note.
7. If I don't have your mailing address, I'll send you an email. Just leave a comment below. I can't wait to surprise you!
March 15, 2009
Sarah: Finger cozies, part two
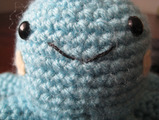
Fine, you caught me.
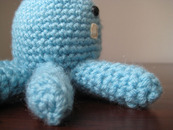
I wasn't making finger cozies at all, but creating many blue legs for a small crocheted octopus. He now belongs to Shantelle's new baby, which is a very good thing. This amigurimi thing is a sickness. Once you start, you can't stop.

Hi. My name is Sarah, and I can't stop crocheting.
February 16, 2009
Sarah: Happy President's Day
Are you saying you didn't spend the long weekend crocheting finger cozies?
Weird.
November 26, 2008
Lisa: Lil' Brudder
When Dave and Angie got married, my parents placed upon my humble shoulders the responsibility of creating a life-size cardboard standup of our brother Jeff. He's in New Jersey until next summer and couldn't be at the wedding in person, so I guess they figured this was the next best thing.
Step one: have Jeff take an appropriate picture of himself.

Step two: purchase a ready-made cardboard standup of George W. Bush. Trust me, these things are readily available, reasonably inexpensive, and a lot easier than obtaining your own large-scale printout and backing it with cardboard. Print out Jeff's face and neck (No, really, W's neck is gross and not at all fitting for a healthy 19-year-old boy.) on a regular color inkjet printer and cut them out. You might want to do a few of slightly different sizes, so you can try them out and see what proportions look right. Glue Jeff's head over George's, getting creative with the neck and collar area. Slap a printout of Jeff's missionary badge on the jacket for verisimilitude.
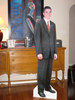

Step three: scare yourself silly on at least five separate occasions, walking into a darkened room and catching a glimpse of Jeff's lurking, shadowy form out of the corner of your eye. Put a bright face on things when you help your baby girl become friends with an uncle she's never met.
Step four: secretly hope your parents get the standup out for Thanksgiving dinner tomorrow.
Miss you, Jeff! I can't wait to hug the real thing.
November 21, 2008
Sarah: Last Chance!
As a reminder, today is the final day to sign up for this year's Ornament Swap. Follow the link for instructions on how to sign up.
If you're here in Salt Lake City, it's also the last day to see Lisa in The Music Man. Lisa and the rest of the cast have done a great job. Congratulations, Lisa! The play starts tonight at seven. See you there!
November 15, 2008
Sarah: Swap 2008

Hey you guys, is anyone up for a second annual ornament swap? Leave a comment below with your email address or send an email to sarah at twolooseteeth dot com and I'll send all of the details. Sign-ups will be open until November 21 and you'll have until December 19 to make your ornaments and ship them to their new homes.
Details are after the jump. Let me know if you have any questions. Everyone that participated last year did a lovely job and I hope they'll sign up again. They also have insight into how last year worked out, so I hope they'll let me know if they have any suggestions. Thanks!
The guidelines:
1. Sign up for the swap by sending an email with the following information to sarah at twolooseteeth dot com by November 21st. If you leave a comment on this entry, I'll try to get in touch with you, but an email will make sure you get all of the information ASAP.
- name
- address
- email address
- you website or blog (if you have one)
(Note that when you submit your information, please submit it in this order with traditional capitalization - it makes things a little easier on our end!)
2. On November 23rd you'll receive an email from me containing the addresses and email addresses of the other swap participants to send your ornaments to.
3. Design a handmade ornament that you can create multiples of and make your ornaments. You will not have to make more than 10 ornaments, but last year's participants only had to make 5 or 6.
4. Package your ornaments well...especially if you create anything fragile.
5. Send one of your ornaments to each person on the list of other swap participants by December 15th at the latest. Send a picture of your ornament in an email to me (sarah at twolooseteeth dot com) notifying me that you've mailed your contribution.
6. Sit back, relax and wait as you receive fabulous handcrafted ornaments in the mail!
7. Once people have received your ornaments, I'll post the pictures here, along with a link to your website, unless you request otherwise.
8. One last note: I'd encourage you to research the cost of shipping and take that into account when you design your ornament--lighter and more compact ornaments are cheaper to ship. I want this swap to be fun for all of us. This shouldn't be a financial burden, it should be a chance to craft and get to know each other a little bit.
Most Common Questions
What sort of materials can be used?
Anything! Knit, sew, letterpress, gocco, paint, draw, sculpt, glaze, cut-out, glue, weave, blow glass, weld...go nuts.
Who are the other people I'll be swapping with?
The other people on the swap list you receive on November 23rd.
Will my address be on the internet anywhere?
No. The only people who will receive your snail mail address and email are the people you are swapping with.
What about shipping costs?
You are responsible for shipping costs for your ornaments, just as others are paying to ship ornaments to you. Please check your local shipping rates ahead of time if you are wary of the cost of shipping.
What if I don't receive all my ornaments or I can't send my ornaments out on time?
This is why you will be given the other swappers' email addresses. Please email your group with any concerns directly. You may also post announcements on this blog entry or email me if you have any questions concerning your group. Anyone who participated last year who did not follow through and ship an ornament, however, is not invited to participate again. If you're running late, let us know and ship your ornament when you can.
Do I need to have a blog to participate?
No. If you have a blog, that is lovely, but absolutely not a requirement to join the swap.
Other questions? Email sarah at twolooseteeth dot com and I'll respond as quickly as possible.
November 14, 2008
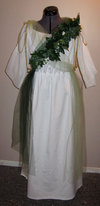
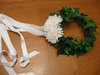
Lisa: in the best Delsarte tradition
I told you! I get to wear a ridiculously decorated faux toga. Bonus: I decorated it while watching the season finale of Mad Men with Sarah. Now, every time I put it on, I think of Don Draper. Unfortunately, every time I put the toga on, I am also reminded that my hair will never be as awesome as Joan Holloway's.
In action:
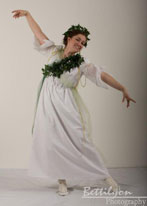
We open tonight! I hope I see you there.
November 12, 2008
Lisa: I don't know how I can ever wait to see
Sorry if I've been a bit one-note, but practicing three days a week has sort of kept the play at the forefront of my mind. Anyway, we open this weekend, so it will all be over soon enough.
The shirt is from Steve & Barry's, and I made the skirt myself using this pattern. The humongous, tulle-topped hat is my favorite of the ones I made. It's not so great for tight backstage quarters, but there's a certain satisfaction in forcing your stage husband to bend down and peer under the brim in order to sing into your face.
[Edited to add a shot of the hat in action. It is fully three heads wide.]
November 09, 2008
Lisa: "Wow. That's really...bright."
As with the last ensemble, the outfit was provided for me, but I decorated the hat myself. (Good thing I've had lots of practice.) The blue tulle around the hat hangs down in front to form a veil around my face.
So, yeah. When you get to the church, I'll be the one in the pulsing, radioactive ball of blue.
[Edited to add a shot of this costume in action.]
November 08, 2008
Lisa: You've Got Trouble
What goes with a blue-and-shocking pink gown with padded-out hips? A hat featuring lovebirds in a love nest, of course.
You know you want to be there.
November 06, 2008
Lisa: prop
This is but a preview of some of the costume-related entries to come. So many hot-glue burns, so much tulle, so much unbridled joy. Nora is going to have the best dress-up box ever.

September 30, 2008
Lisa: What, you don't have a decoupaged business card holder?
Before everything went insane, Jeremy, Marci, Mallory, and Sarah came over for a super Saturday craft day. We pooled our craft supplies and everybody brought treats, and it was awesome. Sarah came up with the idea to decorate office stuff, and I went a little crazy with Mod Podge and some scrapbook paper.
I promise, more real entries to come when it's not my last week at work.
September 17, 2008
Sarah: Call Me, On the Line
I love the idea of a calling card. Like a business card, but for personal use, a calling card is unusual but traditional, cool and sophisticated, and much classier than writing your number on the inside of a matchbook. (Although that has some awesome kitsch value too.) I decided I wanted some calling cards of my own that (hopefully) reflected some of my interests. Here's what I ended up with:
Calling Card Tutorial
Materials:
- Cardstock. I used green cardstock, but I wish it were thicker. Bring a business card with you to the paper store so that you understand the relative weight of your paper when you're deciding.
- Linoleum Block. Think of it like a stamp that you cut yourself. Maybe you could use a halved potato as a stamp instead, like when you were a kid. Or actual stamps, if you have some that you love. You get the idea.
- Ink. I used white screenprinting ink because I had it on hand, but I'd recommend something less thick and gloppy, if you have your choice. Ink intended to be used on paper would be better. Even a stamp pad might be fine.
Tools:
- Paper cutter. To cut your paper into card-sized pieces, of course.
- Linoleum cutting tool. I love my Linoleum Cutter from Speedball, which I purchased at Utrecht Art Supply. It has 5 or so different blades that store in the handle, and they're super sharp. Excellent.
- If you use thick ink, you'll need a brayer and a piece of acrylic or glass (I used an 8x10 sheet of glass stolen from a picture frame). Unless you've come up with some other solution, like the stamp pad.
- Typewriter. It's just not the same if you print your name and number on the computer. Typewriters are much better.
Now that you've gathered some supplies together, let's get to work.
Instructions:
- Cut a design into your lino block. Remember, you'll be inking up the raised surface, so cut away any areas you don't want printed. And obviously your printed image will be flipped from what you're cutting, so any words or numbers should appear backwards on the lino block. Like I said above, it's like a stamp. The Linoleum Cutter is a sharp little bugger, so try not to cut off too many fingers.
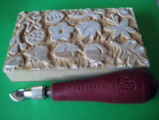
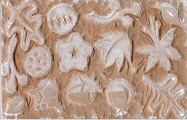
My shapes were loosely inspired by this fabric I saw in a Pottery Barn catalog, inspired by Josef Frank.
Frank's fabrics were featured in Mamma Mia (I loved looking for them after reading design*sponge), and they're amazing. I do not mean to compare my crude shapes to Frank's awesome patterns, I was just delighted to be inspired. Moving on.
-Once the linoleum block is finished, you're ready to start printing. I wanted my pattern to be a little different on each card, so I didn't worry about where it would fall. First, roll the ink using the brayer out onto your piece of glass. This lets you get a thin, smooth layer of ink on the brayer. Roll the brayer across the lino block until the printable area is nicely inked up.
Then press the lino block onto the paper, re-inking as necessary.
- You're almost done. If you plan to print your contact information using a computer, now is the time to format your document accordingly. This is a perfectly acceptable method, but you will have slightly less street cred than those individuals using typewriters.
- If using a typewriter, I suggest cutting your paper into cards now. The standard business card size is 3 1/2 inches by 2 inches. Or postcards would be fun. Square would be unusual. Twice as wide or tall, then folded over? My heart is all a-flutter.
- Typing, my favorite part! I compromised for centering my information. Originally, I'd envisioned my name and number along the bottom of the card, leaving plenty of white space for a quickly scrawled message, if needed. Unfortunately, such careful registration on a typewriter is a little unrealistic. This works too.

- Then you're done. Slip a small stack of cards in your purse or back pocket and wait to be asked for your number. Or don't wait, but hand your card to the cutest guy in the room, you saucy minx.
September 08, 2008
Sarah: Up to No Good
My energy seems to have been spent elsewhere as of late, so my blogging has been a bit more sparse. Perhaps it went towards something like:
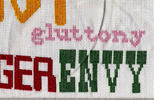
Making my own Seven Sins Pillow

Applying for graduation
Trying out a new cardmaking technique (Yeesh, the green is slightly less radioactive in real life.)
Responding to Jeff's adorable card
Enjoying my gifts from Japan (Thanks, Val!)
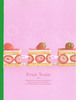
Pink text: Fruit Train -- Welcome to the country of the fruit. What do you see in this fruit? It is a train that carries your dream.
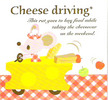
Yellow text: Cheese Driving* This rat goes to buy food while taking the cheesecar on the weekend.
Anyway, I'm keeping busy, and I like you. More entries brewing!
August 22, 2008
Sarah: Midnight Crafting
While getting my apartment into shape, I worried about scratching up my kitchen table with this pottery.

I tried attaching felt feet to the pot for my aloe plant, but the first time I watered it, sloppily of course, the water I sloshed around its base ruined the glue and made the whole thing unpleasant. Plus, the table needed something to make it look a little more finished, don't you think?
Perhaps a cute placemat/tablerunner, I thought. Something felt, so that no sewing is required. $3.50 for a yard of dark gray felt later, and I was in business. My tools:
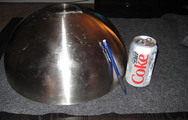
My giant IKEA bowl was used as a template. I traced the bowl, then added an inch all the way around.
I loosely measured 1 1/2 inch wide scallops all around the circle of felt, cutting down to the bowl outline. I embraced the handmade quality of the project and let the scallops be imperfect. Ten minutes later and:
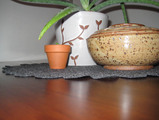
What do you think? Improvement?
July 31, 2008
Sarah: Wishing I could justify inflicting pain upon my credit card.
Lately I've forbid myself from shopping for myself. Although I'm sad there are now Victoria's Secret models in the catalog that I don't even recognize, I suppose my money is better spent on things like rent and food.
If, however, my budget did not have such painfully strict restraints, I would be doing more than just admiring Jonathan Adler's collection for Barnes and Noble. And maybe going crazy with a seven sins pillow.
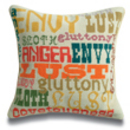
Is this something I could replicate myself with my meager embroidery skills?
June 21, 2008
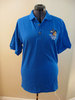
Lisa: Friends don't let friends wear men's golf shirts.
You know those golf shirts they ordered for everyone at work? Yours doesn't really fit, does it? Like, it's somehow simultaneously too big AND too small? Maybe because you are not six feet tall and shaped like a sausage? I think I can help.
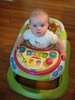
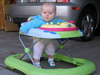
First things first: find a good show on Tivo, so you don't get bored, and plop the baby in the walker. Hi, cutie!
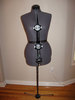
Double-check your measurements against your trusty dress form (you can even make your own if you don't want to splash out for this invaluable tool).
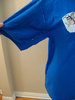
Okay. Turn your golf shirt inside out and put it back on the dress form. Your shirt probably doesn't have side seams now--we're going to create side seams in order to give it some shape. The process is the same whether it already has side seams or not, really. Just grab the fabric at the side of the shirt, under the arm, and pin it together close to the dress form, keeping the pins marching in a fairly straight line down the side. If there's a place where the shirt is already somewhat snug, like at the hips or whatever, then you only need a tiny pin tuck to keep the illusion of a side seam going. You're going to pin the body of the shirt and then continue the line of pins around the curve at the armpit and along the bottom of the sleeve. Trust me, there's enough room in that sleeve to take out an inch or so.
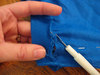
Unpick the ribbed material from the bottom of the sleeves. Just detatch it from the sleeve--don't unpick the stitching that keeps the cuff in a circle. Set those sad-looking things aside for now.
Time to start sewing! Don't bother cleaning off the table first; this is enough domesticity for one day, don't you think? Anyway, you should stitch along the line of pins you put in earlier, pulling them out as you go. After you do both side seams with a straight stitch, change your machine to a zigzag and add a row of that OUTSIDE the side seams. Trim off the extra fabric right next to the zigzag stitch. If you have a serger, this can all be done in one step (but...you are probably a very competent seamstress and don't need my help).
Let's address those monster sleeves. You can cut at least four inches of fabric off of each of those. This isn't an exact science; eyeball it, then fold over the fabric on top of itself as you go, using the cut-off bit as a guide so that you trim off a straight piece. Throw those pieces away, or make one into a headband a la 1990s Seventeen magazine featurettes.
Once you have the sleeves trimmed down to size, pin the cuff back on. Make sure you think this through before you start sewing! Right sides go together, and the underarm seams go together. If your shirt is still inside out, you will be pinning the cuff inside the sleeve. Then stitch a straight stich and zigzag stitch (like the side seams) right along the rough edge of the ribbing.
If you haven't tried your newly curvy shirt on yet, you might want to do that now to measure where the hem should be. Put the shirt on inside out, and pull the hem up over the shirt until you like the length. Pin it in four or five places so it'll stay in place while you pull the shirt back off.
The bottoms of knit shirts are usually finished with a double row of straight stitching. To copy this look, just sew around the hem twice with a straight stitch, picking a place on the presser foot to measure against for the second time around. When you're sure that you haven't hemmed your shirt too short, trim off the extra fabric.
Voila! Isn't that better? You just lost twenty pounds, visually. Work will be 45% more bearable today!
May 05, 2008
Lisa: headboard
The other day, I started vaguely considering a minor bedroom-revamping, and I priced some upholstered headboards online. That morphed into looking for instructions on making your own upholstered headboard, and then suddenly all the raw materials were at my house, waiting for me to do something with them. Funny how that happens.
Anyway, one day while Nora was down for a nap, I brought the baby monitor outside, dragged the chipboard and foam out of the garage, and got started.
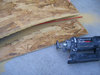
I got the foam pieced together and glued by the time she woke up. I hadn't really thought about how I was going to glue the foam together, but I remembered from Cockeyed that contact cement might work. I wasn't sure what contact cement was, and I knew I didn't have any, so I googled it. Hmmm. That container looks kind of like blue glue, doesn't it? I dug the blue glue out of Blake's bag of sprinkler stuff and used that--it's stinky, but it worked fine. It didn't take much to get the edges to stick to each other.
For the headboard's arch, I traced a template I had found online, printed out, and taped together. After I had the shape marked, I used Marci's RotoZip saw to cut it out. This is the perfect tool for this kind of application. The RotoZip is basically a drill, but with a little guard added around the drill bit, and an extra handle on the side for stability. you put the guard right up against whatever you're sawing, and then move the drill wherever you want, making a freehand cut. So, it's not intimidating to use for anyone who has used a drill before. It doesn't make a perfectly smooth or straight cut (especially in a material of varying content, like chipboard), but that's OK when you're planning on covering your cut with thick layers of foam and fabric, and you just need the right overall shape. Thanks, Marci!
Meanwhile, Nora was being a superchamp, yelling back at the saw and thinking we were playing an awesome new game.
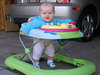
Once I had the wood cut out, I wrestled it on top of the foam and traced it with a sharpie. I used my trusty electric kitchen knife to cut the foam. That's what the instructions said to use, and when the lady at JoAnn's used an electric knife to cut the length I needed, I figured it was the way to go.
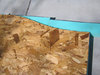
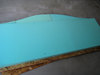
Nora thought the knife was almost as fun as the saw.

After I brought Nora inside and got her set up with some toys, I laid out my fabric, right side down, and lugged the wood and foam inside and centered the foam on the fabric. I trimmed the extra fabric a bit.
I got some big covered button kits (the only kind sold at JoAnn's) and made some buttons with the scraps I had trimmed off. I pinned the fabric loosely to the back of the foam, flipped it over, and figured out where I wanted to place the buttons. Then I sewed the buttons through the fabric and foam, and through another button on the back side to keep the thread from pulling through the foam. Here's the thing. In my experience, tufting with buttons is harder than you think it should be. For one thing, if you're using a covered button, the loop that your thread has to go through is on the back of the button. If your button is pulled into the foam really deeply, how do you get your needle back through that loop for another pass? It doesn't seem like one thickness of thread would be strong enough to keep the button tight against all that foam, either. And the first time you're pushing the needle through, it's tricky (and hurts your fingers) to push the needle in as far as you can while simultaneously compressing the foam to get the needle to poke through the other side far enough so that you can grab the tip and pull it out. I am convinced that the pros have a different set of tools to use when they're doing deep tufting--possibly including a very large needle, very strong thread, and some kind of button system with an open-faced (?) button on each side of the foam, which is easy to pull tight and allows for a decorative covered button to be snapped on afterward. Anyway, my buttons aren't as deep as I'd like, but they look OK.
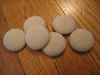
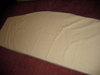
Once I had the buttons sewn in, I unpinned the fabric from the back of the foam, laid the chipboard down on top of the foam, and stretched the fabric as tightly as I could around the back of the board, stapling as I went. In a few places I had to pull the staples out, smooth things out a bit, and staple again, but it worked pretty well. I'm really glad I believed the part of the instructions that says to glue the board to the foam ONE INCH BELOW the top of the foam, even though they are cut to the same size. This allows the top of the foam to curve back around the board, making a nice round edge at the top of the headboard, instead of a slope ending with the hard edge of the board. With the headboard being so big and heavy, it was hard to get the fabric pulled tightly enough while keeping things smooth. Maybe enlist a strong person to help.
Speaking of strong people, I got Blake to help me prop up the headboard above our bed so that I could take this extremely anticlimactic picture of the final product. I don't know what's going on with the focus and the lighting and the colors here, but I'll post some prettier pictures when the whole revamping is done.
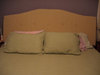
foam: $40
fabric: $18
button kits: $10
chipboard: $8
Everything else I already had or made Sarah dig out of her storage unit.
Total: $86
If I were going to do this over again, I'd use a lighter but still rigid material (MDF?) instead of the chipboard and a slightly thinner foam covered with a thin layer of quilt batting to soften the edges of the foam. I think I'd also cut the foam a bit larger than the backing, so that it would wrap around the edges more. I'd definitely try to figure out some way to get the buttons sewn in more deeply. All in all, though, I'm happy with it--and it was certainly cheaper than buying one readymade.
December 14, 2007
Lisa: Can I fluff your pillows?
All of Sarah's holiday domesticity reminded me to post about the pillows I made for our living room. Blake and I gave each other two leather armchairs for Christmas this year, and I wanted to celebrate finally having adult furniture with the addition of some pretty new throw pillows. Nice-looking throw pillows are surprisingly expensive, but I thought I could make some on the cheap using the upholstery fabric I had left over from making my needle case. $75 worth of pillow forms and fancy trims later, I got all the pieces cut out and ready to sew. Four simple seams, right? Zip, zip, zip zip, turn it inside out and stitch it up, right? Well, sort of. It is really tricky to hold the trim tight enough against the zipper foot and keep all the layers lined up straight. If I were doing this again, I'd sew the trim onto the right side of one of the pieces of fabric first, like my mom suggested.
Here are the finished pillows:

[ETA: These pictures looked fine on my monitor at home, but on my work computer they're super dark. I'll try to take some more with all the lights on!]
December 11, 2007
Sarah: Quick Holiday Craft
Yesterday, fueled by adrenaline, caffeine, and one hour of sleep, I found myself feeling restless. Already at the craft store getting ornament supplies, I picked up a styrofoam wreath form.
When I got home, I cut several strips from some green coordinating fabric I had laying around from a previous project.
Then I just ironed the raw edges under and went crazy with the hot glue gun. If you try this project at home, learn from my mistakes: Hot glue will dissolve your styrofoam. While this may be a Fun With Science! moment, it will also make little craters in your wreath. Did I switch to one of the many other adhesives in my apartment at any given moment? No, because I will never give. If you insist upon using hot glue, apply the glue to the fabric, then press the glued fabric to the styrofoam. This dissolves it much less. Oh, and if you're clumsy by nature? You will burn off your fingertips. You always do.
Those dots on the bottom right side of the wreath are a few pushpins I purloined from my bulletin board. The wreath was just a little too plain. I tried to add a simple bow with my red ribbon, but my bow tying skills were not up to the task.
This project cost me about $4.50 and 20 minutes. Totally worth it!
Sorry the pictures are so fuzzy. I'm still sticking it out with only my camera phone. Hint hint, Santa!
November 17, 2007
Sarah: Ornamented
As promised, I've found a few links to inspire you to make a few Christmas ornaments of your own. Wouldn't ornaments make cute gift toppers? I think so. I apologize that I don't remember where I found these links.
And because I couldn't resist, instructions to make a Droidel. Get it? Droidel?? That made me giggle.
This entry has spiraled out of control and marks the end of the Christmas-centric posts for the next several days, but I hope I helped get your creative juices flowing!
November 15, 2007
Sarah: Swap

Ladies and Gents,
I'm excited to announce Two Loose Teeth's first Christmas ornament swap. Thanks for your interest! You'll find all of the details after the jump, but to get started, if you want to participate, send me an email with your information before November 20th. Please write "Ornament Swap" in the subject line of your email so that I don't miss you.
Tomorrow I'll post some ideas for ornaments to get your creative juices flowing, but I'm sure that you're all going to blow me away. Stay tuned!
The guidelines:
1. Sign up for the swap by sending an email with the following information to sarah at twolooseteeth dot com by November 20th.
- name
- address
- email address
- you website or blog (if you have one)
(Note that when you submit your information please submit it in this order with traditional capitalization - it makes things a little easier on our end!)
2. On November 21st you'll receive an email from me containing the addresses and email addresses of the other swap participants to send your ornaments to.
3. Design a handmade ornament that you can create multiples of and make your ornaments.
4. Package your ornaments well...especially if you create anything fragile.
Things to NOT include in your package: food or candy or any perishable items.
5. Send one of your ornaments to each person on the list of other swap participants by December 15th at the latest. Send a picture of your ornament in an email to me (sarah at twolooseteeth dot com) notifying me that you've mailed your contribution.
6. Sit back, relax and wait as you receive fabulous handcrafted ornaments in the mail!
7. Once people have received your ornaments, I'll post the pictures here, along with a link to your website, unless you request otherwise.
8. One last note: I'd encourage you to research the cost of shipping and take that into account when you design your ornament--lighter and more compact ornaments are cheaper to ship. I want this swap to be fun for all of us. This shouldn't be a financial burden, it should be a chance to craft and get to know each other a little bit.
Most Common Questions?
What sort of materials can be used?
Anything! Knit, sew, letterpress, gocco, paint, draw, sculpt, glaze, cut-out, glue, weave, blow glass, weld...go nuts.
Who are the other people I'll be swapping with?
The other people on the swap list you receive on November 21st.
Will my address be on the internet anywhere?
No. The only people who will receive your snail mail address and email are the people you are swapping with.
What about shipping costs?
You are responsible for shipping costs for your ornaments, just as others are paying to ship ornaments to you. Please check your local shipping rates ahead of time if you are wary of the cost of shipping.
What if I don't receive all my ornaments or I can't send my ornaments out on time?
This is why you will be given the other swappers' email addresses. Please email your group with any concerns directly. You may also post announcements on this blog entry or email me if you have any questions concerning your group.
Do I need to have a blog to participate?
No. If you have a blog, that is lovely, but absolutely not a requirement to join the swap.
Other questions? Email sarah at twolooseteeth dot com and I'll respond as quickly as possible.
(Thanks to Kathleen of cake & pie and Nicole of freshly blended for the template for these guidelines)
November 14, 2007
Sarah: Ornament Swap
Hey everyone, I'm considering hosting a swap and I'm just trying to see what interest there is. I wanted to participate in the Ornament Swap being hosted by Kathleen of cake & pie and Nicole of freshly blended, but the sign-ups have ended. Then I thought that we could just have our own swap! It's starting a few days later, but I think it could still be fun.
The idea is that you make several handmade ornaments (I'd make sure each person had to make less than 10) of any style and then you mail them out all of your swap partners. Then we each get several new hand crafted ornaments to hang on our trees in time for Christmas!
My head is spinning with the possibilities. Knitted or crocheted, sewn bits of lace or delicately patterned fabric, paper and glue, embroidered or glass, the possibilities are endless.
If you're interested in participating, leave me a comment. If there are several of us, I'll make an official announcement, complete with ideas and rules, on Thursday, November 15. I hope you guys are as excited as I am!
November 07, 2007
Lisa: accessory clips
When I hung up the letter hooks in Nora's bedroom, it started an addiction that could only be fed by adding more hooks. Blake hung some little brass hooks in my craft closet for me that are now holding gift bags, and I ordered three more hooks from Restorers (through Amazon) for Nora's room.
I knew I wanted to hang her blessing dress and the gorgeous handmade blanket she got from her anonymous "secret grandma," but that left one empty hook and a long narrow space in the middle. With Sarah's help, I brainstormed an accessory holder.
Here's the result:
![]()
I'm really happy with how it turned out, and the whole thing took less than two hours to make. Endless variations are possible to suit your needs and tastes. Instructions and the materials I used are after the jump, if you're interested.
Materials:
Steps:
1. I cut the cardboard to the width I wanted, getting rid of the bent-up corners in the process. Then I set the cardboard on my fabric and cut around it, leaving plenty of extra fabric to wrap around the back.
2. I pinned the dark green ribbon down the center of the right side of the fabric, and just stitched right down the center with the sewing machine. Easy peasy.

3. The next step was a little bit tricky for me, since I'm not really a good spatial thinker. I centered the cardboard on top of the fabric and ribbon, and marked the top center and bottom center of the cardboard with a pin. Then I messed around with the clips, the light green ribbon, and some pins for a while, until they looked right. The idea is that the light ribbon threads through the clip rings, which are held in place by one pin through all three layers in the center of the loop. These pins will be replaced with stitching in the next step.
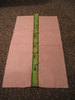
4. Next I replaced the pins with stitching. I slid the rings on each side away from the pin, carefully removed the pin without letting the ribbon slip, and backtacked over the light green ribbon a bunch of times.
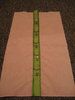
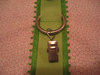
5. I cut a piece of batting a bit smaller than my fabric.
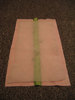
6. Then I plugged in my trusty hot glue gun, and while I was waiting for it to heat up I ironed my fabric so the final product would be nice and smooth. Placing the fabric right-side down, and the batting centered on top of it, and the cardboard centered on top of that, I folded the two ends over the cardboard and glued them down. I took special care to make sure the ribbon stayed centered on the cardboard, and pulled each end of the ribbon tight while pressing it into the glue. Don't burn yourself--hot glue hurts like a mother.
7. Folding the corners like wrapping a present, I pulled the sides in tight and glued them down, too. While the glue was still warm and slidy, I turned the project over to the right side and made sure things looked smooth and not puckery from the front. Then I took the leftover light green ribbon and glued it in a loop to the back side of the top edge. If I'd wanted to get fancy, I could have cut a panel from the leftover fabric, ironed the edges under, and glued it to the back of the project to cover the empty cardboard and rough edges. Nora was getting hungry, so I bagged that idea, but I might still do that sometime if it starts bugging me. It would definitely look more professional and finished that way.
8. Ta-DA! I used five of the curtain clips for optimum future flexibility. I'm only using three of the clips now (see the top picture above), but in the future I might want to display different items, and I wanted to be able to accommodate various sizes.
October 09, 2007
Lisa: calorimetry
Instead of going to the yarn store like I wanted to last week, I forced myself to dig out an unfinished project I already had. The girls and I all bought yarn to knit Calorimetry together, but after a few introductory knitting sessions, our impetus kind of fizzled out. I thought I could finish mine pretty quickly, thus satiating my need to knit AND allowing me to figure out any tricky bits in advance so that I can help the girls with the pattern if any of them ever decide they want to work on it again.
Here's the finished product, which (in spite of the unflattering picture) I really like. Basically, it's a sort of headscarf that buttons at the back of the neck, so that your ponytail or whatever can stick out the back.

The pattern says "It is very important to obtain the correct gauge for this piece," so instead of just skipping the boring gaugeing altogether, I went ahead and knit the little square with 5mm needles and the yarn thickness that the pattern calls for. My square was too big, so I figured that if I knit the whole thing on 4.5mm needles instead, it would turn out about the right size. I didn't bother gaugeing again, which was a mistake. My first product was the humongous thing in the photo below.
I started again, but this time cast on 80 stitches instead of 120. The pattern uses short rows, working in a 2x2 rib until a certain number of stitches remain on the end of each row. I knitted 7 instead of 15 of the repeated decrease rows, and just did enough increase rows so that I had the right number of stitches on the end of the row again. That probably makes no sense if you don't knit or haven't read the pattern, but suffice it to say that this was a pretty easy pattern to knit and to alter. My second attempt was a success--the version on the bottom of the photo below turned out to be exactly the right size. I found a button in my tin that fit the buttonhole, stitched it on, and it was ready to go!
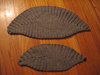
Knitting time (if you only knit the smaller version): four hour-long dramas with no commercials.
September 28, 2007
Lisa: maybe if i just put a picture of myself next to the doorbell, that will scare them off
When I read Mindy's rant about door-to-door salespeople, I remembered how I felt when we first moved in to our neighborhood. I'm not normally a fan of door signs, and the 'no soliciting' signs you can buy are pretty hideous. On Gabrielle's recommendation, I took advantage of a trip to Color Me Mine with the girls to make my own. The colors are a little off in this picture, but here's the result:
Anyway, it works like a charm on everyone who knows what "soliciting" means.
In other Perschon-family reading, I tried the Celebrity Morph that Charles posted about, but after the site tried to match my face with Dave Navarro, Lance Bass, and Robert DeNiro, I gave up. Sarah, you don't still think you're the mannish one, do you?
September 22, 2007
Sarah: Not So Secret Window
After living in my apartment for over one year, I find myself still settling in. Some walls are still bare and the desk area still a bit uninviting. One thing that had to go, however, was this curtain on my front door:
It's fine, I suppose, but not really me. Unfortunately, there's a matching curtain in my bedroom. Roses. Whatever. So obviously something had to be done. I decided to try for something a little more simple. And more importantly, something inexpensive.
I decided to try clear contact paper to simulate frosted glass. This would be a lot more sleek than the dusty rose look, plus I already had the contact paper on hand. Free project!
The process was simple: I just measured the window, cut four pieces of contact paper, and...
There's a definite lack of privacy, and those hooks are left behind from the rose curtain. So for now I drape a blanket over the hooks at night for privacy. It probably doesn't matter much, but you know that I have issues.
September 05, 2007
Sarah: In the Queue after Harry Potter
The lovely and talented Not Martha recently had a drawing for the new book Craft, Inc. on her site. Even though I never win anything (see: lottery tickets purchased on recent road trip), I put my name in the hat and... won! Yay!

I received a signed copy of the book in the mail yesterday, and I'm so excited to read every word!
A big thanks to author Meg Mateo Ilasco, Not Martha, and Chronicle Books!
Oh, and incidentally, Chronicle Books was at Bumbershoot in all their adorable and craft-related book glory. The girl manning the booth even complimented my purse. I love them! Go buy some crafty books. They're all so pretty and full of ideas, I wish I could shoot Chronicle Books into the veins in my eyeball with a needle.
June 20, 2007
Sarah: MDFriday night craft
Using some MDF leftover from another project, I decided to create a fabric covered bulletin board inspired by these homasote and fabric bulletin boards (found by way of Not Martha, Craftzine, and shiso mama).

I first used spray adhesive to add corkboard to the MDF. Although MDF is soft enough for a tack to penetrate the surface, I didn't want the bulletin board to be stronger than my matching fabric-covered tacks.
Corkboard attached, I was ready for fabric. I wanted my bulletin board to have a pocket, so the bottom strip of green is the top of the pocket. See?
Attaching the fabric was an easy excuse for buying a staple gun. Just staple the fabric to the back of the board, and you're done.
The little circles on the bulletin are my matching fabric covered tacks, which I made using this tutorial. They were easy and fun to make.
Thank you, internet.
Sarah: Don't call me listless.
Wishing:
That my living room was five feet wider
That the spiders would stay away
There were more hours in the day for me and my cruiser.
Wanting:
an Airstream trailer
a Vespa. Still.
Making:
a fabric-covered bulletin board (pictures to follow)
baby gifts
wood cuts for our letterpress class
thumbtacks. I may be selling a set or two soon.
Eating:
field greens
nine-grain bread
Mt. Rainier cherries
Pastries and sandwiches
Wandering:
the Farmer's Market on Saturday mornings
the Arts Festival with the girls on Friday.
Coveting:
Andrea's good taste
Lisa's knobs
wall decals
Liking:
my brothers. I miss them.
Working:
on my company's annual event. It's in three weeks and I'm freaking out a little.
fighting the good fight against apartment squalor.
June 07, 2007
Lisa: I saw the sign
I finally finished my dad's Christmas present--just in the nick of time for Jeff's farewell party Memorial Day weekend. It's a sign that will hang outside the big stone barn on my parents' property in Spring City. My dad had the shape cut out of wood, painted it with chalkboard paint, and screwed in some hangy-hooks. My job was just to paint the lettering on each side.
This side is for when there are special events in the barn--they can write in the name of the event with chalk.
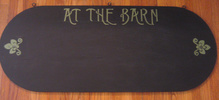
This side is the side facing the street most of the time--when there's not a special event going on.
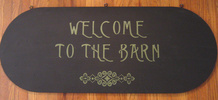
I used stencils and a special weatherproof paint. As always with a new craft project, the most time-consuming part was going to different craft stores to track down the supplies. I found Patio Paint on the JoAnn's website, but not in the store itself. Roberts had Patio Paint, but not the stencils I wanted. I went to Michael's last, and they had by far the best selection of stencils and stenciling supplies. NOW YOU KNOW.
April 06, 2007
Lisa: Bunnies, bunnies, it must be bunnies!
As Andrea mentioned, we read The Miraculous Journey of Edward Tulane for book club last month. Because it was a kids' book, and because I'm a little craft-obsessed, I had everyone make a bunny out of felt. I was hoping to make these little guys, but I couldn't find the book in time. Instead, I printed some of blue by you's photos for inspiration.
I love how all the bunnies came out so different and so fun.
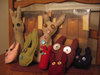
Meet my rabbit, Randall:
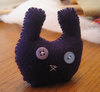
January 14, 2007
Lisa: Supercharged
Every electronic gadget we buy seems to come with its own proprietary charging cord and adapter. I've been wanting to make a charging center to hide the resulting ugly and inconvenient cord soup residing in the bin on our kitchen counter. At first, I was thinking of a painted wooden box, with holes drilled in it for the cord ends to poke out of. Then I got inspired by these ribbon boxes, and Sarah helped me develop the final idea.
Here's what went into it:
As with most craft projects, shopping for the supplies took far more time than the project itself. It seems like I used to see those cardboard photo boxes everywhere, but maybe they've fallen out of fashion. Once I got the stuff, all it took was cutting the holes in the box with the X-Acto knife, and attaching the bookplates around the openings with the brads. I was initially planning on using grommets or eyelets (like in the Martha Stewart version), but I couldn't find any big enough for all the plug ends to fit through.
Here's the result!
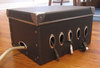
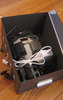
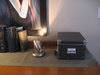
November 30, 2006
Lisa: make like a tree and leaf
I finally finished the Branching Out scarf I started last May, and I wore it for the first time today! I actually finished knitting it quite a while ago, but I lost motivation before weaving in all the ends. Here's to finishing a project! And here's the finished product:

The color is much closer to the picture with the flash, but the picture without the flash shows the detail much better, so I included that too. It really wasn't that complicated to do the lace pattern once I got the hang of it. Next up, blocking the Ribby Cardi!
July 19, 2006
Lisa: freezer paper stencil
Sarah sewed me a tote bag for no other reason than that she is super nice. All that was left to do was add a decorative element. I decided to try out the freezer paper stenciling Mariko mentioned, and I used some screenprinting ink Sarah bought for another project (because I am just a moocher like that). In keeping with my current Office obsession, I decided to use am image from the show's credits. I figured only fans of the show will know what it is from. Linds20 helped me find a screencap of the image, which I just cut out of the freezer paper with scissors. I'm not too skilled with X-Acto knives. Once I had the design cut out, I ironed the freezer paper to the fabric, stippled the screenprinting ink on with a brush, let it dry a bit, and then peeled off the paper. Then I heat-set the ink with the iron, so it should last through washings and stuff if necessary.
Here's the bag:
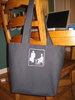
And here's a closeup of the stencil/screenprint:
I love how it turned out. Thanks, Sarah!
May 25, 2006
Sarah: Obi Wan For Century
Dave asked me to create packaging for the magazines that different members of our magazine staff have worked on. I thought it would be cool to have obi-inspired "belts" around the stacks of magazines.
Having recently fallen in love with Duck Cloth, I decided that this fabric would be perfect for the project: it is heavy duty, doesn't fray a lot, holds its shape well, and my local fabric store carries a variety of colors. I chose a bright red and a sage-y green. Joann's also had some skinny ribbon on sale, so I picked up a few spools (3 spools for $.99!) in the same colors.
Since I've been wanting to try out some home screen-printing, I thought this would be a great project to try out, since it'd make the packaging a little more interesting. I grabbed an image of a bonsai tree from a Google image search, and went to town using this tutorial. I didn't take any pictures of the process, just of the finished product.
Some notes on screenprinting using this tutorial:
- The Mod Podge takes many hours to dry. Dave and I both needed to wait almost 24 hours for the Mod Podge to dry before we could begin printing.
- Mod Podge is water soluble, so rinsing your screen after you screenprint (in case you wanted to save your screen for later) is not an option. Using paint or something else that would block out the screen but not wash off could be a better solution. I decided that the destruction of my screen would encourage me to make another pattern.
- It seems like more abstract patterns (like my bonsai that didn't need to be exact) did better than more precise patterns (like the words that Dave attempted to print). One could try a finer screen than $1 super-generic brand nylons.
- Do not, under any circumstances, use red Sharpie to outline your pattern on the screen. Dave and I used white screenprinting ink, and his red marker bled, making his phrase pink. No good.
I put contrasting ribbons around each obi, and offset the screenprint because... I thought it looked better that way. People were nice and acted like they liked them.
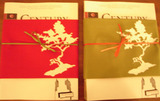
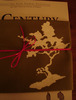
So that's the two different colors (again, the colors are prettier in real life, I keep taking pictures at night in my semi-dark apartment), a closeup on the screenprint, and then the back. At Lisa's brilliant suggestion I opted out of sewing the back shut, and instead just pressed all of the edges (yes, this was a sew-free project), and then used double-sided tape to close up the back. The effect was nice, and the construction was pretty easy.
May 18, 2006
Sarah: Getting Better at Sewing Straight Lines
So, remember how I used to talk about how I loved to do crafts, and I was always making things out of garbage, like a mobile out of cds, and a wallet out of postal envelopes?
And then remember how I completely stopped making stuff, and almost stopped posting on this site altogether?
Well. I have regained my lust for life, and finished sewing a purse.
I used this pattern
and followed the directions for the big bag on the left, that looks like a giant tote, but is in reality a generously-sized purse. I altered the straps to be a bit wider and maybe a tiny bit longer (seriously, what was this purse creation originally? I think the answer is: short, skinny-strapped Uggo.) and didn't include the layer of polyester fleece (for increased purse rigidity?) because, well, I didn't have any on hand and couldn't be bothered to buy some.
I used fabric that had purchased several months ago for a fraction of their original price. This is a closeup on the fabric, although the brown color is much prettier in real life.
So here is the finished product:
And showing the lining and inner pocket:
Things I am learning about my camera:
1. Moving at all, by the subject or the photographer, results in a fuzzy picture that may or may not be apparent from the screen of the camera.
2. Natural light really IS needed for quality photos.
3. I still have no idea what the icons on the Menu do. Perhaps it is time to read the manual.
February 17, 2006
Lisa: shrinky
As you know, Sarah and I have been talking a little bit about selling the things we make, on Etsy and elsewhere. We have been thinking about packaging as well. I designed a round version of our logo, and I think we are going to investigate getting some stickers made to seal poly bags or to stick on top of marble tins. Then I came up with the brilliant plan of making tags with our logo out of shrink plastic (remember Shrinky Dinks?). They make sheets of shrink plastic that you can put in an inkjet printer now, and I've been wanting to try them out for a while. After striking out at JoAnn's, Office Max, and Michaels, I finally found the printable shrink plastic at Roberts, but there was only one brand to choose from: Grafix Arts.
The first thing I did was make an Illustrator file with our logo repeated as many times as I could fit it on the page, while allowing for 30% shrinkage. We tried it on paper first (sorry about the flash--the glue stick is in there for scale).
That looked okay, so I set the printer to Draft (colors intensify with shrinking) and printed on a sheet of the plastic. I cut all the circles out, punched holes near the tops, and popped them all on a parchment-lined cookie sheet. Let me just say right now that the instructions on the Grafix Arts website have been updated since they printed the instructions that came in the package we bought. For instance, now they say the final product will be only 20% of its original size. This is information that would have been helpful to have. They also listed a wide temperature range for baking: 250-400 degrees.
I chose a temperature roughly in the middle (325), and put the circles on the sheet matte side up (mainly because then the printing was readable, so they seemed "right side up"). As I watched the shrinking action through the oven door, I kept waiting for the pieces to flatten out again. This is as close as they got:
I did try flattening them out with a spatula while they were still warm, without much luck. I also decided that I wanted to read the text through the shiny side of the finished piece, so I reversed my Illustrator document so that everything was backwards, and printed out another sheet of plastic. I also read the instructions again more closely, and noticed these tips: 1) "lowering the temperature will slow the absorption of heat, resulting in longer shrink time and reducing distortion," and 2) "curling and sticking can be minimized by putting a piece of heavy weight vellum or parchment paper on top of the piece while baking." Armed with this new information, I set the oven to 250 degrees and covered the pieces with another piece of parchment. Just for kicks, this time I tried baking the pieces matte side down, so that the words were still "right side up" on the cookie sheet. I figured the first way didn't work out, so this could only be better. I was so wrong. Here's what the second batch looked like:
First of all, I couldn't see the pieces through the parchment I had put on top, so I didn't know the extent of the problems until they had been in the oven quite a while. The pieces stayed much bigger, and curled up so tightly that flattening them out after cooling was completely impossible.
Determined not to waste another sheet of plastic, and kicking myself for not trying this right at first, I made several little test pieces out of scraps. I turned the oven back up to 375, and tried one matte side up and covered, one matte side up and uncovered, one matte side down and covered, and one matte side down and uncovered. The best piece was the one that had been baked uncovered and matte side up (like my first batch).
I steeled myself and printed a new page of tags on the plastic. This time I only baked three or four at once, so that I would have time to flatten them all out before they cooled down too much. I kept the oven at 375. Since the pieces never truly flattened out, instead I waited while they curled up like cups and then curled back down into little arches. Then as soon as I took them out of the oven, I turned them all upside down and smashed them down as flat as I could. Here's the final result:
They are still quite distorted--they started out as perfect circles, and now are decidedly oblong. Also, I feel a bit sheepish that it took three sheets of the film to get eight usable tags. Anyway, I think I have figured out the best method for this brand of film, but I'm still a bit disappointed. Shrink experts, advise me!
February 14, 2006
Sarah: Beading, and oh yeah, Valentine's Day
Last night Jessie, Mallory, and I went to the bead store and got supplies for a new crafting project we've wanted to do for a while: beading! We each ended up with very different supplies, ideas, and resulting jewelry. I liked that we didn't all make identical projects, and I think each of the items came out quite well.
Unfortunately I don't have pictures of Mal's or Jessie's projects, but Mal's was a boho-chic style long necklace with light wood beads and dark glass beads (made from recycled glass in Africa. Or Indonesia. The saleswoman seemed a bit confused on the subject.), strung on a piece of "maximum cool" pleather cord.
Jessie created a two-strand necklace that was black with a hint of silver. Her beads were ultra-glam and polished. She thought about her design more than me, and even had some larger beads for the center of the longer strand. The result was a very glamorous necklace that she can wear to work.
I made a long necklace with the idea that I could double it up for a relaxed 2-strand look. Then I had some leftover beads, so I went ahead and made a matching bracelet.
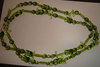
I used monochromatic beads (sort of avocado/lime-ish color) and six different shapes. The clasps are silver lobster clasps. I tried to keep the organization fairly random, and I'm quite pleased with the end result.
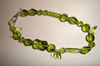
And in honor of the one day each year where numerous people say "VD" with little irony and no negative connotations, I recommend Pamie's Annual Valentine's Day Poems. Not for the naive or prudish.
February 10, 2006
Sarah: Tyvek
You know what's better than a cheap craft project? A free craft project!
I made a wallet out of an Express Mail tyvek envelope:
Tyvek is the material they make those envelopes out of that feel like a cross between paper and fabric. It's water resistant and supposedly very durable. Plus, you can get the envelopes for free from the US postal service! I've seen project tutorials where the material was sewn, but I just used packaging tape (and I did it while I was at work... Ssshhhhhh).
So. Anyway. I thought I took pictures of the steps to make the wallet. But apparently I didn't. So here are some shots of the final project:
It ended up being a tri-fold wallet:

With six credit card slots:
And a place for bills:
But it was a little sproingy when I first completed it, so I had to try to squash it down:
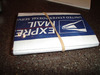
So there you go. I crafted and fought the man, all at the same time.
![]()
Oh, and I left the postal stuff on the outside because, well, that's just so punk rock.
February 07, 2006
Lisa: Can you handle my truth?
I have been needing a new flute bag for a while. Strangely enough considering how much I used to play, I have never had a real flute bag. I have used various backpacks, messenger bags, and tote bags to lug my instruments and music and stuff around, but I never wanted to spend the money for a real flute bag (one made for that purpose), and besides I hated the idea of carrying a huge flute bag AND my backpack for books and whatever else around campus. Also, the bags designed for that purpose are technically called gig bags, a term which I abhor. These days I don't need a backpack and textbooks, and something a bit more professional-looking is probably in order. Anyway, a flute bag must conform to a few specifications. It has to be big enough to fit a flute and piccolo and the necessary accessories, and black enough that it can remain under my chair during orchestra concerts--because woodwind players get to do that (Eat your hearts out, string players!).
The whole point of this is that I have been keeping an eye out for potential flute bags each time I go shopping, especially at Target. A few days ago I found this bag, meant to be sort of an oversized hobo shoulder bag. It was only $14.99, so I was willing to overlook the sheer stupidity of the bag's handle.
Trust me, this picture from the Target website looks much better than the bag actually looks in person. The handle is so short that you can't even get it out of the way when you want to unzip the bag--it just sort of blocks the bag opening. I know the sides of the bag are supposed to come up and form part of the handle, but it just wasn't working out. Something in the design process had gone amiss. I decided to get the bag anyway, and just replace the handle. How hard could this be?
I cut off the old handle (seen here in all its ridiculous shortness)...
![]()
...and first tried braiding some leather-ish vinyl strips ($7) I found at JoAnn's into a handle. That was much too wimpy, and the braid wouldn't lay flat and look right. I decided webbing was my best bet. After some false starts at fabric stores and online, one of Dave's bandmates suggested REI, which sells climbing rope and webbing by the foot. I chose a 2" tubular nylon webbing. They cut four feet for me with their hot cutter (sealing the ends so they wouldn't fray), and charged me only $2.50. I got some snaps and a snap-setting tool at the fabric store ($8) and put the whole thing together. Easy peasy!
Here's the finished product:
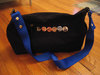
I added a few buttons for extra cuteness power. In this picture, my flute is inside the bag, so you can see that there's plenty of room. At the broadcast on Sunday, I just tucked the handle under the bag. Success! As usual, the hardest part of this project was finding the right supplies at different craft and fabric stores.
February 05, 2006
Sarah: Dollar Store Project
I completed my first dollar store project Saturday morning. Here's the whole process:
I purchased my supplies:
A hand mirror, metal picture frame with glass, and bag of tealights. Cost: $3 plus tax.
I cheated a little on this project and used some aluminum flashing I already owned.
How could I resist? It's so shiny...
So first I cut a piece of flashing that was roughly twice as tall as the face of the picture frame. I bent it at about 90 degree angle and slid it into the area where a picture would go. Here I am, holding the frame sideways (with the frame's support sticking down... get it?):
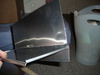
And then I destroyed the mirror:
...which would have been fun, if breaking a mirror didn't leave tiny glass shards on your bedroom floor and embedded in the sleeves of your sweatshirt. I obviously didn't think this step through. Oh, plus the whole seven-years-bad-luck thing.
I then glued the pieces of mirror to the "back" and let it dry overnight. I ended up using the following materials, outside of my dollar store purchases:
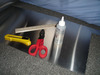
The flashing I've told you about, Craft Glue attached mirror to the back, I cut the flashing with the tin snips (after scoring it with the knife), and the ruler helped me bend the flashing.
So the idea of this project was to end up with a wall-mounted tea light holder. I have a lot of silver accessories in my room, and I wanted the broken mirror to sort of make the candle light sparkle. It didn't come out exactly as I hoped, but I think it's not bad for $3. Ta-DA:

February 03, 2006
Sarah: Me and Artie Fufkin, We Love Us Some Felt.
This isn't a dollar store project, but I just got excited, so I wanted to share! I made these hairpins last night and today at work.
I used wool felt, some old buttons I had in my craft table, and extra strong burgandy thread. The hairpins are sewn on, and so the felt does slide around a little, but overall I like how they turned out. I'm trying to be guttsier, so I've been cutting the felt without first looking at someone else's cute shapes. I know. I live dangerously.
So here I am wearing the flower:
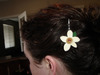
And look! I got a leaf in my hair!
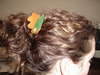
The colors aren't quite right in this photo. They are much more subdued and autumnal and pretty.
And I did my hair in about two seconds, so don't mind how out-of-control messy it is.
I really like the dot:
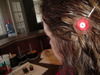
Although again, we have the wacky hair issues.
I didn't mean this shot to have such an excellent view of my work space. Hello cell phone! Hello discs! Hello Maverick cup full of Diet Coke!
And here we are with a quarter for scale (since my head is abnormally large and doesn't give you an accurate idea of the size of the pins):
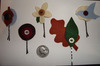
Ta-DA! I am very anxious to hear what people think: Do you like them? Hate them? Think they would sell, if I chose to make more? I know they seem more autumn-oriented, which is strange to see in February, but I am loving those colors right now, and the felt at the fabric store I went to was rather limited. Just be glad I didn't use glitter felt. Because, damn.
January 31, 2006
Sarah: Dolla Dolla Bill, Y'all
I believe that it's fairly obvious at this point that I enjoy crafting. I also really like the idea of being able to sell the items I make. I've decided that my downfall at this point is my lack of original ideas. I sometimes come up with wacky schemes, but end up either not executing them, or executing them poorly. The only ideas I trust enough to follow through on are ideas that someone has already come up with and created successfully. As a result, I can't sell anything, because everything I've made has been done before. The point of all this is that, starting this week, I'm going to start a new ongoing feature: Dollar Store crafting. Other crafters have flexed their brains by gathering bizarre materials from the dollar store, and turning them into something new. So this is my mission. I hope to make this a regular practice, although because I am in school, it's uncertain how quickly projects will be completed. Still, I hope to have something to show you within the next week. That's all for now!
January 19, 2006
Sarah: Falling Down a Slippery Soap
Today I added soap to our shop. They come in two shapes:
Round:
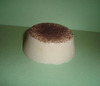
and rectangular:
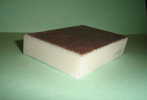
Check them out! I really like them because the size is manageable and fits in your hand, and they make a very rich lather. Plus, they're handmade, which is cool.
January 12, 2006
Lisa: Hello, Sailor
I posted some of my marble magnets in our Etsy shop. So far I've just got one set listed, since the photos didn't come out very well, but it's eight color-coordinated magnets in a round tin. Go check it out!
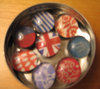
Lisa: Triptych
Once I got my super cool Jamaica Trinnaman oil paintings for graduation, and put the big one up in the living room (I will try to remember to take a picture of it), I didn't think the print we had hanging over the couch went so well in there anymore. Plus, we had a blank bedroom wall where the print would go perfectly. I moved the print into the bedroom, leaving the wall over the couch blank.
Now, the over-the-couch area is tricky, because it is so wide. Whatever you hang there has to be big enough to visually balance the couch, or it looks dinky. I used some leftover inspiration from Vern on Trading Spaces, and decided to make sort of a triptych of abstract red oil paintings. The idea was that they would be simple and relatively easy to do, but create a visual impact and mesh with the more modern oil painting by the real artist hanging nearby.
Here's the living room before, with the print Blake gave me for Christmas last year. He remembered that five years ago in a print shop I said I liked it! Anyway, it looks right at home in the bedroom.
I bought three canvases on sale at JoAnn's. They're the kind that don't have visible staples on the edges, so they don't have to be framed. Then I painted them quick-and-dirty in three slightly different styles, and sprayed some varnish stuff over the top. Easy peasy! Here's the result:
Should I hang them further apart?
January 05, 2006
Lisa: More Adventures in Millinery
I made beanies to go with the girls' Christmas presents this year. They were inspired by a beanie I saw at Anthropologie last winter. I couldn't find a picture of the beanie online anywhere, so I just had to go from memory, but I think they ended up pretty close. If you bought this beanie and recognize it, let me know!
Anyway, here's the yarn I used. It's a lightweight worsted yarn, made of easy-care acrylic and nylon, but it is really soft and feels a bit angora-y. Two skeins was more than enough for five hats. I could have gotten them all out of one skein if I hadn't kept the giant, loose version I made first.
I used YLI 4mm silk ribbon (which I finally found at the Stitchin' Station) to do the ribbon embroidery. My mom showed me the stitch for the rose and what she called a "lazy daisy" for the leaves.
Here's the finished product! Unfortunately, the photo is crap, but now I've given them all away so I can't take another picture. Maybe I'll force Sarah to model hers so I can get another shot.
The embroidery part was surprisingly really easy. What also surprised me was that I had such a hard time crocheting the hats. I used a simple double-crochet beanie pattern (I'll post the link later if I can find it), but I had several problems. First of all, I don't think I really understand crochet patterns. I mean, I know what all the stitches are, but there are still some confusing things. For instance, why does the pattern want me to close off each row with a slip stitch, chain a few stitches, and then start the new row? Why can't I just crochet the whole beanie in a big spiral? Anyway, the first time I tried the beanie with the recommended yarn weight and hook size, it came out humongous. I guess I am a loose crocheter. I tried a much tighter version, which hurt my hand, but that turned out like a little skull cap that ended above the ears and looked ridiculous. I ended up adding a few extra rows of DC above the SC edging, and just ignoring the row separations--I did it in a spiral. After I got all that stuff figured out, each hat took about 2 1/2 hours to crochet and then the embroidery took about 20 minutes.
Sarah: Etsy
I didn't like the idea of filling up our site with items that I've made, trying to sell stuff to my own friends and family. After looking around the internet for craft fairs and other selling options, I've almost decided upon selling items on Etsy, but I'm going to first design a banner and hopefully get some feedback about their site from you guys. Thanks for your support, and for your nice comments. Let me know before Jan. 10 if you're interested in any specific items that I've posted here, and I'll make sure not to sell them to anyone else.
January 03, 2006
Sarah: Crafty, part 3
You might say that I could have used my long weekend to clean my apartment. And you would have been right. But instead, I hung out with Blake and Lisa, had dinner with the fam, watched some dvds, trained for the marathon, and Jessie and I ran errands, had lunch with our friend Staci, and picked up some records. I spent the remainder of the evening making record bowls and boxes. I've decided to see how these items fare on our site. If you'd like to buy a bowl and/or box, leave a message in the comments. These will work on a first come, first serve basis. Any shipping costs will be arranged through myself and the buyer. Of you want only the box, they are $2 each. All boxes, unless otherwise noted, are 3 inches tall. Any box that is not spoken for will be included as a free gift with its corresponding record. Thanks, and I hope you like them!
Big Bird Sings record bowl and matching box:
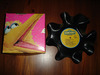
I took a picture of this box and bowl from the side, but it mysteriously removed itself from my camera. I will post a side view tomorrow. Bowl: $7, Box: $2.
Kenny Loggins is ALWAYS a classic:
He looks a little like he just finished creating the universe, and is bestowing upon our humble planet a sun to warm the land, but that's ok with me. My confusion, however, was that I thought he was hardcore (well, as hardcore as songs like Danger Zone) until he had kids, at which point he made Return to Pooh Corner. This picture makes him look less Top Gun and more benevolent celestial being. Anyway. The best part of this box and bowl is the back of the box:
I know. It's great. Oh, and as far as quality control, I noticed after taking this picture that the sides of the box were coming a little unglued. That situation has since been remedied. Bowl: $7, Box: $2.
Next up is Saturday's Warrior. Let me start by saying that I've never listened to or watched this production, so I am not sure how it actually compares to Beowulf, Ramayana, Chaucer's Canterbury Tales, or Dante's Divine Comedy. This is a fine specimen of LDS culture, and is a two-record set. As a result, I have one box and two bowls:
These can be sold as a set, or separately. Bowls: $7/each, Box: $2.
In keeping with the wacky religious enthusiasm theme, I found several awesome looking bands when searching for more information regarding the band Rockin' Horse, but not the band that made this record:
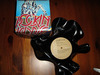
They have a great looking album cover, and also dedicated this album to L. Ron Hubbard.
The dedication is easily visible on the side of the box (which is 3 1/2 inches tall). Bowl: $7, Box: $2. With this item, I am offering the optional Scientology package, which will include the Rockin' Horse bowl and box, plus the TomKat pin featured on my previous post and a few other Scientology/celebrity-related pins. This package will be $11.
I thought this box and bowl was a little punk-rock, a little classical.
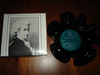
Mozart! Bowl: $7, Box: $2.
Thanks for tuning in!
Prices have been changed to more accurately represent fair, competitive prices. Thanks.
December 30, 2005
Sarah: Crafty, continued.
At Lisa's request, I took pictures of my craft items. I can't find my bag of marble magnets, so the list is incomplete. Also, this is my first time posting pictures, after a short crash course. Let me know what you think, upon inspection.
Pins (some examples):
and:
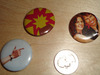
(quarter shown for scale)
Record bowl:
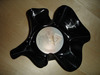
(this one is more wacky-shaped than the other bowl i've made. All, however, would have a charmingly original, handmade, irregular shape. Oh, and yes, it IS a Barry Manilow record.)
full of pins:
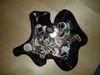
Take out box:
Jessie's suggestion to have this box as my trademark packaging was cute, but it'd probably considerably raise the cost of items. Well, by at least $3. Also, the boxes take a while to make. I like them, but they're a little labor intensive. Perhaps I can find a more efficient way to produce these.
Mosaic:
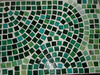
and a closeup, with a quarter for scale, to understand the size of the tiles:
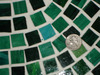
Ta-DA! I await your comments with baited breath.
December 28, 2005
Sarah: Crafty
Doesn't everyone want a little extra income? I've been trying to think of a craft item I make that people would pay money for. Here's my list so far, but leave a comment if you have any ideas.
I added potential price ranges, so please let me know what you think would be reasonable
(along the lines of what Lisa, Mom, Jessie, Mallory, and Marci recieved for Christmas)
I have yet to make up a prototype. This idea is still in my head, but I will post a picture when I make one (possibly this weekend).
possibly picture frames, or this could be on a commission basis.
(so far I've focused on celebrity faces, which I could not sell, but I could make some with words or drawings)
These have a hole in the bottom and are not for cereal. Dry foodstuffs or display items only.
(again, like the girls got for Christmas - metal, for display or uses like holding pens)
Does anyone have any ideas? Are you sympathetic in my quest? What would you pay me to make for you? What do people pay you to make?
December 19, 2005
Sarah: And I thought Martha Stewart was the only person that used a bonefolder.
So, I know I have an Amazon wishlist, which I love, but I was completely overcome by the beauty of this site, and now I want the entire inventory. Everything is just so beautiful...
Lisa, you know how we were talking about how cool a bookbinding class would be? Well, it would be really cool. But you know how we can get our fix between now and when a class is possible? With their kits. Their pretty, pretty kits.
December 12, 2005
Sarah: On the ball
I'm not meaning to gloat, I'm just so proud of myself, I had to share:
I am completely finished with making and purchasing Christmas gifts. I have three more to wrap (I ran out of cellophane at 1 am last night), and I'm waiting for one item to be shipped, and will then wrap that item. I also have purchased and wrapped my dad's birthday gift. I participated in a gift exchange with some internet friends, and the package I sent should arrive at its destination today, even though the delivery deadline is Dec. 16th. In short, I am more on top of Christmas than I have ever been in the past. I just needed to share my excitement.
Unfortunately, I still have items yet to be accomplished. Why are so many of my friends and family born around Christmas time? Still on the list:
Blake's birthday
Mal's birthday
Mom's birthday
Still, hurray for me! I won't be finishing gifts Christmas morning, like last year.
November 14, 2005
Lisa: Halloween Festivities
A year after I was inspired, I finally got around to making the cute Halloween lanterns from Laura Land. I cheated a bit by using the library's Sizzix machine to cut out the shapes, but I think they turned out pretty cute anyway. I used one strand to decorate our mantel, and a few more (Sarah helped!) as decorations for our Halloween party.
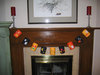
As always, the best part of a Halloween party is the costumes. Here are the girls:
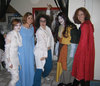
Sarah, in the middle, is a mad scientist (obviously).
Here are Dave and Jess. She's a semi-sexy mummy, if you couldn't tell. I'm not sure what David represents. He borrowed our dad's Nigerian traditional, and then when we got to the party we added a fake mustache from the Target dollar-bin multipack. Somehow, I think the whole of his costume is greater than the sum of its parts.
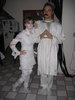
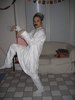
Marci was a semi-sexy devil, and Mal was Sally from Nightmare Before Christmas. Awesome costume, eh?
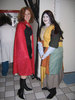
Here I am with Blake. I'm wearing the Princess Buttercup costume I made for the library, and for him we improvised a Dread Pirate Roberts/Westley costume at the last minute.
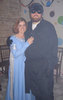
It turned out pretty well, don't you think?
Anyway, the party was fun, but I think next year maybe I will opt for something a bit more low-key. Plus, if I go to another costume party involving strangers college-age and up, I am going to have to devise some kind of sexy faux-stume. I felt somewhat ridiculous dancing to R&B in a princess costume.
October 06, 2005
Lisa: colored contacts for my house
So, a while ago the cellular fabric blinds in our kitchen broke. I don't know when this happened--in fact, they might have been broken when we moved in. Basically, there was just no string coming out of the string hole. You know, the string that is supposed to pull the blinds up? So the blinds could not be pulled up. To add insult to injury, the blinds had been let down too far, so that they hung over the window sill, like so:
Anyway, it had been bugging me for a while, but A) we couldn't afford new blinds, and B) our neighbor's house is really close on that side, so I didn't want to just take the blinds down and have a naked window. Gabrielle suggested these window clings that imitate stained glass, so I picked up a few at Home Depot and went to town with the Exacto knife, a little soapy water, and my Costco card.
Much better, huh?
We had a similar situation in the bathroom. The blinds weren't broken, but they were those fabric shades. Since our bathroom seems to stay really steamy a lot, I was getting kind of freaked out about the possibility of mildew. Anyway, I decided to put the window clings up in there, too!
Here's the bathroom before.

And here's the window halfway done--you can tell the view is super great from this window, too...

Ta DA!
Anyway, I think the window clings are a pretty good temporary solution. You can tell up close that they're not really stained glass, but if you're not looking for it, it's not bothersome. And the light shining through to the inside during the day and to the outside at night is really pretty. Plus, they are totally temporary and easily removable, unlike the window frosting spray I put on the windows in my side door, to mixed results.
June 08, 2005
Sarah: Tool of the Week
Before I announce this week's tool, I'd just like to bring to our readers' attention that this feature has now existed for three weeks. That is longer than most of my relationships. Its longevity surprises even myself.
This week's tool of the week is...
for painting frames, clips, and other accessories for your home. Yes, your stuff will look painted, not like they're actually silver or anything, but they will look better than the plywood or colored plastic that they once were. Also, having many items the same color will make them a more effective grouping. I had a bunch of picture frames that were all different colors, but once several of the cheap ones (wood and plastic, mostly gifts from high school... picture frames were somethng I never spent much money on) were painted silver, I could have a surface that was all pictures and looked very put together. Also, I painted several clothespins (that I already owned) silver and put up fishing line on a wall so that I could use the clothespins to pin up horizontal rows of small photos. I liked this look better than my old tactic of taping photos directly to the wall, but didn't have to pay anything! Having the silver frames/picture holders makes my room feel more consistent without involving any significant purchases.
May 23, 2005
Sarah: Tool of the Week
As a new apartment renter, I'm discovering fabulous tools, appliances, and other objects as I maintain, decorate, and fix up my apartment. This week we celebrate:
fabulous for cutting flowers shapes out of soda cans, which you then attach to "stems" (pieces of wire hangers, also cut by the tin snips) and put in a $1.00 vase. An awesome free crafty project (after the initial tin snip purchase), easy to do for any period of time. Just make sure your friends don't mind the sound of tearing aluminum.
The details:
After I sacrificed myself for "my art" (sic, Mallory) and drank a few cans of Diet Coke, I cut around the top and bottom, then snipped down the can length-wise so that I had a small rectangle of metal. I lightly imprinted the basic shape of my flower with the tip of a pencil. This helped me to end up with an okay shape, and also make sure I included the parts of the can that I wanted. I'd rather have the wavy colored line in the petals of my flower, rather than the nutritional information. You know what I mean. I made all of my flowers with at least two layers of metal. That way, I felt like they were a little more interesting, and looked a bit more finished. Doing so, however, makes it hard to get more than 1.5 flowers per can. Thus, my project is ongoing. A girl can only consume so much soda in one night. To attach the flowers to the stem, I punched a hole through the center of the flower with a hammer and nail, and then threaded the stem through, bending it around the hole with pliers. It's hard to explain, but perhaps I can add pictures eventually. I also made a few leaves, but I have not been able to successfully attach them to the stem. I've tried pinching them around the stem and punching a hole in them, but either way they slide to the bottom. Ideas are welcome.
May 17, 2005
Sarah: Untapped potential (and I'm not talking about myself)
This site is full of potential craft projects. If you click on the different categories, you will find not only ready-for-crafting "arts and crafts" and "kits and models" but popsicle sticks for recreating your fourth grade diorama, lamps, sockets, and wiring for creating your own awesome lamp, and who doesn't want their own lab supplies? I know I do. I know you do. Let yourself be seduced by the broad range of offerings and low prices, but also pray that they will have photos of all products, not just some. The drawings, though cute, fairly accurate, and reminiscent of old catalogs, do not convince me when it comes time to purchase.
May 10, 2005
Lisa: Casing the Joint
After the whole needle breaking in half incident, I decided that my next sewing project should be making a knitting needle case. I found one in this rockin' book that looked pretty simple. I picked up some cool upholstery-weight fabrics at the Home Fabrics store in Midvale (which has a huge and reasonably priced selection) and went to town.
Word to the wise: invest in some heavy-weight sewing machine needles if you're using upholstery fabric for this project--I think the ones I got were made for sewing on denim. My top-stitching seam across the bottom of the case was going through four layers of velvet, two layers of chenille, and two layers of jacquard. I broke two regular needles before I gave up and went to JoAnn's.
Anyway, here's the finished product:
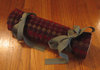
I'm happy with it. I think this is more of a keep-at-home storage solution for the entire needle collection, rather than something I would carry with me on the go. It's fairly huge. Maybe I should make a mini travel version...
May 09, 2005
Lisa: fit for a princess
I can't believe I haven't posted about decorating my pager yet! About a month ago, I bought 2-way pagers for myself and Blake. The idea was that they would be a cheap alternative to cell phones. We can send each other text messages, send and receive email messages, and exchange text messages with anyone who has a cell phone. It's quite handy, and about half the cost of cell phones per month. The pagers themselves were $9 each, and are plain back used models. I wanted to make mine cute, so, inspired by Sara's Handbling over at Going Jesus, I decided to paint it and then stick on some "jewels." I found some spraypaint especially for plastic and some acrylic crystals at JoAnn's. I decided not to ante up for the real Austrian crystals, since they cost three times as much. I didn't want to spend $20 on crystals for a $9 pager.
I taped off the screen, keyboard area, and the area on the back with the serial numbers and stuff, and sprayed on a few coats of paint according to the instructions on the can. When that was totally dry, I stuck on the crystals using tweezers and E6000 adhesive, as Sara recommended. Here's the result:
Sorry about the blurry pictures. It's surprisingly difficult to take in-focus pictures of something that sparkles. My camera kept freaking out and focusing on the table instead.
May 06, 2005
Lisa: Fountain Cowl
While at the Needlepoint Joint, I also bought the materials for this sweater,
which is called Fountain Cowl or something, and is from this book:
In addition to being very cute, I am hoping that this sweater will replace the pink one that I so sadly shrunk. Here's the yarn I got:
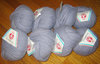
It's Schoeller+Stahl Flanell, and it's much cheaper than the Adrienne Vittadini yarn the pattern calls for, but the color is almost an exact match, and it should be the same gauge and fiber content. I also had to get two pairs of straight needles and two pairs of circular needles for the cowl part. I have never used circular needles before, so that should be an adventure. This sweater will definitely be the hardest thing I have done so far, but that's how you learn, right? And I will do the Branching Out scarf first, so that I get the hang of doing lacy patterns.
May 05, 2005
Lisa: Do not do a Google search for "tight skirt."
On a dollar-pattern day at JoAnn's a while back, I picked up this skirt pattern and some black denim. I finally got around to finishing it.
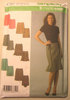
I don't know if you can see it very well in that picture, but I did View D, which has pleats on the sides with some ribbon trim across the top of the pleats.
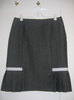
The skirt turned out cute, but it's a little on the snug side. I need to remember that sewing pattern sizes are smaller than retail clothing sizes! Oh, well. I've been meaning to lose a few more pounds anyway, right?
May 04, 2005
Lisa: Branching Out
At the Needlepoint Joint I picked up a few skeins of light green cotton yarn and some #8 needles in preparation for making Branching Out, a springy, lacy scarf pattern from the newest knitty.
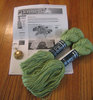
The little thingy on the left is a yarn cutter pendant, which I got because (unlike scissors) it can be taken on an airplane. However, I am NOT going to wear it as a pendant, because of its humongous size and obvious old-laditude. Anyway, I am thinking about taking this project (since it doesn't involve 10 balls of yarn and four different sets of needles) to work on in the plane and on trains/buses when we go to England and Scotland. Is this a mistake?
May 02, 2005
Lisa: Needlepoint Joint
As I mentioned earlier, Sarah and I decided to drive up to the Needlepoint Joint in Ogden, which is about 45 minutes North of Salt Lake City. It was definitely worth the drive. The store was awesome. I snapped these two pictures on the sly, since I didn't think I would be allowed to photograph the store.
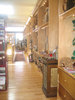
And here's Sarah, checking out pattern books!
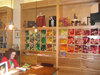
Anyway, they had every kind of yarn I had heard of, plus tons of patterns, needles, accessories, and fancy buttons. Most importantly, they had Swallow casein needles like the one I broke--but I managed to find one or two other things to buy also. I'll post separate entries for the new projects.
I wish we could have spent more time up there. Historic 25th Street (where the Needlepoint Joint is located) is super cute, with tons of little brick shops that are antique stores, restaurants, galleries, etc. Maybe next time we will make it an evening!
April 18, 2005
Lisa: My mind is always in the cord gutter.
Since I haven't had any luck finding a separating zipper in the right length and color for my Ribby Cardi at local stores, I have been searching around online. I am a little wary of trying to match colors that way, but I finally found a site that sold clear zippers along with various other knitting supplies. Unfortunately, the site was in German, so I had to use Babel Fish to get a rough translation. However, I found it via a recommendation from another knitter's blog, so I felt OK about giving it a try. When I went back today to actually purchase the zipper, I was greeted with this (translated) message:
Hello dear cord gutters,
we decided to adjust our on-line Shop.
It was a beautiful time with you. Thank you for your confidence.
They reach us weriterhin under info@seasonstore.com
The search continues.
Update: I just ordered a zipper from Zipperstop. $1.80 for the zipper, and $5.40 to ship--sheesh! You'd think they could just stick it in a regular envelope and mail it for 37 cents. Anyway, we'll see if it works.
Update #2: The zipper from Zipperstop arrived this morning, and it is a terrible match. Argh! If you have any suggestions, please let me know.
April 09, 2005
Lisa: That joint is tieeeght!
As I pulled my knitting out of my tote bag the other day, one of my needles snapped right in half. The needles, which I ordered from elann along with my Ribby Cardi yarn, are US size 7 (4.5 mm) Swallow casein 12-inch single points. I love them. They are just the right length, and they are smooth and warm but not staticky. Elann is sold out of that size, of course, and I haven't seen them at any of the yarn stores in Salt Lake. It looks like it might be time to make a pilgrimage to the Needlepoint Joint in Ogden, which is supposedly like a knitter's Mecca or something. Check this space for more.
For the next entry in the saga of the Ribby Cardi, click here.
Update: I guess I should be glad my needle didn't EXPLODE, like this poor lady.
March 05, 2005
Lisa: Atomic Age Apron
A while back, on a 99-cent pattern day at Jo-Ann's, I picked up this retro apron pattern.
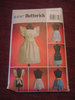
Since I believe not actually needing to use an item shouldn't stop you from making it, I took advantage of a Presidents' Day fabric sale to pick up this sweet fabric combo. The one with the bubble/dot things on it is seersucker, the pink is a linen-look fabric for the lining, and the trim is a lime-green velvet ribbon.
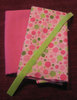
The pattern only took me a few sessions to sew, and it was pretty easy to figure out. I think this might be the best sewing I have ever done--my gathers lined up exactly right and my stitching stayed even right on the edge of the trim, and everything. I even learned how to sew on buttons and put in buttonholes on my sewing machine!
Anyway, here's the apron in all its neon-colored retro glory. Now I guess I'll have to find something to cook. In heels.
![]()
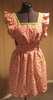
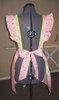
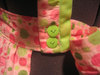
February 04, 2005
Sarah: I long to be crafty
So, Sarah, what do you do while you're supposed to be working? Well, among other things, I surf the interweb looking for ways I wish I could be spending my time. I want to be able to come home every night and craft. Well, maybe not every night. But there's so much cool stuff that other people do! Look at stuff I've found:
wee wonderfuls
Thimble
my paper crane
edge of urge
not Martha
get crafty
Going Domestic
Ok, so some aren't strictly crafts, and some you've seen before. But it was so fun! I want to craft. Right. Now.
In other news, Lisa's been out of town, and I miss her! Who am I supposed to call with questions about html or bring to silly movies, or just hang out with?! I like her. Come home, Lisa!
UPDATE: Oh, and urbanSPY.
January 28, 2005
Lisa: Knitting Update
I finally got around to pulling my Ribby Cardi pieces out of the drawer, pinning them to the rug, and taking a picture. Still looking a bit rough, but I haven't blocked them yet.
Here's the first sleeve, which I just started working on again.
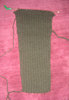
Knitting wisdom of the day:
When the heading of a pattern section says "NEXT ROW - DEC ROW (RS)," make sure that when you start knitting that row, you are on a right side row. Do not just assume that you will start on the row following the last row of the last section of the pattern. Ugh.
For the next step in the Ribby Cardi process, click here.
January 03, 2005
Lisa: I am a knitting machine
Yesterday I finished the right front piece of my Ribby Cardi! Both of the front pieces are curling up like crazy since they have large sections of stockinette stitch, so I will need to pin them to something flat before I can take pictures. I had problems with the pattern again, mostly because the pattern assumes I am smarter than I actually am. It says stuff like "for the shaping, follow the instructions for the left front but substitute such-and-such stitch," and then when you refer to the left front instructions it says "follow the instructions for the back," and that way leads to confusion. Plus, sometimes it turns out that I should be reversing parts of the instructions as well as replacing certain stitches.
Anyway, the knitting in the Ribby Cardi hasn't been nearly as hard for me (a near-beginner) as deciphering the pattern has been. I am finding that it is much more important to have a good overall understanding of how the pattern works (including how the sweater is actually constructed and what stitches create particular results) than it is to worry about following the pattern step-by-step.
So, I have started a sleeve (and a new yarn color!), and I should probably start thinking about where to get an appropriate matching zipper. It is very gratifying to be working on a piece of clothing with shaping and curves and everything. I think finishing an actual sweater will feel like a much bigger accomplishment than just doing another scarf. Yay for moving up to a more challenging level!
For the next update on the Ribby Cardi, click here.
December 30, 2004
Lisa: O, Tenenbaum!
I procrastinated putting up holiday decorations this year, but I'm glad I finally got around to it. There's nothing like a Christmas tree to make a house feel homey. Now we have a whole year to figure out how to string up Christmas lights outside with no handy electrical outlet.
Somehow in the holiday madness I found some time to work on my Ribby Cardi, and you can actually see some progress! Here's a picture of the finished back panel (click on the thumbnail for a larger image):
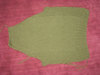
The instructions for the neck shaping on the left front piece kind of confused me, but with the help of a Christmas gift from Dave, I unpicked only what I had done wrong and redid it. I'm now about 10 inches into the right front piece. Woohoo!
For the next entry in the saga of the Ribby Cardi, click here.
December 06, 2004
Lisa: And now, the news we have all been waiting for
Here's the latest picture I took of my second try of the Ribby Cardi back piece. It's actually about a foot long now, and going much better! The shorter needles (and the pattern correction) helped a lot. Next up: not screwing up the decreases.
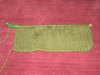
For the next entry in the saga of the Ribby Cardi, click here.
AND! The laundry room ordeal is over at last. The washer and dryer are hooked up--we even did a bunch of laundry yesterday. The drain is working fine, and the only problem we had after moving the washer and dryer in is that the sink doesn't fit in the laundry room any more. I can live with that!
(As always, click on the thumbnails for a bigger picture.)
November 22, 2004
Lisa: Problems in Ribby Cardi Land
I'm having a little trouble getting started on my sweater. I had the first three inches done of the back piece, but then there was an error in the pattern. If I had been using common sense, I would have caught the error right away--in fact, while I was knitting, I kept thinking something must be wrong. Three stitches are missing from the first row of the stockinette panel section of the back piece. Thanks to Amped for helping me figure out what I had done and why. Anyway, I had knitted a few rows after the mistake, so I just had to rip out the whole thing. I haven't yet figured out a way to back up in knitting--once it's off my needles, I can't salvage it. I was bummed, but actually a little glad because I had made a small mistake towards the beginning that now I could fix. The pattern calls for the piece to be started on smaller needles, and then you switch to the regular needle size after a few rows (which I think is a genius idea). The problem is that I didn't order the smaller needles from elann, so I just went to the JoAnn's near my house and grabbed the pair they had in stock that was the right size. They are 14 inches long, which is really too long for me. I keep bumping stitches off the end of the needle and screwing up. I started the first few rows three times before it was acceptable enough to go on the first time, and now I have started the first few rows another two times. Plus the yarn is all icky to work with now that it has been knit and then unknit. Argh. I am afraid to just cut that section off and start with fresh yarn, in case there isn't enough left to finish the sweater.
Update: I found a little yarn shop around the corner from my house called The Wool Cabin, and bought a new pair of 10-inch #6 needles. I have started the back piece again, and things seem to be going much better with the shorter needles.
For the next entry in the Ribby Cardi saga, click here.
November 17, 2004
Lisa: Swatching
I got the gorgeous yarn from elann! Here's what it looked like when it came...
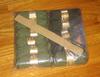
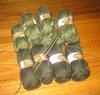
I even knitted a swatch according to what I could decipher from the pattern instructions. It says "19 sts/24 rows over 4" stockinette stitch using #7 needles." I took that to mean "cast on 19 stitches, stitch 24 rows alternating knit and purl, and make sure the result is 4" square." It worked out (I guess), because my result is basically 4" square.

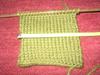
Anyway, I hope that means I'm on the right track as far as size, because I couldn't wait to find out before getting started on the sweater. I have the first two inches of the back piece done--pictures to follow (becuase I know you are on the edge of your seats).
For the next entry in the Ribby Cardi saga, click here.
November 08, 2004
Lisa: Careful, I think it might be contagious.
I let this Super Eggplant entry convince me to order yarn from elann in preparation for knitting this sweater, which is probably way too hard for me. Here are the colors I chose:
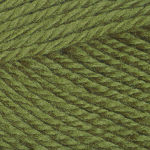
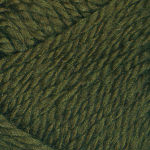
Hey, the yarn was less expensive than the cheapo stuff at Fred Meyer...and what kind of librarian would I be if I didn't knit my own sweaters?
For the next entry in the Ribby Cardi saga, click here.
November 06, 2004
Lisa: I wanna get witcha...and take your pitcha
Here are some more of the pictures I have been talking about for weeks. You would think it wouldn't be so hard to download them from my camera onto the mac, edit the images in Photoshop, put them on the USB key, upload them onto the website, and then ultimately save them on our PC...
Anyway, as always, click on the thumbnails to see larger images.
Here's the flower pin I made, pinned onto the apron my mom gave me because 1) I didn't have an apron and 2) my dressmaker's dummy looked kind of funny in my kitchen. It isn't in the kitchen anymore (because I now have a craft room!!!), but I still have a cute apron that matches my kitchen and dining area.
Here's the poncho/capelet thingie I crocheted to take my mind off of being super stressed out. I really like how it turned out, but I haven't worn it yet because I am afraid that I don't have the fashion chutzpah or whatever to pull it off. I am afraid it will look all contrived, poseurish, and over-trendy.
Here's a picture of a Scion just like mine. Sarah and I snuck onto the Toyota lot one night before my Scion came in and took pictures of the one they had there. I guess now I could just post pictures of my own Scion, but then we would have been so stealthy for nothing, right?

October 14, 2004
Sarah: I'll never tell...
It's crazy to think that this week was midterms. I still feel like I just barely got to school. My mind has been filled with thoughts of craftiness. I've been working on a table that I bought from Deseret Industries for $5, painting and mosaic-ing and the like. Pictures will appear as soon as I get around to stealing my roommate's digital camera. I'm also making Christmas gifts this year. I have a couple different projects, and I'm SO EXCITED! I can't say what they are, since Lisa, if no one else, would find out what they were getting. Some hints are that the gifts involve the fabric store, I've stolen my mom's sewing machine, and I will have to find an iron and ironing board from somewhere to complete them. They're also gender specific. That is to say, the girls will recieve something different from what I will be giving the boys. Wish I could tell you more! I know this seems early, but it takes a long time to make gifts! Cut me some slack! To those critics out there, worried that they will be recieving "Quaker presents," you couldn't be more wrong. These gifts are hip! and original! and made with love! and hip!! I promise they'll be good. Right after Christmas, I'll have pictures and details for the website. So, I guess this post is mostly to say "Even though I'm not actually telling you anything, there are cohesive thoughts going on in my brain... Maybe." Get excited, family and friends.
As an added bonus, I have links today also:
While searching the internet for crafty gifty supplies, I came across this rad site. I especially like the flower.
Mighty Girl, who is one of my favorite bloggers (see my favorite sites), has started a shopping site. Very nice. Thanks Margaret!
October 01, 2004
Lisa: Hey, I can be silly AND serious
Molly, I know we talked about going to your cabin on Halloween weekend, but are you sure you don't want to have a Lots-a-Leias party instead? I could totally get into making a Leia costume, and I would pay good money (if I had some) to see Blake in a Leia costume too. Or maybe he could be a wookie.
Also, I would like to ask a special favor of any Utahns of voting age who may be reading this. Please read this site and make an educated decision on whether to vote yes or no for Amendment 3 next month. Knee-jerkers, I would like to ask you to pay special attention to the section titled "LDS Church has NOT Endorsed Amendment 3." Thank you.
September 01, 2004
Lisa: Everything is insane
1. I got the job at the library (WOOOHOOOO!!!) and I start September 13th.
2. Blake and I have met with our realtor twice and have been prequalified for a home mortgage.
3. My mom just took out a line of credit for our business, and we are rushing to finalize things with the manufacturer in time to fill our first order.
4. I ordered a Scion xA.
5. I started crocheting a poncho last night around midnight. Because...?
It is obviously a time for new beginnings. And a time for increased chance of stress-related illness or accident. I am planning to take deep breaths, drink lots of Diet Coke, and attempt to form coherent thoughts.
August 25, 2004
Lisa: Suddenly Seeking...Shrug?
The other day I was feeling bummed out while grocery shopping at Smith's Marketplace, and some yarn ended up in my cart. I didn't have a project in mind for it or anything, but the idea of future craftiness did make me feel a bit better--and it was on sale! The yarn is a sort of variegated black and white natural fiber/acrylic blend. I thought it was Lion Brand, but I can't find the color on their excellent website. Or maybe it's a discontinued color, and I should hurry back to the store and buy some more just in case. If I had it here, I would just check the label and all of this confusion would be cleared up. Anyway, it sounds dumb, and I'm sure if it was regular cheapo 100% acrylic, it would be ugly, but actually it is nice-looking.
The point is that I am trying to decide what kind of project to do with said yarn. I am bored of scarves and gloves, and anyway I still have a mitten to finish crocheting in the blue-green Homespun. I haven't been knitting or crocheting long enough to feel confident about complicated patterns, or figuring out gauge, and I certainly am not going to spend money on super-fancy real yarns yet. I think I want to do a fitted shrug to wear with all the black clothes I own. That would be cute, right? I love this pattern, but it looks too hard for me, and I think the cool lacy back wouldn't be right for the more rustic-looking variegated yarn. I just want a simple pattern for a fitted shrug--I even promise to check the gauge this time so that it ends up the correct size! (Maybe something like this, but not so bulky?) So, let me know if you see something promising.
Also, I want to make this poncho, which would follow the huge (and somehow disturbing...yet appealing) poncho trend, but also kind of reminds me of the Jessica Simpson Newlyweds shawl. However, again I'm worried that the pattern is too difficult, and it looks like it requires a TON of yarn, which could get expensive.
Also, I have an update on the car situation. I went to the Toyota lot, and to be honest, the Scion xA is cuter and nicer than the Echo. I think I am going to order one configured just the way I want it. The Scion's no-haggle pricing means there's really no cost advantage to buying one from the lot that isn't exactly what I have in mind. It will take 6-8 weeks to get here, but I can wait. That just gives us 6-8 more weeks to save another $1000 or so, so that we don't have to take out any loans for the car at all. The only problem will be if I happen to get the library job, and have to start driving to work every day. Blake has assured me he doesn't mind taking the bus to work if that happens, but I have my doubts.
Update:
The yarn is actually Red Heart. I think it's this one, in Zebra. And I will not be making a shrug, as everyone I suggest the idea to quickly condemns shrugs as useless and ugly. So, I guess I'm back at square one...
To see the finished capelet/poncho thing I made using this yarn, click here.
July 26, 2004
Lisa: Mmm. Piepants.
I made a little knitted case for my digital camera inspired by Sara's iPod cozy over at Going Jesus. It's knitted in stockinette stitch (purl side out) with a seafoam-green chenille yarn I got at Fred Meyer. The coral-colored button is vintage, I think probably owned by my grandmother back in the day. It's quilted, and looks like it was made to match a specific article of clothing.
This photo was taken with my palm pilot inside the case instead of the camera, since I was sort of using the camera to take the picture. It's roughly the same size--the camera is a little narrower and fatter, if that makes sense.

I have been making these marble magnets (following Megan's instructions on Not Martha, here) for a while now. They're totally habit forming, since they are so easy to make and turn out so cute. If you're going to make your own, I would like to reiterate a few of Megan's suggestions, based on my experience. First of all, buy a circular punch the same diameter as the magnets you will be using. Cutting out the little pictures with scissors takes the fun right out of the project. Secondly, if you're using magazine pictures, back each one with a circle punched out of white cardstock (I use magazine subscription postcards). The silicone sealer sometimes makes the flimsy magazine paper a bit transparent, allowing the black of the magnet to show through. For cute tins to put the magnets in for gifts, I usually go here.
These particular magnets are the ones we currently have on our refrigerator at home. They're a little heavy on the Nintendo references, to keep Blake happy.
As usual, click on the thumbnails for bigger versions.
June 29, 2004
Lisa: the freakish domesticity continues
Can I just say that I love having a sewing machine? I asked for one last Christmas, and it was totally an inspired request. The best part is that I can take clothes I already own and alter them to fit the way I want them to. I can bend them to my will! I had access to my mom's sewing machine growing up, but something about having my own just makes me want to use it more. Unfortunately (suprise, suprise), my apartment doesn't have room for a dedicated sewing space--you can tell from the pictures below that the machine is currently set up on the kitchen table. I figure that since I rarely cook, this is actually a much more effective use of the space.
Here are two projects I did recently (as usual, click the thumbnails to see bigger pictures):
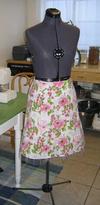
I don't know WHAT I was thinking when I tried this skirt on at the store. Everything seemed fine in the dressing room, but then when I put the skirt on to go to a baby shower last Saturday morning, it was humongous. Seriously, it fell down around my hips and looked totally weird. I wore it to the shower anyway and just hoped my shirt covered the weirdness adequately, but as soon as I got home I ripped the skirt off and went to town with my sewing machine. I put two little darts in the front and two bigger darts in the back, and topstiched over all four to make them lie down right. The entire project was complete in like fifteen minutes, and I wore the skirt (now minus the wonkiness) for the rest of the day.
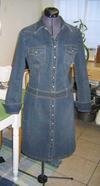
This dress was one of those online purchases I should have just let go, but I loved it so much that I couldn't. I ordered my usual size, and the dress that came in the mail fit perfectly on top but (since I am not a Victoria's Secret model) was too small on the bottom. I sent the dress back for the next size up, which fit totally fine on the bottom. Unfortunately, this meant the top was a little baggy, and the whole thing was made for a taller person. The belt, which is supposed to be low-slung, was really too low on my hips--I don't need to make my legs look any shorter. However, I just had my mom take in the darts on the back a bit and redo the topstiching, and I wore the dress a bunch of times. The problem is that now I have lost more weight, and the top of the dress was even baggier and just looked silly. So a few weeks ago, I decided to take in the side seams myself, since they are relatively hidden and hard to screw up. While I was at it, I got ambitious--not only did I take in the side seams, I also took in the front darts, redid the topstitching over the darts, took off all the belt loops, and reset them about an inch higher. I'm actually really happy with how it looks--who would have thought?
I highly recommend an adjustable dressmaker's dummy if you are sewing things for yourself. Pinning and measuring things on your own body is almost impossible. Mine is a Twin Fit, and it rocks. My sewing machine is a Viking Huskystar 219, and I've been VERY happy with it so far.
April 30, 2004
Lisa: Fruity Labors
As part of my abrupt swing into craftiness, I decided to teach myself how to crochet. Several months ago, I started a baby blanket that (with some tweaking) actually turned out well enough that I gave it to a friend at her baby shower. Of course, halfway through that project I saw some prettier yarn at the store and wanted to make something for myself. A scarf seemed like just the thing. Since the yarn I used makes crappy-looking fringe, I decided to add a few rows on each end with a fancy eyelash yarn (just because I'm crazy like that). Here's the finished product:
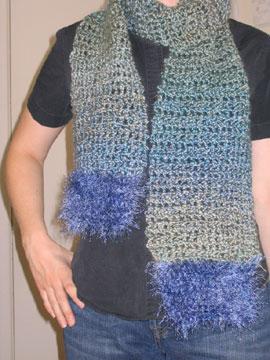
I was pretty happy with my scarf, so I decided that I needed matching mittens. I found some free patterns online, and tried the one that looked most promising. Unfortunately, I had no clue about the importance of measuring your gauge, plus I was using fatter yarn than the pattern called for, and I'm naturally a pretty loose crochet-er. Of course, the first mitten turned out humongous (see below). I tried a new pattern without checking the gauge AGAIN, and it turned out huge too, so I sort of improvised (using my own creative ideas [hee]) to come out with a mitten that was basically the right size. If I ever finish the other mitten, maybe I'll post a picture.
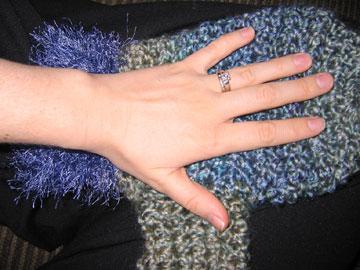
The yarn is Lion brand Homespun (acrylic) in Windsor 341 and Fun Fur (polyester) in Sapphire 109. Both yarns are pretty to look at, cheap, and easy to find, but hard to work with--and would undoubtedly be frowned upon by yarn snobs.
Next up, I'm going to try knitting again. The last time I knitted was in Girl Scouts, and it was an abject failure. Not knowing how to cast on or off was probably detrimental to the whole process. I checked out a copy of Stitch 'N Bitch from the library, and I think I'm going to try the "Ribbed for Her Pleasure" scarf in a charcoal gray wool for my dad. I just won't tell him that's what it's called. Anyway, wish me luck!
April 26, 2004
Lisa: Cabin Fever
As promised, I have produced another cute yet useless picture that is supposed to look somewhat like myself. Here she is (the ribbon belt is an homage to Sarah):

I think there has been some confusion on how these are made. I started with a base (from the website I linked in my earlier entry) which is essentially a picture of a bald, naked body, and then I drew the clothes and hair on all by myself using MS Paint. Why would one do this, you ask? That is a very good question. One that I cannot answer right now. Shhh.
Caution! Non-sequitur ahead.
My friend Molly has asked me (and Blake, if he doesn't have school) to go to Europe with her this summer. I want to go SO MUCH! I don't think we can afford it, though. What's the best place to look for good prices on plane tickets?
April 13, 2004
Lisa: because I like to join every craze two years too late
I made a little picture of myself in my concert clothes after accidentally finding this website. (Thanks, Xandorra!) I don't know what to do with her yet, but I'm going to make another one immediately.

Any thoughts on what the purpose of this mini-Lisa should be?
March 23, 2004
Lisa: At least I'm in time for the DVD release...
Okay, I'm finally posting more pictures of my costume for the Lord of the Rings Trilogy Tuesday. To see the full photos, click on the thumbnails (duh).
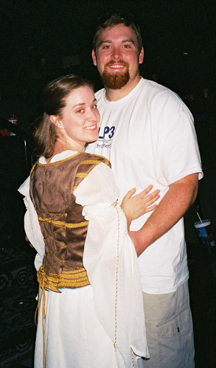 Back. (with Blake!)
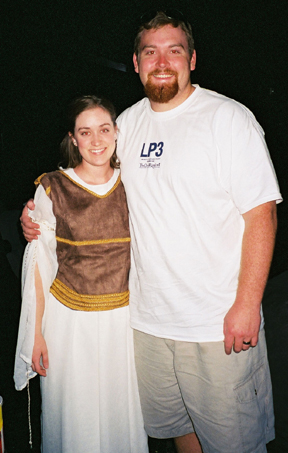 Front. (with Blake!)
 Back. (Outside. Yes, it is cold. Hence the silly velvet cape)
For the first entry in the saga of the Eowyn costume, click here.
January 16, 2004
Lisa: No Experience Necessary
I've been messing around (but looking very important and productive) on Zazzle, designing dorky t-shirts. I highly recommend creating some of your own, especially if you are more creative and talented/less dorky than me. If you want to see the Lisa originals, keep your expectations low and click on the picture below:

Once your design is done, you can order any shirt style and color that you want. Now go! Create!
December 31, 2003
Lisa: Yes, I am a huge nerd. Why do you ask?
If you want a sneak preview of my Eowyn costume before I post my own pictures, you can check me out here on The One Ring. If I look a little disturbed to have a complete stranger taking my picture, well, that's because I am.
For the next entry in the saga of the Eowyn costume, click here.
December 10, 2003
Lisa: none of your business!
I hate it when the ladies at the fabric store ask me what I'm going to be making with the materials I'm buying. You always get asked twice, too--once by the person who cuts the fabric, and once by whoever rings you up. Here's the conversation from my last trip to JoAnn's:
Nosy Cashier Lady: What are you making?
Me: (mumbling) Oh, just a cape.
NCL: Oh. Is it for a wedding?
Me: Nope.
NCL: Well, is it for some other special occasion?
Me: Uh, no...(turns head to the side and talks out of corner of mouth) it's just a for a costume.
I'm sure they're just trying to be friendly, but it seems a little invasive to me. When I worked at the bookstore, we weren't allowed to comment on the books customers were buying. Plus, I've been buying fabric for a costume that I'm a little insecure about anyway. I don't want to feel embarassed or like I need to justify myself!
I also anticipate with dread the reaction of video store clerks to what I'm renting. The clerks at Blockbuster seem especially prone to praising or scoffing at video choices. Unfortunately, impressing Mr. Blockbuster Employee with a sophisticatedly artsy or cult classic tape doesn't guarantee that I'll enjoy the film. The last movie I rented that got the "great movie!" seal of approval was a terrible disappointment. Valley of the Dolls, why hast thou forsaken me? To add insult to injury, when I complained about the movie to my mom later, she insisted (in a disgusted and disappointed tone) that it was X-rated. Apparently, "all [she knows] is that when it came out, people considered it PRET-TY ROUGH." Please, Mom. Have another "doll."
For the next entry in the saga of the Eowyn costume, click here.
October 07, 2003
Lisa: A Friend of a Friend
So, I have this friend, TOTALLY not me, who has a hypothetical scenario that she would like a little feedback on. The friend's husband really likes the Lord of the Rings movies. Hey, who doesn't? Anyway, mostly for the benefit of the husband, this friend of mine may hypothetically have purchased some exorbitantly priced tickets to see the midnight showing of the new movie AND the extended versions of the first two movies, in a wacky trilogy extravaganza. There might happen to be gift bags, prizes, and a costume contest. So here's the question. My friend, who has long been a proponent of costumes and "dressing up" in general, is considering making a Lord of the Rings costume and wearing it to this event. Would that make her the biggest nerd ever, to be mocked by friends and family at every opportunity? And if that is the case, should she care?
For the next entry in the saga of the Eowyn costume, click here.