
September 17, 2008
Sarah: Call Me, On the Line
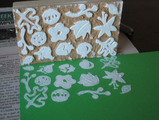
I love the idea of a calling card. Like a business card, but for personal use, a calling card is unusual but traditional, cool and sophisticated, and much classier than writing your number on the inside of a matchbook. (Although that has some awesome kitsch value too.) I decided I wanted some calling cards of my own that (hopefully) reflected some of my interests. Here's what I ended up with:
Calling Card Tutorial
Materials:
- Cardstock. I used green cardstock, but I wish it were thicker. Bring a business card with you to the paper store so that you understand the relative weight of your paper when you're deciding.
- Linoleum Block. Think of it like a stamp that you cut yourself. Maybe you could use a halved potato as a stamp instead, like when you were a kid. Or actual stamps, if you have some that you love. You get the idea.
- Ink. I used white screenprinting ink because I had it on hand, but I'd recommend something less thick and gloppy, if you have your choice. Ink intended to be used on paper would be better. Even a stamp pad might be fine.
Tools:
- Paper cutter. To cut your paper into card-sized pieces, of course.
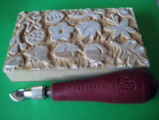
- Linoleum cutting tool. I love my Linoleum Cutter from Speedball, which I purchased at Utrecht Art Supply. It has 5 or so different blades that store in the handle, and they're super sharp. Excellent.
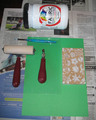
- If you use thick ink, you'll need a brayer and a piece of acrylic or glass (I used an 8x10 sheet of glass stolen from a picture frame). Unless you've come up with some other solution, like the stamp pad.
- Typewriter. It's just not the same if you print your name and number on the computer. Typewriters are much better.
Now that you've gathered some supplies together, let's get to work.
Instructions:
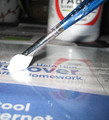
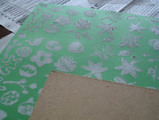
- Cut a design into your lino block. Remember, you'll be inking up the raised surface, so cut away any areas you don't want printed. And obviously your printed image will be flipped from what you're cutting, so any words or numbers should appear backwards on the lino block. Like I said above, it's like a stamp. The Linoleum Cutter is a sharp little bugger, so try not to cut off too many fingers.
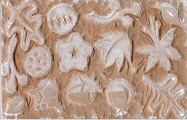
My shapes were loosely inspired by this fabric I saw in a Pottery Barn catalog, inspired by Josef Frank.
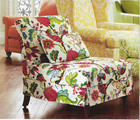
Frank's fabrics were featured in Mamma Mia (I loved looking for them after reading design*sponge), and they're amazing. I do not mean to compare my crude shapes to Frank's awesome patterns, I was just delighted to be inspired. Moving on.
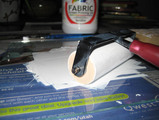
-Once the linoleum block is finished, you're ready to start printing. I wanted my pattern to be a little different on each card, so I didn't worry about where it would fall. First, roll the ink using the brayer out onto your piece of glass. This lets you get a thin, smooth layer of ink on the brayer. Roll the brayer across the lino block until the printable area is nicely inked up.
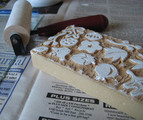
Then press the lino block onto the paper, re-inking as necessary.
- You're almost done. If you plan to print your contact information using a computer, now is the time to format your document accordingly. This is a perfectly acceptable method, but you will have slightly less street cred than those individuals using typewriters.
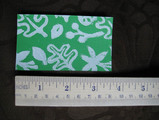
- If using a typewriter, I suggest cutting your paper into cards now. The standard business card size is 3 1/2 inches by 2 inches. Or postcards would be fun. Square would be unusual. Twice as wide or tall, then folded over? My heart is all a-flutter.
- Typing, my favorite part! I compromised for centering my information. Originally, I'd envisioned my name and number along the bottom of the card, leaving plenty of white space for a quickly scrawled message, if needed. Unfortunately, such careful registration on a typewriter is a little unrealistic. This works too.

- Then you're done. Slip a small stack of cards in your purse or back pocket and wait to be asked for your number. Or don't wait, but hand your card to the cutest guy in the room, you saucy minx.
Posted by sarah at September 17, 2008 02:33 PMThose are AMAZING.
Posted by: Spinch on September 17, 2008 09:04 AMYou are so crafty and creative it make me sick.
Posted by: Marci on September 17, 2008 12:52 PMThose are BEAUTIFUL!!!! I wish I was so talented- and I wish I had an "Old Timey" typewriter!
Posted by: Jen on September 17, 2008 06:01 PMThese are really cool Sar. When are you opening a shop?
Posted by: Mallory on September 18, 2008 11:48 PMOkay, scratch the bacon-scented window cleaner. THIS is what I want for Christmas. Totally cute, seester.
Posted by: Angie on September 22, 2008 01:30 PM